> ## Documentation Index
> Fetch the complete documentation index at: https://docs.zuper.co/llms.txt
> Use this file to discover all available pages before exploring further.
# Adding new property
Adding a property allows you to define the exact physical location where services need to be delivered. A property may represent a customer’s office, retail store, or residence and includes vital information like the address, contact person, and service history. Setting up properties ensures accurate job scheduling, technician dispatching, and record-keeping, especially when a customer has multiple service locations.
**Navigation**: Clients -> *Properties ->+ New Property*
1. Select the "**Clients**" module from the left navigation menu and choose **Properties**. 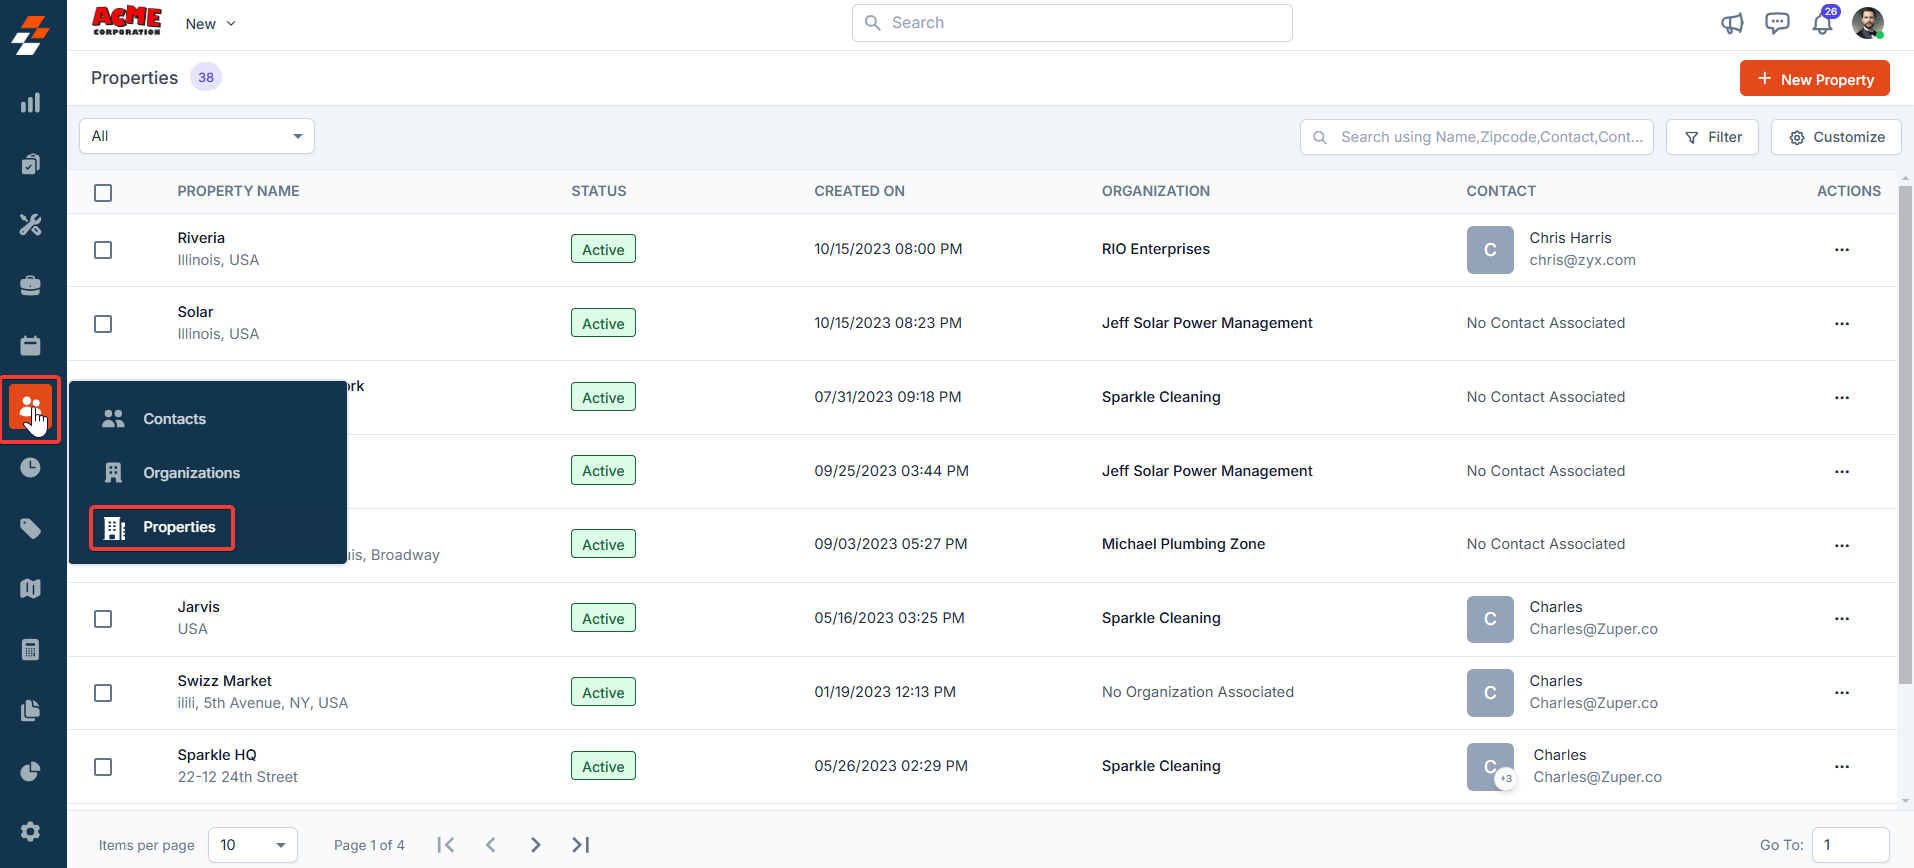 2. The **Properties** listing page opens.
3. Click the "**+ New Property**" button at the top right corner of the page. A new property creation page will appear.
2. The **Properties** listing page opens.
3. Click the "**+ New Property**" button at the top right corner of the page. A new property creation page will appear. 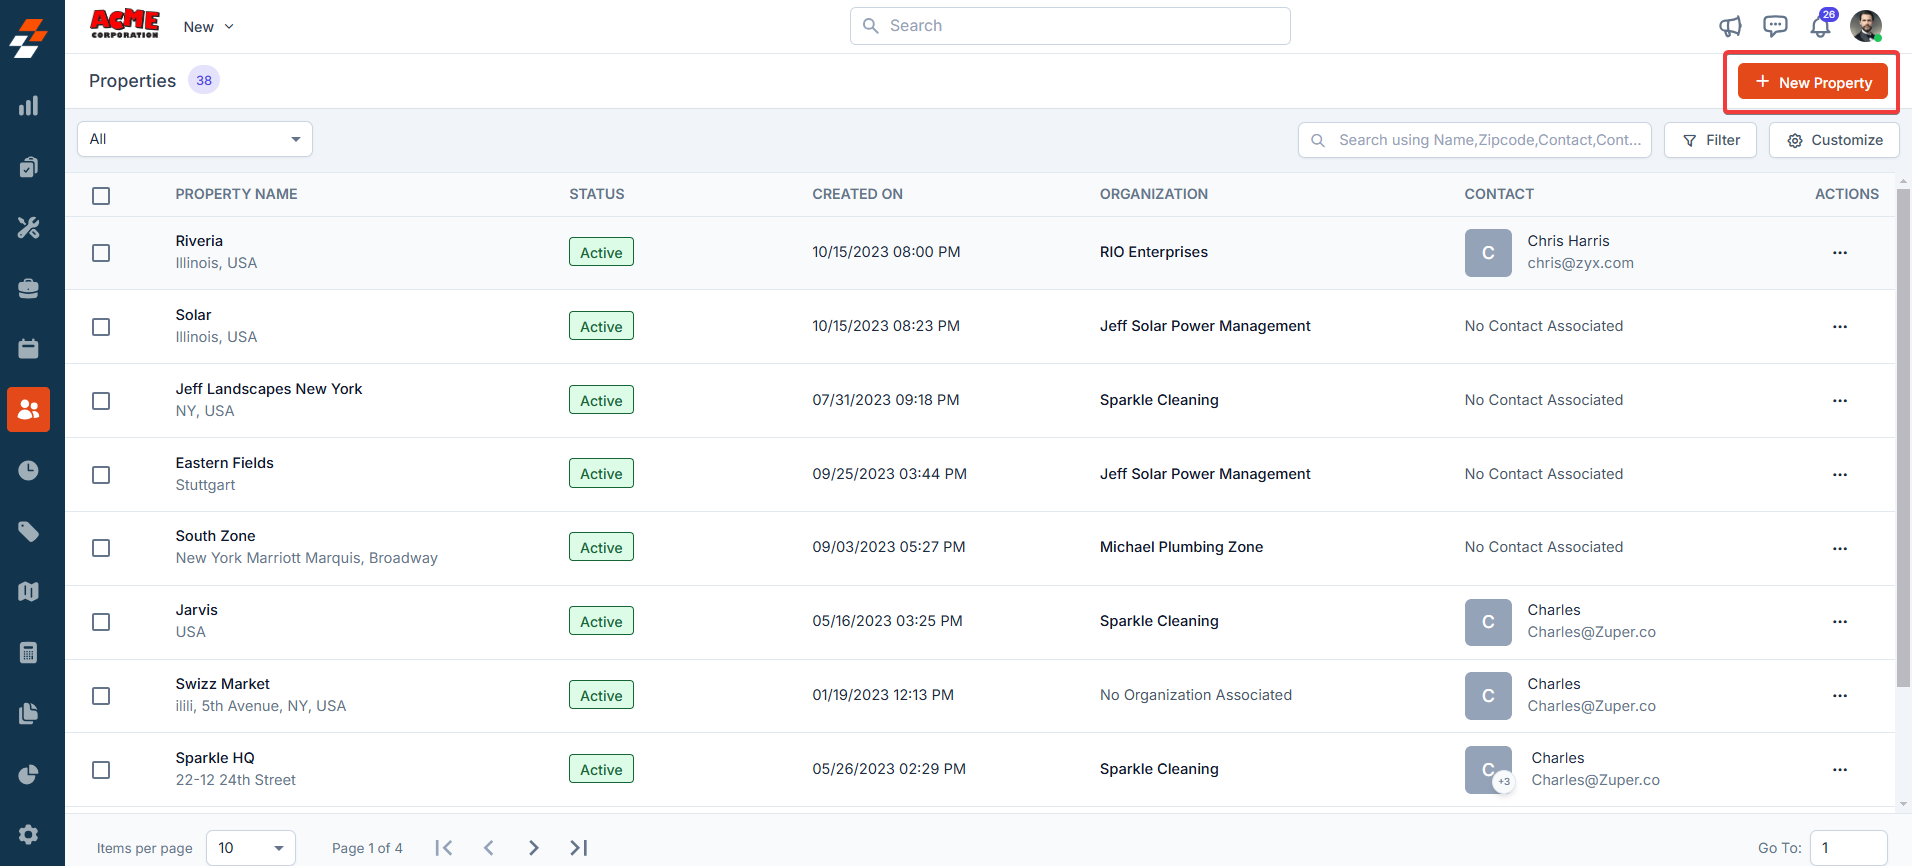 4. Fill in the following sub-sections:
1. **Primary Details**
* **Choose Organization**: Select the organization that this property belongs to.
* **Property Name**: Enter the name of the property.
* **Property Image**: Upload an image to visually identify the property.
* **Choose Parent Property**: If this property is a child property, choose a parent property.
* **Pricelist**: Select the relevant price list to be applied when jobs or services are performed for this property.
4. Fill in the following sub-sections:
1. **Primary Details**
* **Choose Organization**: Select the organization that this property belongs to.
* **Property Name**: Enter the name of the property.
* **Property Image**: Upload an image to visually identify the property.
* **Choose Parent Property**: If this property is a child property, choose a parent property.
* **Pricelist**: Select the relevant price list to be applied when jobs or services are performed for this property. 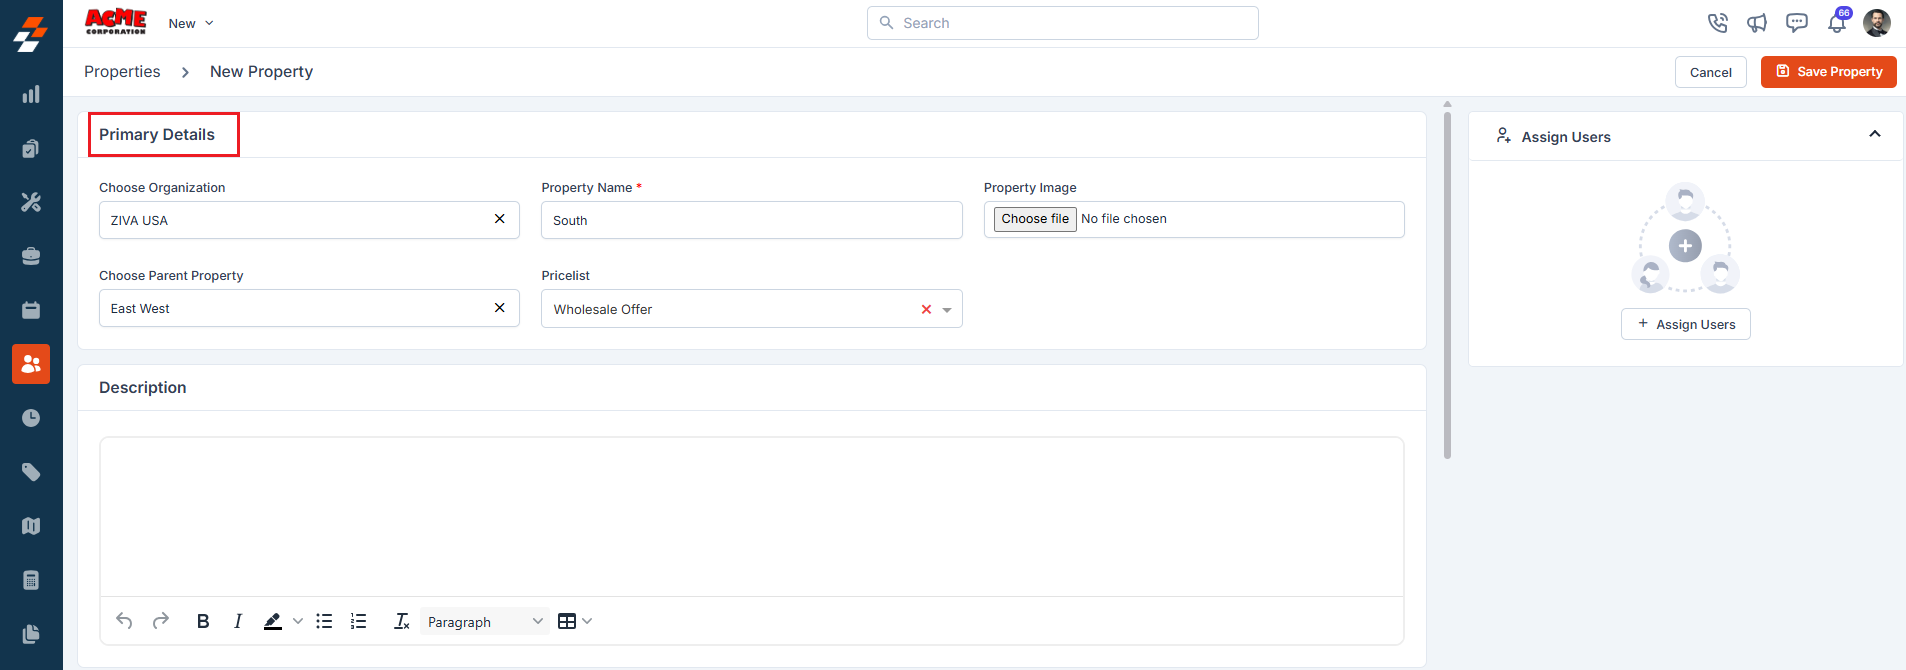 2. **Tax Details** Choose the applicable tax settings for the property based on your region or internal policies. These settings will automatically be applied to invoices and billing documents.
 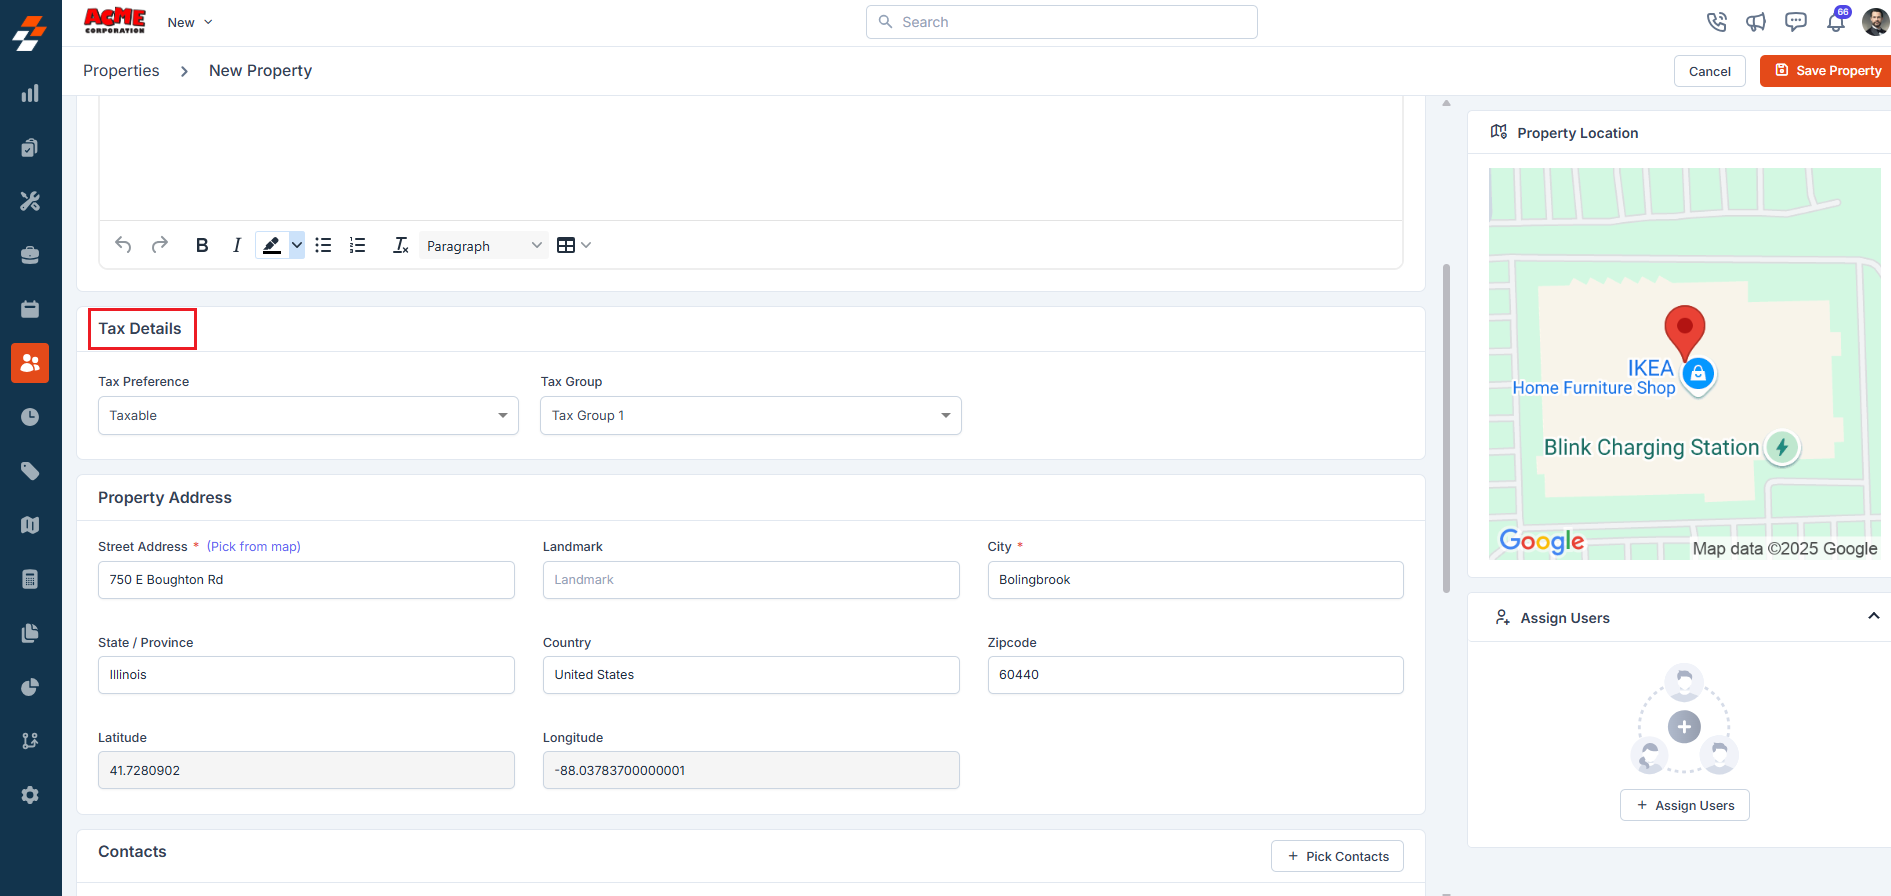 3. **Property Address** Add the property locations. You can specify these details in two ways.
* **Address Entry**: Type the full physical address.
* **Geo-Coordinates**: Enter latitude and longitude if you want to use exact map-based positioning.
3. **Property Address** Add the property locations. You can specify these details in two ways.
* **Address Entry**: Type the full physical address.
* **Geo-Coordinates**: Enter latitude and longitude if you want to use exact map-based positioning. 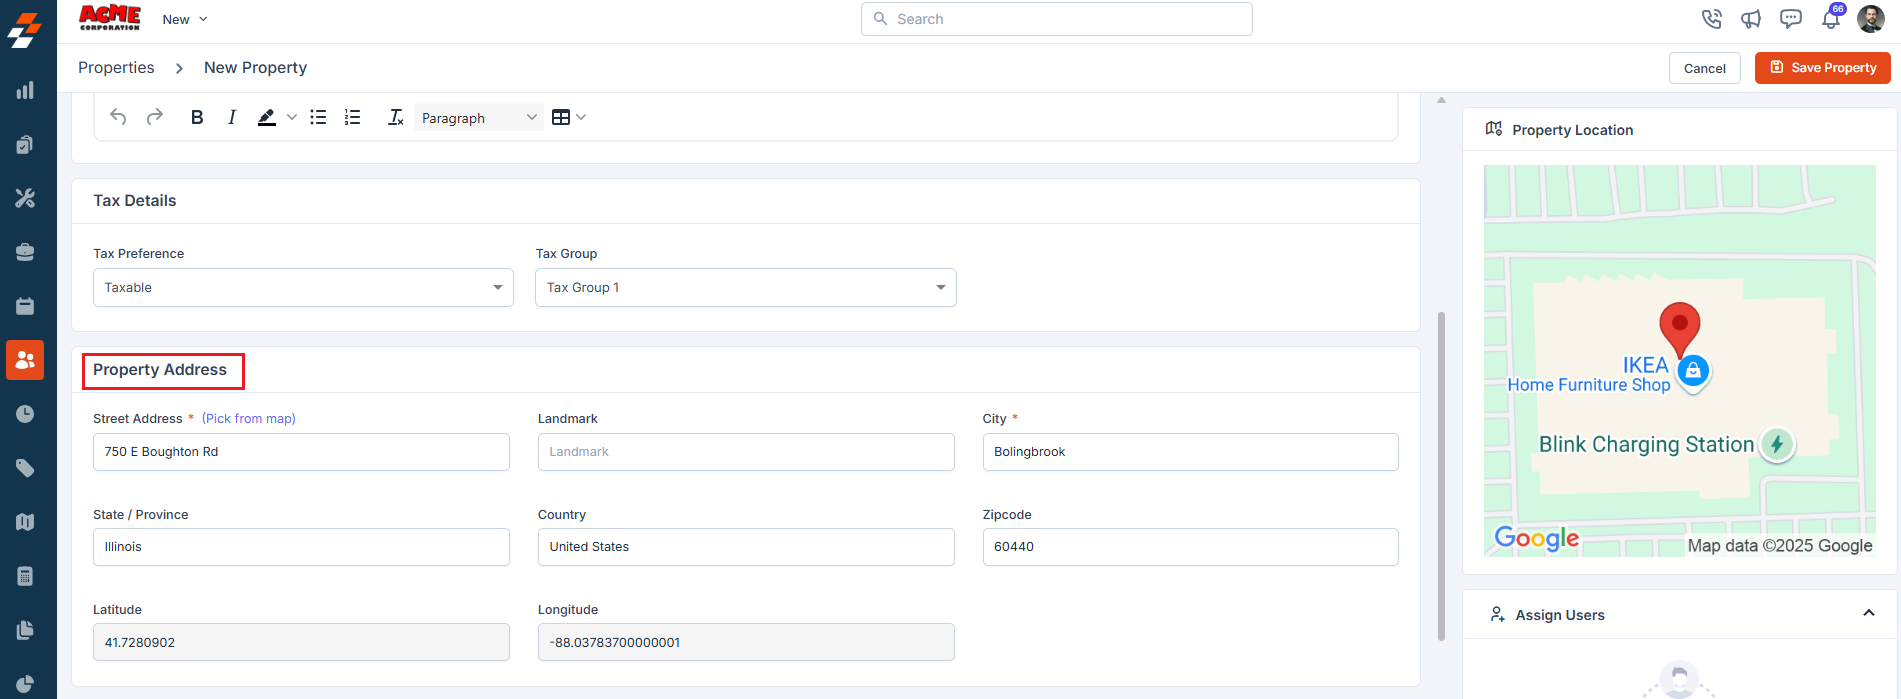 For the most accurate location data, use the **"Pick from Map"** option. This allows you to pinpoint the address directly on the map interface.\
\
Once you've selected the correct location, click "**Use this Address**" to save the information.
For the most accurate location data, use the **"Pick from Map"** option. This allows you to pinpoint the address directly on the map interface.\
\
Once you've selected the correct location, click "**Use this Address**" to save the information. 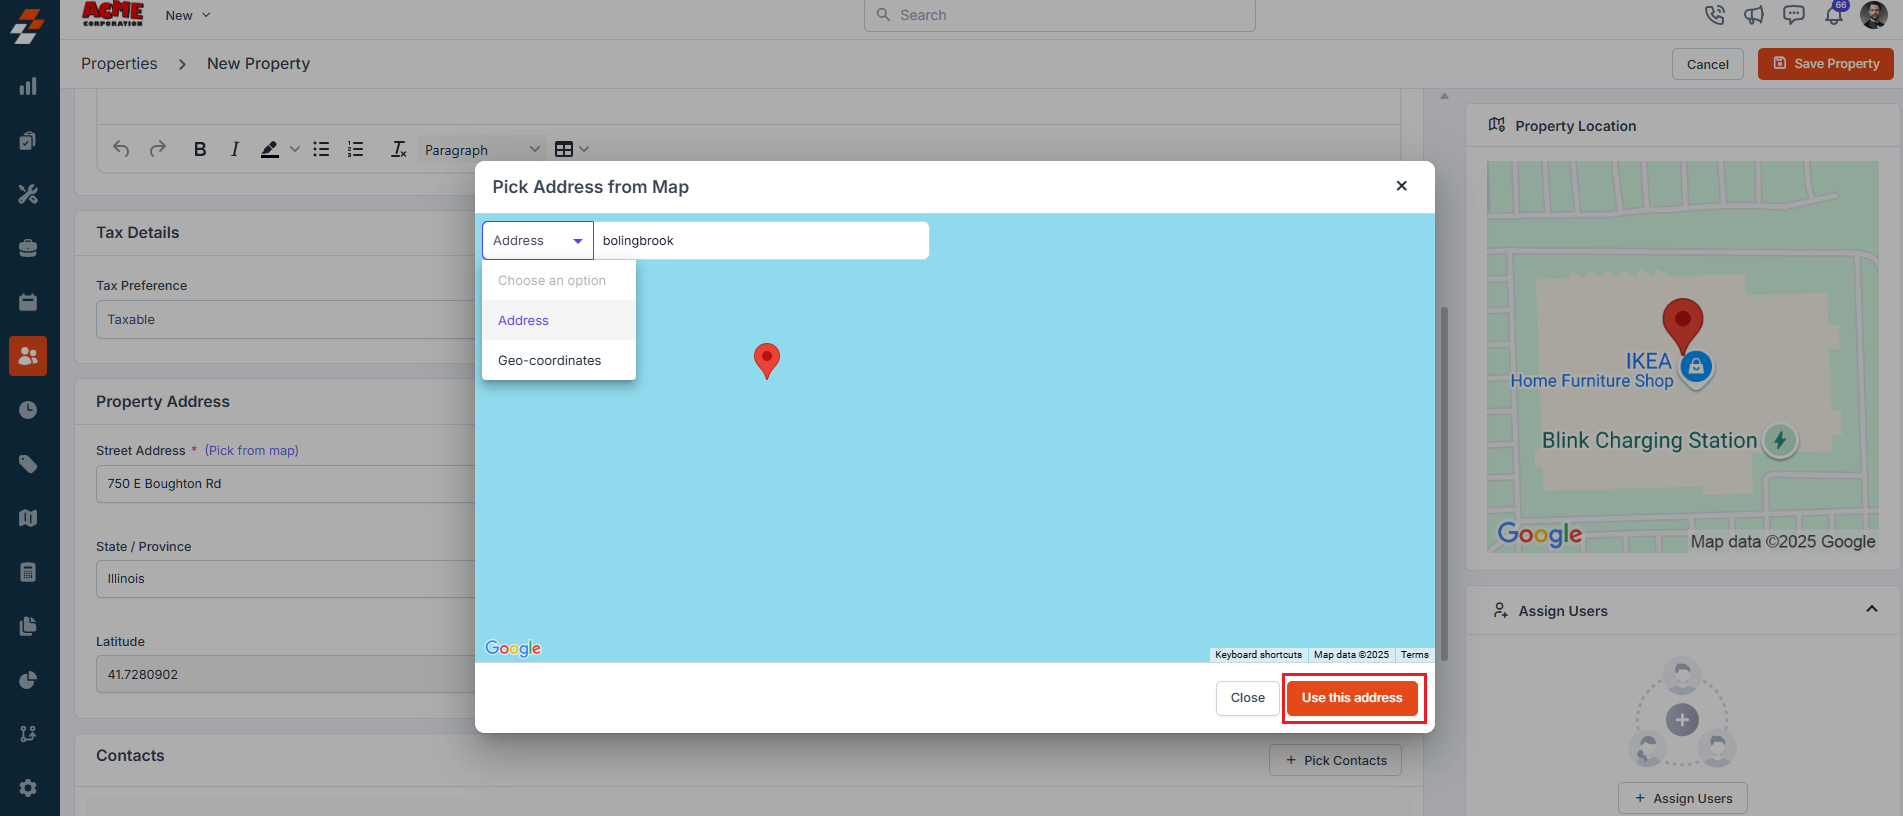 4. **Contacts**: Add customer information for this property.
 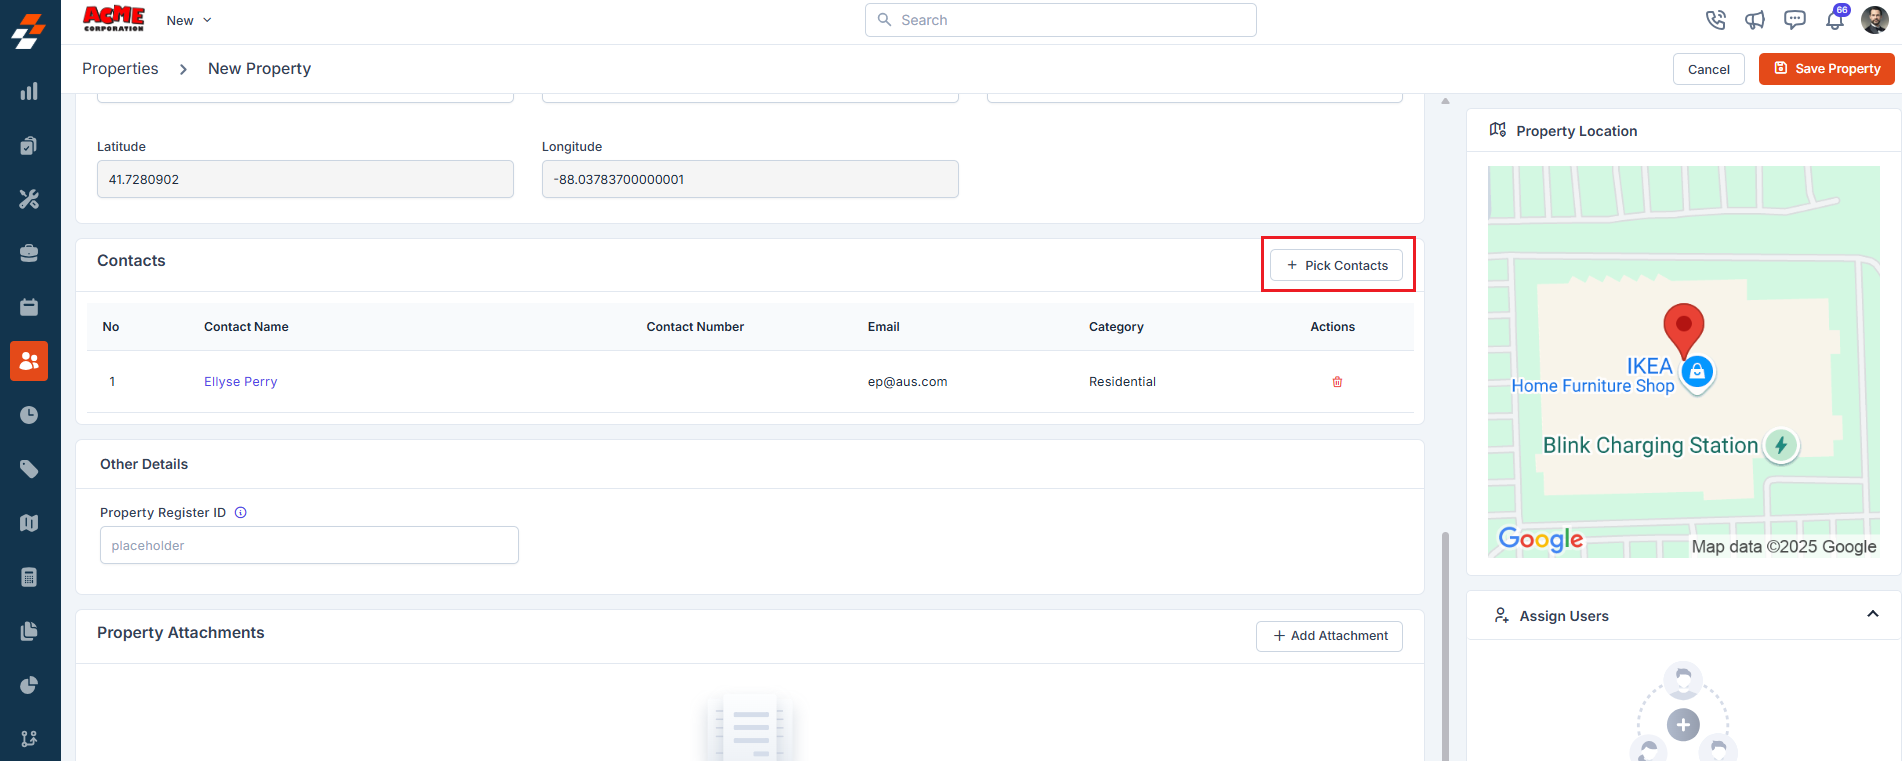 5. **Other Details** If any custom fields are added under the settings, you can fill in the details.
6. **Save Property** After entering all the necessary details, click the "**Save Property**" button to successfully create the property.
5. **Other Details** If any custom fields are added under the settings, you can fill in the details.
6. **Save Property** After entering all the necessary details, click the "**Save Property**" button to successfully create the property. 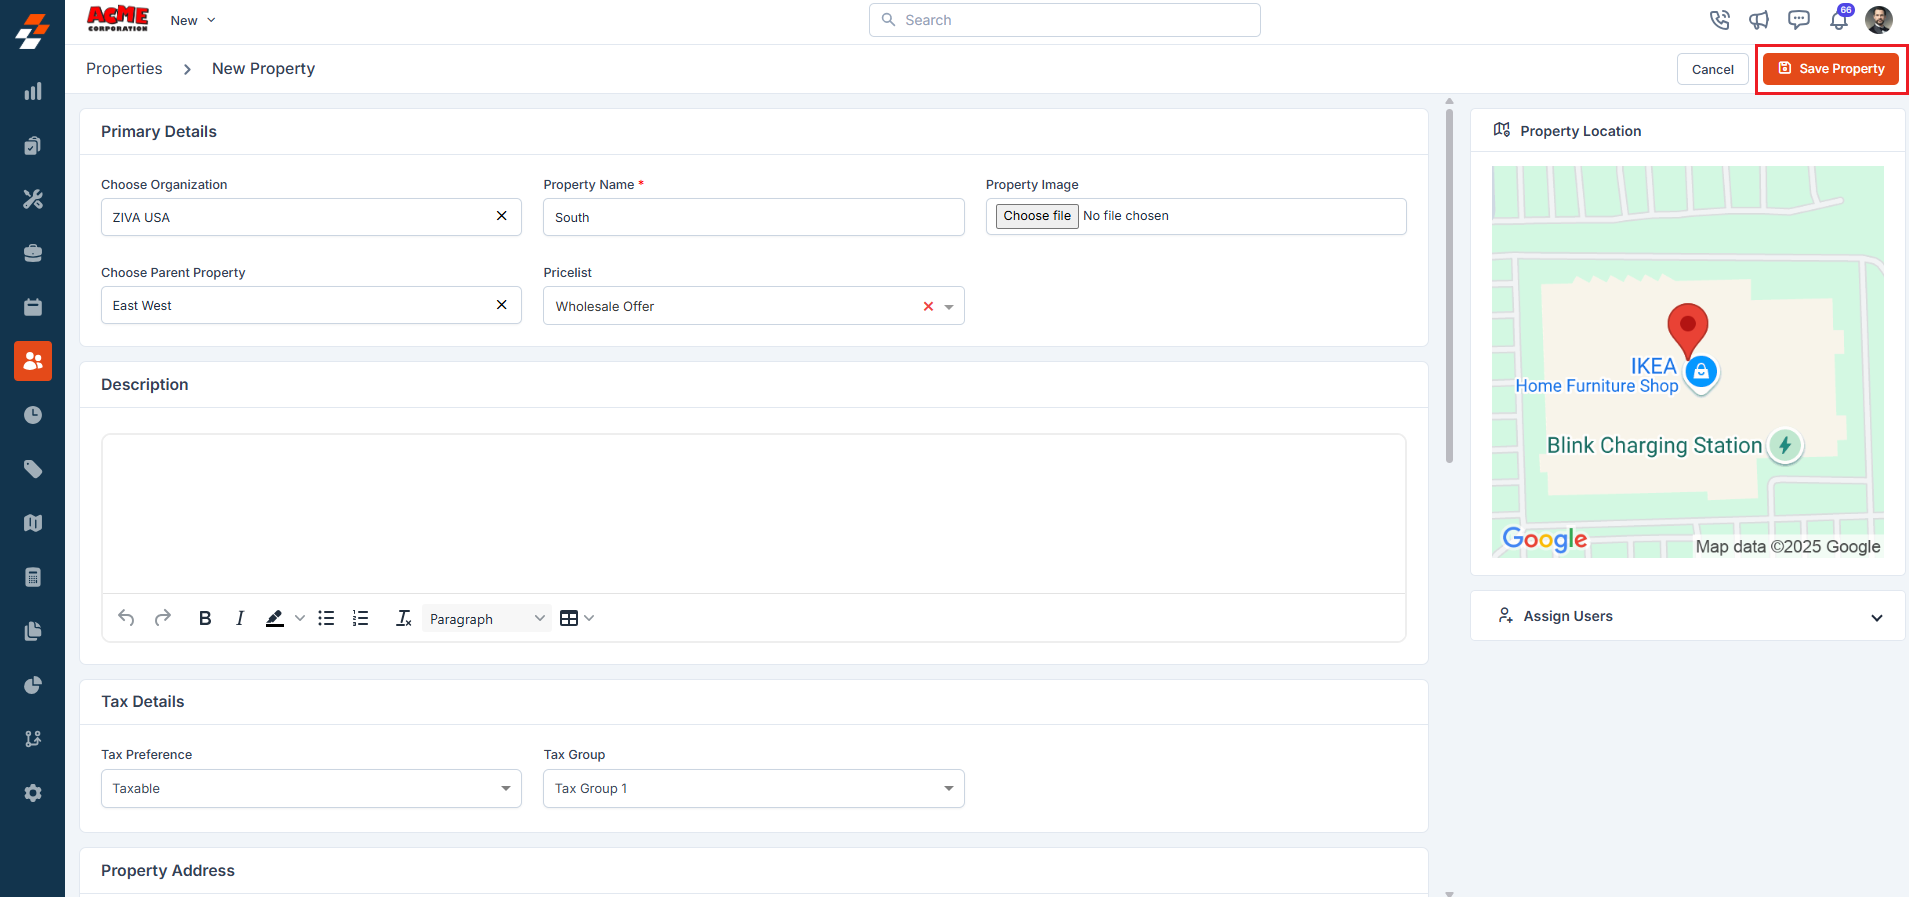 ### Address sync with customer/contacts
If this property is linked to a contact, Zuper keeps the addresses on both records in sync. Update the address here, and Zuper updates the service address on the linked contact automatically and vice versa.
Creating a property is essential for associating it with multiple modules, such as assets and contacts. This association enables field technicians to efficiently provide services to end contacts.
### Address sync with customer/contacts
If this property is linked to a contact, Zuper keeps the addresses on both records in sync. Update the address here, and Zuper updates the service address on the linked contact automatically and vice versa.
Creating a property is essential for associating it with multiple modules, such as assets and contacts. This association enables field technicians to efficiently provide services to end contacts.
