> ## Documentation Index
> Fetch the complete documentation index at: https://docs.zuper.co/llms.txt
> Use this file to discover all available pages before exploring further.
# Email Templates
Email templates can automate communication for various workflows, such as job, quotes, or invoices.
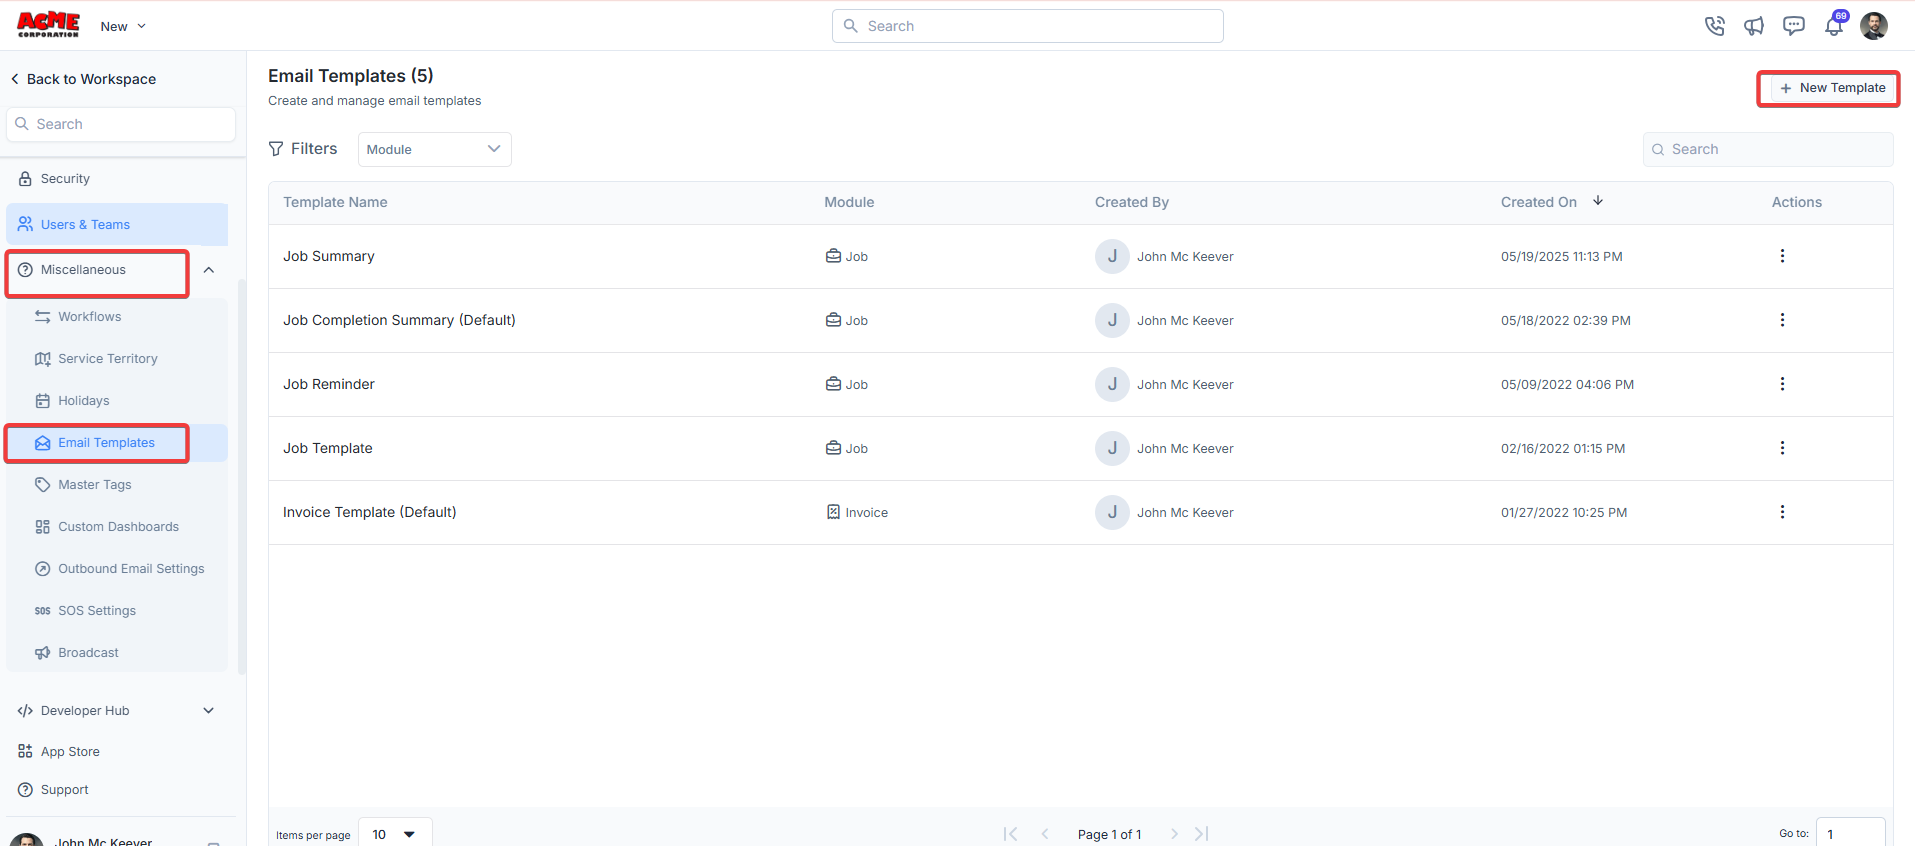
**Navigation**: *Settings -> Miscellaneous -> Email Templates*
1. From the settings, select “**Miscellaneous**." From the "**Email Templates**" section, choose “**+ New Template**."
 2. Enter the following details:
* **Name**: Enter a unique name for your email template.
* **Choose Template Module**: Select the module this template applies to from the dropdown
* **Email Template Description**: Add a brief description of the template's purpose, including any placeholders like \[#work\_order\_number] that will be dynamically replaced when the email is sent.
* **Email Subject**: Enter the subject of the email.
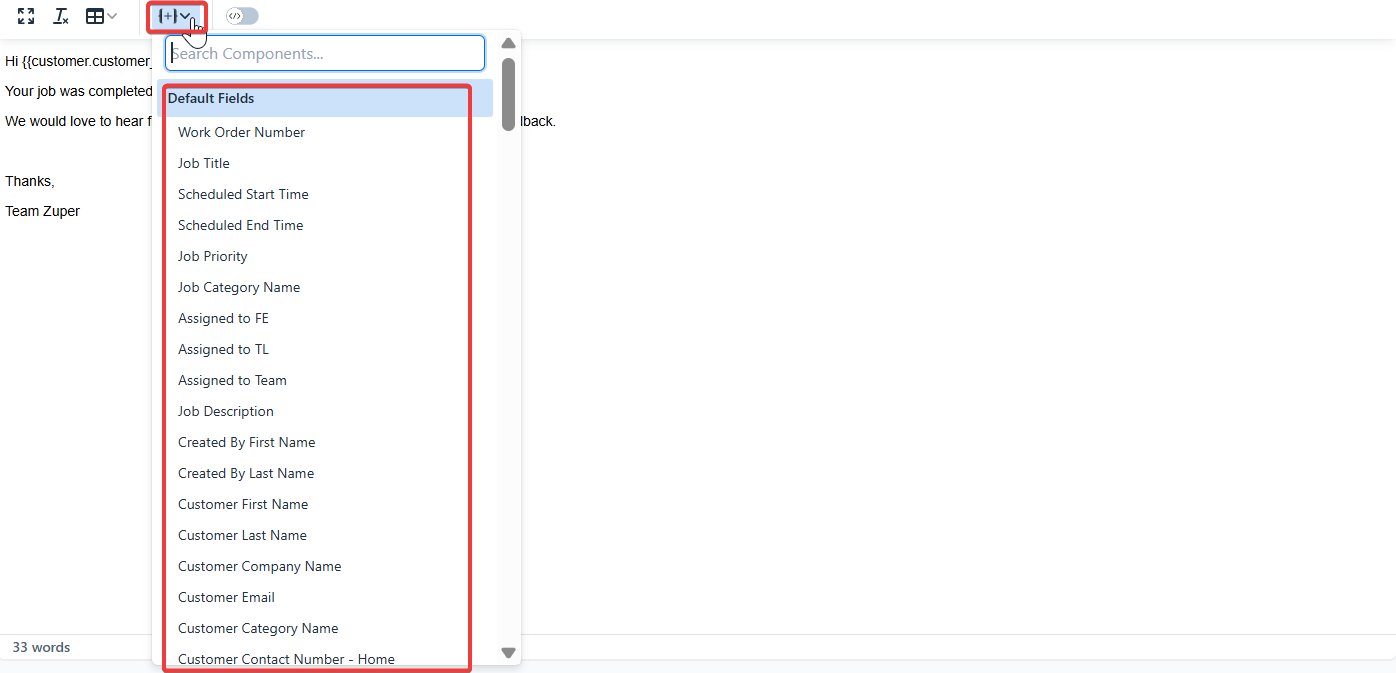
* **Template body**: Enter the template body. Use the available components.
2. Enter the following details:
* **Name**: Enter a unique name for your email template.
* **Choose Template Module**: Select the module this template applies to from the dropdown
* **Email Template Description**: Add a brief description of the template's purpose, including any placeholders like \[#work\_order\_number] that will be dynamically replaced when the email is sent.
* **Email Subject**: Enter the subject of the email.
* **Template body**: Enter the template body. Use the available components.
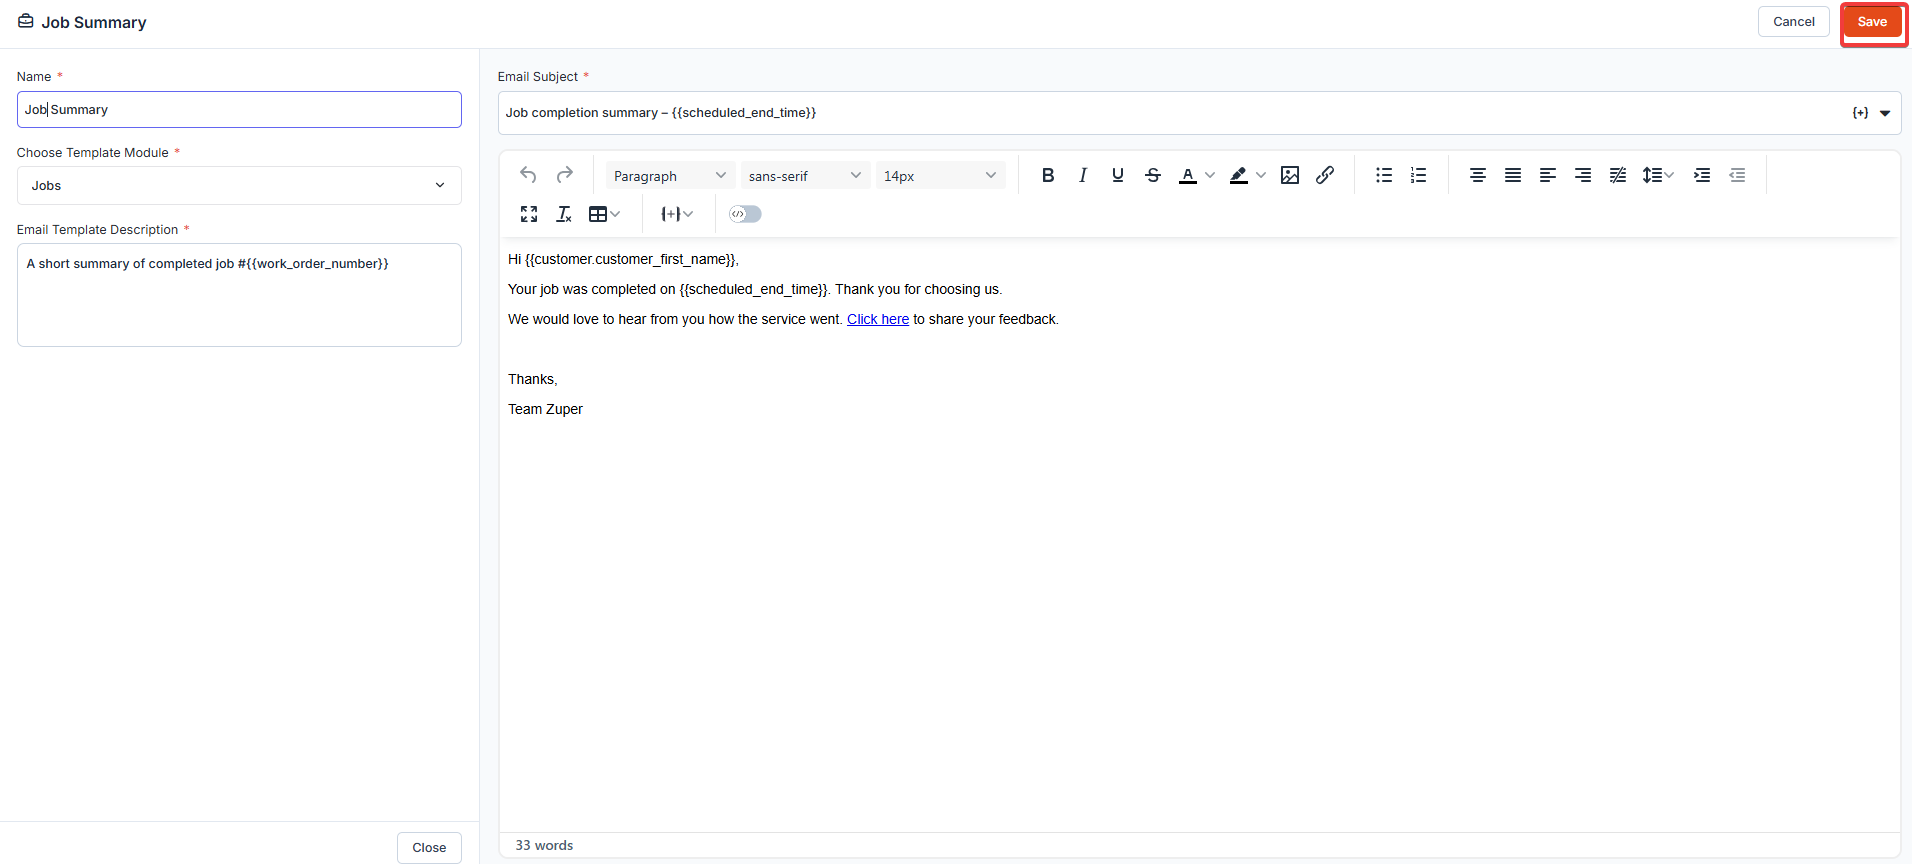 Click "**Save**" to save the email template.
## Configure the payment receipt template
When a payment is recorded in Zuper, the system sends a receipt email to the customer. The content of that receipt — including the support contact link displayed in the receipt — is controlled entirely by the payment receipt email template.
To configure the payment receipt template:
1. Go to **Settings** and select **Miscellaneous**.
2. Select **Email Templates**.
3. Locate the existing payment receipt template in the list and select the three-dot menu under the **Actions** column.
4. Select **Edit**. The **Email** panel opens.
5. Confirm **Choose Template Module** is set to **Invoices**.
6. Update the **Email Subject** if needed. The default subject uses the `{{estimate_no}}` placeholder to automatically include the receipt number.
7. In the **Template body**, update your support contact details. To add or change the support contact link, place your cursor in the relevant body area, enter the link text, and use the link icon in the toolbar to attach the URL or email address.
8. Select **Save**.
If no payment receipt template exists yet, select **+ New Template**, complete all mandatory fields, and select **Invoices** from the **Choose Template Module** dropdown. Select **Save** when done.
The support contact link on a payment receipt is not configurable from the invoice or payment settings. Any change to that link must be made here, in the payment receipt email template.
**Best Practices**
* Use placeholders thoughtfully to ensure the email content is relevant and personalized.
* Test the template by triggering a sample email to verify that all placeholders are replaced correctly.
* You can edit or delete templates later by clicking the three-dot menu under the **Actions** column in the Email Templates list.
Click "**Save**" to save the email template.
## Configure the payment receipt template
When a payment is recorded in Zuper, the system sends a receipt email to the customer. The content of that receipt — including the support contact link displayed in the receipt — is controlled entirely by the payment receipt email template.
To configure the payment receipt template:
1. Go to **Settings** and select **Miscellaneous**.
2. Select **Email Templates**.
3. Locate the existing payment receipt template in the list and select the three-dot menu under the **Actions** column.
4. Select **Edit**. The **Email** panel opens.
5. Confirm **Choose Template Module** is set to **Invoices**.
6. Update the **Email Subject** if needed. The default subject uses the `{{estimate_no}}` placeholder to automatically include the receipt number.
7. In the **Template body**, update your support contact details. To add or change the support contact link, place your cursor in the relevant body area, enter the link text, and use the link icon in the toolbar to attach the URL or email address.
8. Select **Save**.
If no payment receipt template exists yet, select **+ New Template**, complete all mandatory fields, and select **Invoices** from the **Choose Template Module** dropdown. Select **Save** when done.
The support contact link on a payment receipt is not configurable from the invoice or payment settings. Any change to that link must be made here, in the payment receipt email template.
**Best Practices**
* Use placeholders thoughtfully to ensure the email content is relevant and personalized.
* Test the template by triggering a sample email to verify that all placeholders are replaced correctly.
* You can edit or delete templates later by clicking the three-dot menu under the **Actions** column in the Email Templates list.