> ## Documentation Index
> Fetch the complete documentation index at: https://docs.zuper.co/llms.txt
> Use this file to discover all available pages before exploring further.
# Configuring Asset Settings
The "**Asset Settings**" allows you to manage Asset Settings in Zuper, including categories, templates, custom fields, inspection forms, and general settings.
## General asset settings
General settings allow you to define default behaviors for the Asset.
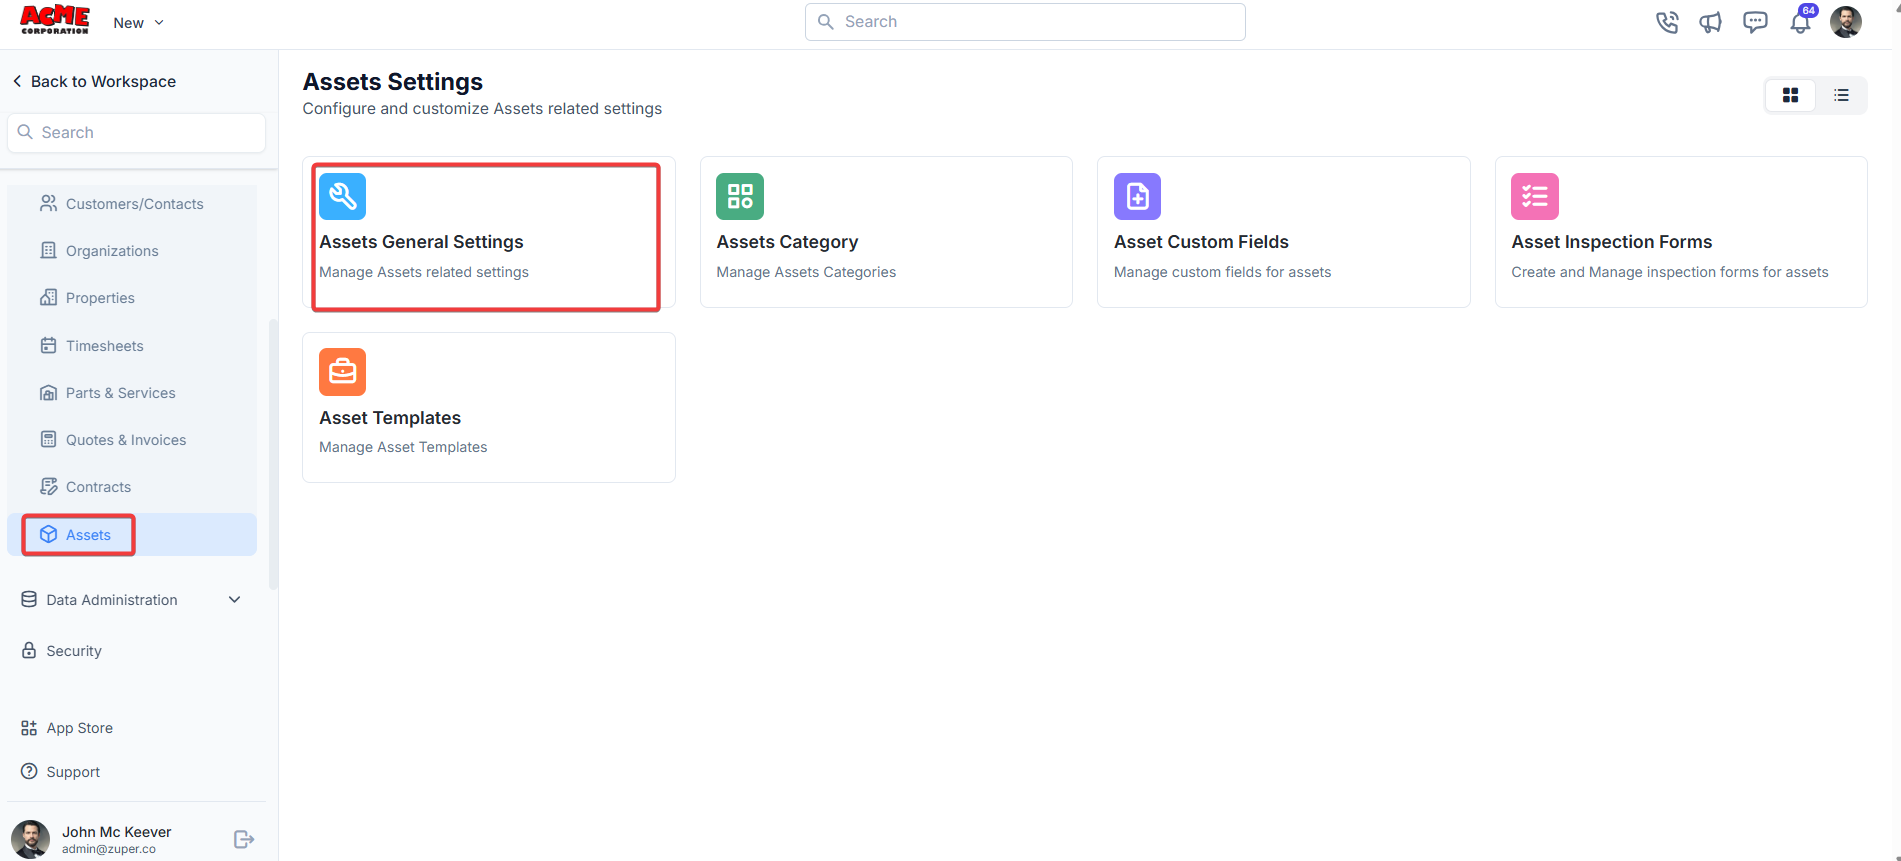
**Navigation**: *Settings -> Modules -> Assets - > Assets General Settings*
1. Select the "**Settings**" module from the left panel. Under the "**Modules**,"choose the "**Assets**." Select the "**Asset General Settings**."
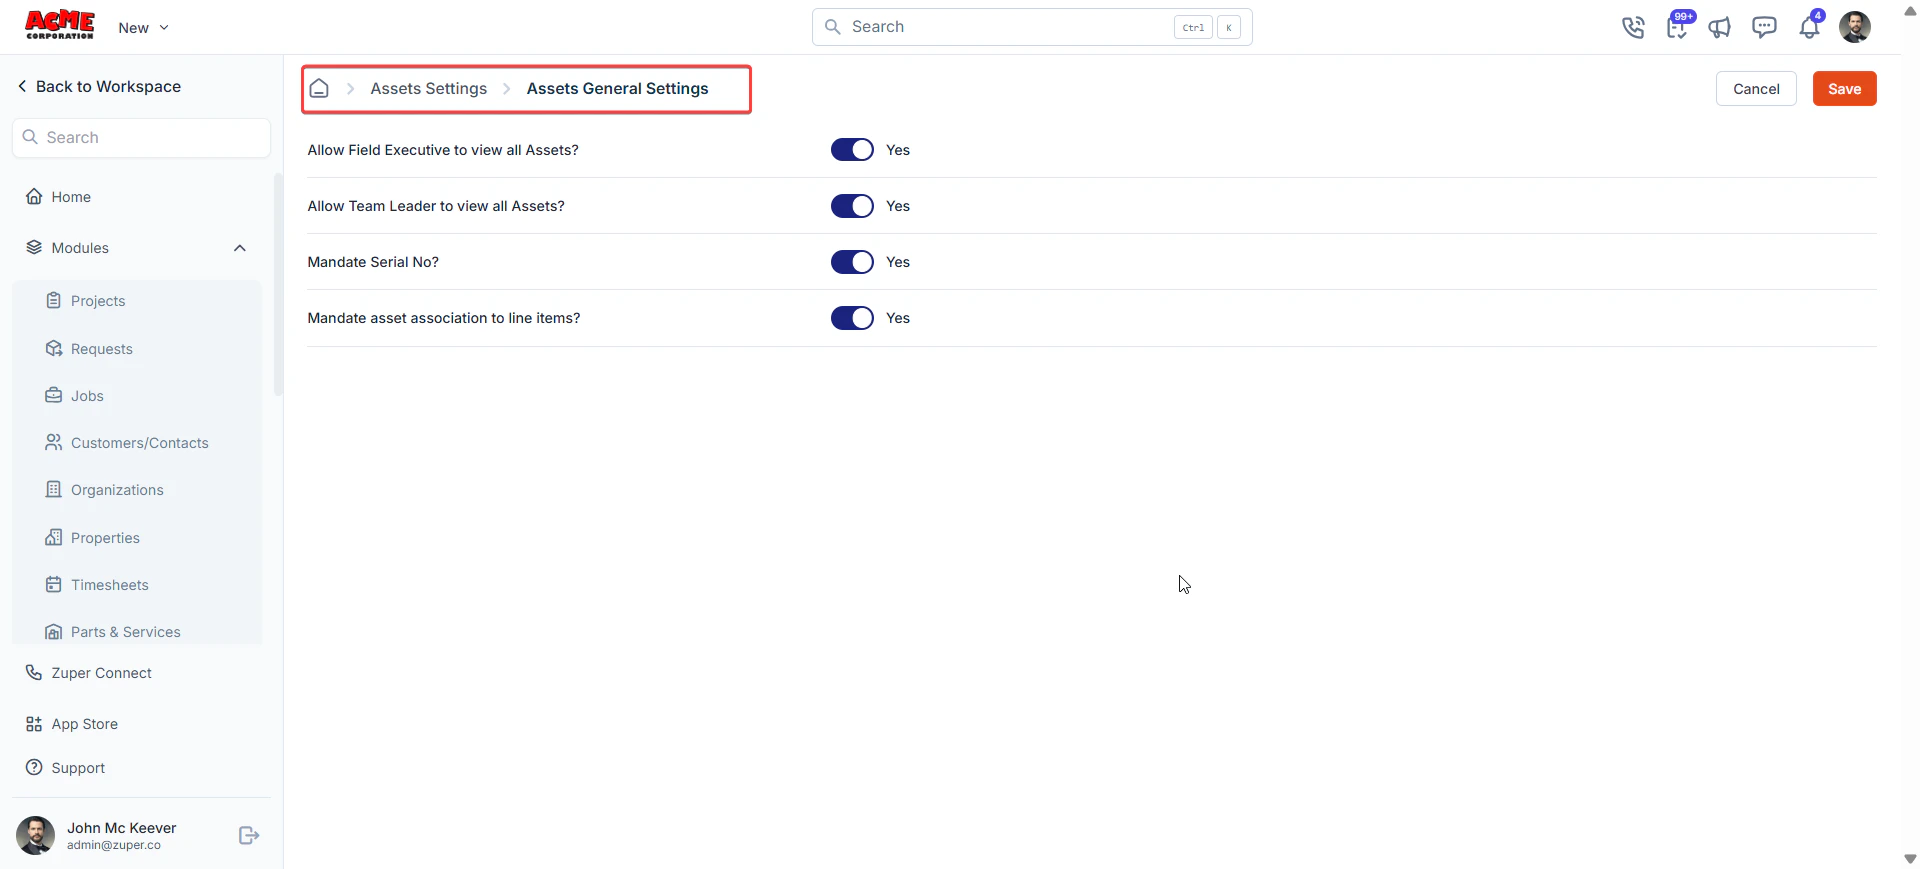
 * **Allow Field Executive to view all Assets?**: Toggle "**Yes**" or "**No**" to allow/disallow the field executive to view all assets.
* **Allow Team Leader to view all Assets?:** Toggle "**Yes**" or "**No**" to allow/disallow the team leader to view all assets.
* **Mandate Serial No?**: Toggle “**Yes**” or “**No**” to enable or disable mandatory serial number entry for asset-linked parts or services in transactions.
* **Mandate asset association to line items?**: Toggle “**Yes**” or “**No**” to enforce asset association for each line item in a quote. If this is enabled and the quote has one or more associated assets, users must assign an asset to each line item; otherwise, an error occurs when saving
* Click **Save** to apply changes.
* **Allow Field Executive to view all Assets?**: Toggle "**Yes**" or "**No**" to allow/disallow the field executive to view all assets.
* **Allow Team Leader to view all Assets?:** Toggle "**Yes**" or "**No**" to allow/disallow the team leader to view all assets.
* **Mandate Serial No?**: Toggle “**Yes**” or “**No**” to enable or disable mandatory serial number entry for asset-linked parts or services in transactions.
* **Mandate asset association to line items?**: Toggle “**Yes**” or “**No**” to enforce asset association for each line item in a quote. If this is enabled and the quote has one or more associated assets, users must assign an asset to each line item; otherwise, an error occurs when saving
* Click **Save** to apply changes.
 ## Asset category
Asset Categories help classify the assets.
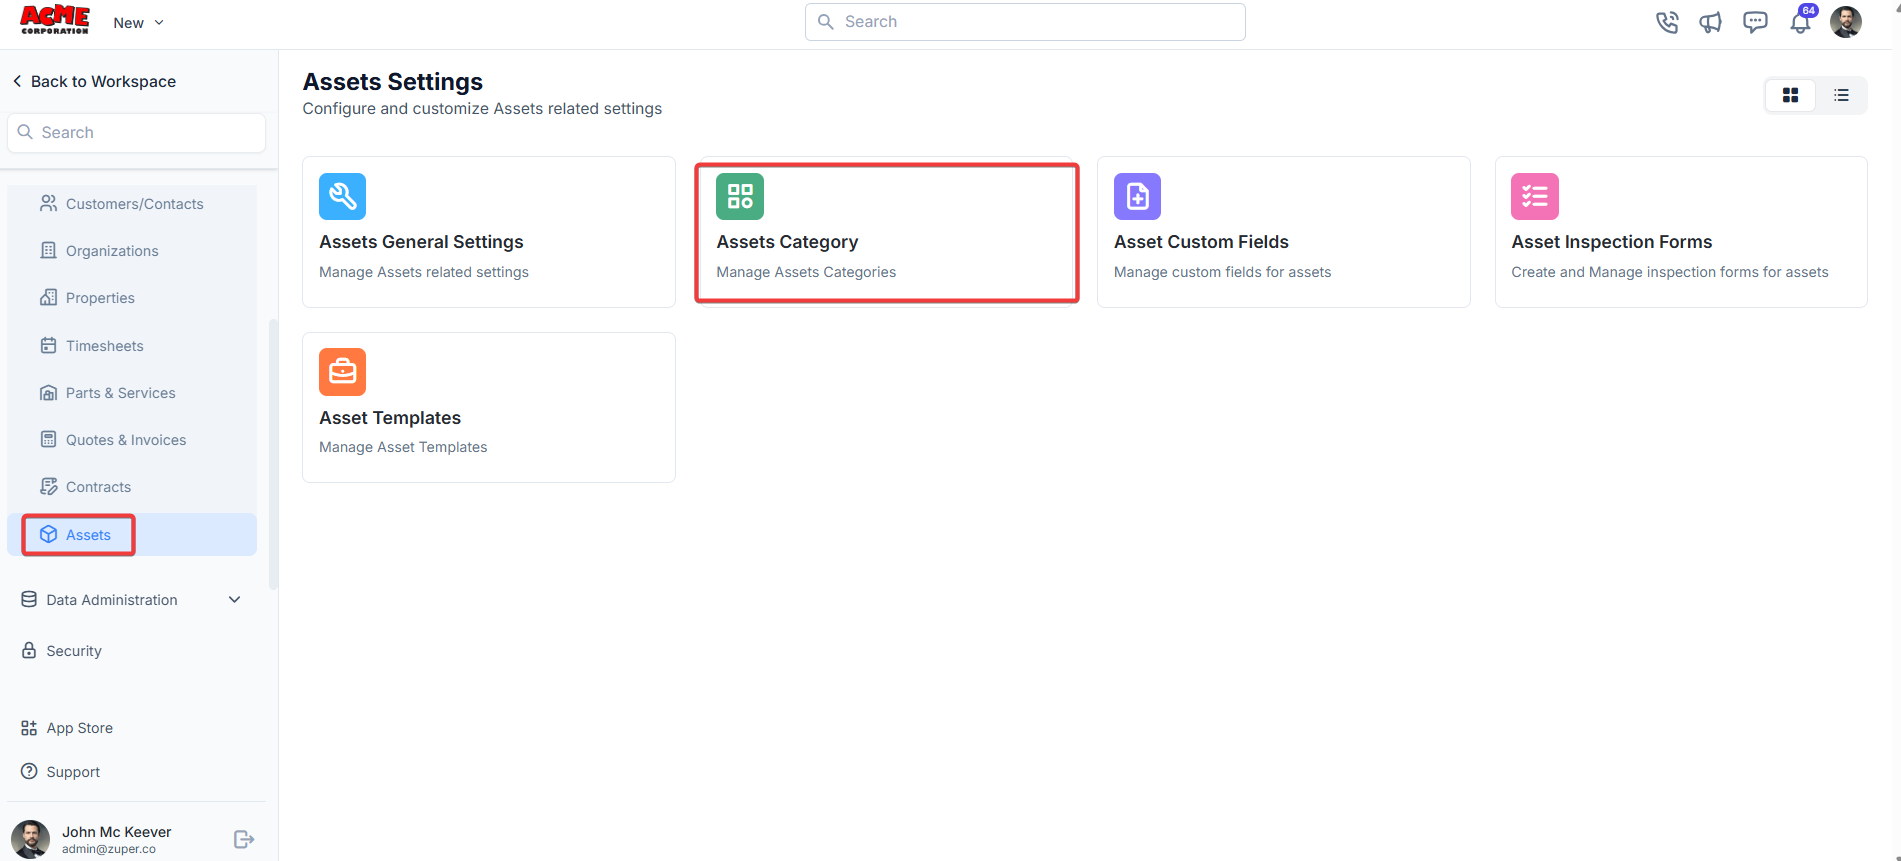
**Navigation**: Settings -> Modules -> Assets - > Assets Category
1. Select the "**Settings**" module from the left panel. Under the "**Modules**," choose the "**Assets**." Select the "**Assets Category**."
## Asset category
Asset Categories help classify the assets.
**Navigation**: Settings -> Modules -> Assets - > Assets Category
1. Select the "**Settings**" module from the left panel. Under the "**Modules**," choose the "**Assets**." Select the "**Assets Category**."
 2. Under the asset category, click "**+ New Category** " to create the asset category.
 3. Enter the category name and description.
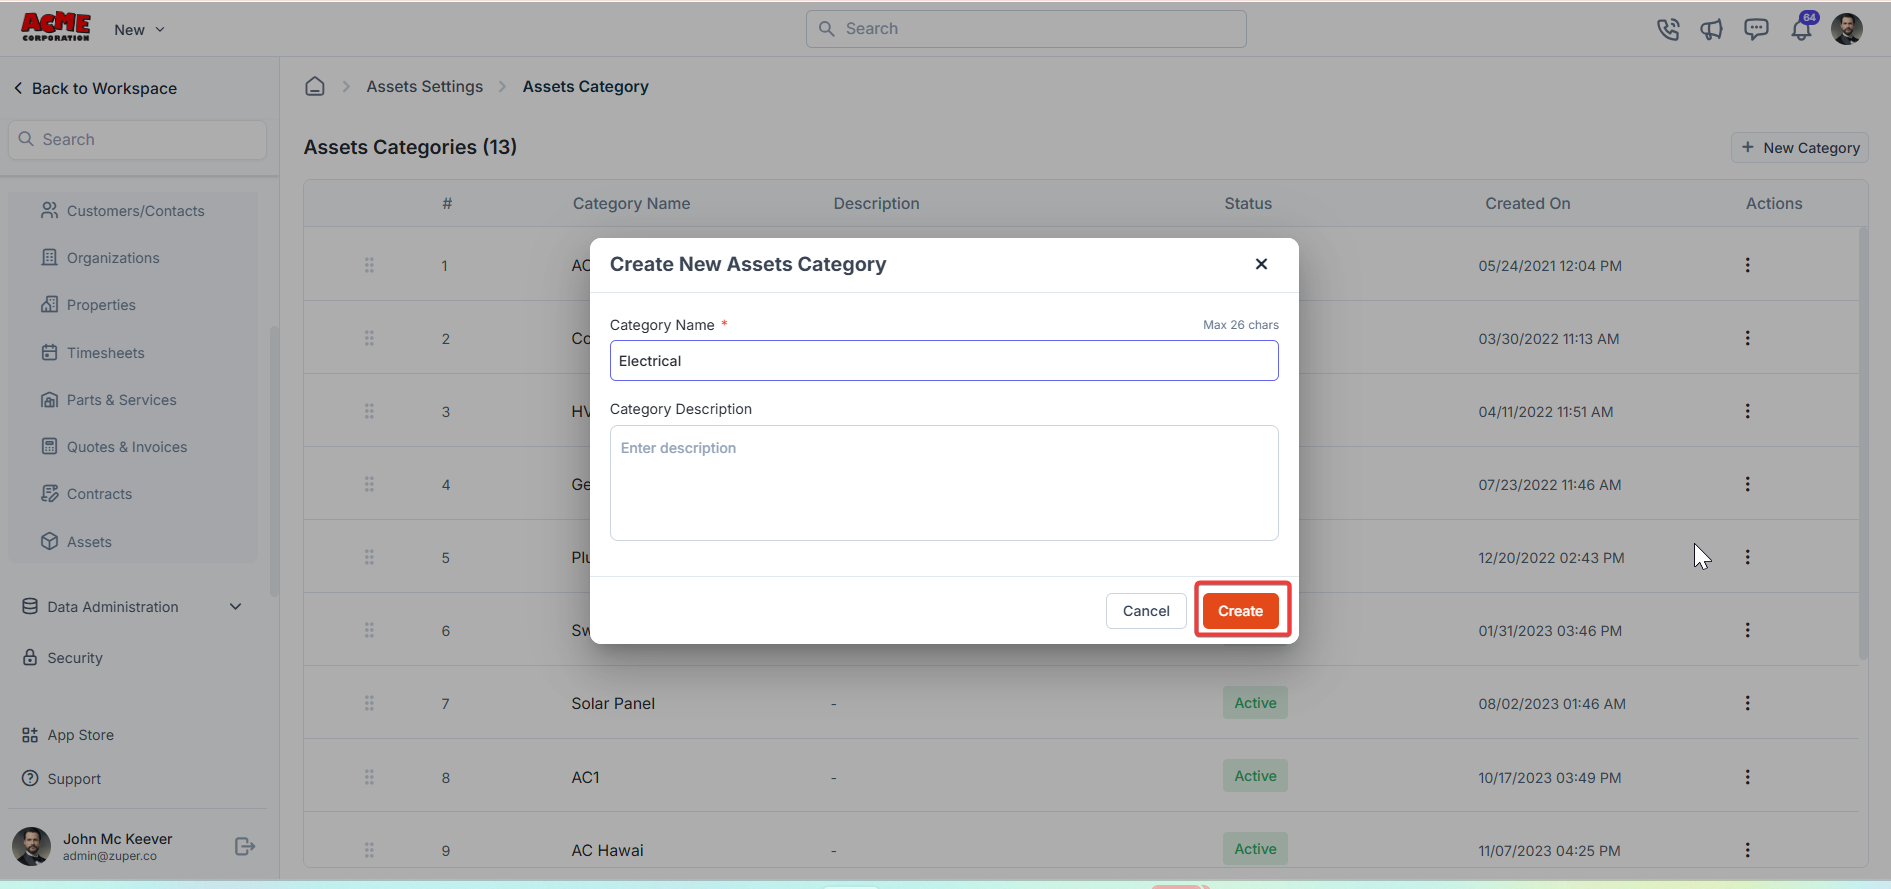 4. Click "**Create**."
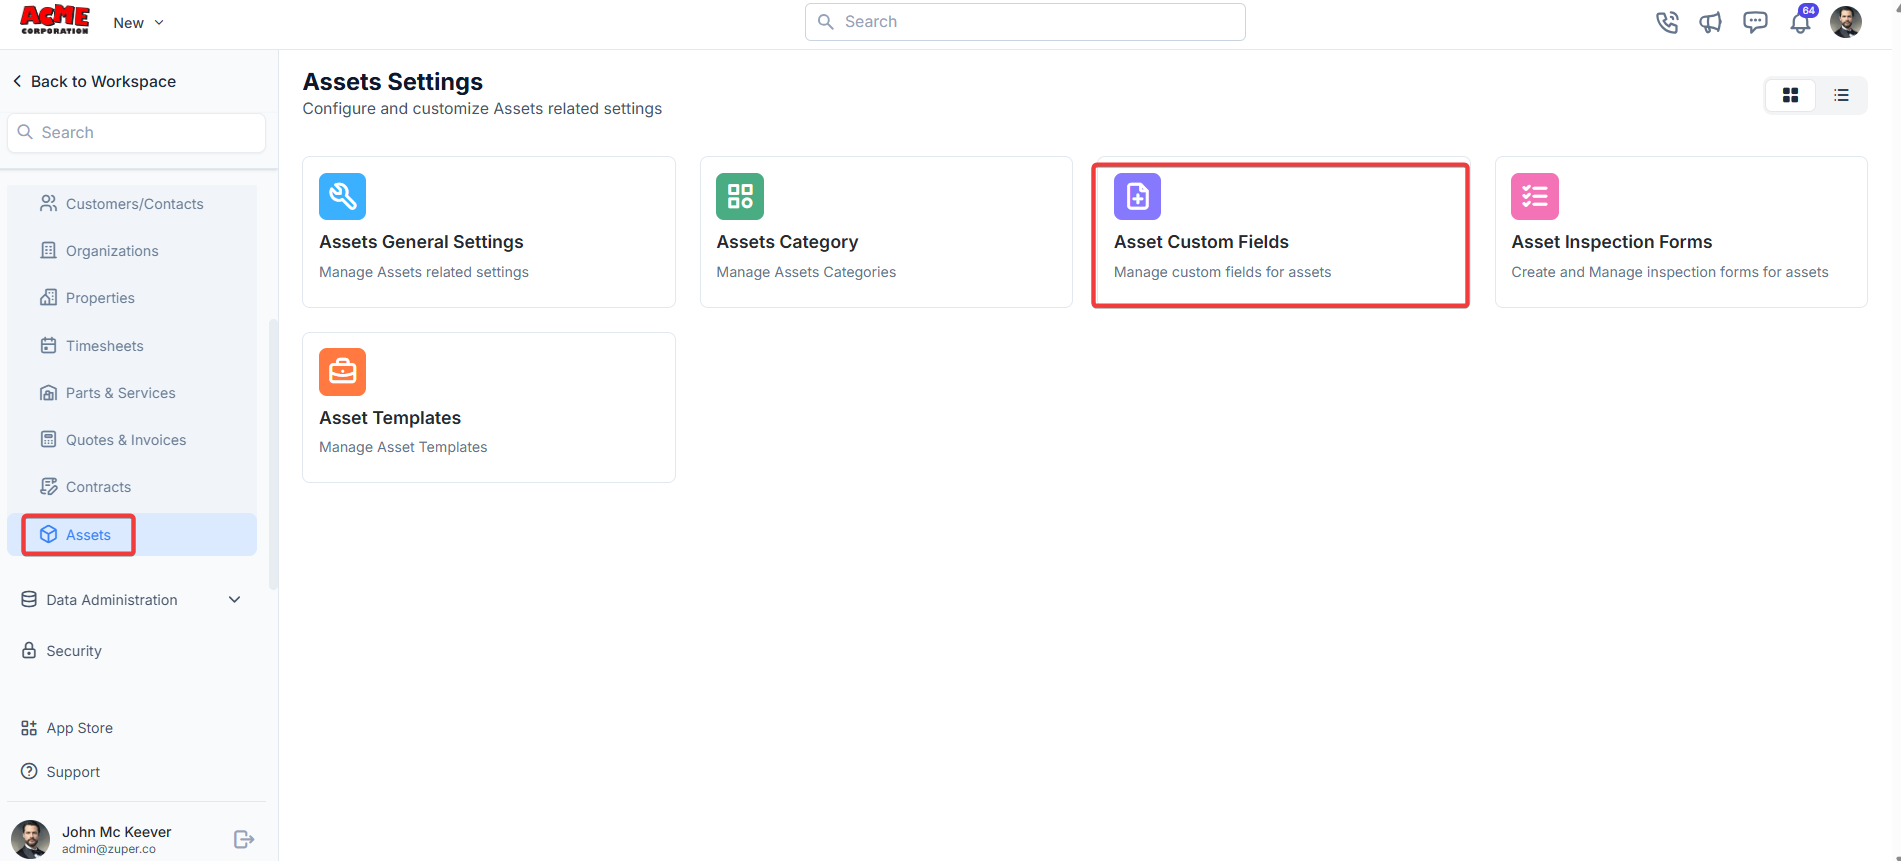
## **Asset custom fields**
**Navigation**: *Settings -> Modules -> Assets - > Assets Custom Fields*
1. Select the "**Settings**" module from the left panel. Under the "**Modules**," choose the "**Contracts**." Select the "**Assets Custom Fields**."
4. Click "**Create**."
## **Asset custom fields**
**Navigation**: *Settings -> Modules -> Assets - > Assets Custom Fields*
1. Select the "**Settings**" module from the left panel. Under the "**Modules**," choose the "**Contracts**." Select the "**Assets Custom Fields**."
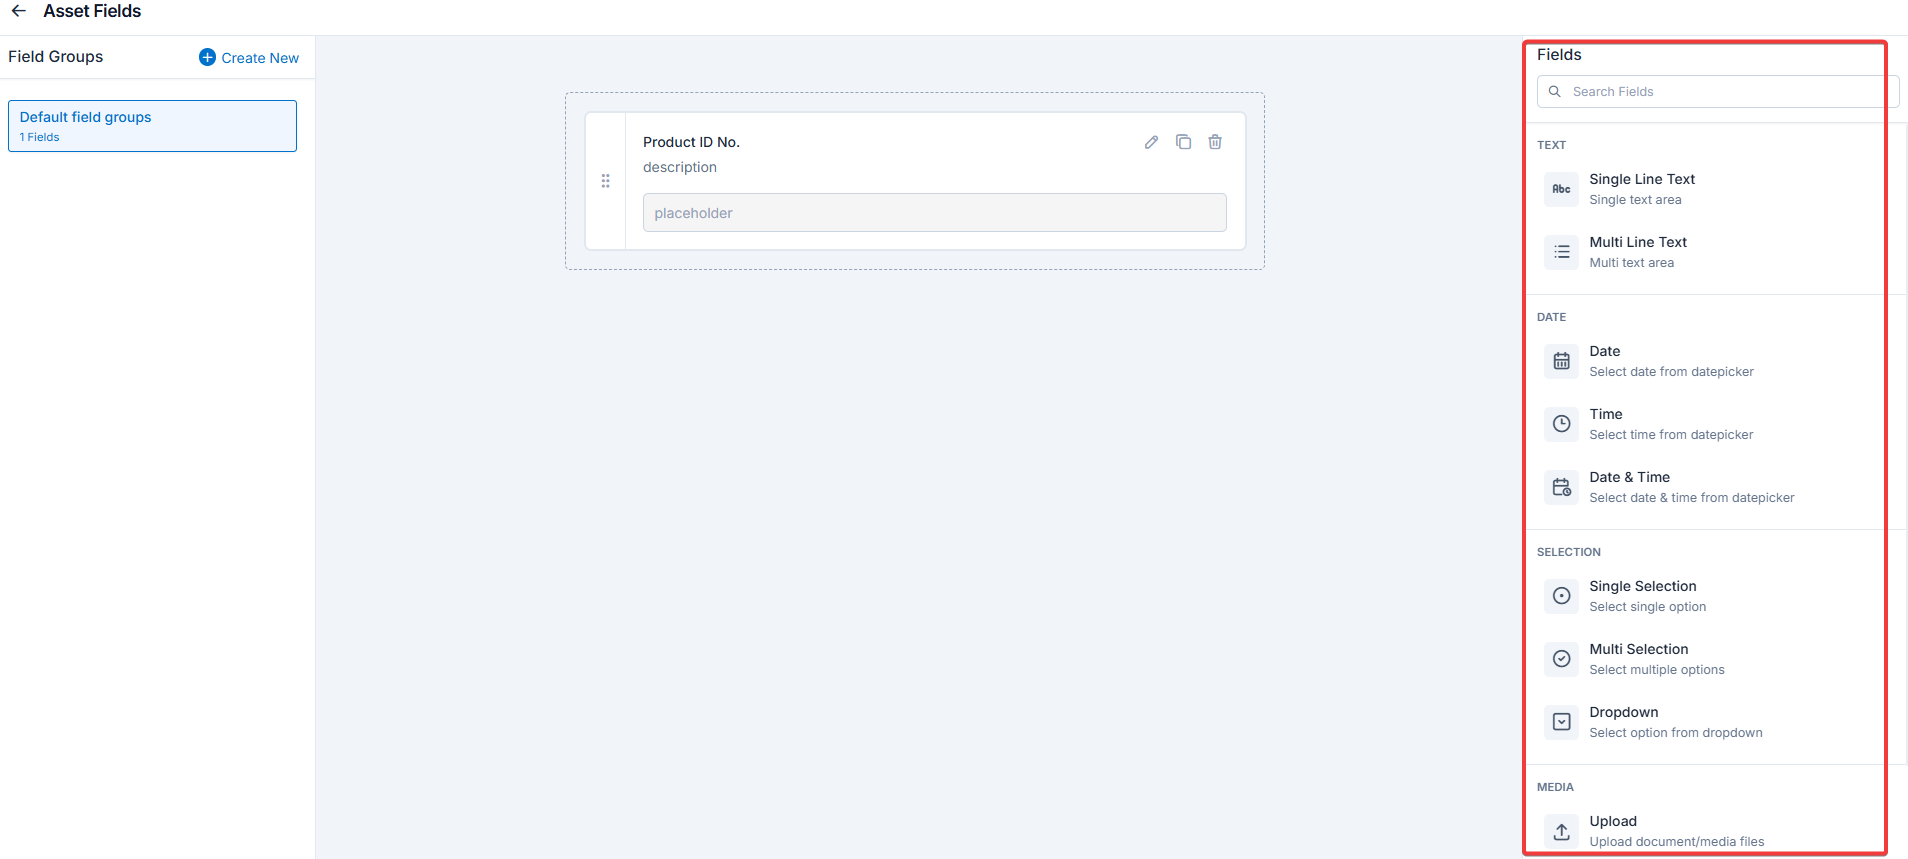
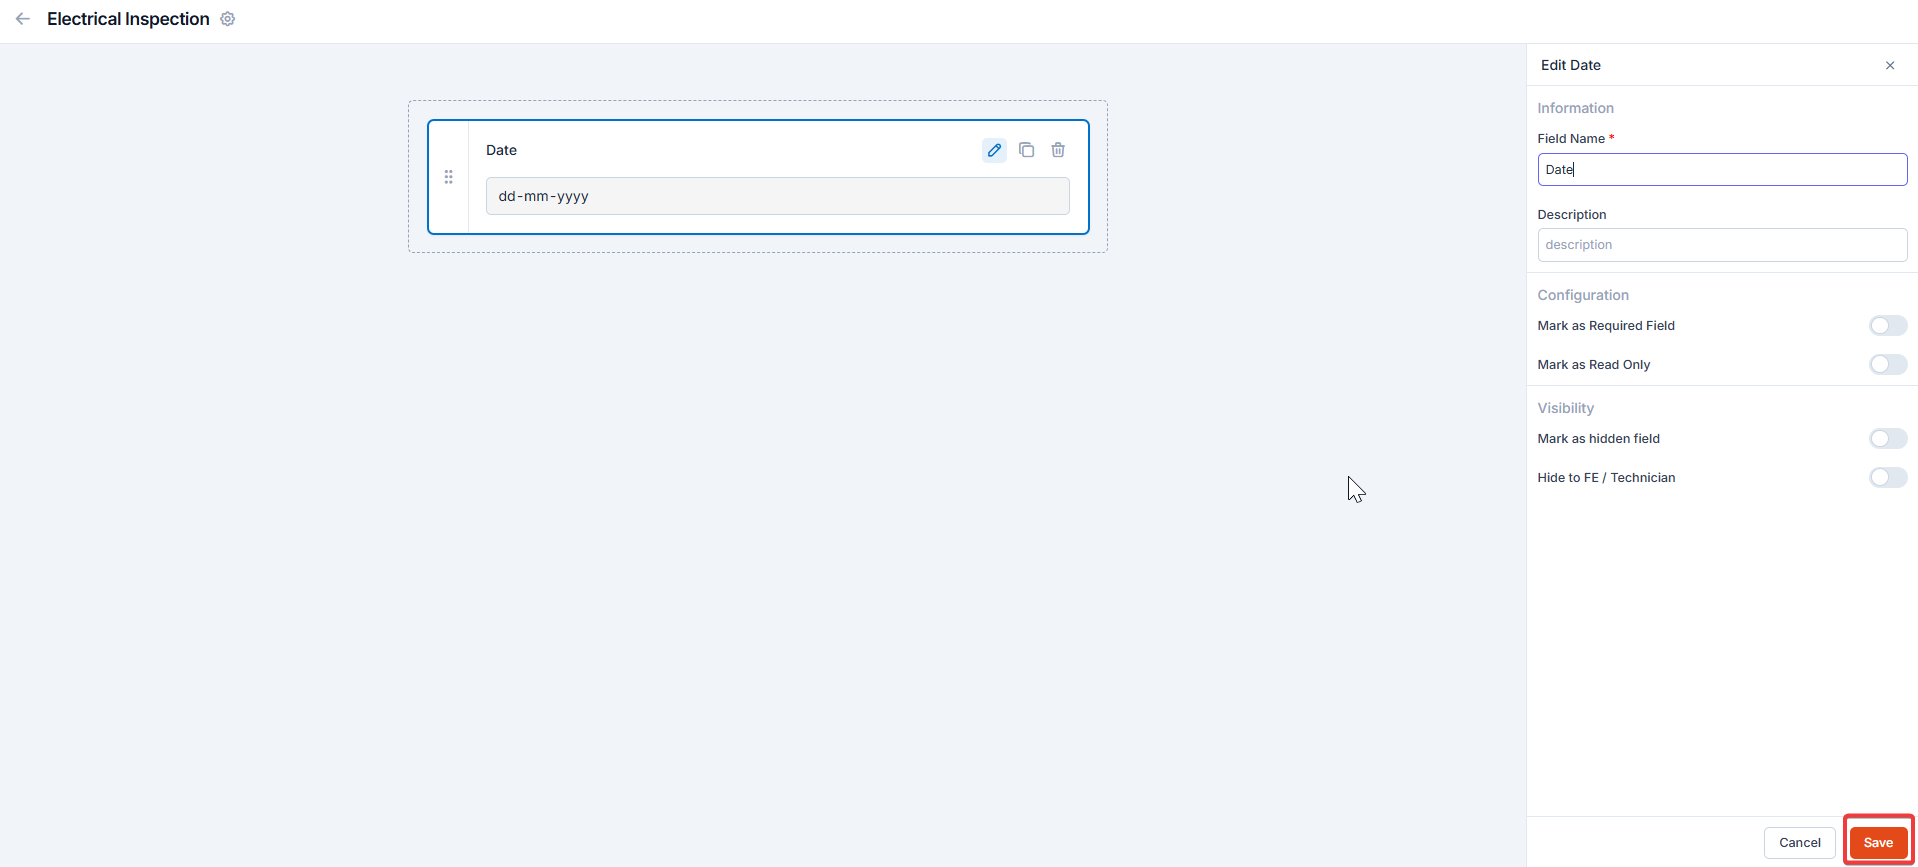
 2. Drag and drop the fields from the right panel.\\
* Single-Line Input: This allows you to create a field to enter a single line of free text.
* Multi-Line Input: This allows you to create a field to enter multiple lines of free text.
* Date Input: This allows you to create a field to select a specific date from a calendar.
* Time Input: This allows you to create a field where you can select a specific time.
* Date Time Input: This allows you to create a field where both date and time can be selected.
* Single-Selection: This allows you to create a radio input Field where one of the provided options can be selected.
* Multi-Selection: This allows you to create check boxes where the provided options can be checked.
* Drop-Down: This allows you to create a drop-down field with the required list of options.
* Upload: This allows you to create a file input field to upload files.
* Look up: This allows you to create a file input field to look up the products from the parts and services module.
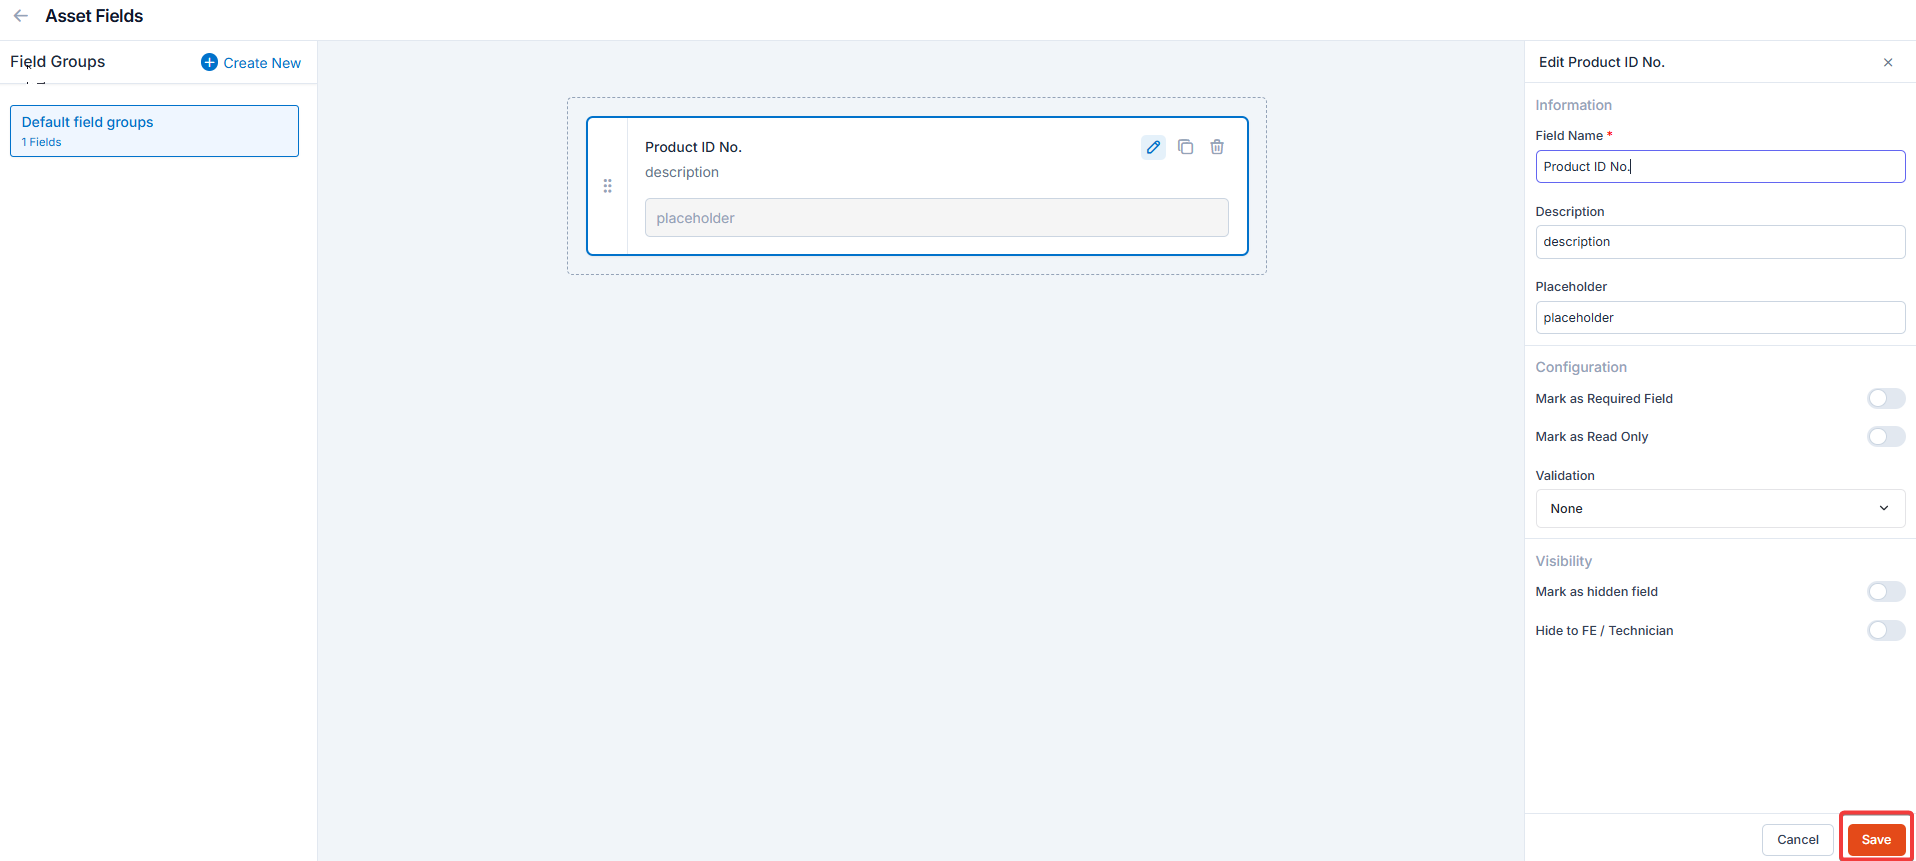
**Note**: You can also control the behavior and visibility of each field using the following options:
* Mark as Required Field - Makes the field mandatory to fill out before submitting the form.
* Mark as Read Only—This option makes the field non-editable; users can view the value but cannot modify it.
* Mark as hidden field- This hides the field from all users; it will not appear in the form interface.
* Hide to FE/Technician- This option makes the field invisible to technicians or front-end users during form access.
2. Drag and drop the fields from the right panel.\\
* Single-Line Input: This allows you to create a field to enter a single line of free text.
* Multi-Line Input: This allows you to create a field to enter multiple lines of free text.
* Date Input: This allows you to create a field to select a specific date from a calendar.
* Time Input: This allows you to create a field where you can select a specific time.
* Date Time Input: This allows you to create a field where both date and time can be selected.
* Single-Selection: This allows you to create a radio input Field where one of the provided options can be selected.
* Multi-Selection: This allows you to create check boxes where the provided options can be checked.
* Drop-Down: This allows you to create a drop-down field with the required list of options.
* Upload: This allows you to create a file input field to upload files.
* Look up: This allows you to create a file input field to look up the products from the parts and services module.
**Note**: You can also control the behavior and visibility of each field using the following options:
* Mark as Required Field - Makes the field mandatory to fill out before submitting the form.
* Mark as Read Only—This option makes the field non-editable; users can view the value but cannot modify it.
* Mark as hidden field- This hides the field from all users; it will not appear in the form interface.
* Hide to FE/Technician- This option makes the field invisible to technicians or front-end users during form access.
 3. Click “**Create New**” to create the “**Custom Field**” group.
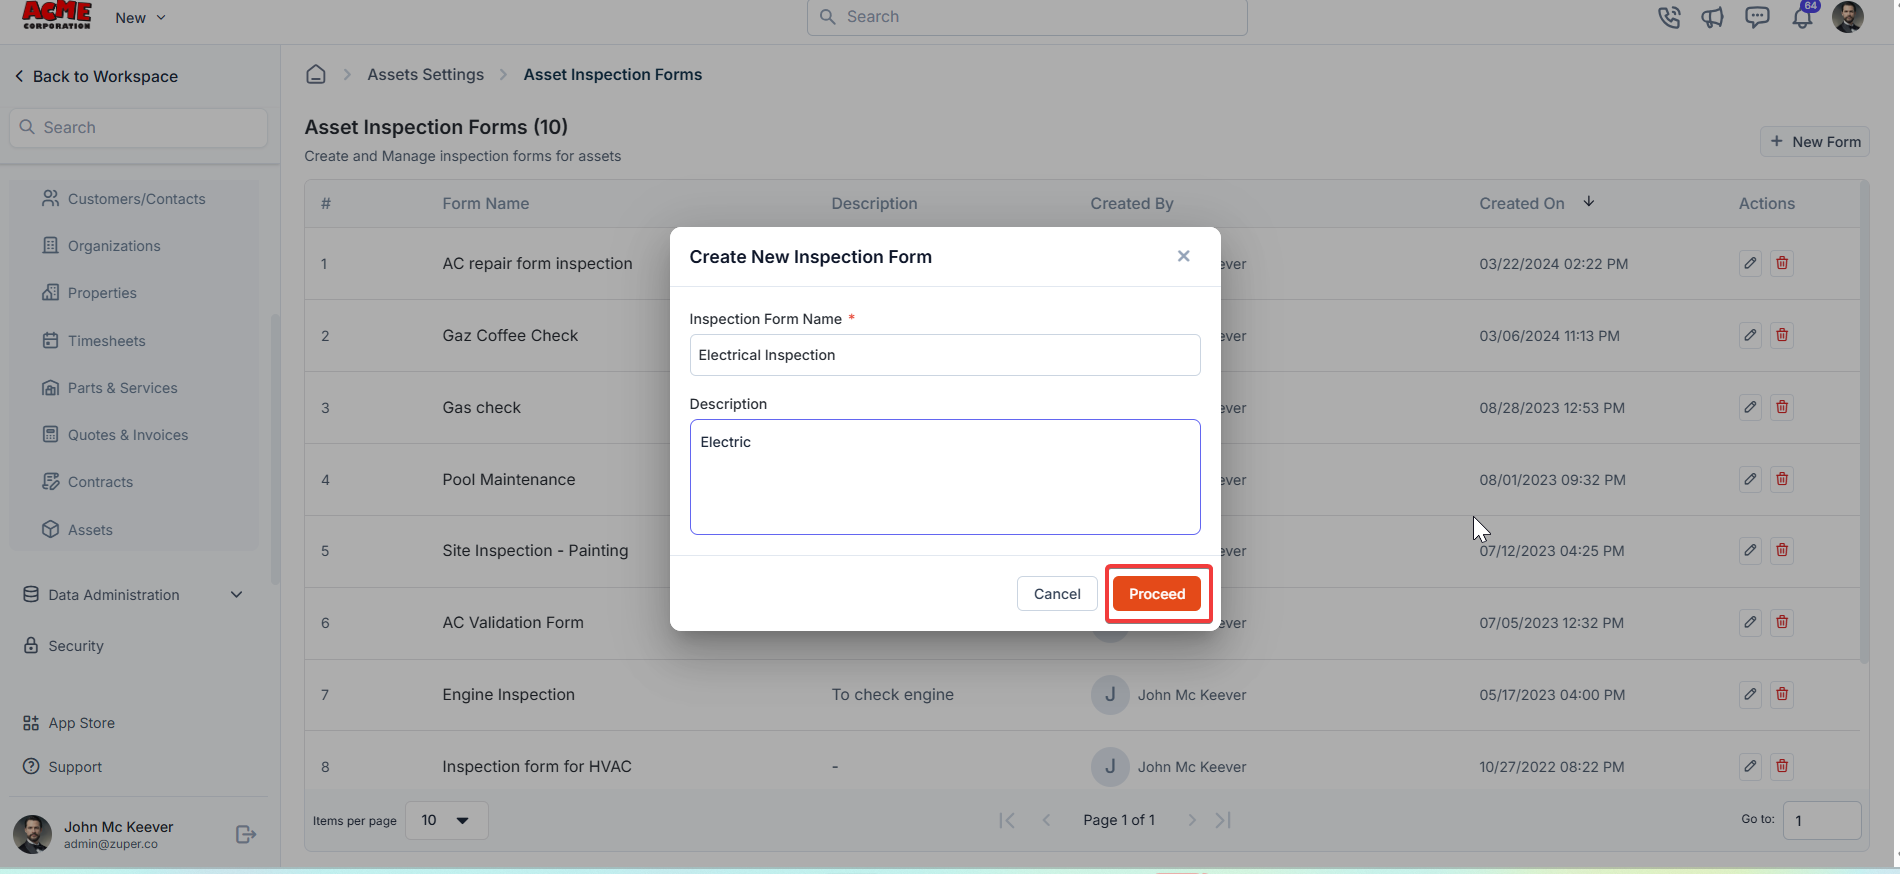
## **Asset inspection forms**
**Navigation**: *Settings -> Modules -> Assets - > Asset Inspection Forms*
An asset inspection form is a checklist for the field technician to conduct asset inspections and record maintenance activities. These forms also play a crucial role in streamlining the inspection process and improving overall efficiency.
1. **Inspection Form Name** – Enter the inspection form name.
2. **Description** – Enter the form description.
3. Click “**Create New**” to create the “**Custom Field**” group.
## **Asset inspection forms**
**Navigation**: *Settings -> Modules -> Assets - > Asset Inspection Forms*
An asset inspection form is a checklist for the field technician to conduct asset inspections and record maintenance activities. These forms also play a crucial role in streamlining the inspection process and improving overall efficiency.
1. **Inspection Form Name** – Enter the inspection form name.
2. **Description** – Enter the form description.
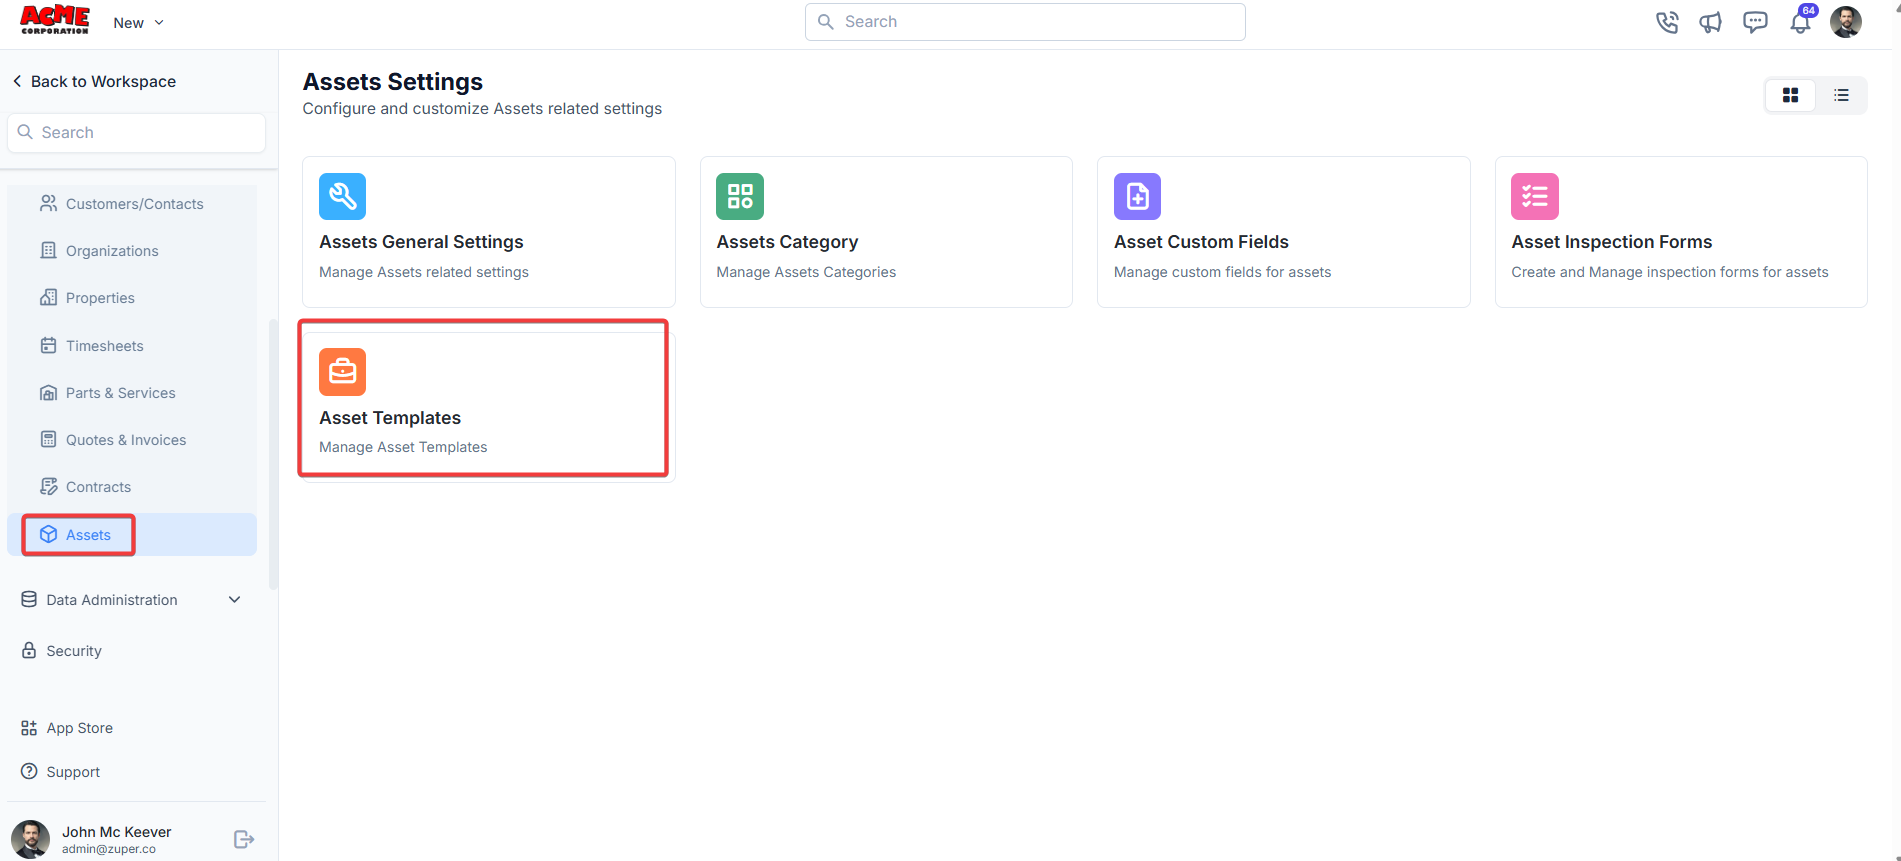
 ## **Asset templates**
Asset templates allow you to standardize asset formats for consistency.
**Navigation**: Settings -> Modules -> Assets - > Assets Templates\_
1. Select the "**Settings**" module from the left panel. Under the "**Modules**," choose the "**Assets**." Select the "**Asset Templates**."
## **Asset templates**
Asset templates allow you to standardize asset formats for consistency.
**Navigation**: Settings -> Modules -> Assets - > Assets Templates\_
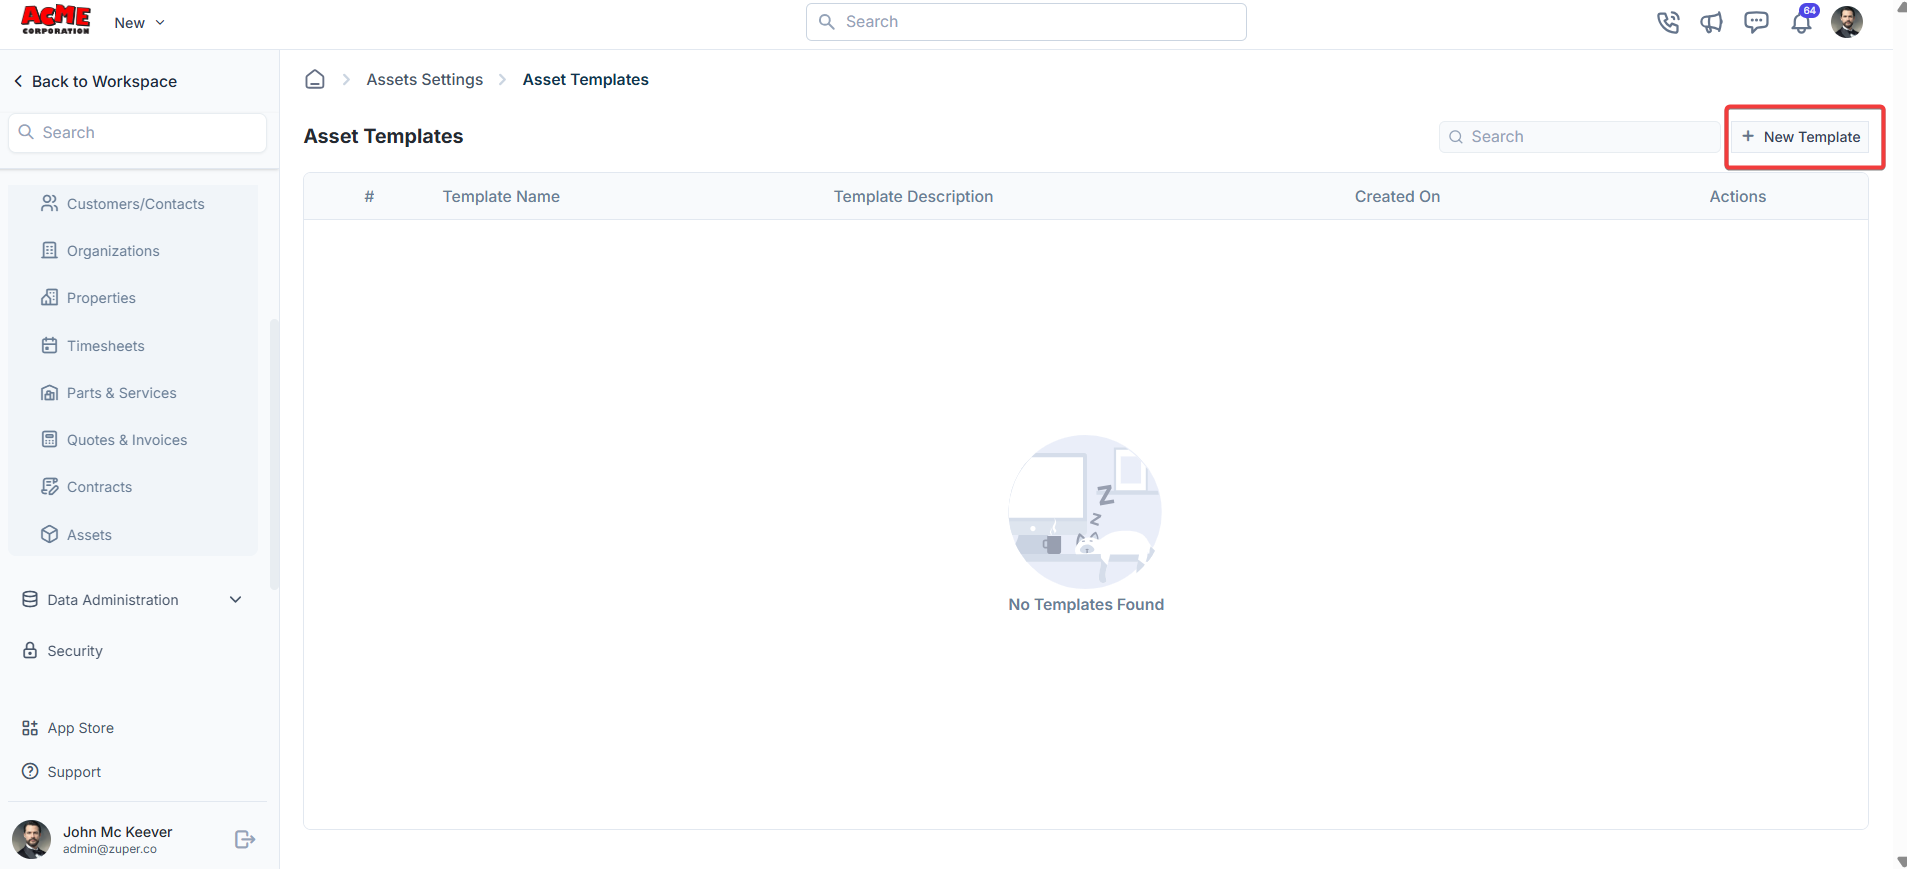
1. Select the "**Settings**" module from the left panel. Under the "**Modules**," choose the "**Assets**." Select the "**Asset Templates**."
 2. Click "**+ New Template**" to create the new template.
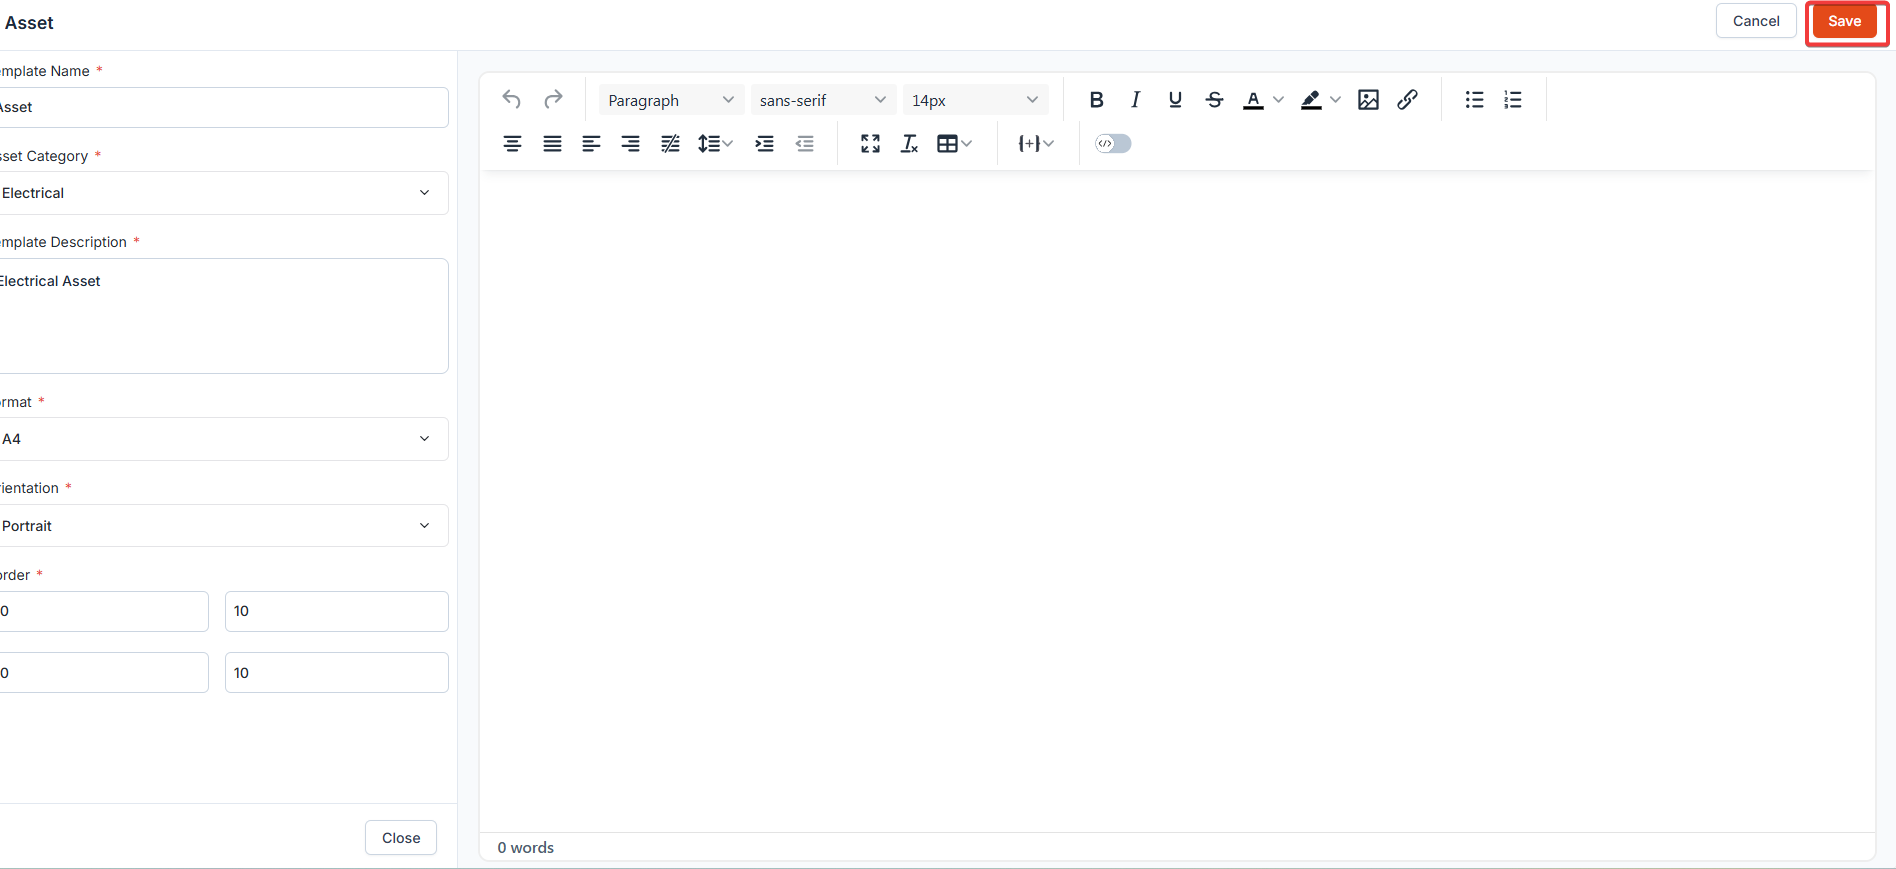
 3. Fill in the template details and click "**Save Template**."
 4. Click "**Proceed**" to create the template.
By following the outlined steps, you can easily manage the asset categories, templates and permissions.
4. Click "**Proceed**" to create the template.
By following the outlined steps, you can easily manage the asset categories, templates and permissions.