> ## Documentation Index
> Fetch the complete documentation index at: https://docs.zuper.co/llms.txt
> Use this file to discover all available pages before exploring further.
# Configuring Task Templates
## Overview
Every job in your business involves repeatable work — inspections, installations, cleanups, and follow-ups that your team carries out the same way every time. Task templates let you define work once and apply it to any job instantly.
Think of a task template as a reusable blueprint. You build it once in **Settings**, and it is available to apply across your jobs whenever you need it.
**Navigation**: *Settings* → *Job Settings* → *Task Template*
## Before you begin
Make sure you have admin or settings access in Zuper. If you do not see **Job Settings** in your navigation, contact your Zuper administrator.
## View your task templates
1. Go to **Settings** from the left navigation menu.
2. Select **Jobs** to open **Job Settings**.
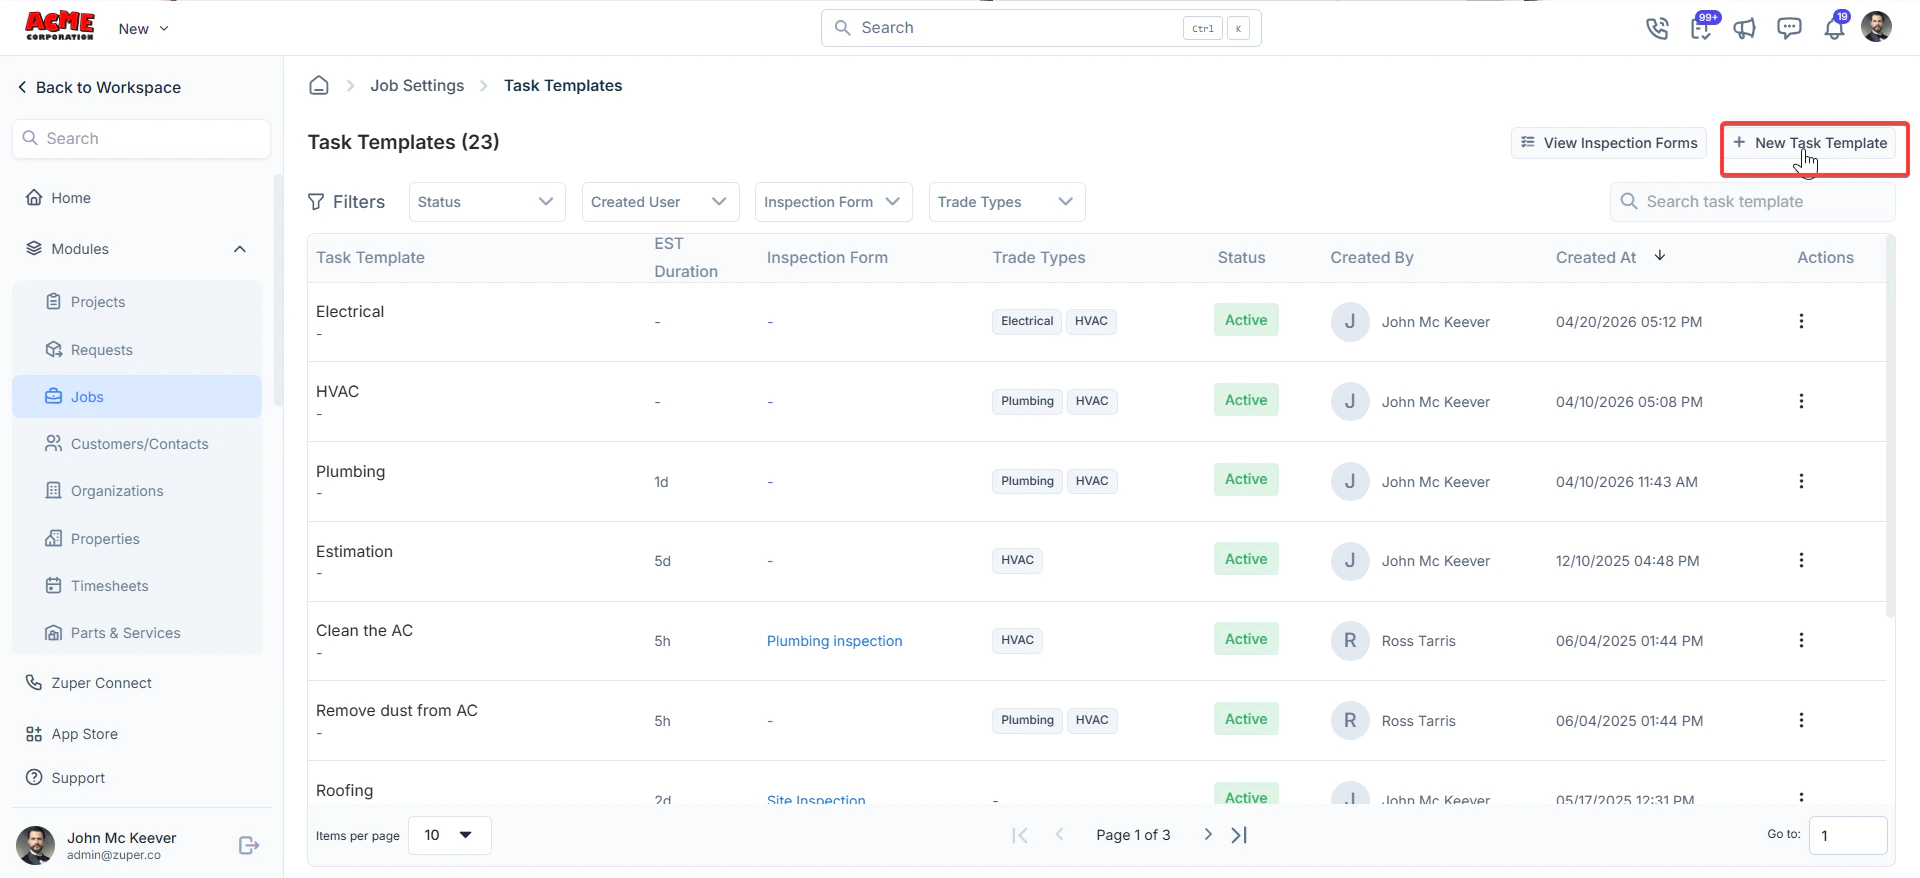
3. Select **Task Template**. The **Task Templates** listing page opens.
On this page, you can see all existing templates with the following details:
* **Task Template** — the name of the template.
* **EST Duration** — the estimated time to complete the task.
* **Inspection Form** — any linked inspection form.
* **Trade Types** — the trade categories the template applies to.
* **Status** — whether the template is **Active** or inactive.
* **Created By** — the user who created the template.
* **Created At** — the date and time the template was created.
Use the **Status**, **Created User**, **Inspection Form**, and **Trade Types** filters to narrow the list. Use the search bar to find a specific template by name.
## Create a task template
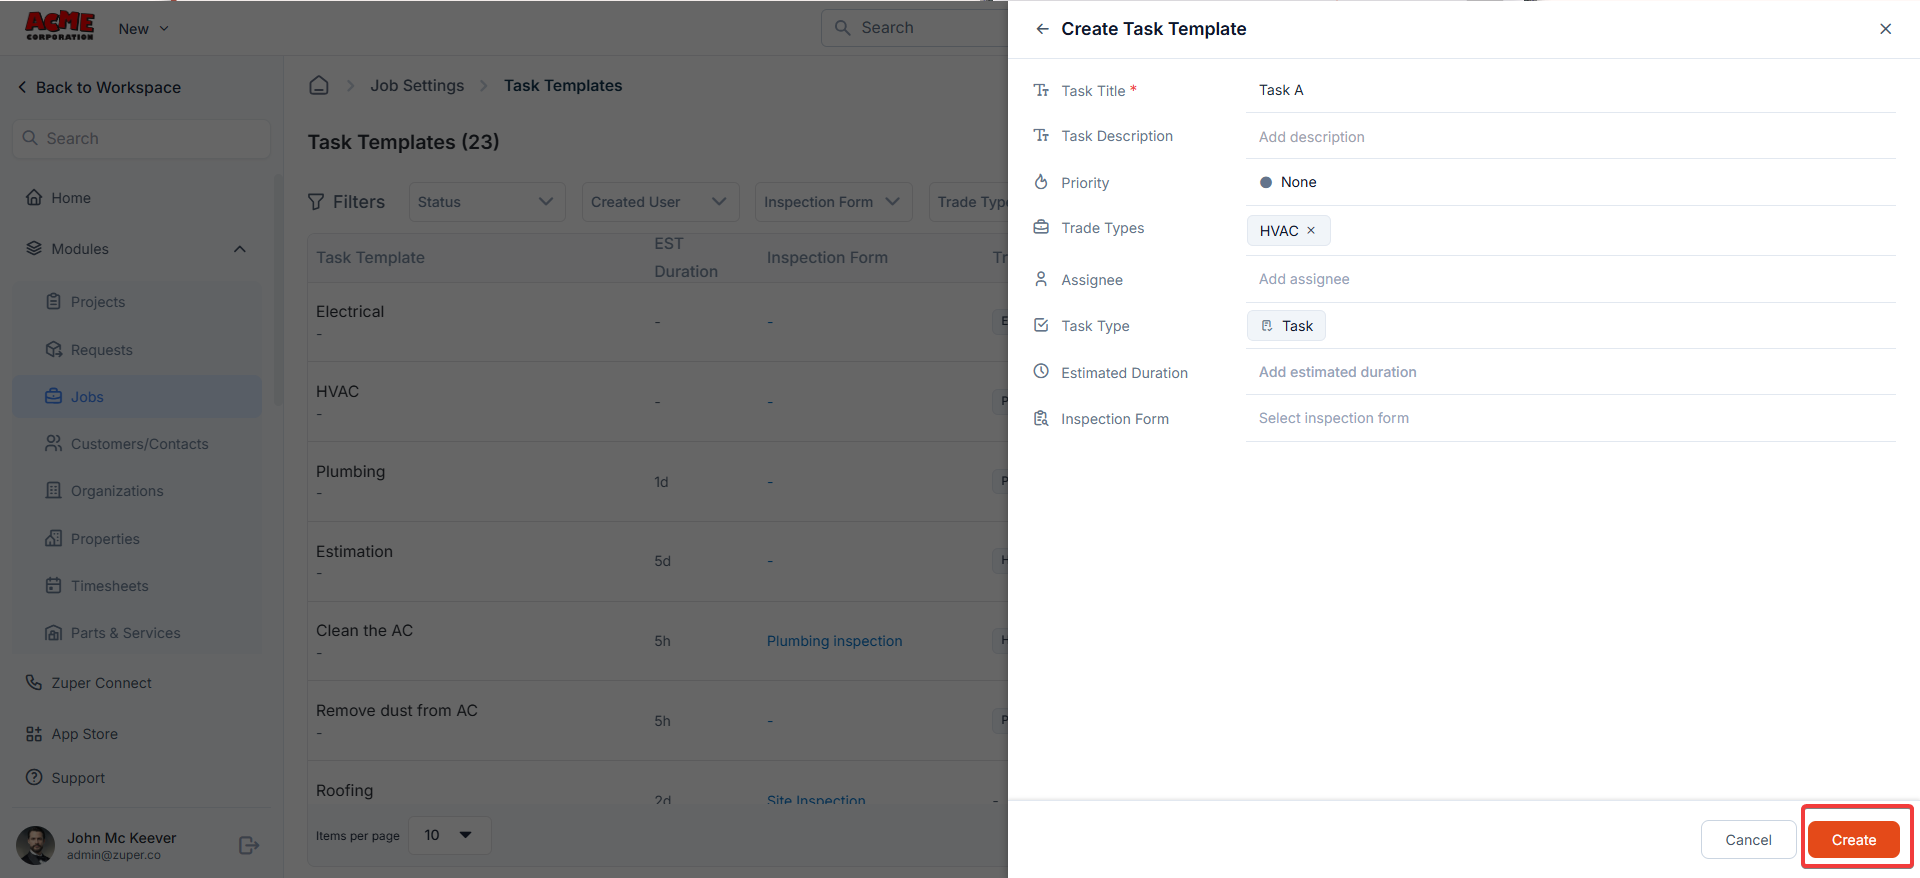
1. On the **Task Templates** listing page, select **+ New Task Template** in the top right corner. The **Create Task Template** panel opens on the right.
 1. Enter a name in the **Task Title** field. This field is required.
2. Enter a description in the **Task Description** field. Use this to explain what the task involves so your team has the context they need.
3. Select a **Priority** level for the task.
4. Select one or more **Trade Types** to associate with this template. Trade types help you filter and apply the right templates to the right jobs.
5. Select an **Assignee** if this task is always handled by a specific team member or role.
6. Select a **Task Type** to categorize the task — for example, **Task**.
7. Enter a value in the **Estimated Duration** field to indicate how long this task should take. Use this to help your team plan their time.
8. Select an **Inspection Form** if this task requires your team to complete a form on the job. The form is automatically linked when the template is applied.
9. Select **Create** to save the template.
1. Enter a name in the **Task Title** field. This field is required.
2. Enter a description in the **Task Description** field. Use this to explain what the task involves so your team has the context they need.
3. Select a **Priority** level for the task.
4. Select one or more **Trade Types** to associate with this template. Trade types help you filter and apply the right templates to the right jobs.
5. Select an **Assignee** if this task is always handled by a specific team member or role.
6. Select a **Task Type** to categorize the task — for example, **Task**.
7. Enter a value in the **Estimated Duration** field to indicate how long this task should take. Use this to help your team plan their time.
8. Select an **Inspection Form** if this task requires your team to complete a form on the job. The form is automatically linked when the template is applied.
9. Select **Create** to save the template.
 The new template appears in the **Task Templates** list with an **Active** status.
## Manage existing task templates
From the **Task Templates** listing page, select the context menu (⋮) in the **Actions** column next to any template to access the following options:
* **Edit** — update any of the template's details.
* **Deactivate** — make the template unavailable for use without deleting it.
* **Delete** — permanently remove the template.
The new template appears in the **Task Templates** list with an **Active** status.
## Manage existing task templates
From the **Task Templates** listing page, select the context menu (⋮) in the **Actions** column next to any template to access the following options:
* **Edit** — update any of the template's details.
* **Deactivate** — make the template unavailable for use without deleting it.
* **Delete** — permanently remove the template.