Overview
This help article explains the process of creating a new roofing job in Zuper’s job management system, based on an existing inspection and proposal. Installation jobs allow you to:- Organize work orders
- Assign teams and technicians
- Schedule tasks efficiently
- Track customers, properties, attachments, and service details
Follow these steps to set up a new roofing job efficiently.
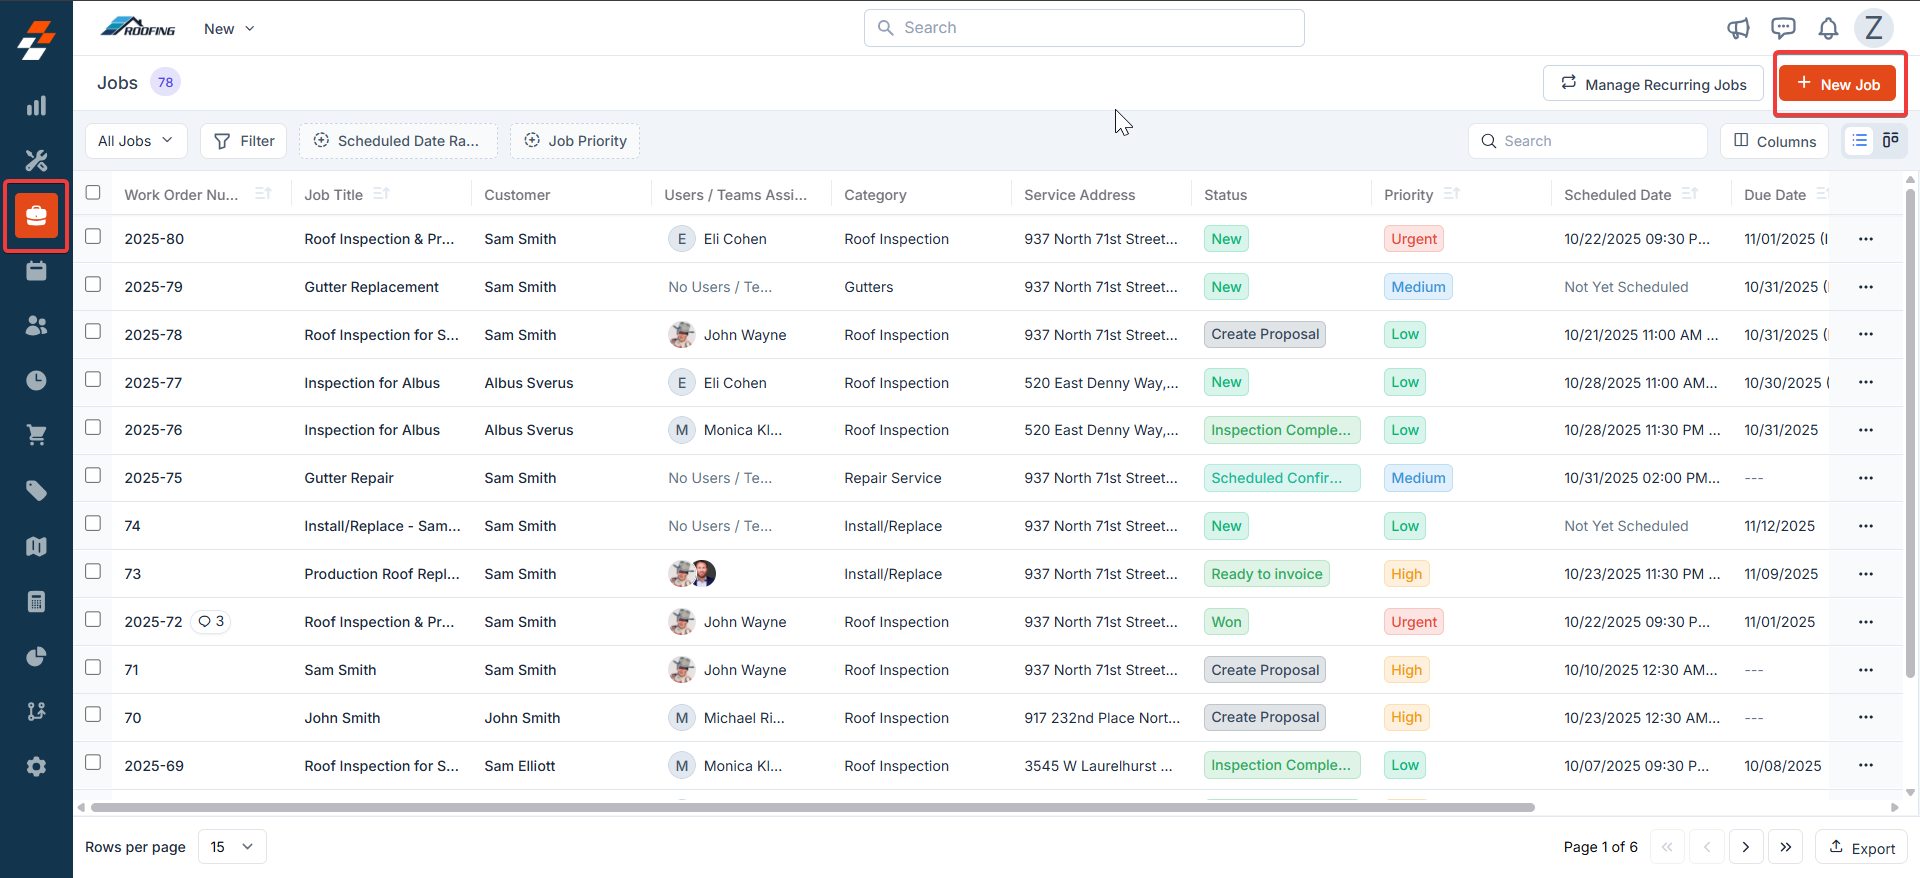
Navigation: Jobs —> + New Job
- Click the “Jobs” module from the left navigation menu.
- Click + New Job in the top-right corner of the jobs listing page.
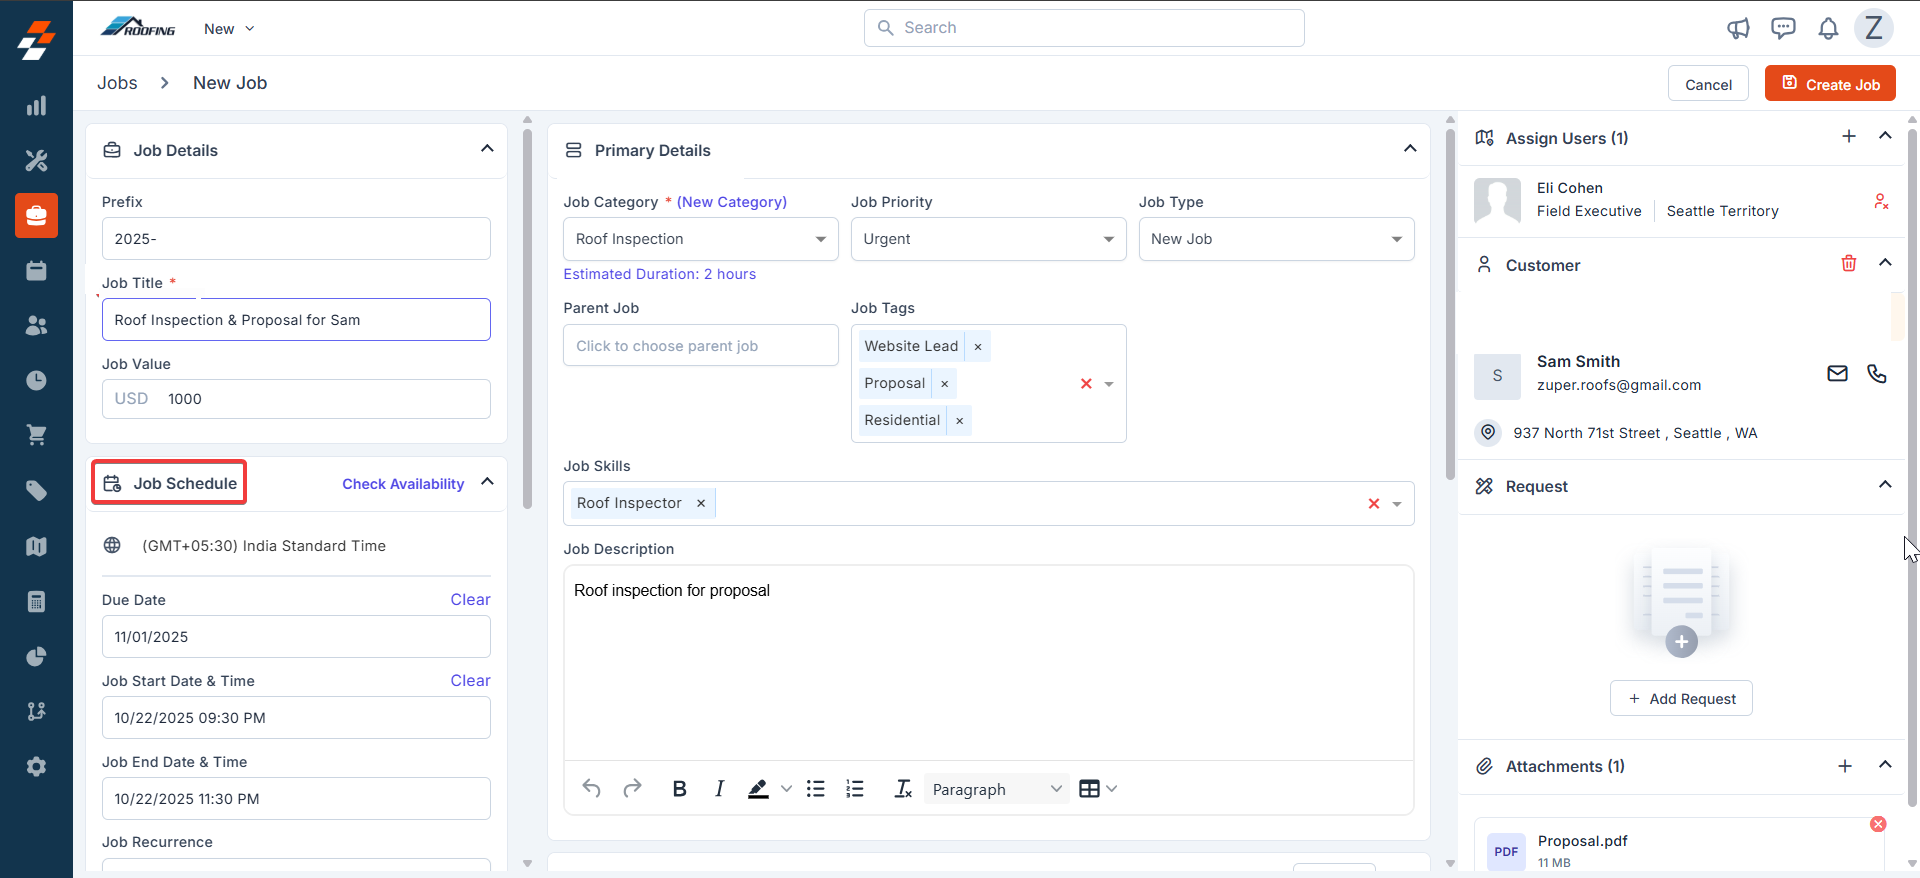
A. Job Details (Left Panel)
- Prefix: Enter the roofing installation job prefix.
- Job Title* (Mandatory): Enter a roofing installation-specific descriptive title.
- Job Value: Enter the estimated value in USD.
B. Primary Details (Center Panel - Top Section)
- Job Category* (Mandatory): Select the roofing job category from the dropdown.
- Estimated Job Duration: Auto-fills based on category edit as needed.
- Job Priority: Select the priority level of the Job.
- Job Type: Choose the job type.
- Job Description: Enter job details.

C. Job Schedule (Left Panel - Bottom Section)
Schedule based on customer preferences. Either a Due Date or Start/end dates are mandatory.- Time Zone: Defaults to your account setting, adjust if needed.
- Due Date: Set the inspection due date.
- Job Start Date & Time: Enter installation start date & time.
- Job End Date & Time: Enter installation end date & time
D. Service Tasks:
Based on the selected job category, the service tasks are automatically retrieved.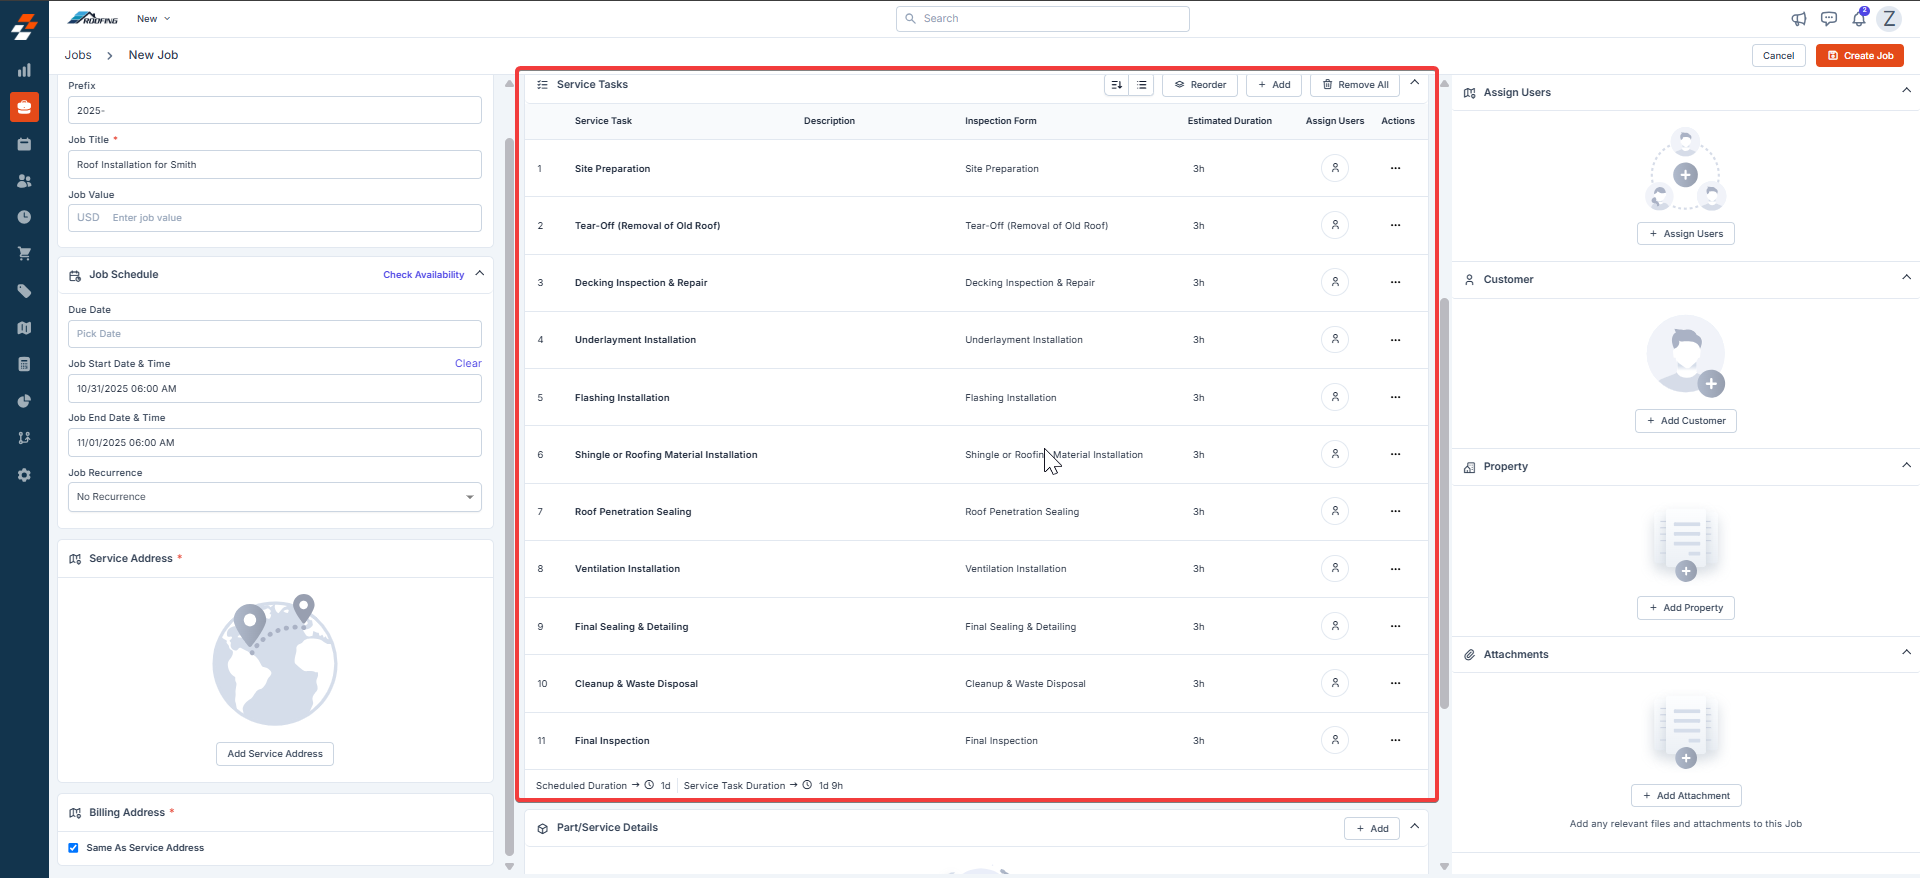
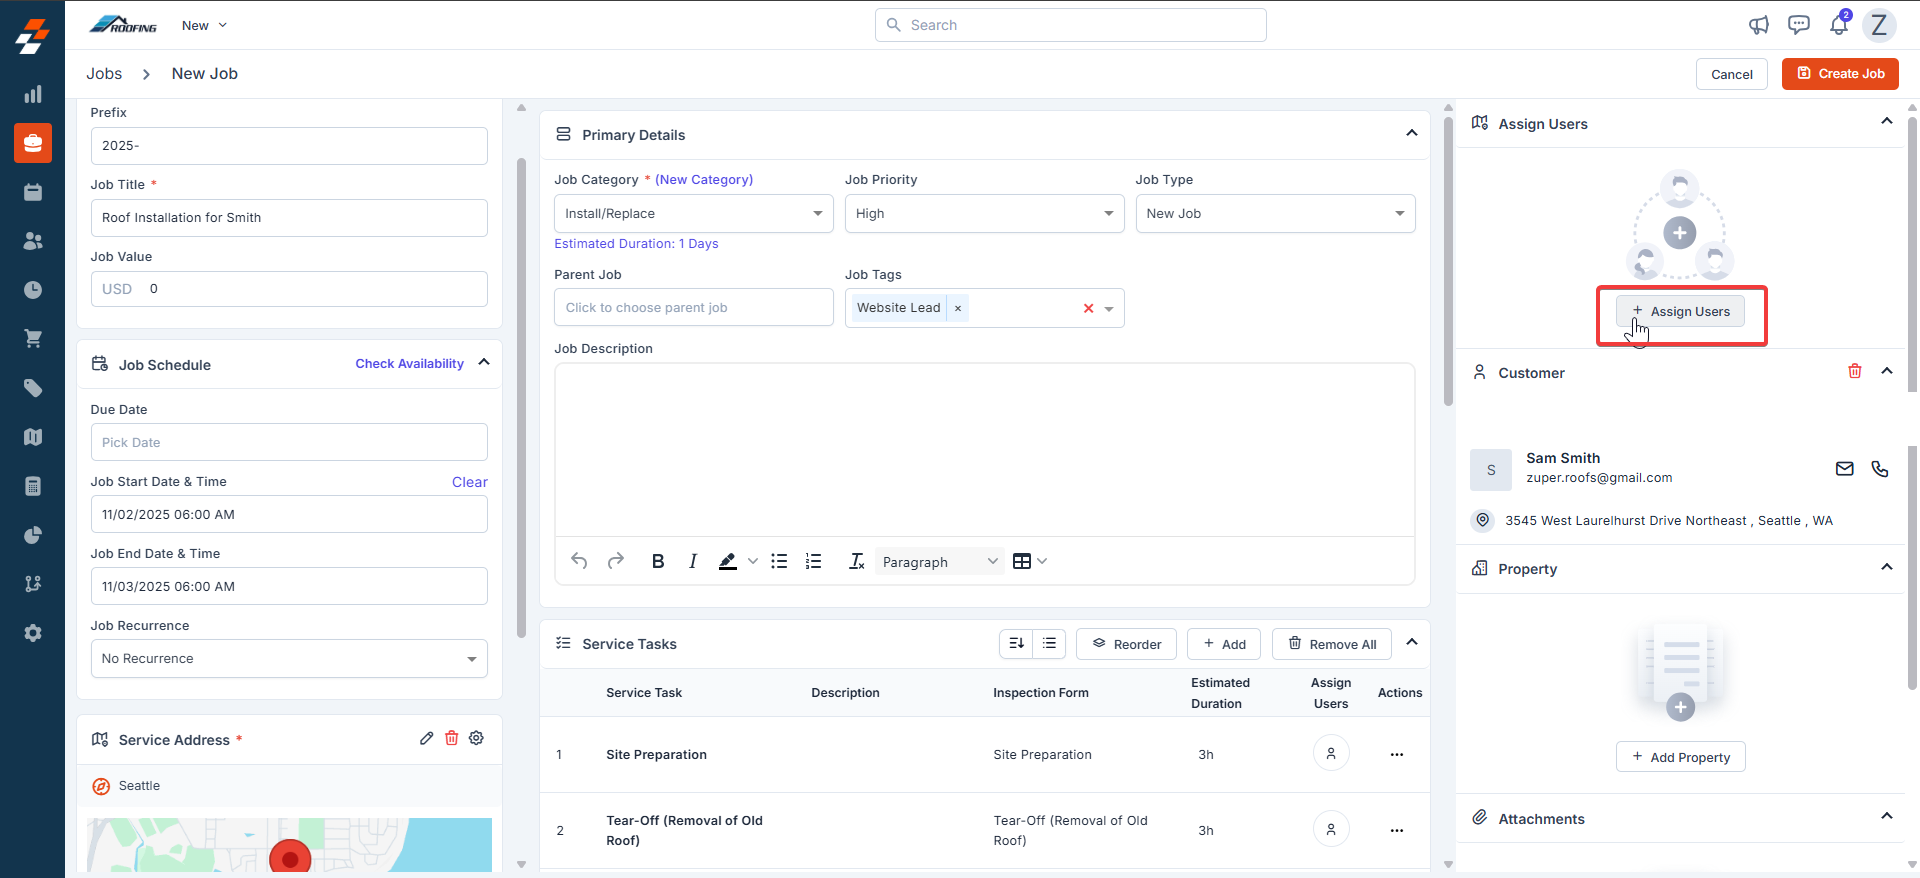
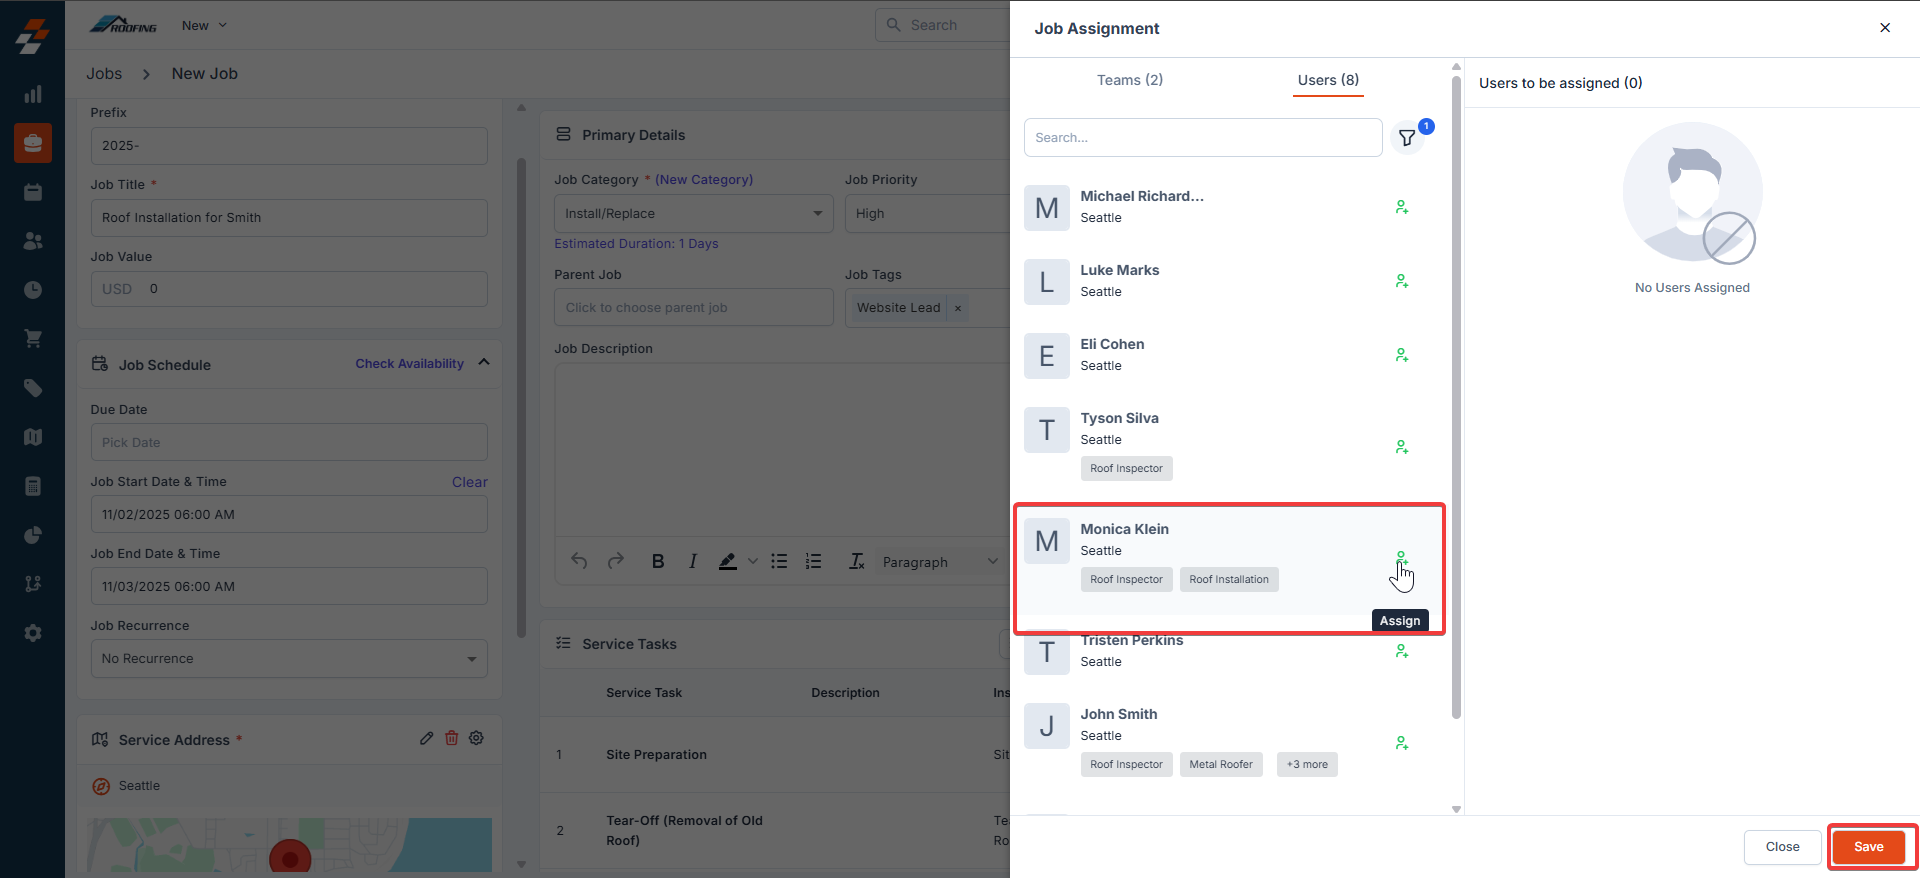
E. Assign Users, Associations:
- Assign Users/Teams: Click + to add technicians.
- + Add Organization/Contact: Click to search/add a customer.
- Attachments: Click + to upload files. Supports PDFs, images, and other file types for proposals, photos, or contracts.

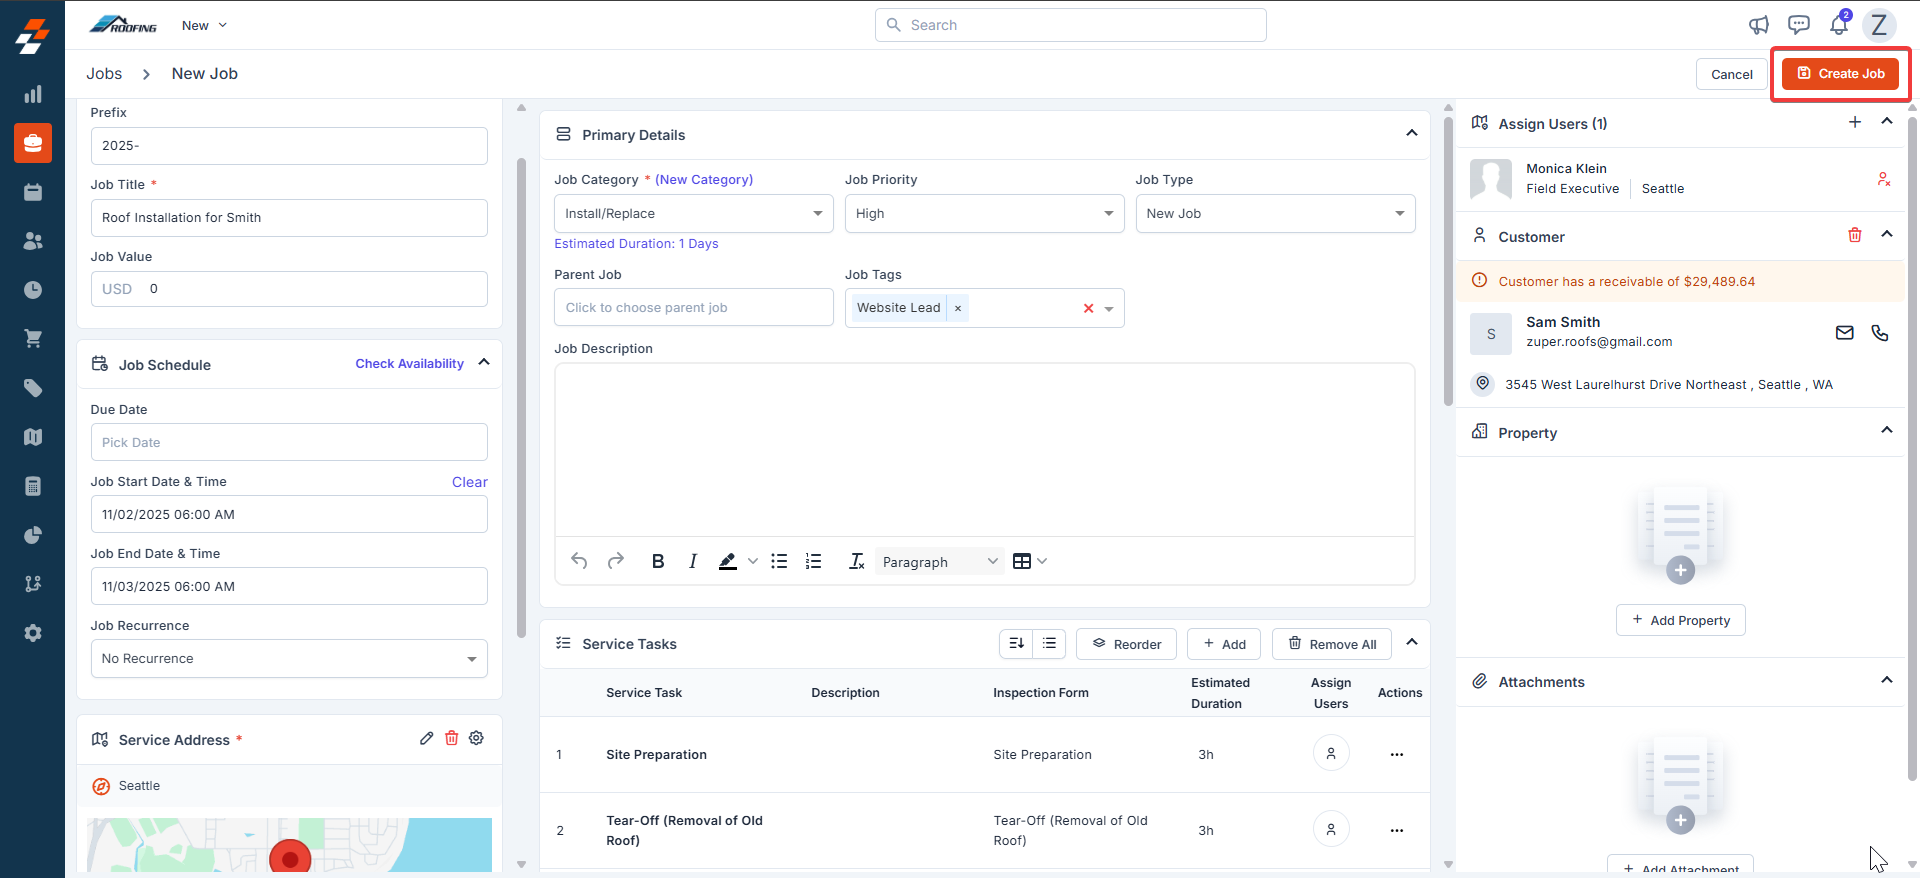
F. Create the Job
- Review all panels for completeness. Click Create Job (top-right).
- Confirm in the dialog box.
- Click Create to save.