

Accessing Zuper Pay settings
Navigate to Settings module > Zuper Pay from the left navigation menu in the Zuper application. The settings page includes four sections: Account Management, Terminal Management, Payment Methods, and Surcharge Settings, where you can review and manage your payment settings.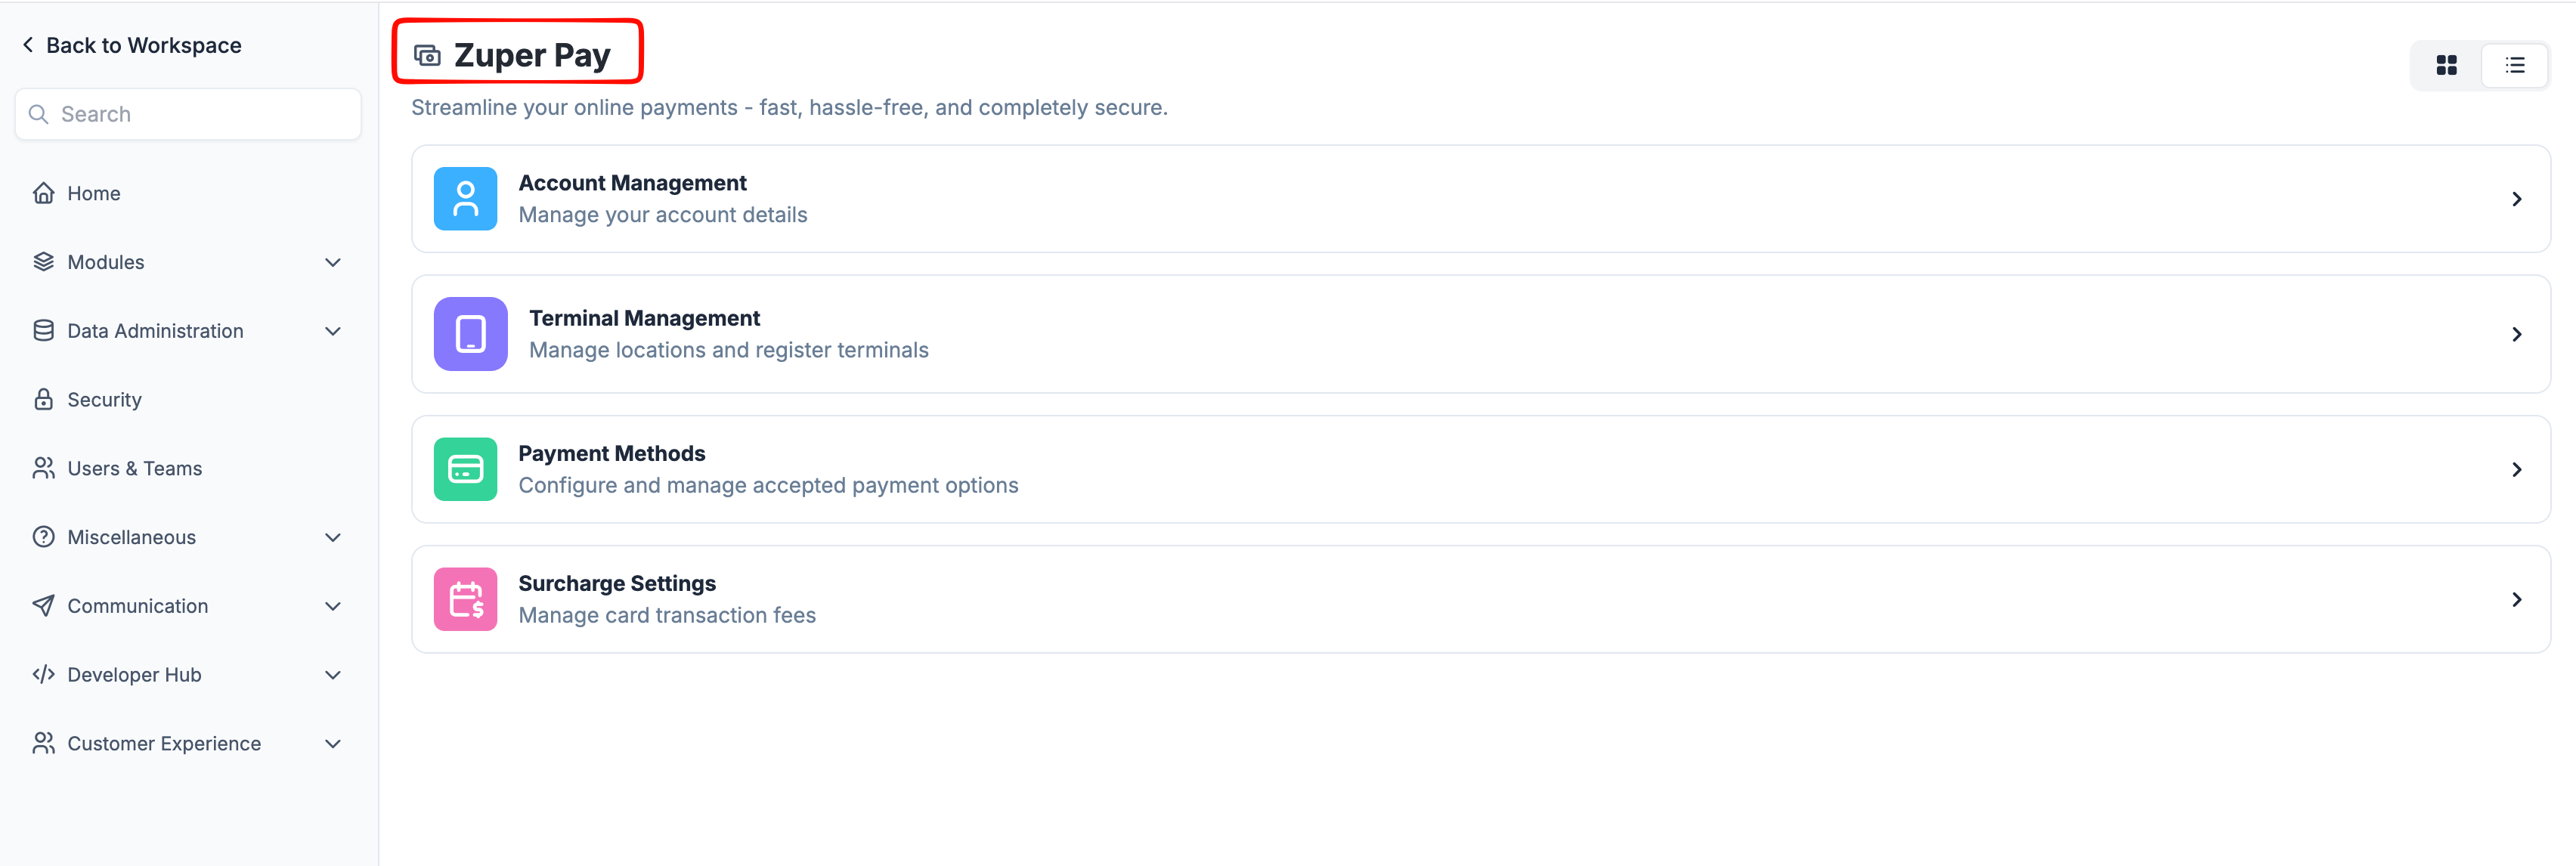
Account Management
The Account Management section allows you to view and manage key information of your account, business, personal, and ownership details.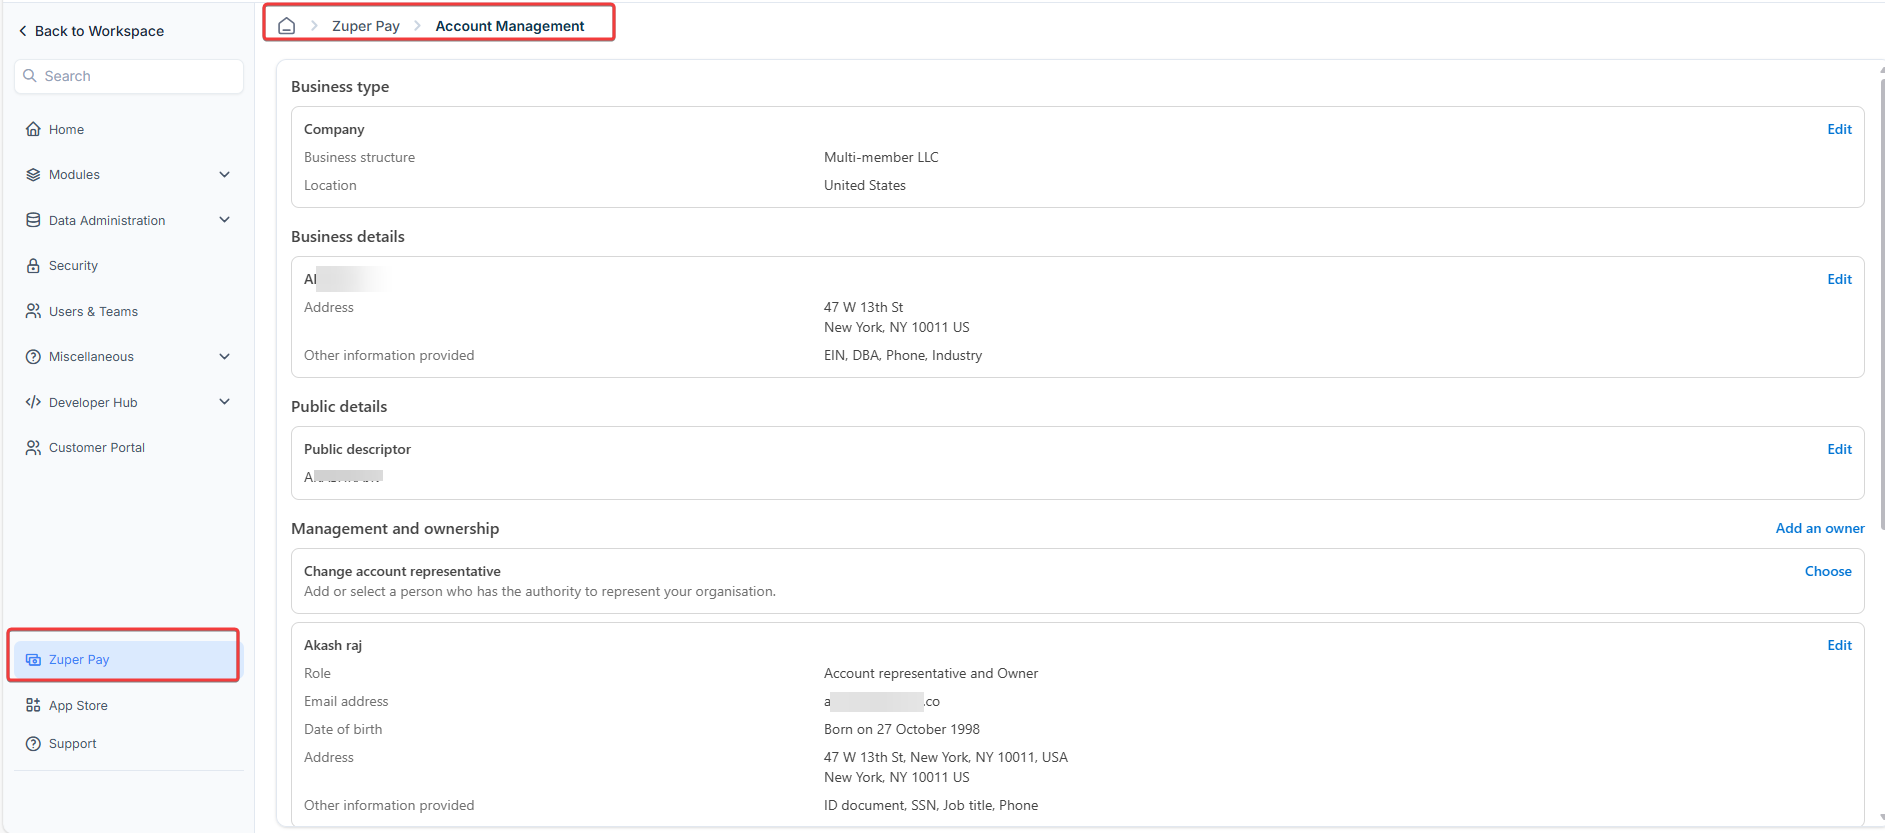
- Business Details: This section displays your registered business name, address, and industry details. Ensure these details are accurate for compliance and verification.
- Public Details: This section displays customer support information such as your support address, phone number, and the descriptor shown on customer statements.
- Management & Ownership: This section shows the assigned account representative with their contact details. You can add or update representatives as needed.
- Payout Details: This section displays the linked bank account where payouts will be deposited. You can manage or update these details to ensure seamless transactions.
- Linked Accounts: This section lists external payment accounts connected to Zuper Pay for transaction processing. You can remove or modify linked accounts if necessary.
- Authentication Details: This section contains the registered email and phone number for account verification. Keeping these details updated ensures secure access to your payment settings.
How to change the bank account for payouts
To update the bank account where payouts are deposited, follow these steps:- Navigate to Settings > Zuper Pay from the left navigation menu.
- Go to the Account Management section and select Payout details.
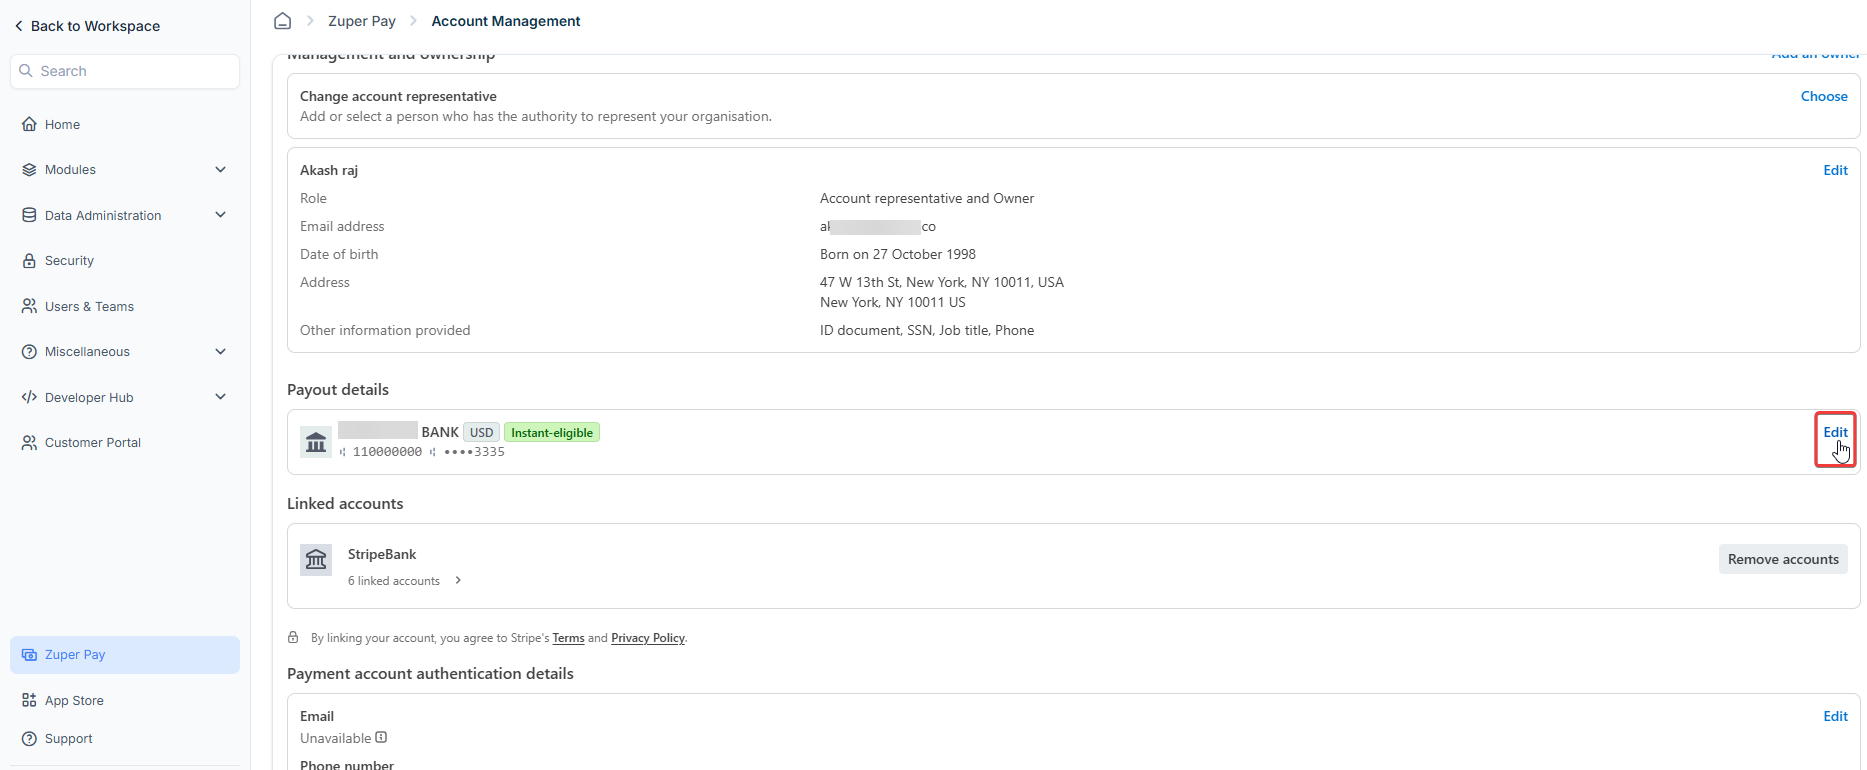
- On the Payout details section, you’ll see the bank account currently connected to Zuper Pay.
- Click the Edit icon next to your bank account.
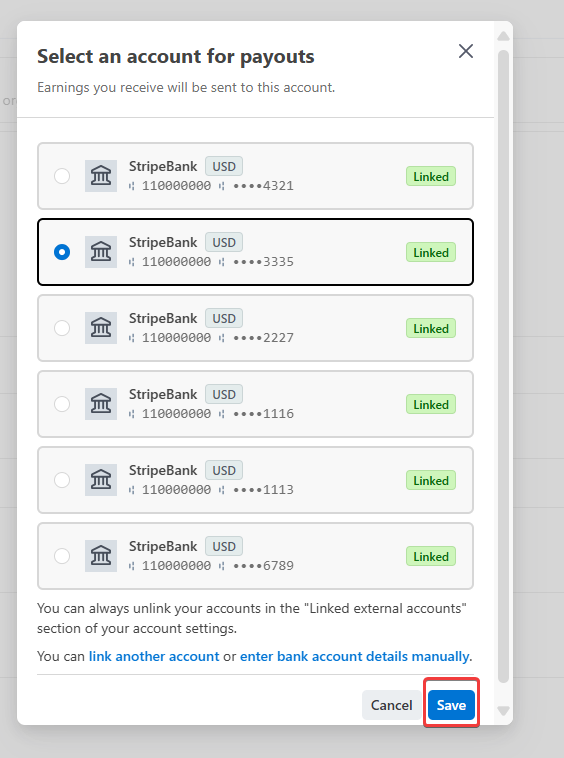
- View the list of connected bank accounts. Select the appropriate account and click Save. If the desired account isn’t listed, choose Link another account or enter bank account details manually to add it.
Terminal Management
The Terminal Management section helps you manage payment terminals. You can add locations, register new payment readers, and view a list of your terminals.My Terminals
To view your terminals, go to Zuper Pay > Terminal Management > My Terminals. This page displays a list of your terminals with details like name, status, serial number, and associated location.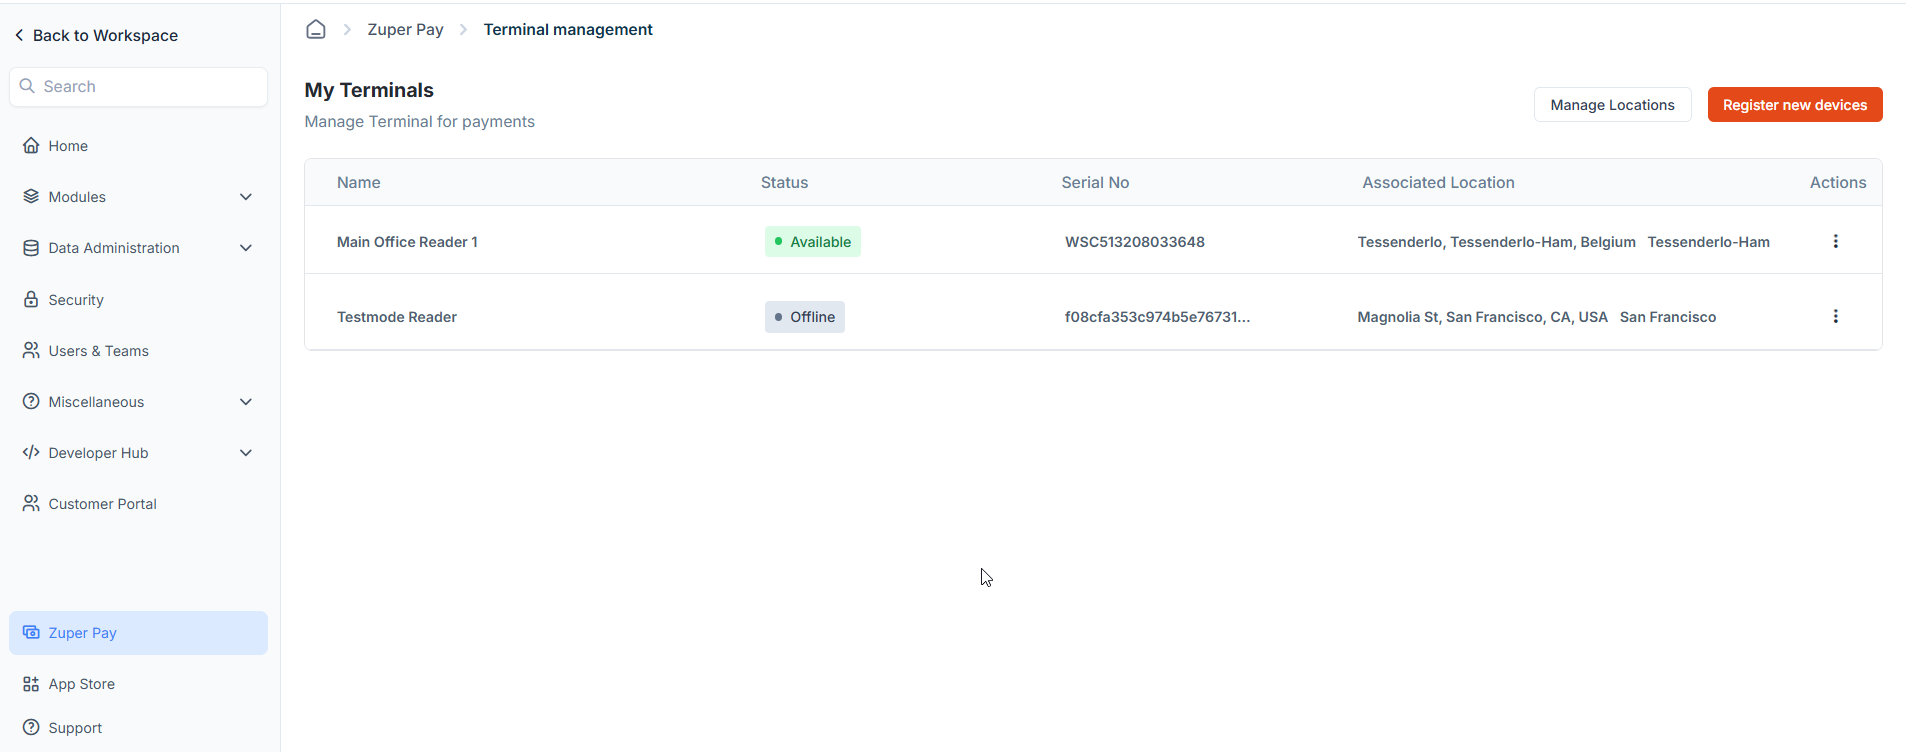
Manage Locations
You can create and manage locations to link your payment readers (e.g., BBPOS WisePOS E) to specific physical or operational sites for streamlined device management.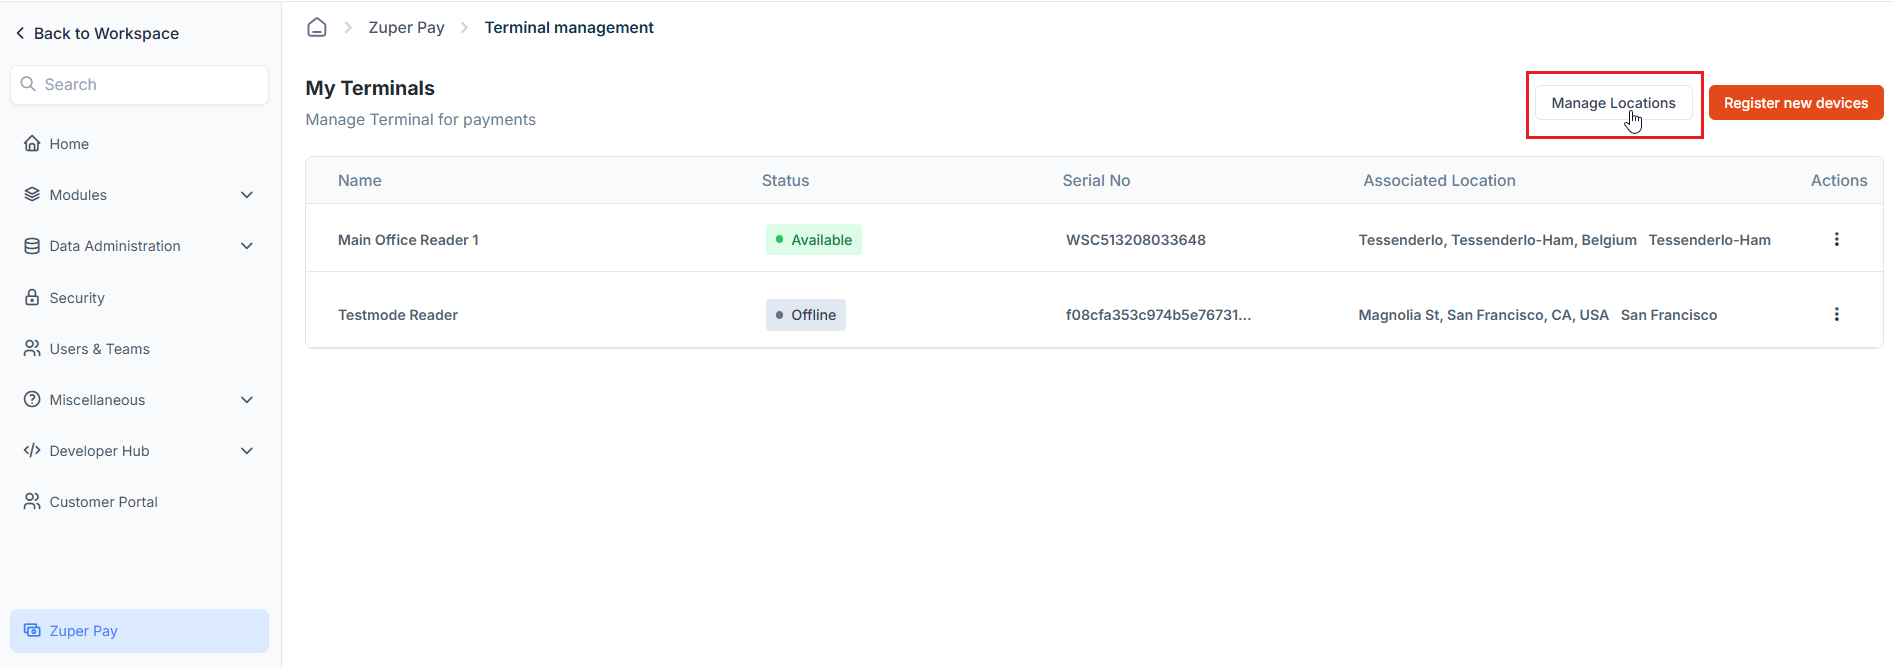
- On the My Terminals page, click the Manage Locations button.
- On the Manage Locations page, you can:
- Create a Location: Click Create Location to add a new location for your payment reader.
- Delete a Location: Click the delete icon next to the location you want to remove.
Register New Device
You can register a new payment reader (e.g., BBPOS WisePOS E) to link it to your Zuper account and a specific location for accepting payments.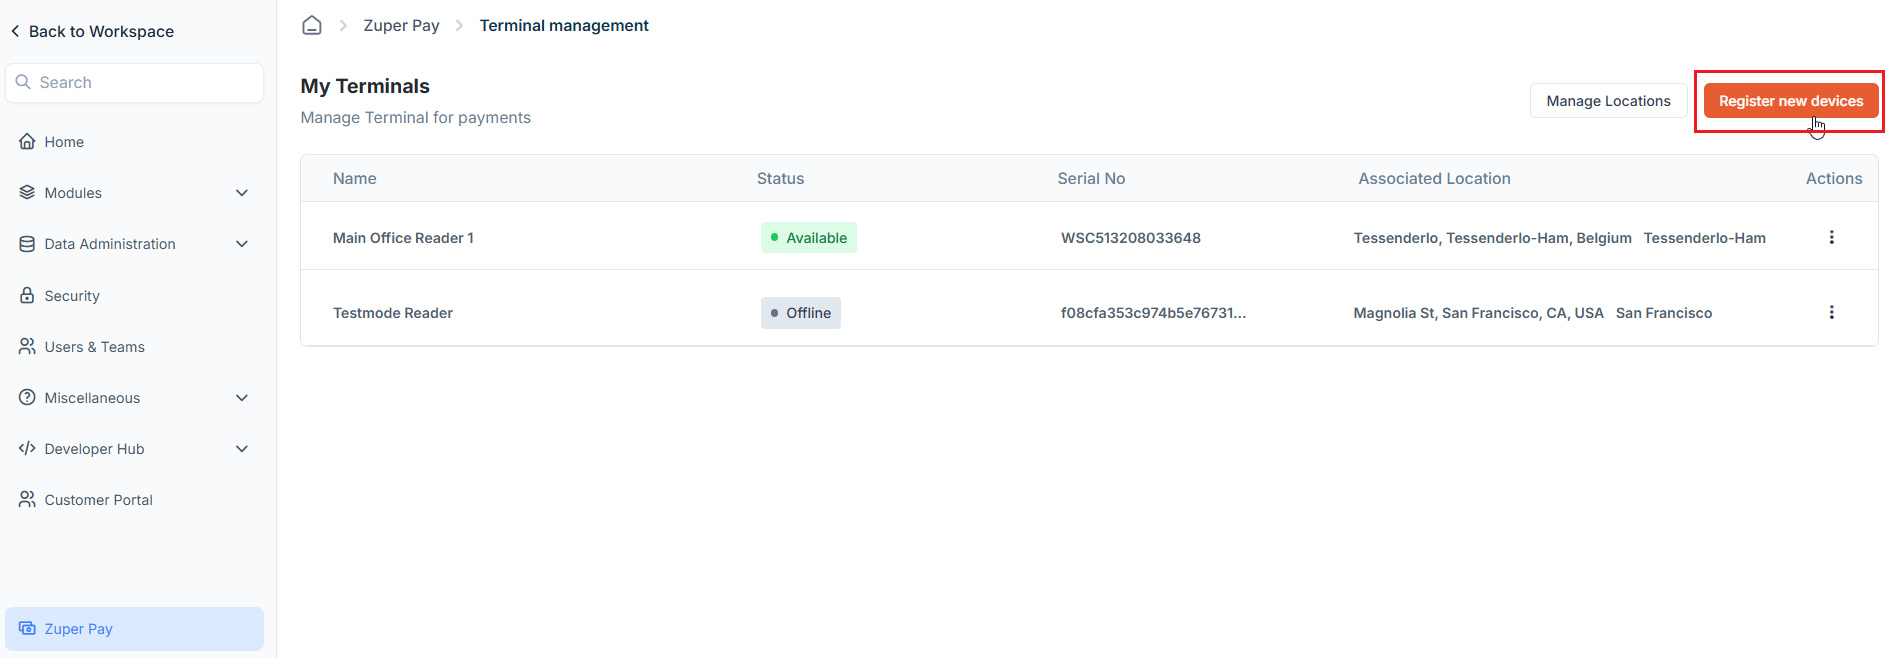
- To do so, click the “Register New Device” button on the My Terminals page.
- A Register New Device page opens. Enter the reader’s name, specify the three-word code, and assign it to a location.
- Click “Proceed” to complete the registration.
Payment Methods
Zuper Pay gives you control over which payment methods customers see on invoices, quotes, and partial payment requests. You can set the available payment methods for all transactions at the organization level, then adjust them for individual transactions when needed. Payment Methods Configuration supports:- Cards (includes all supported card types)
- Cash App Pay
- Amazon Pay
- ACH Direct Debit
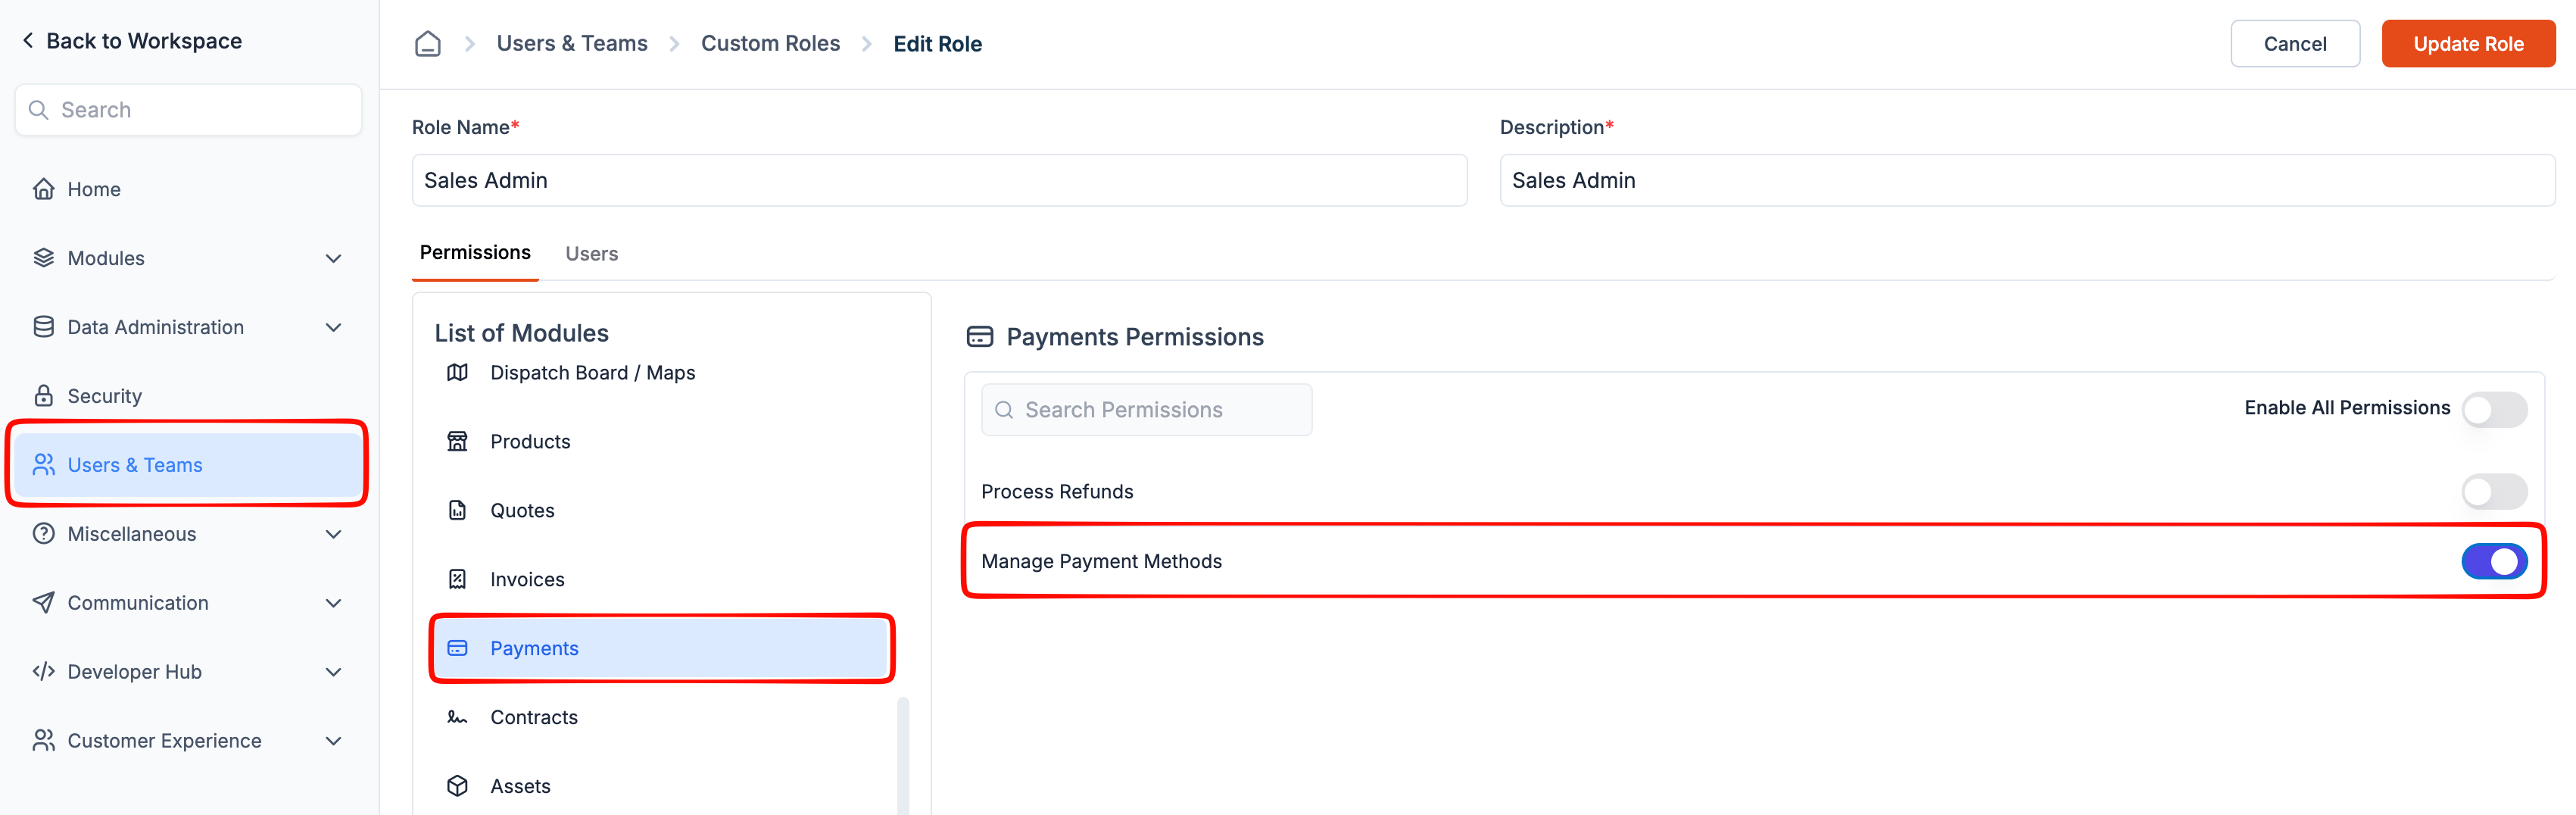
Permissions: Admin and Team Lead have default access control for Payment method configuration. However, if your business requires a different level of visibility, you can customize the access using Custom Roles.
Configure payment methods for your organization
- Navigate to the Settings page and select Zuper Pay.
- Select Payment Methods.
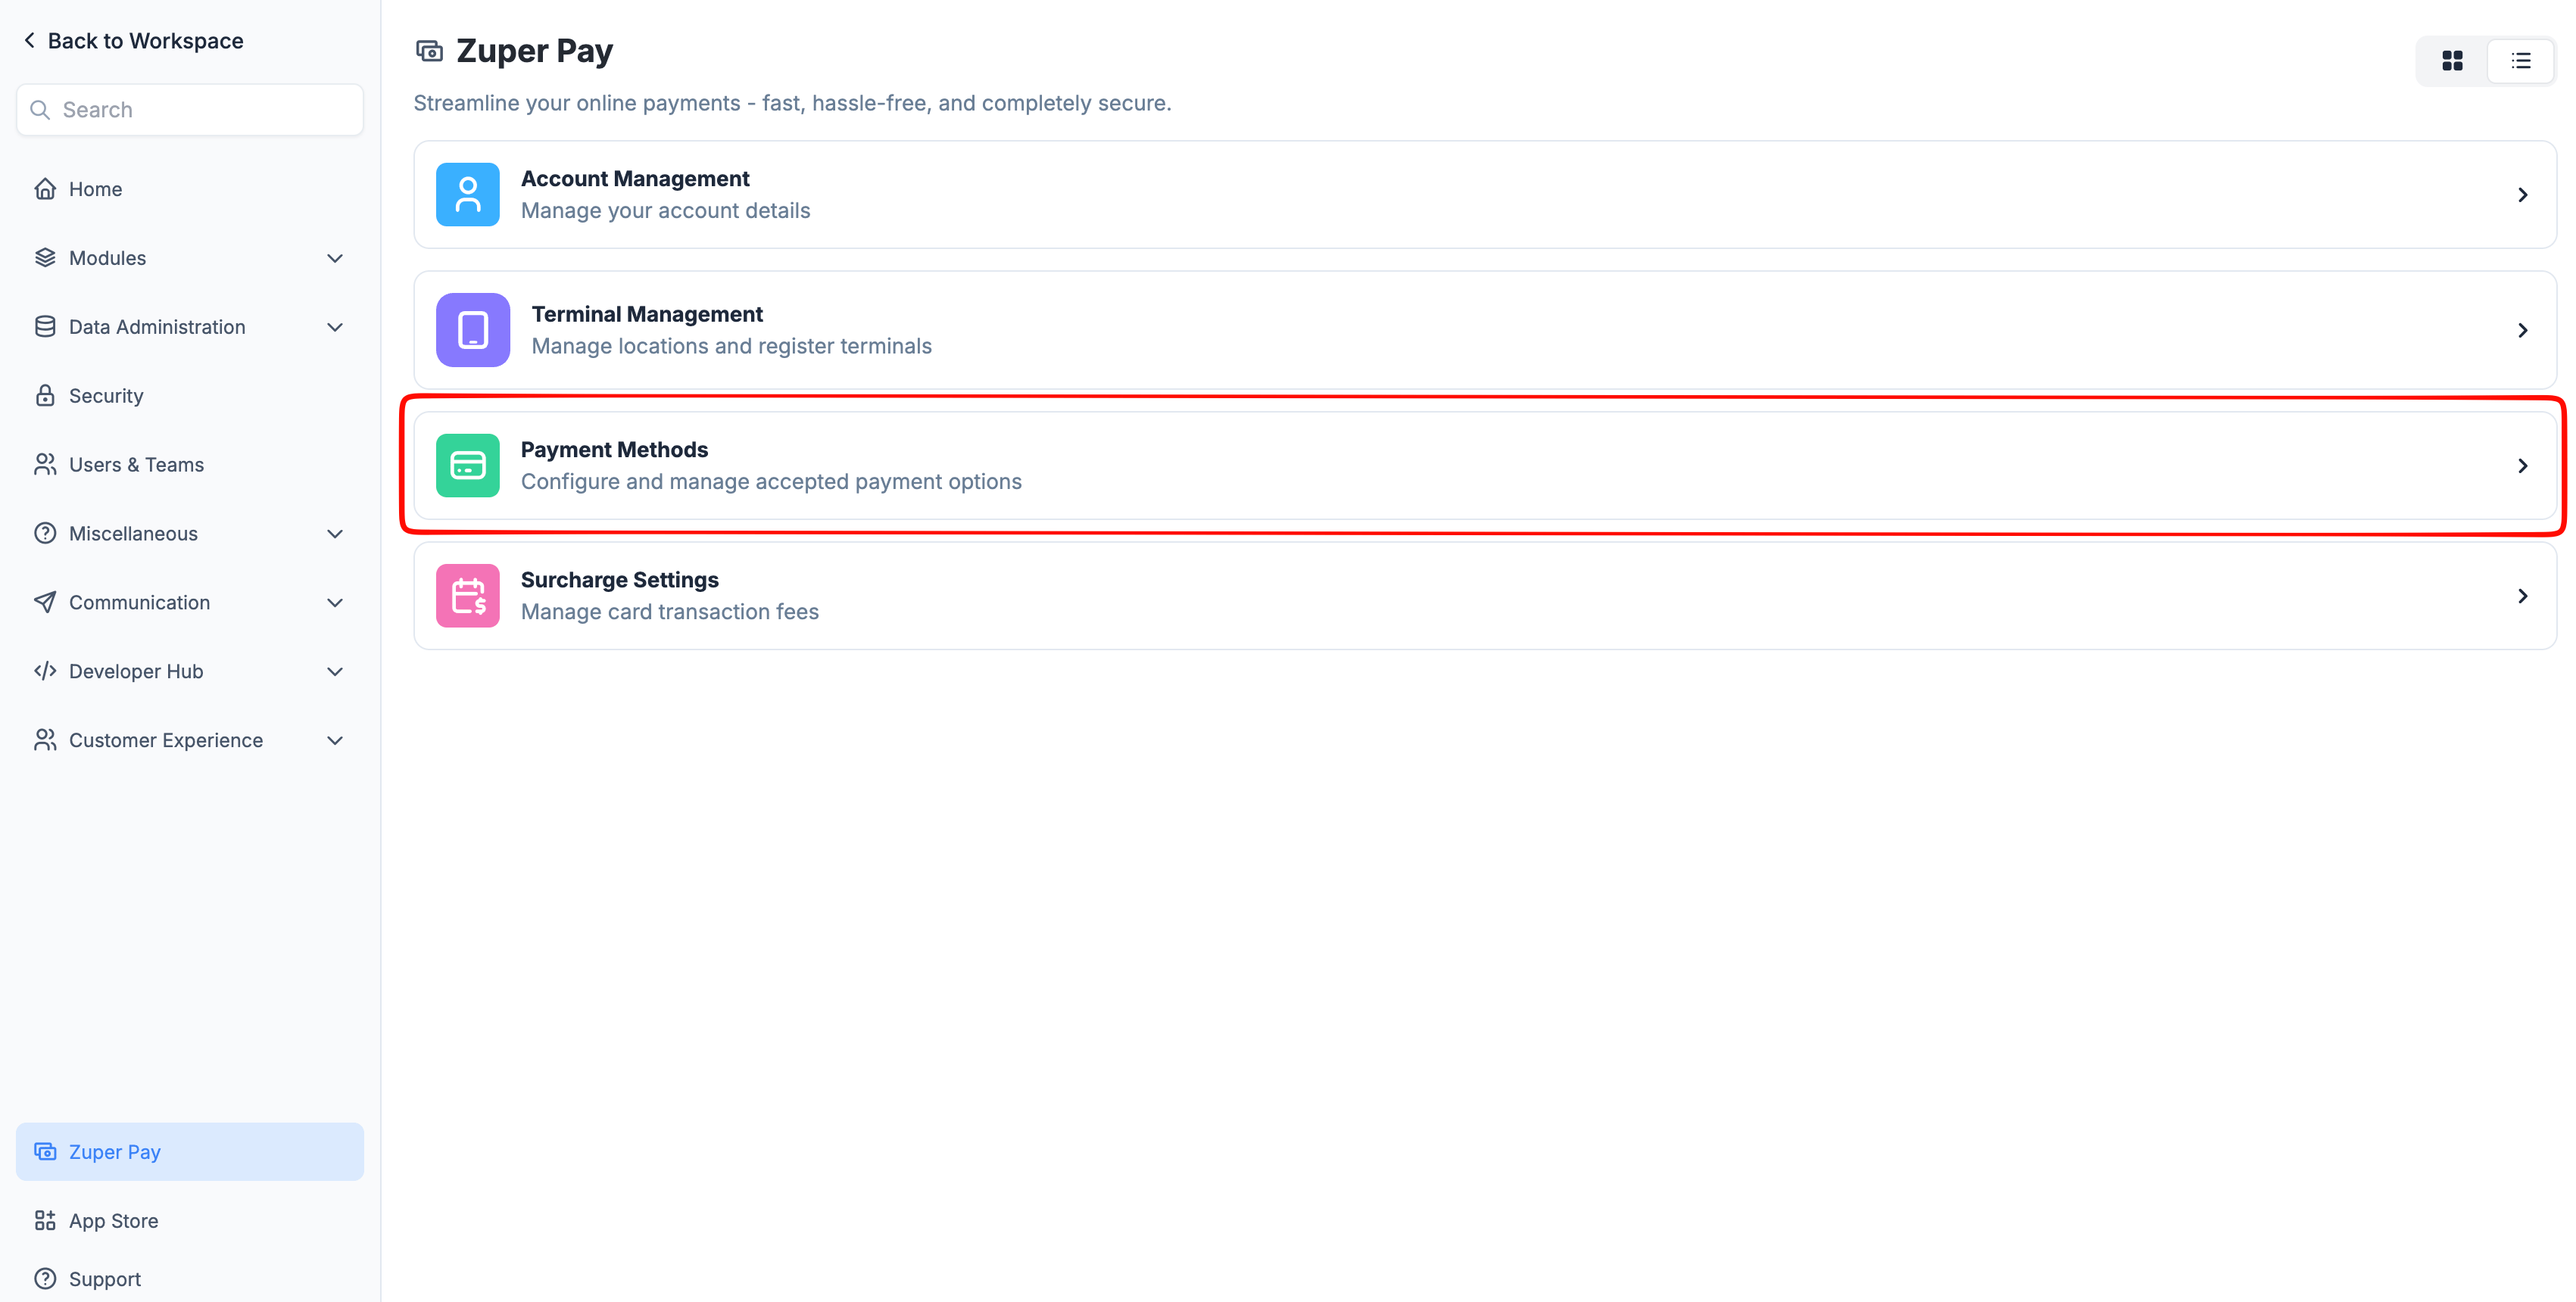
- Enable the payment methods your organization wants to accept.
- Disable any payment methods you do not want to offer.
Whatever you turn on or off here applies to every future transaction you send, unless you override it on a specific document.
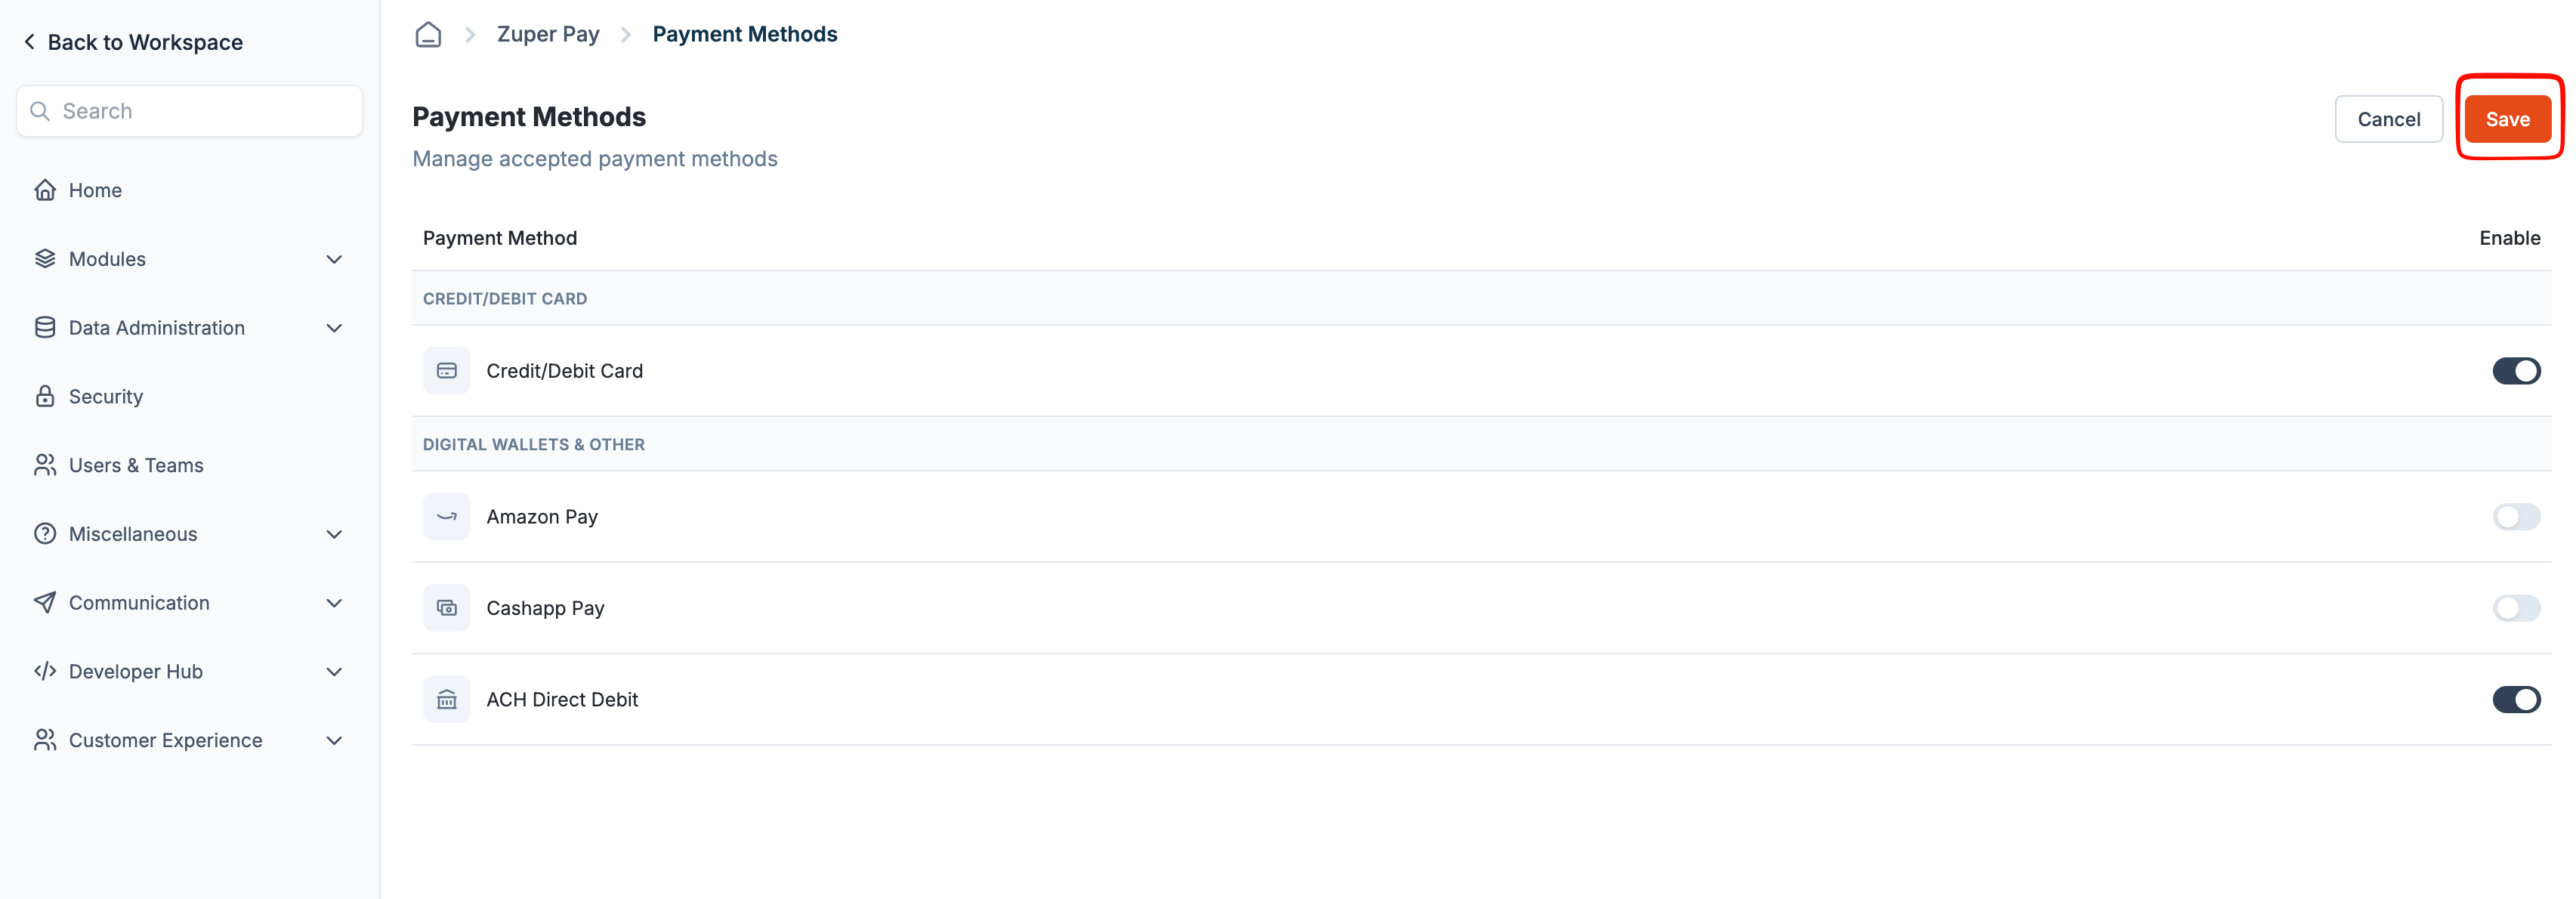
- Save your changes.
Configure payment methods for an individual transaction
For any individual transaction, you can override your payment settings and toggle specific payment methods on or off for that customer.- Create or open an invoice, quote, or partial payment request.
- Locate the Payment Method field.
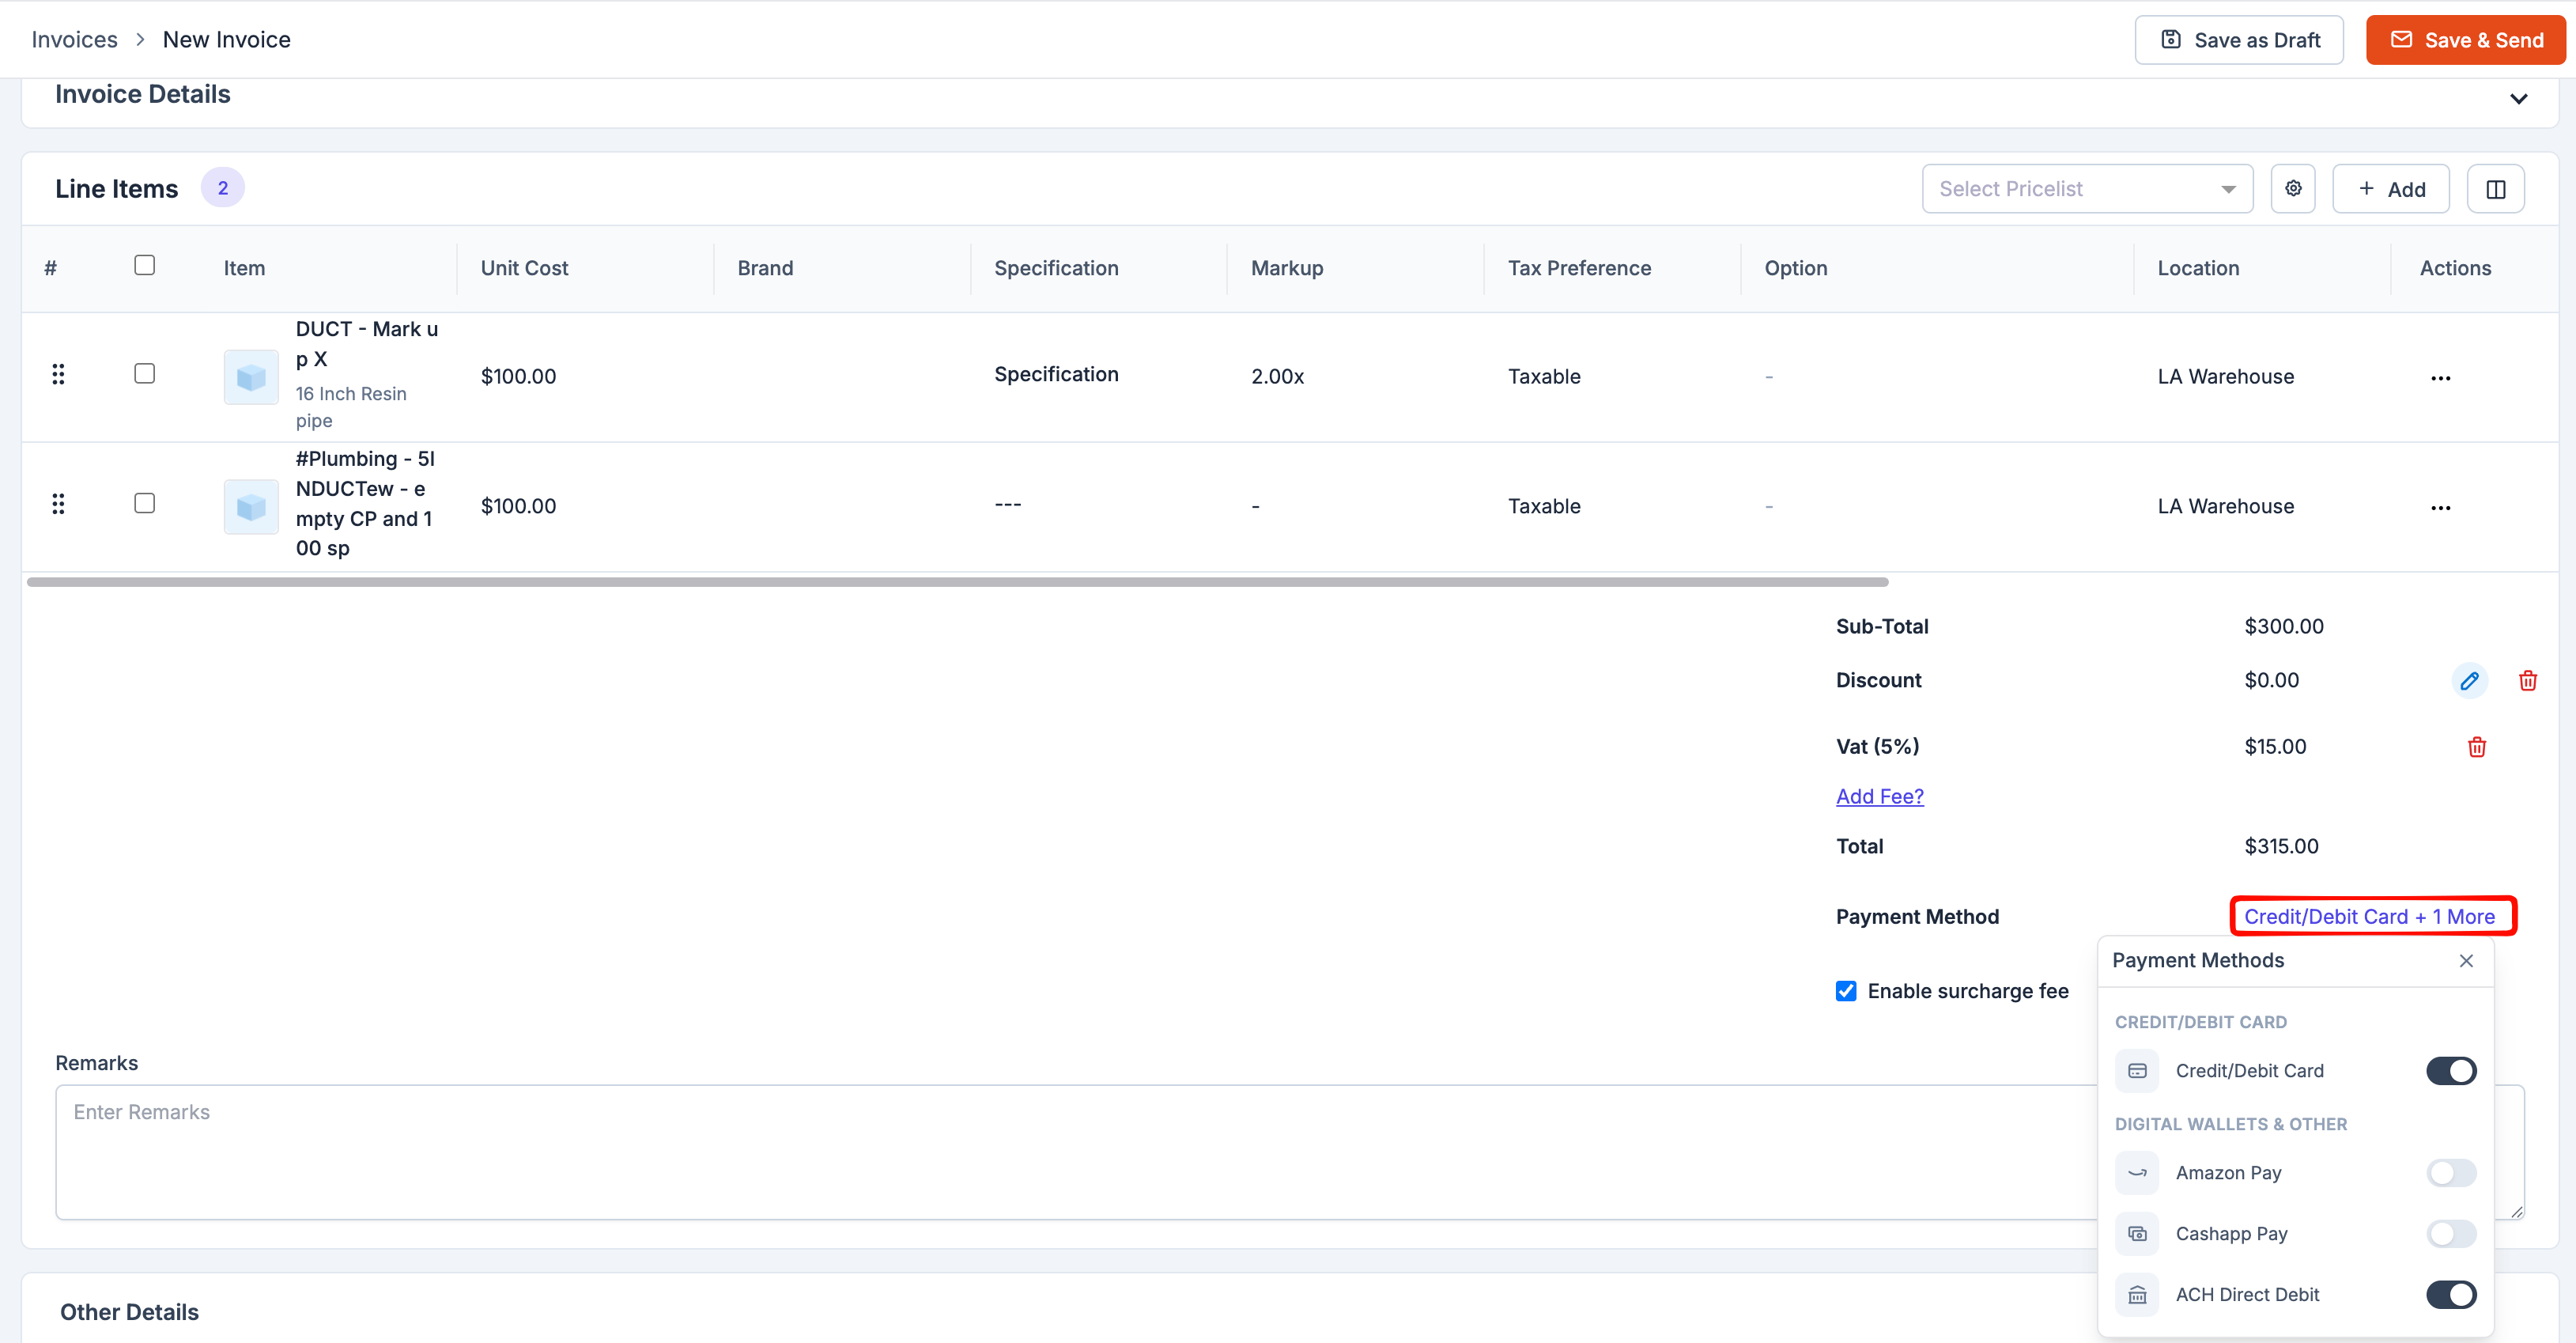
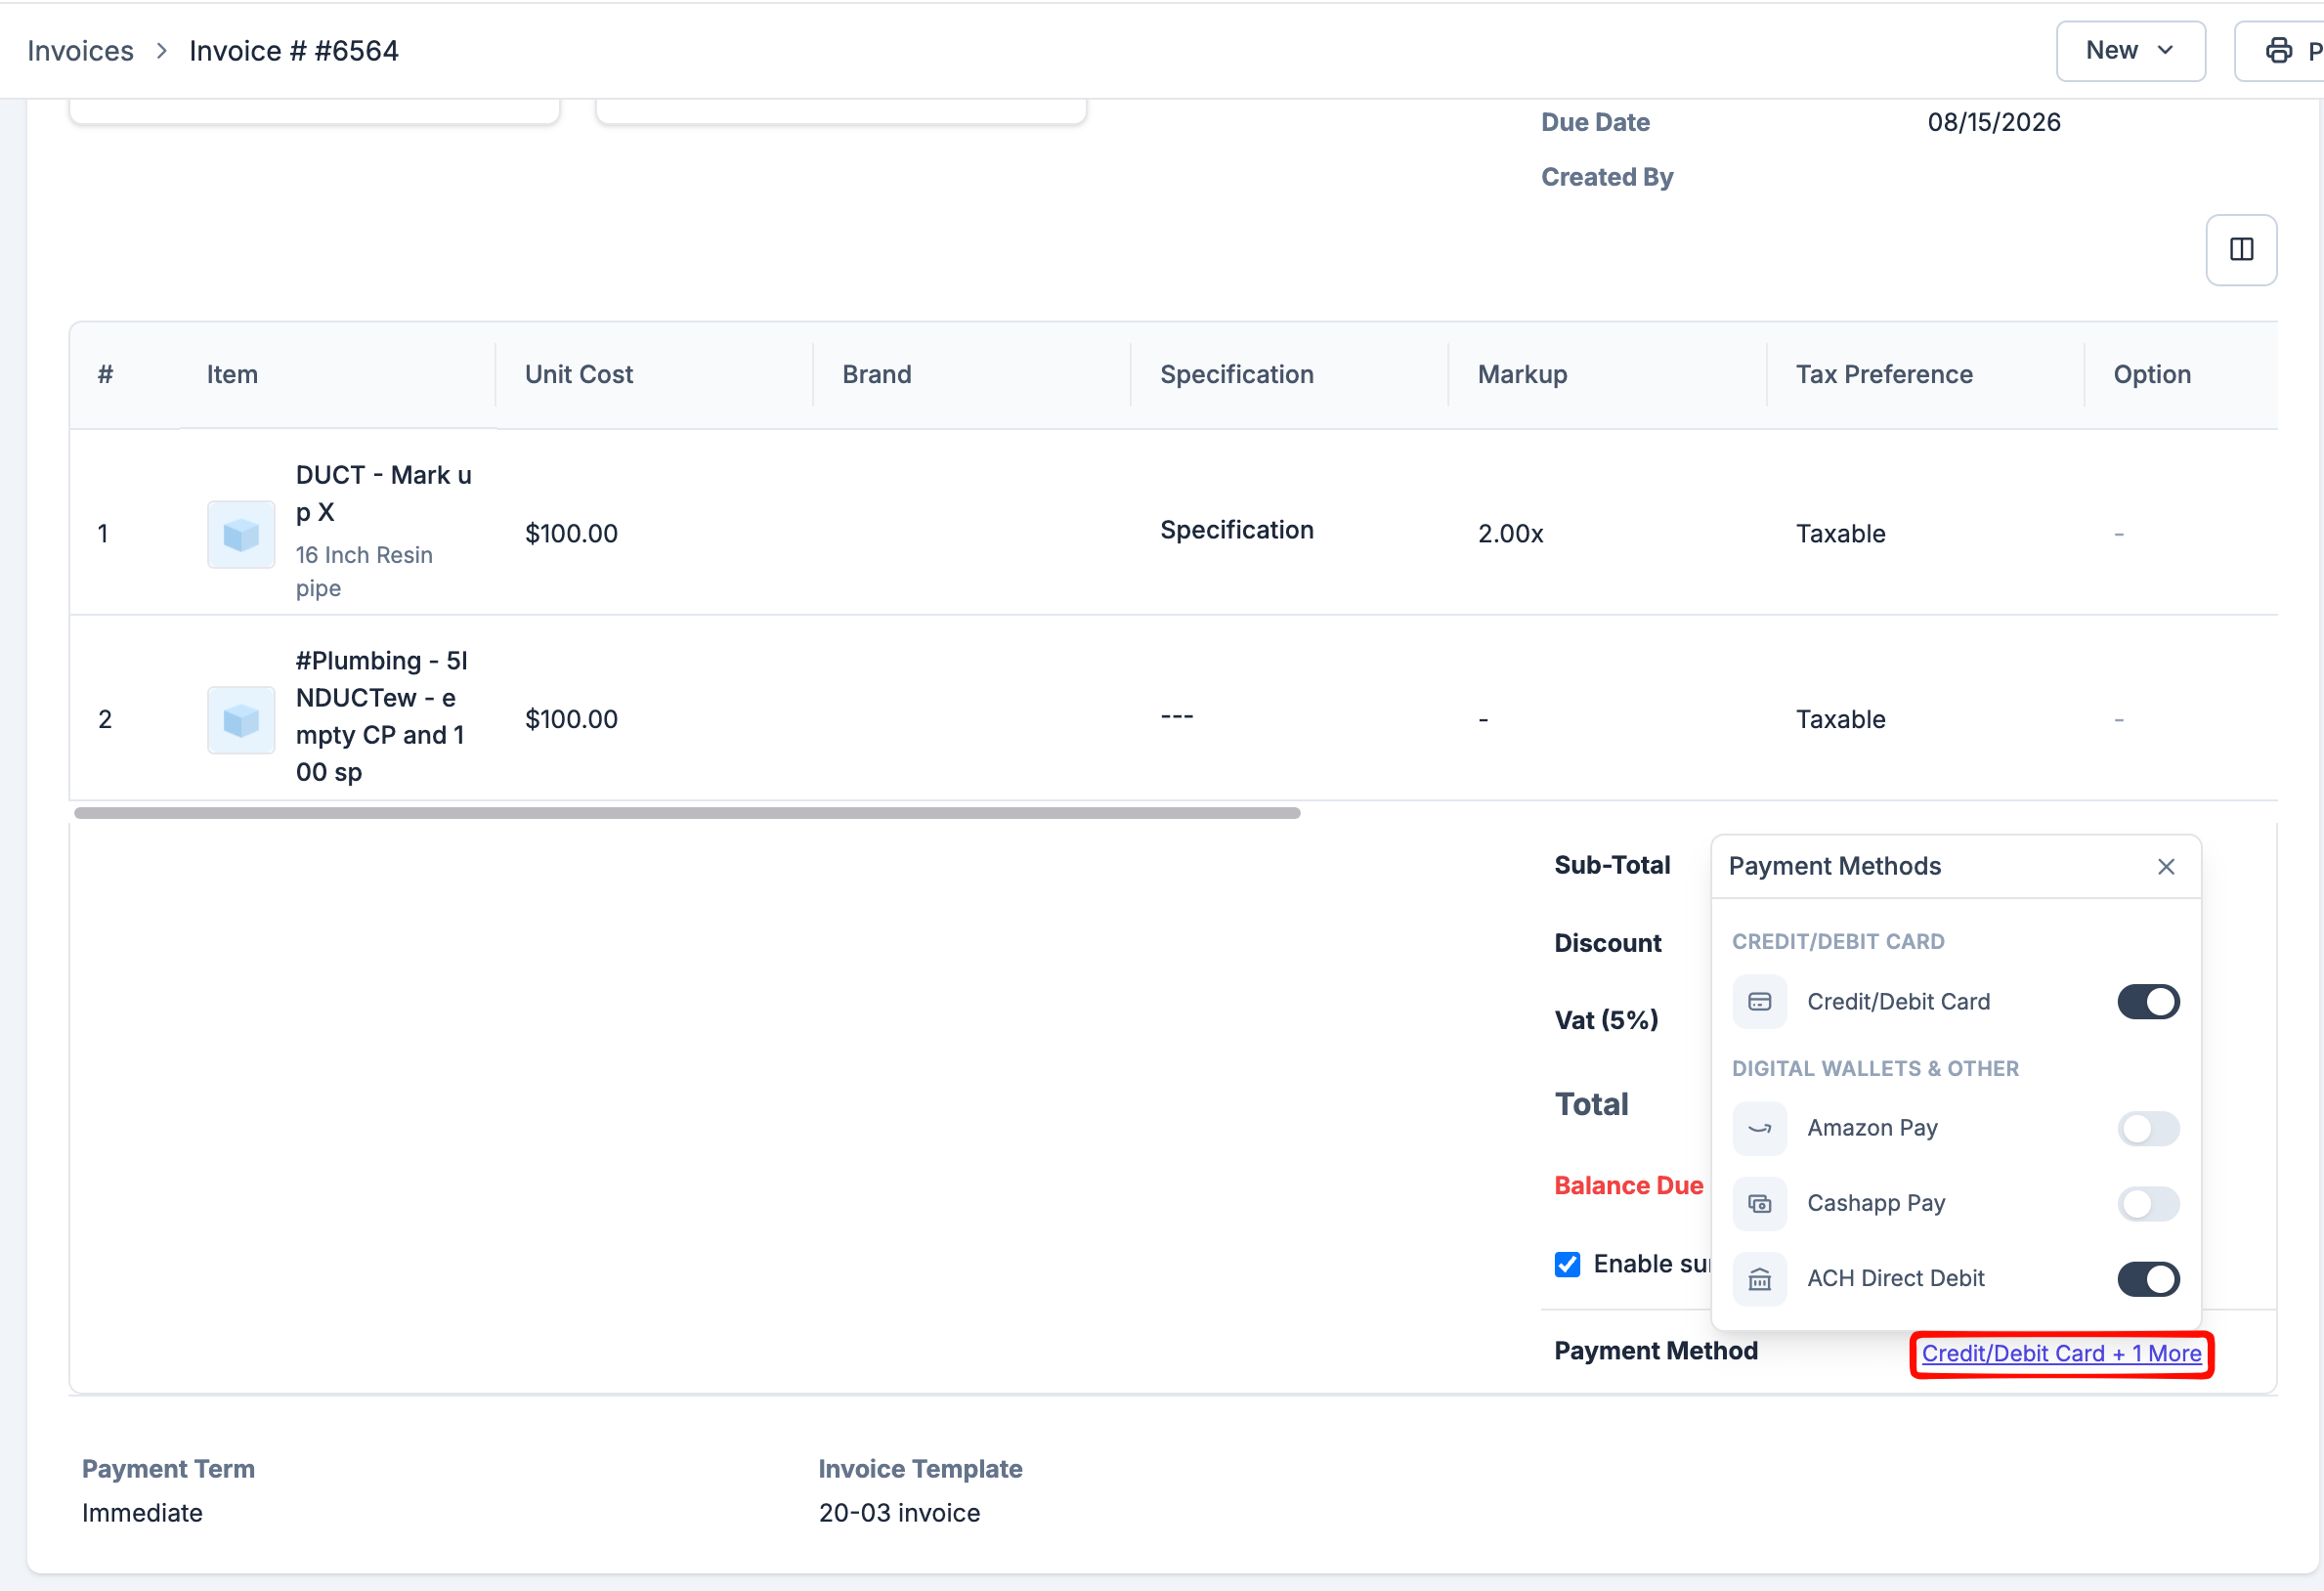
Frequently asked questions
What happens if I don't change the methods on an invoice or link?
What happens if I don't change the methods on an invoice or link?
The transaction uses your organization’s default methods. You only need to make a change when you want to offer fewer options.
Can I offer fewer methods on a single invoice than my organization allows?
Can I offer fewer methods on a single invoice than my organization allows?
Yes. Open the Payment Method field on the invoice and turn off any method you want to hide for that transaction.
Can I offer a method on a transaction that is turned off at the organization level?
Can I offer a method on a transaction that is turned off at the organization level?
Yes, you can turn any method on or off for an individual invoice, quote, or partial payment.
Why can't I change the payment methods on an invoice?
Why can't I change the payment methods on an invoice?
Your role does not have the Manage Payment Methods permission. Ask your admin to grant it under Users & Teams > Custom Roles > Payments.