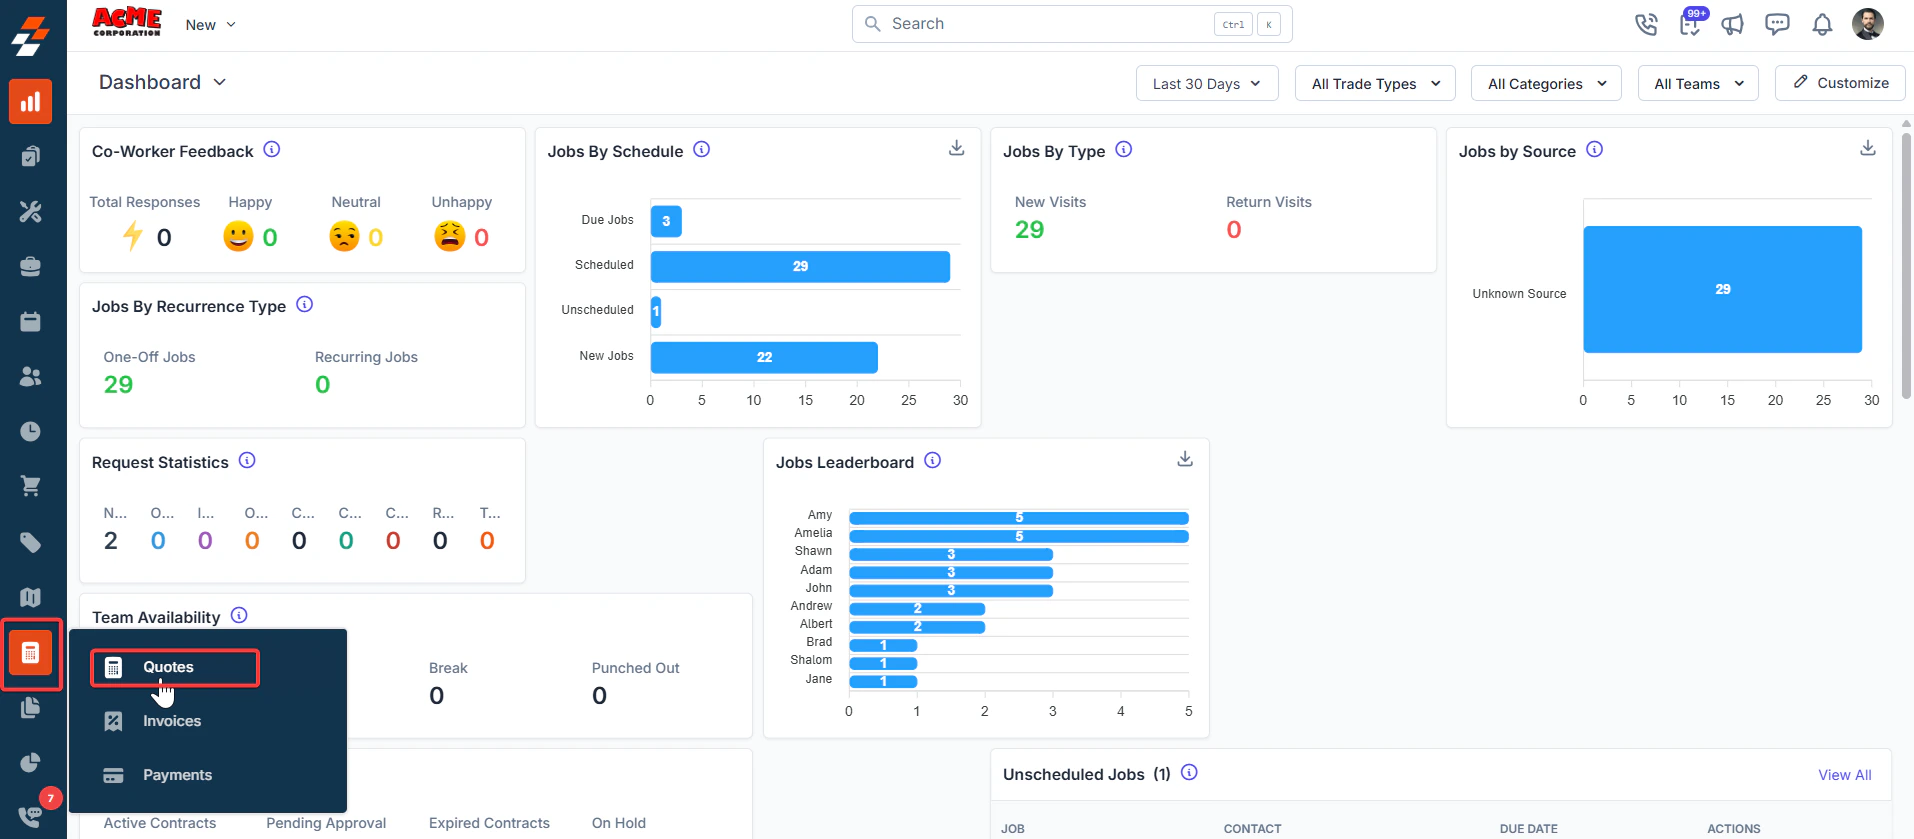
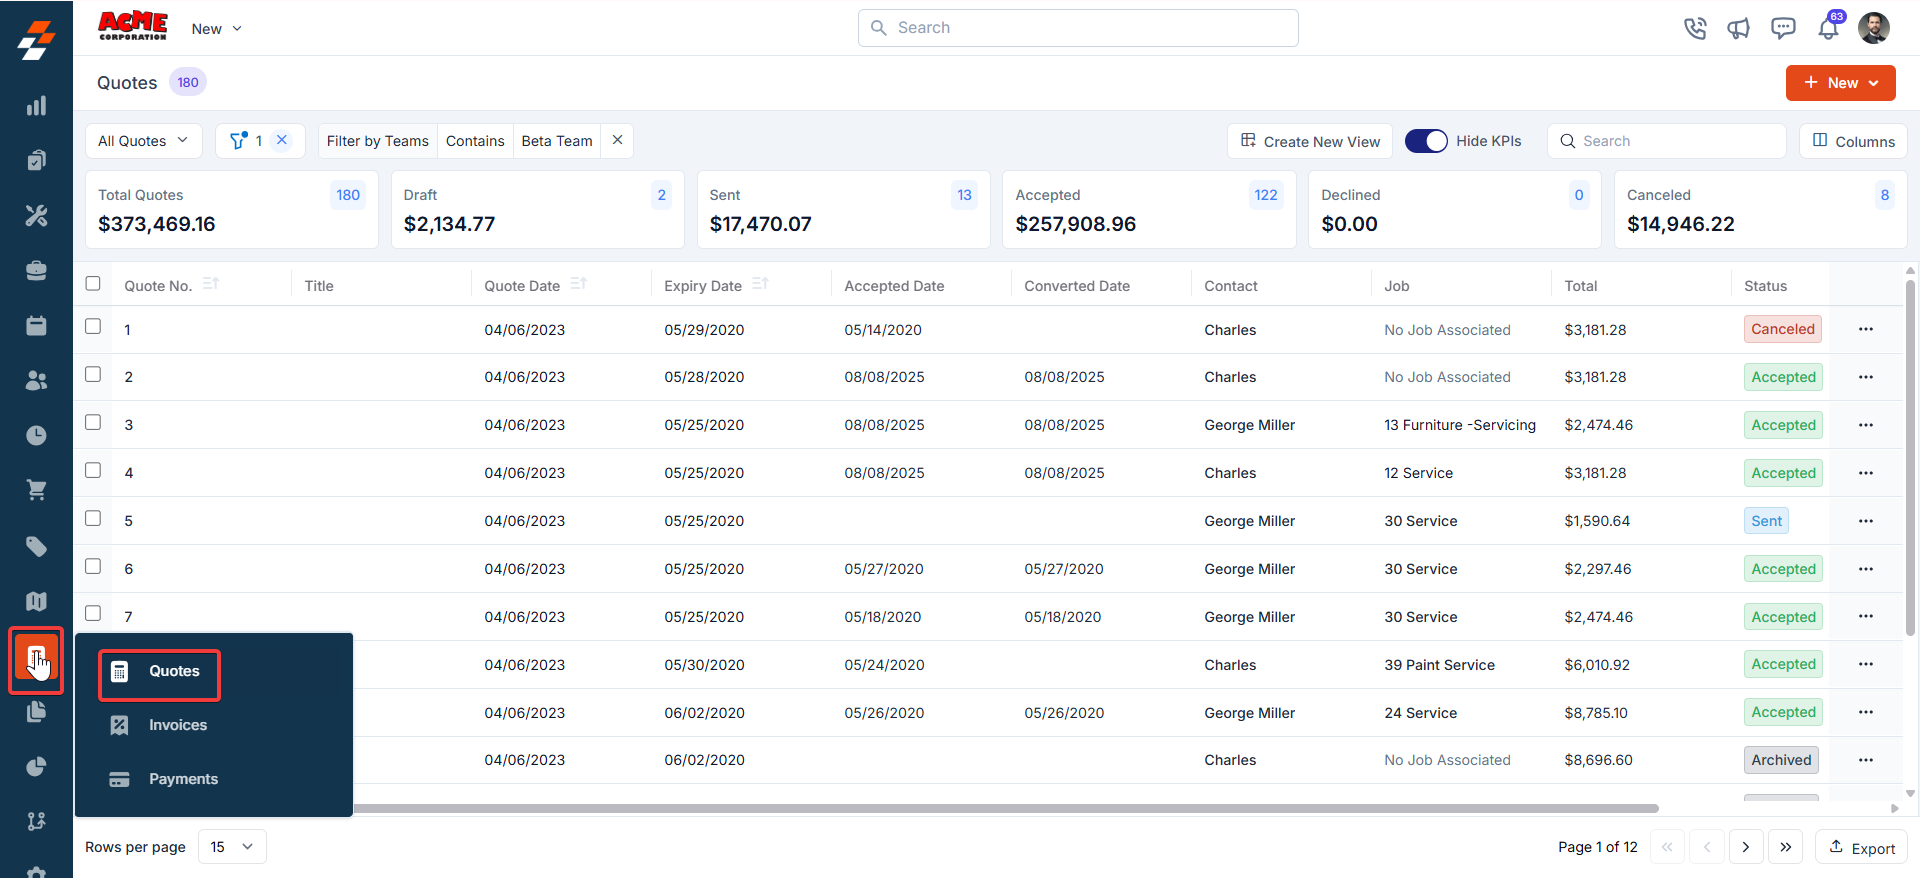
Accessing the Quotes/Proposal listing page
Navigation: Accounting -> Quotes —> Quotes listing page
- Select the “Accounting” module from the left navigation menu and choose “Quotes.”
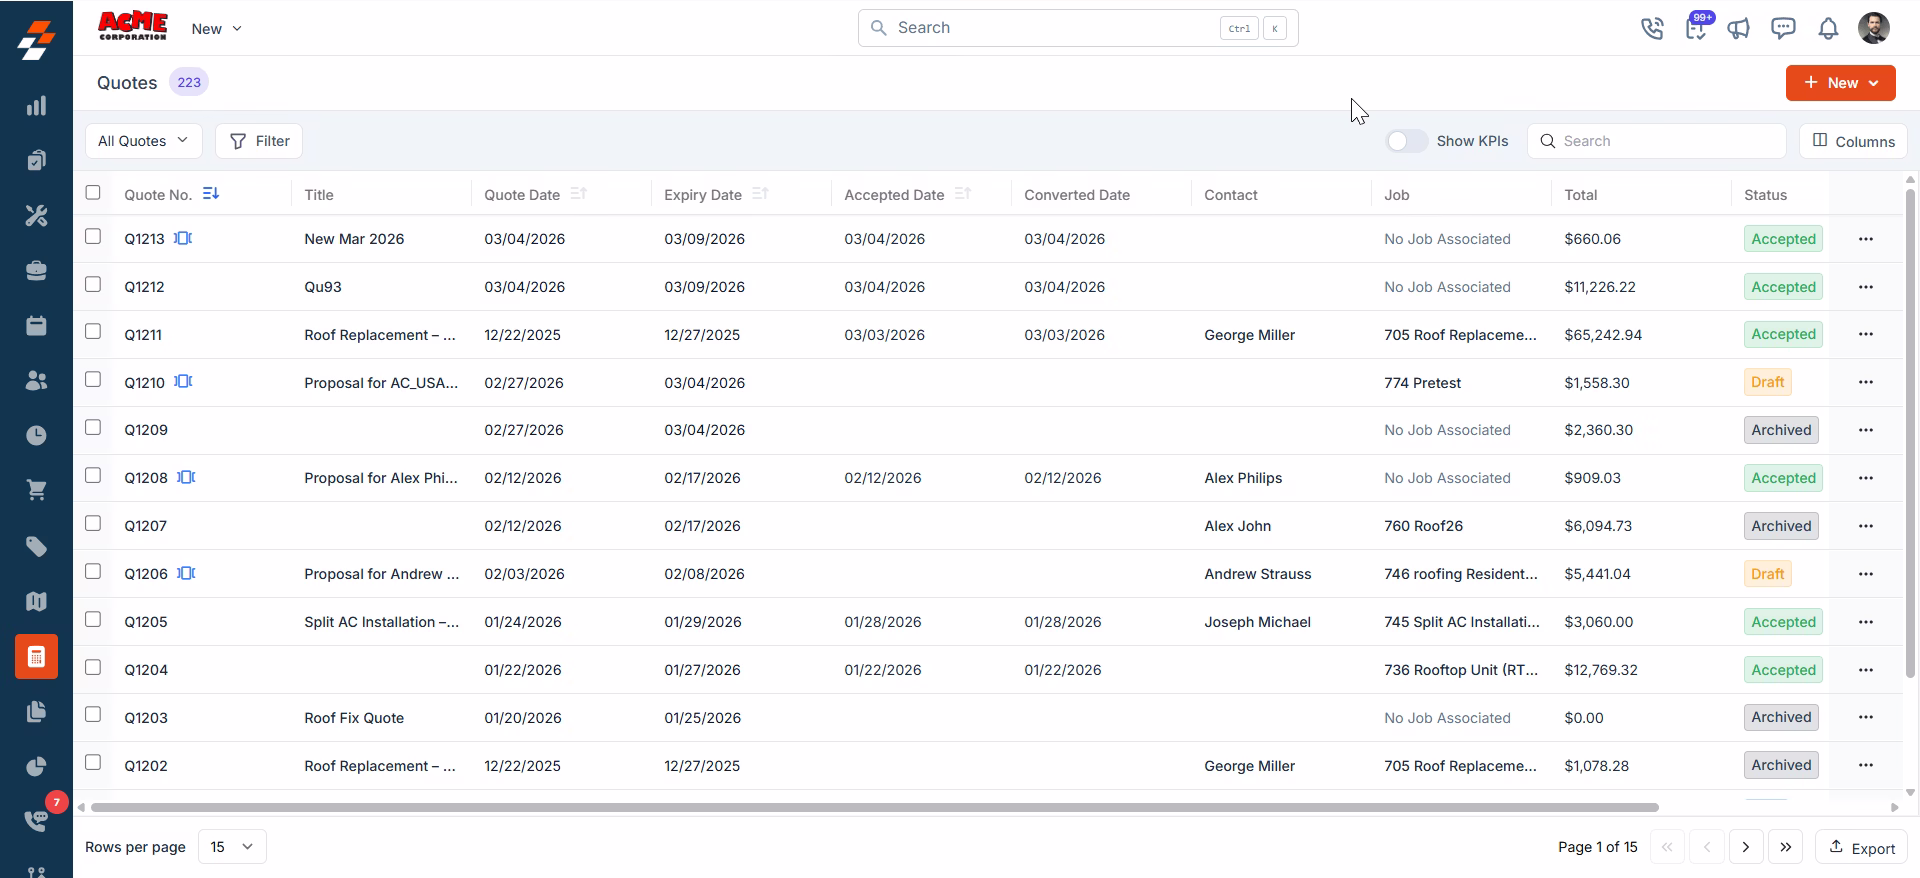
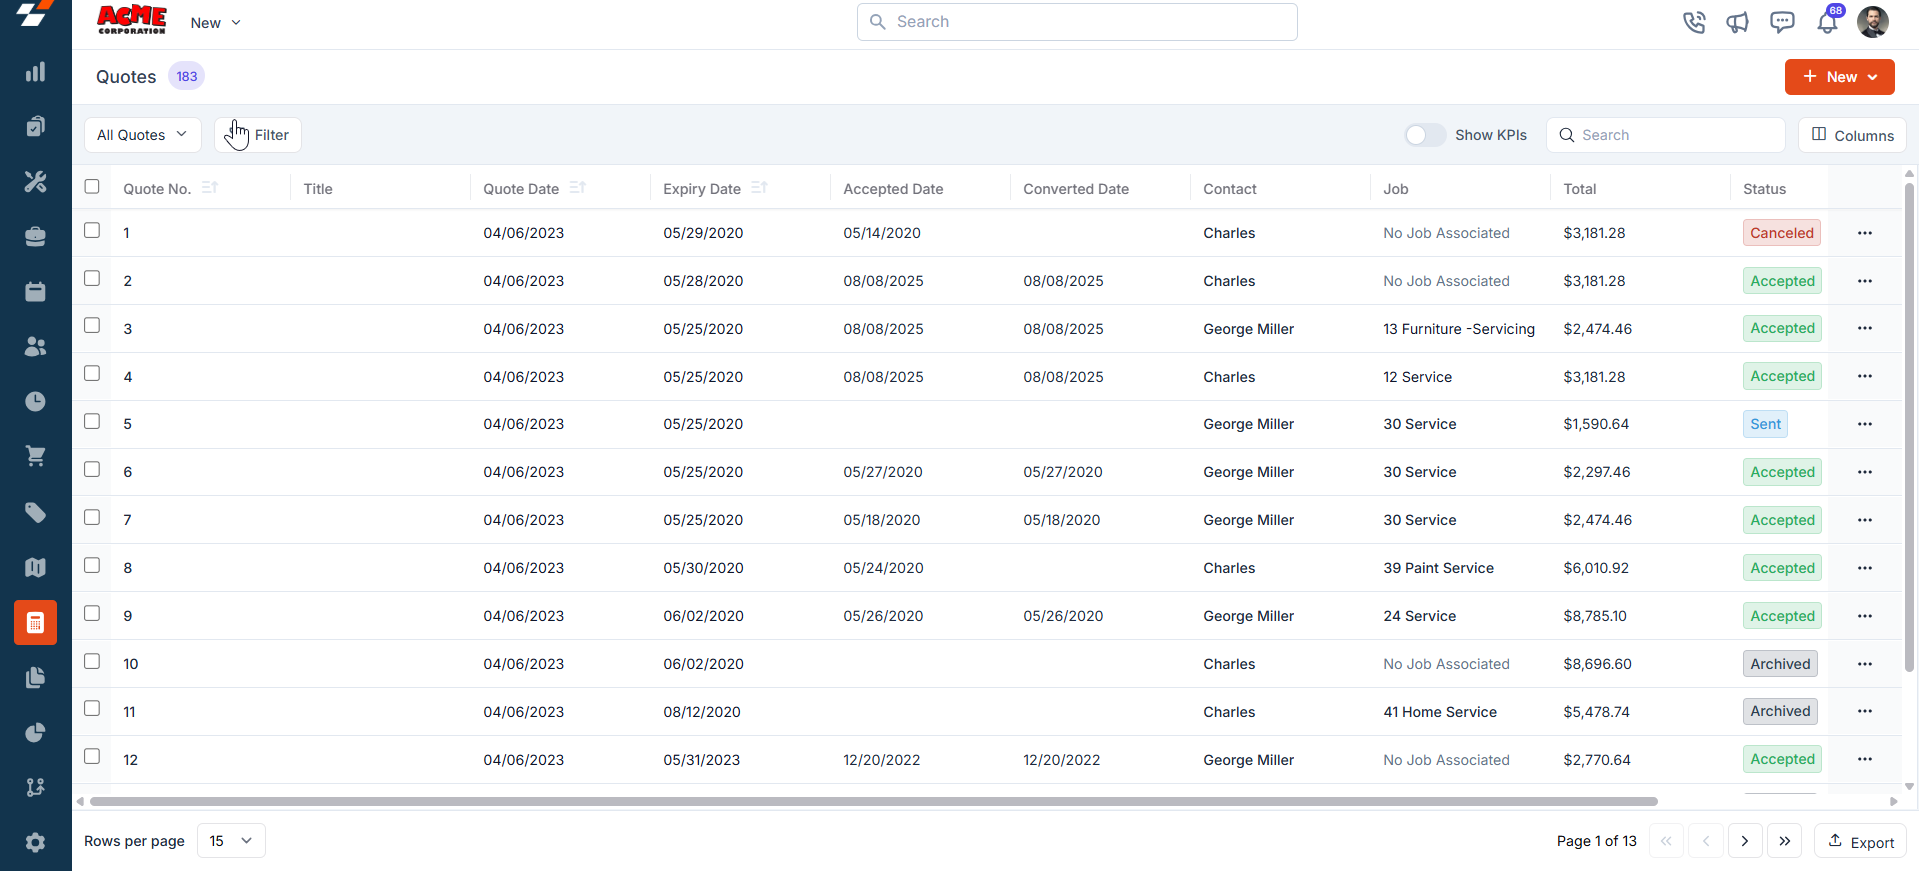
- You will land on the Listing page. The listing page provides a comprehensive view of all your quotes and proposals, including essential details such as their creation date, customer information, and status.
Exploring Listing Page
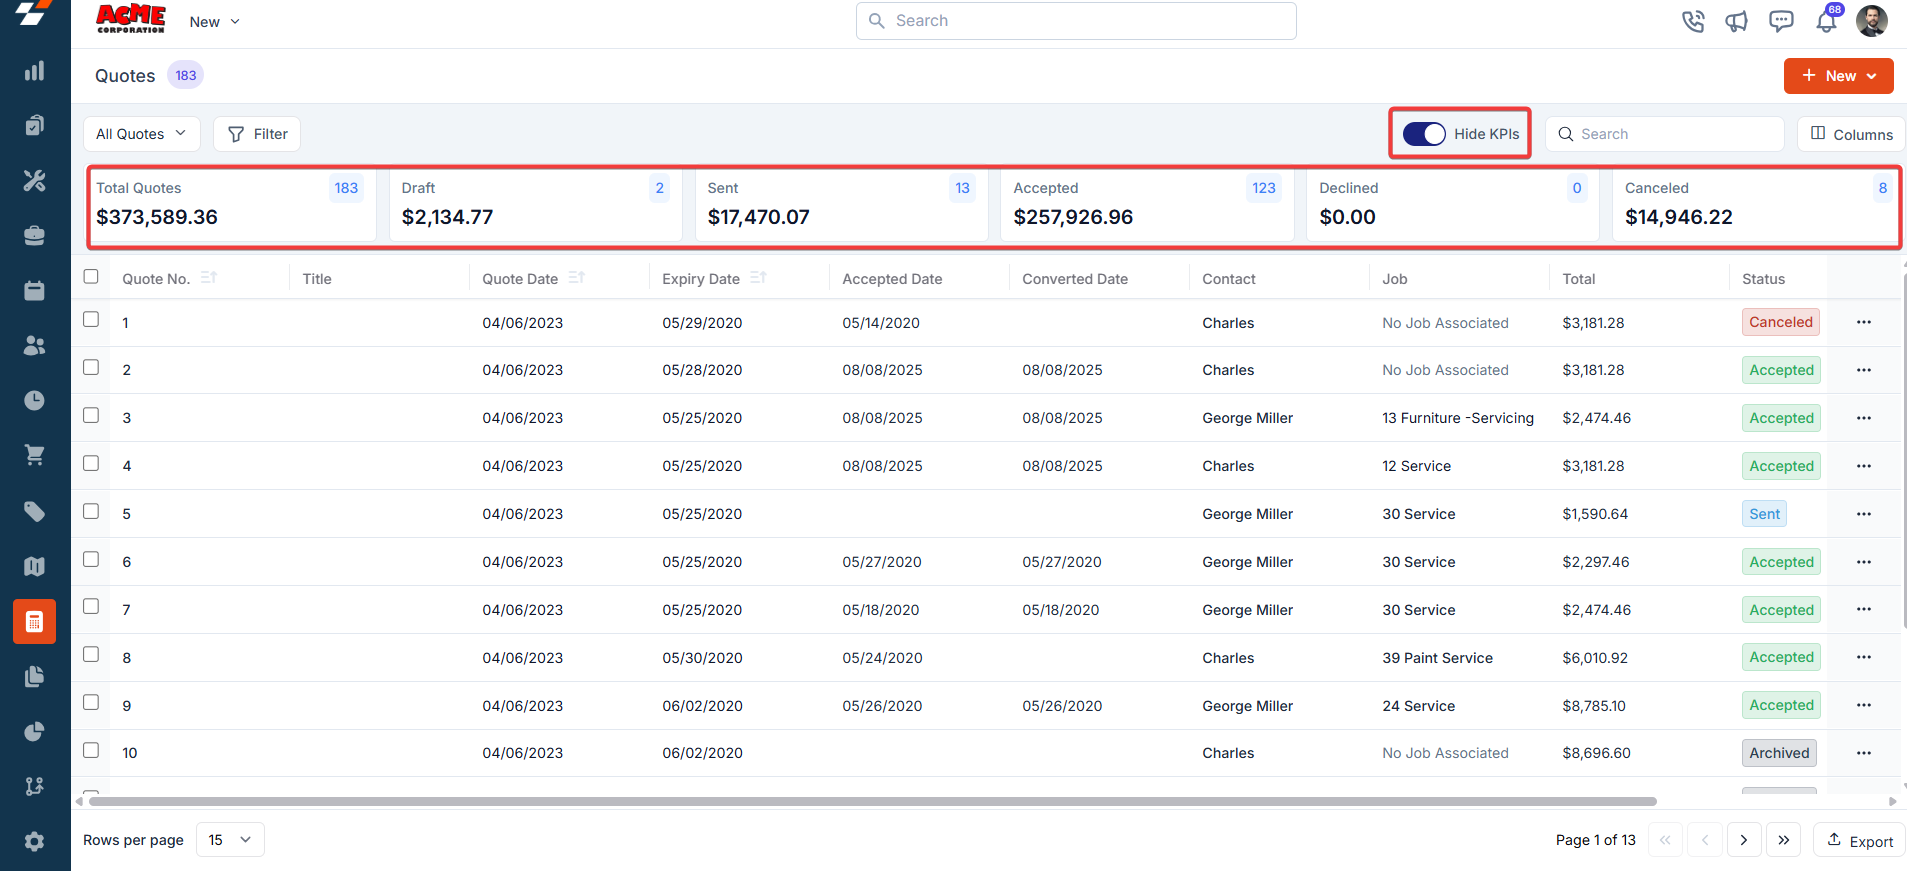
The quotes and proposals listing page is designed to help you stay organized and quickly access the information you need. It includes the following elements. Summary Cards: On the top of the listing page, you’ll see summary cards displaying high-level information about your proposals and quotes. Each card highlights details such as:- Total number of quotes
- Drafts, sent quotes, and their total value
- Approved, declined, and canceled proposals. These cards provide a quick overview of your progress and help you identify areas that may need attention.
Listing Views
Customize the Quotes listing by adding/removing or reordering columns, then Update View to overwrite or save it as a new view.- Update View: Click Update View to modify the current view after changes.
- Save as new view: Use the dropdown beside Update View → Save as new view.
- Create View dialog: Enter the View Name (mandatory); choose Share with (User/Team) and add users; toggle Visibility to all users; click Create.
- Reset View: Click Reset View to restore the current view to the default.
- Permissions:
- Edit: Add/remove/reorder columns; save as new or overwrite existing views.
- View-only: Apply views but can’t edit; can Save as new view to copy without altering the original.
- Manage view: Rename, adjust Visibility (Only Me/User/Team or global toggle), Duplicate, or Delete (creator only; reverts to default/another saved view).
- Open quote details: After filtering, click a Quote Number or Quote Title to view and manage details.
Pinned filters
Zuper’s Quotes module lets you use pinned filters to streamline your filter experience. Pinned filters keep your most-used criteria readily accessible for quick application. Pin up to 3 filters in any module.Navigation: Accounting -> Quotes —> Filters —> Pinned Filters
- Select the “Quotes” module from the left navigation menu.
- Pin Filters for Quick Access
- Once your filters are set, click the Pin Filters button in the dialog box to save them as pinned.
- Pinned filters appear in the dialog box’s “Pinned Filters” section, allowing you to apply them with one click in future sessions.
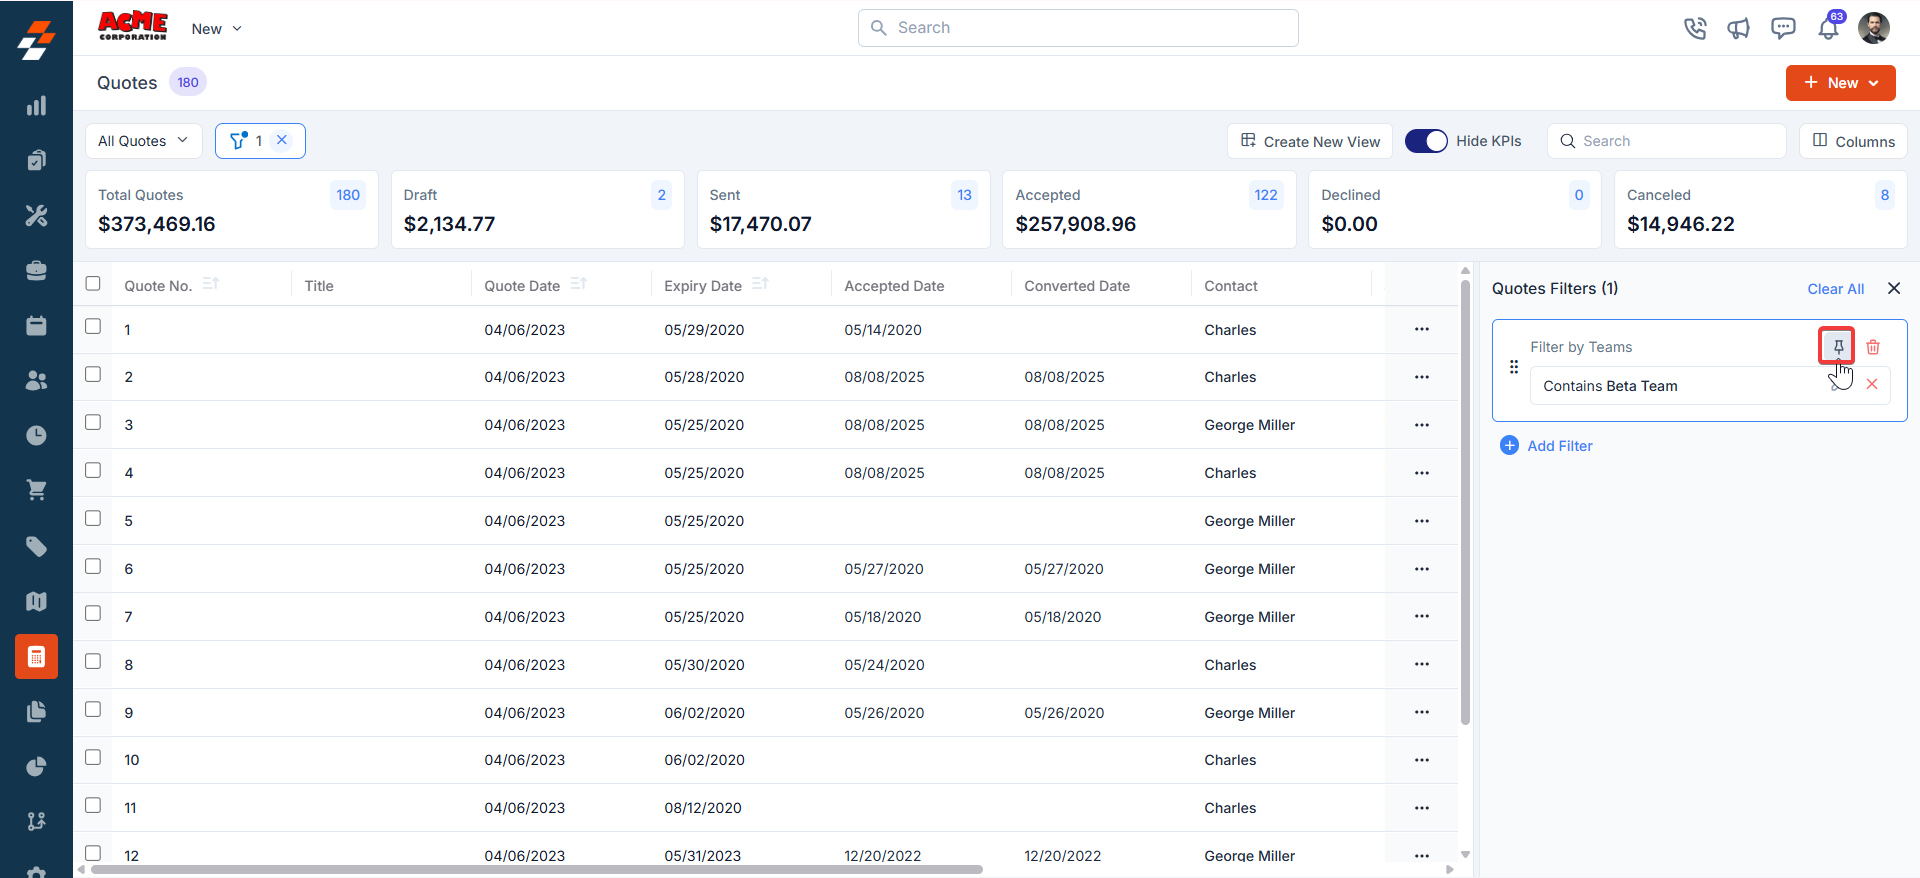
- To Unpin the filter:
- To unpin, select a pinned filter and click Remove.
- To apply pinned or default filters, open the dialog box and select them.
- Use Clear All to remove active filters.
Managing Proposal details
Once a proposal is created, the Proposal Details page becomes your go-to space for managing its lifecycle. The page is laid out in two columns, with the left side highlighting primary details and the right side offering contextual insights and quick actions.
Left Panel
The left panel is the primary section where details are displayed. It includes the following elements.- Status update: You can view the current status of the proposal (e.g., Draft, Sent, Accepted) and manually update it as needed.
- Customer information: You can review the billing details of the customer, including their address and the contact person’s information.
- Proposal Options: You can view the options available to the customer, allowing them to choose between different configurations.
- Templates and Notes: You can see the template used to create the proposal and review any additional notes.
Right panel
The Right Panel provides you with contextual information and quick actions, organized into collapsible sections for easy navigation:- Quote Status: You can track the proposal’s status changes through timestamps and see who performed each action.
- Organization and Contact: You can view the company information associated with the proposal.
- Associated Records: You can view or associate various modules (e.g., Property, Project, and so on) with the proposal. Use the “+” icon to add a module. You can quickly navigate to or manage associated records like organizations, properties, or projects using the provided links or icons.
More actions
Managing proposals doesn’t stop at viewing details—you can take various actions to keep things moving. Things you can do are: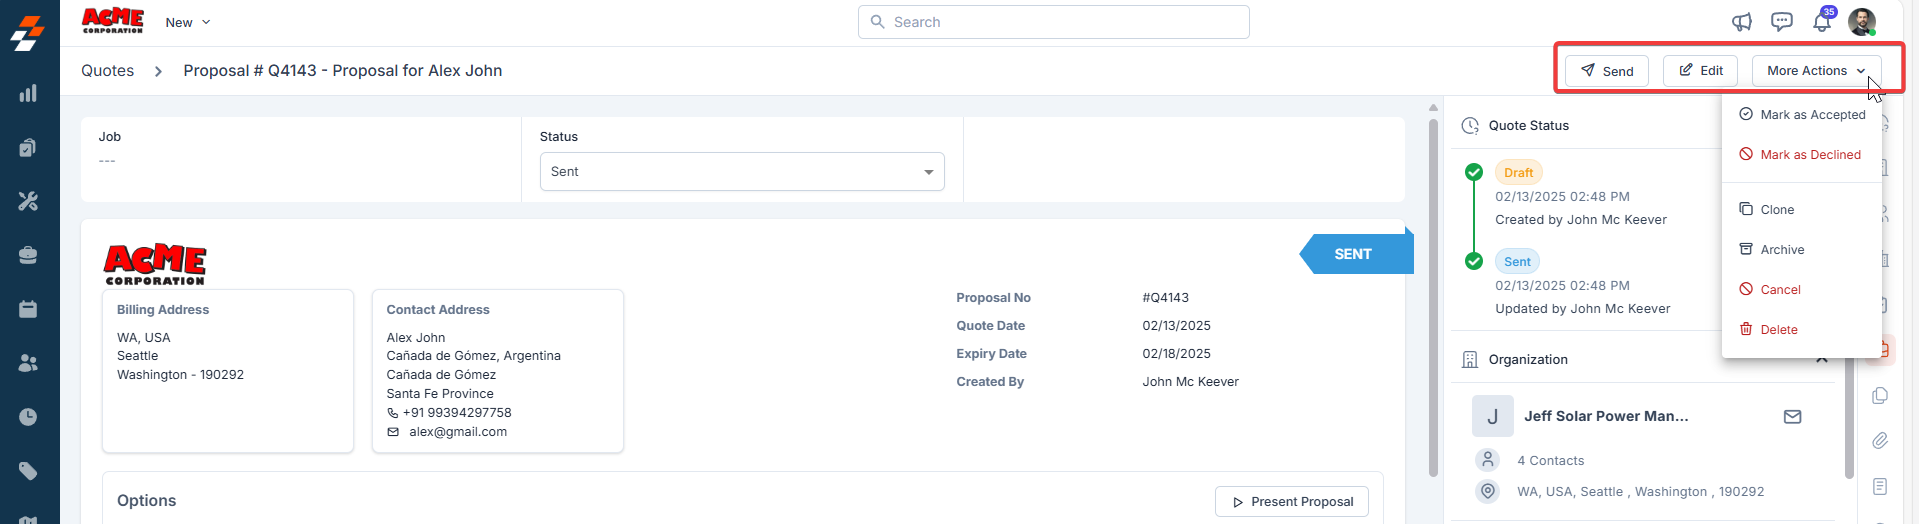
Quick actions
Quick actions
- Send: You can share the proposal to the respective customer for your acceptance.
- Edit Proposal: You can modify the proposal, including package details or other information, by clicking Edit.
- Save as Draft: You can save changes to the proposal without sending it immediately by clicking Save as Draft.
- Mark as Accepted: Once the customer agrees to the proposal, click Mark as Accepted to finalize the proposal. This marks the proposal as accepted and ready for the next steps. After marking the proposal as accepted, the proposal is automatically converted into a Quote, which means the proposal has been confirmed and the process is moving forward.
- Mark as declined: You can record the customer’s decision to decline the proposal by clicking Mark as Declined.
- Archive/Delete: You can archive or delete the proposal.
Managing Quote details:
The Quote Details Page provides a comprehensive view of all information related to a specific quote, including customer details, product specifications, and associated records. The page uses a two-column layout: the Left Panel and the Right Panel, designed for easy navigation and quick actions.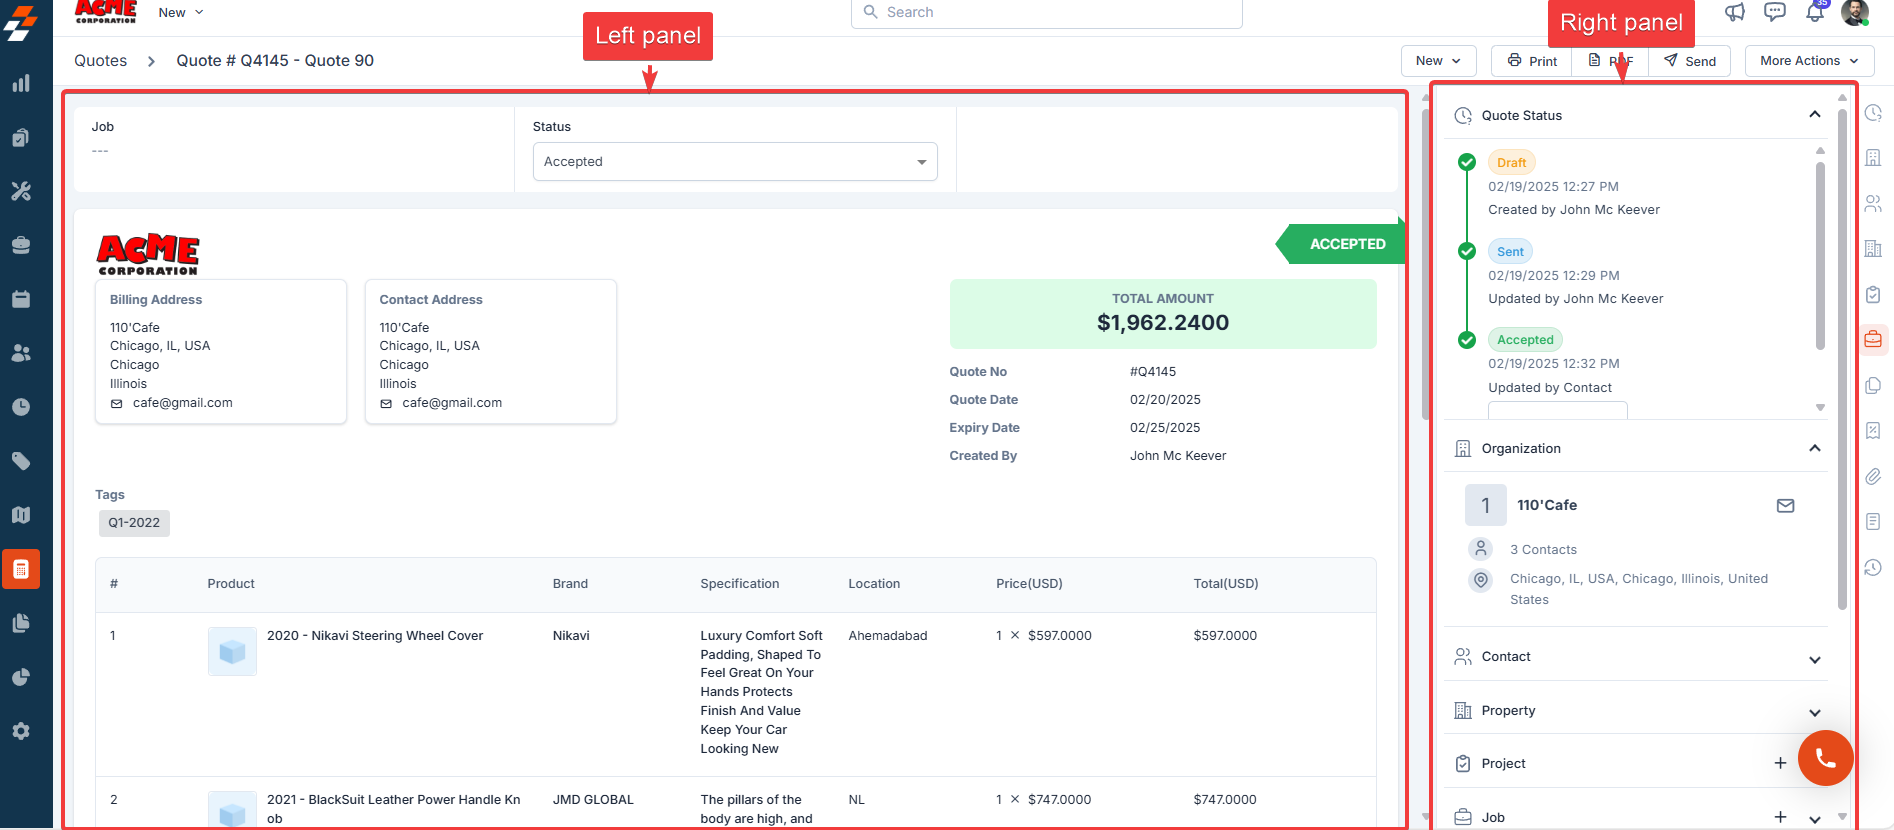
Left panel
The Left panel serves as the primary area for viewing the detailed breakdown of the quote. It includes the following sections:- Status Update: You can see the current status of the quote (e.g., Draft, Sent, Accepted) and manually update it.
- Customer/Organisation Details: You can view the Billing Address for the customer and contact details of the customer or organization.
- Product table: You can review a detailed breakdown of all items included in the quote, along with their prices.
Right panel
The Right Panel displays contextual information and quick actions related to the quote. It includes the following sections:- Quote Status: You can view a timeline of the quote’s lifecycle, including timestamps and the user who performed each action.
- Organization Details: You can see the company associated with the quote, along with the number of contacts and their location.
- Associated Records: You can view or associate various modules (e.g., Property, Project, etc.) with the quote. Use the “+” icon to add a module. You can quickly navigate to or manage associated records using the provided links or icons.
More Actions
You can perform the following actions to manage quotes effectively: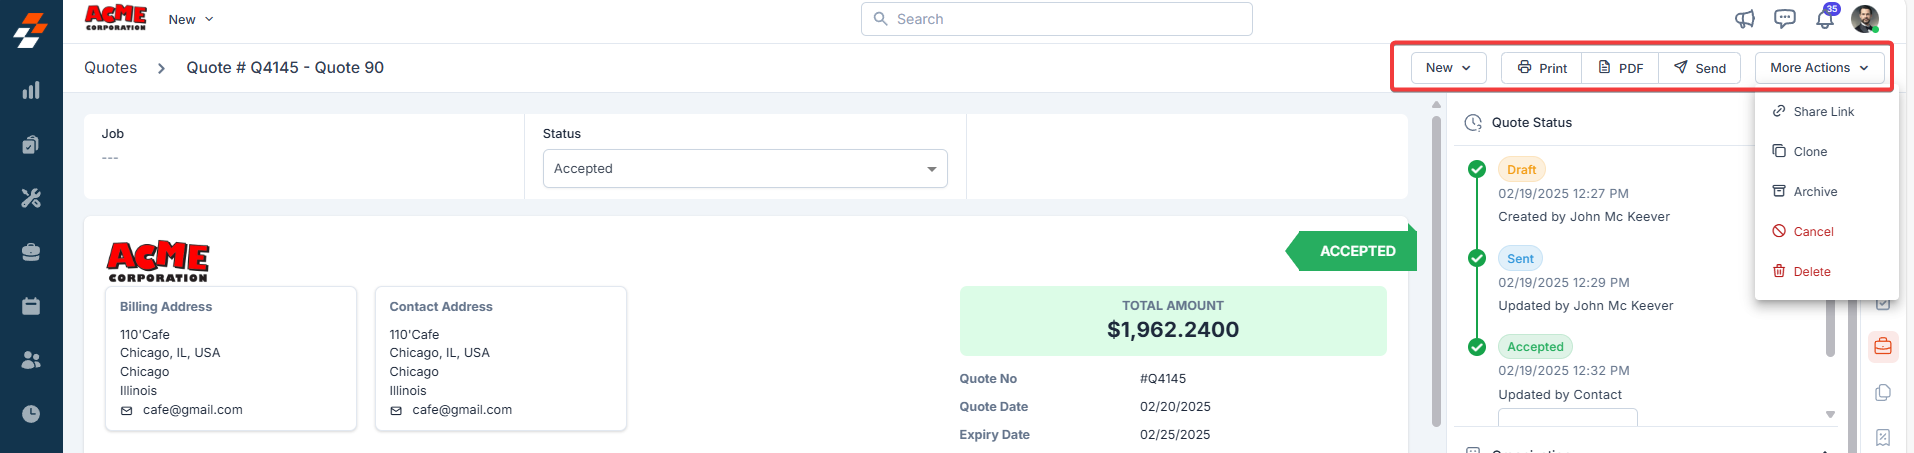
Quick actions
Quick actions
- New: You can create Job, Contract, and Project via Quote.
- Print: You can generate a physical copy of the quote for record-keeping or customer reference.
- Send: You can send to customers for their review and acceptance before the job begins.
- Share Link: You can generate and share a link to the quote.
- Clone: You can duplicate the quote to create similar records.
- Archive: You can archive the quote for record-keeping purposes.
- Cancel/Delete: You can cancel or delete the quote as necessary.
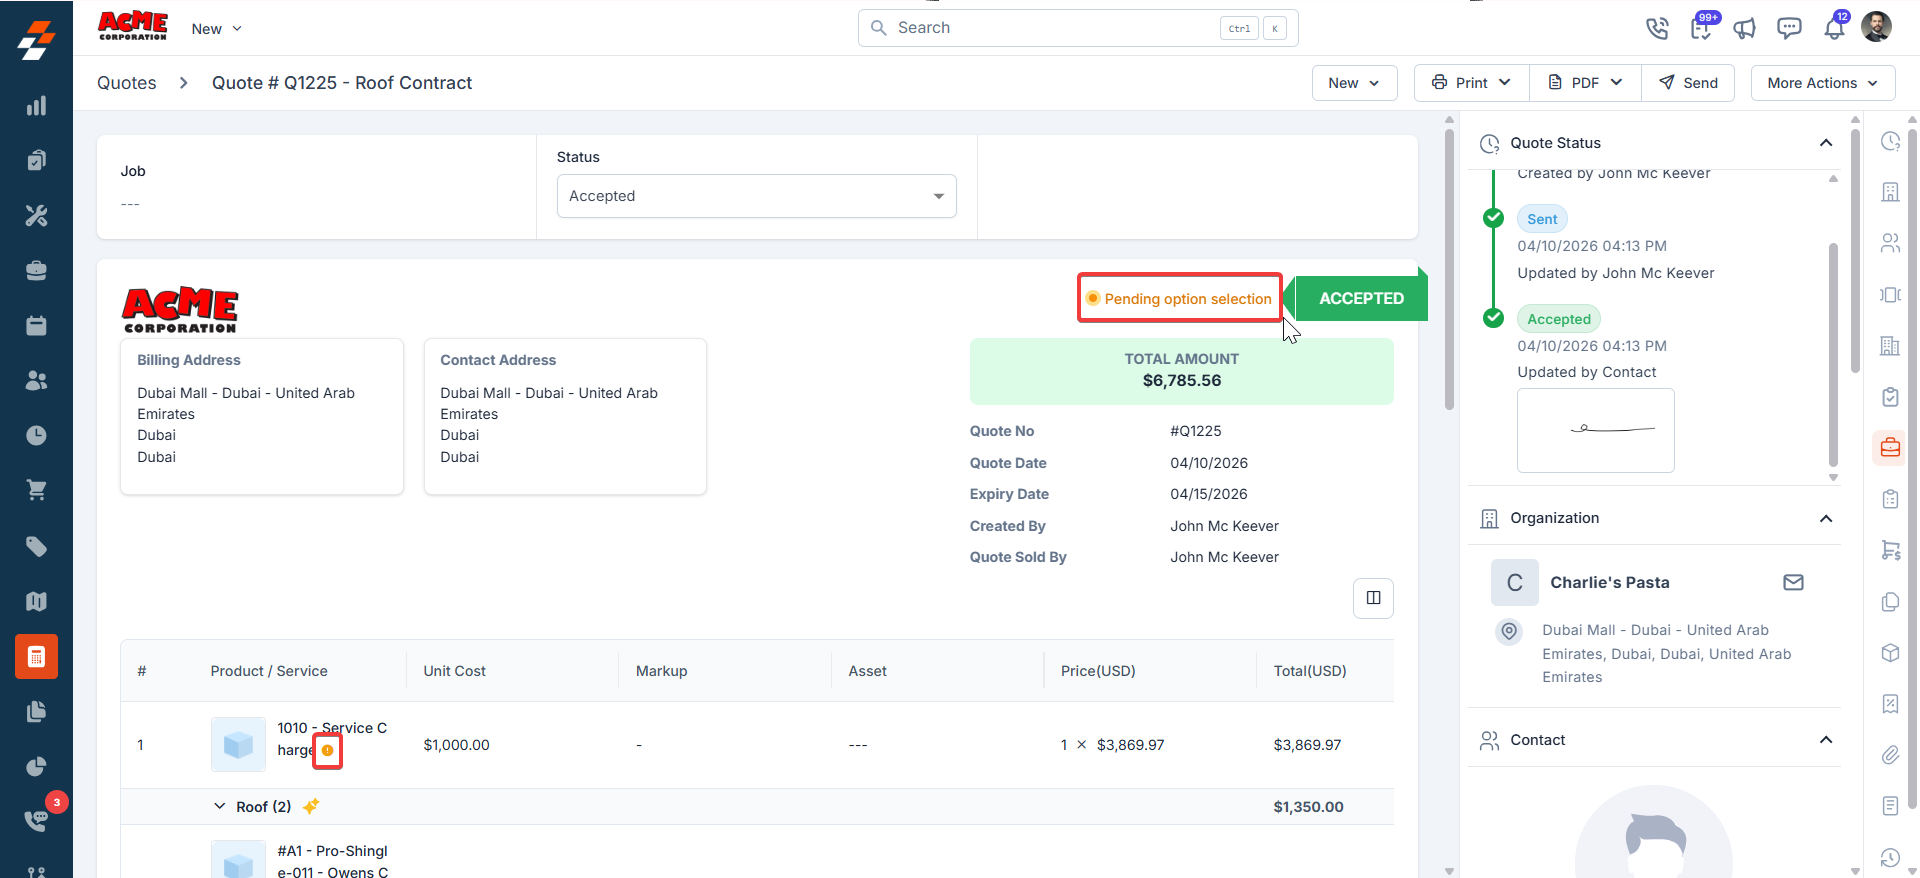
Pending option selection
If a line item in your proposal has options configured, but the option value is empty for any line item, Zuper marks the converted quote as Pending option selection. You can update or fill in the option value for each line item directly from the quote details page. While a quote is in Pending option selection state:- It cannot be converted to an invoice.
- Creation of a material request and purchase order is restricted.
If a customer opens a payment link on a quote but exits without completing payment, two separate records are created: a “quote viewed” entry in the Activity log and a Canceled entry in the Payments report. This is expected behavior. The Cancelled payment entry does not indicate an error — it reflects that a Stripe payment intent was created when the payment page loaded, but no transaction was completed.
Monitor pending quotes and set up sales alerts
When quotes are sent to customers but remain unanswered, your sales team needs a way to catch them before they go cold. Zuper doesn’t have a single built-in “pending quote alert” button, but you can set up monitoring using a combination of approaches depending on how much automation you need.Option 1 — Quotes listing pinned filter (manual, instant)
Option 1 — Quotes listing pinned filter (manual, instant)
The quickest approach. Filter the Quotes listing to show only sent quotes created before a specific date, then pin the filter for daily use.
Apply filters
Click Filters and set:
- Status = Sent
- Created Date = more than 3 days ago (or your preferred threshold)
You can also add a Created Date column to your listing view so quote age is visible at a glance without opening each record.
Option 2 — Scheduled Report (automated daily email)
Option 2 — Scheduled Report (automated daily email)
Set up a Quote report that runs automatically and emails the Sales team each morning with a list of quotes that have been in Sent status for more than 3 days.
Add fields
Include: Quote Number, Customer Name, Quote Amount, Created Date, Expiry Date, Assigned To, and Quote Status.
The Report Builder is available under Reports in the left navigation. Legacy reports (pre-built) are available under Legacy Reports in the same section.
Option 3 — Workflow Builder (automated internal notification)
Option 3 — Workflow Builder (automated internal notification)
For teams that want a proactive push notification rather than a report email, the Workflow Builder can send an internal alert to Sales each day listing quotes that have gone unanswered.The general setup:
- Trigger: Scheduled Trigger — daily at your preferred time (e.g., 9 AM)
- Get Records node: Fetch Quotes where Status = Sent and Created Date is older than 3 days
- Condition node: Check if the result list is non-empty
- Notification node: Send an Internal Notification or email to the Sales team with the list of pending quotes
Option 4 — Dashboard expiry KPI (passive monitoring)
Option 4 — Dashboard expiry KPI (passive monitoring)
The Zuper Dashboard includes a built-in KPI under the Quotes module that surfaces quotes approaching their expiry date. If your quotes are configured with expiry dates, this gives the Sales team a daily visual signal without any setup.Navigate to your Dashboard and look for the Quotes section — the expiring quotes card will highlight records that need attention.