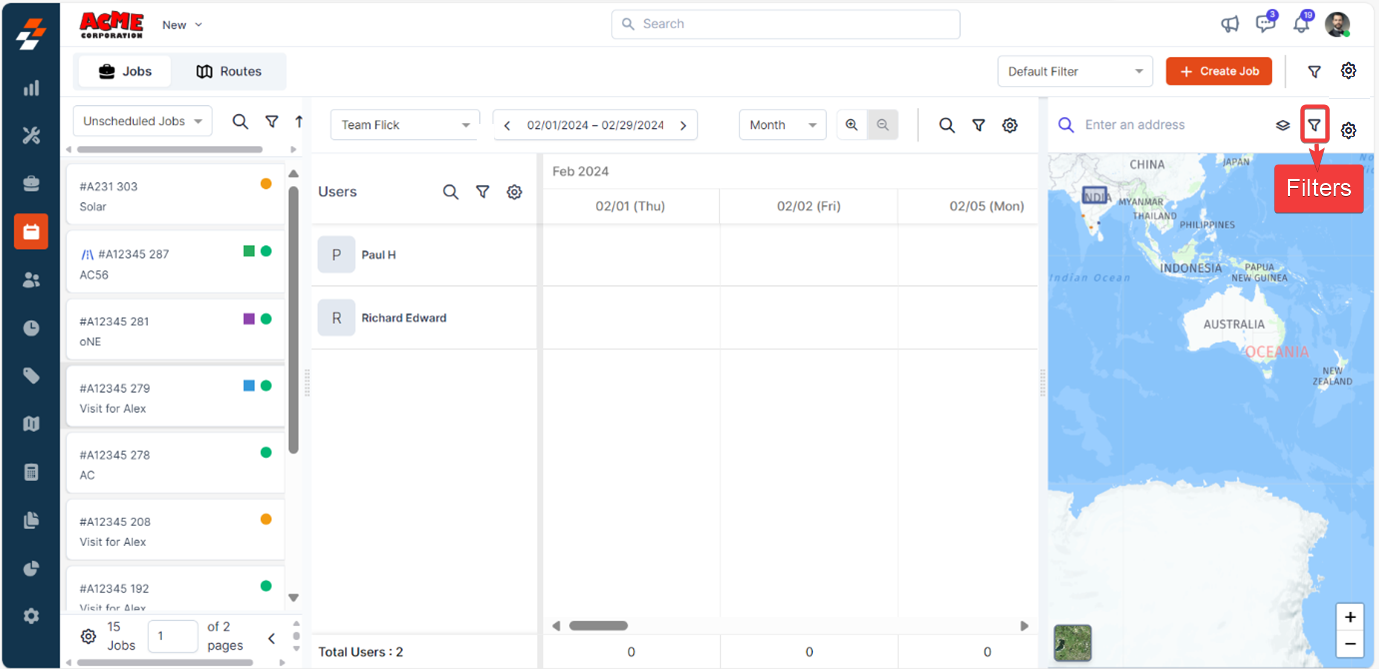
Navigation: Dispatch Board -> Settings
Open Dispatch Board settings
You can open settings in two ways:- Click the Settings icon at the top right of the Dispatch Board, then select a panel from the left.
- Click the Settings icon inside the queue, users list, scheduler, or map. Settings opens directly on that panel.

Dispatchers queue settings
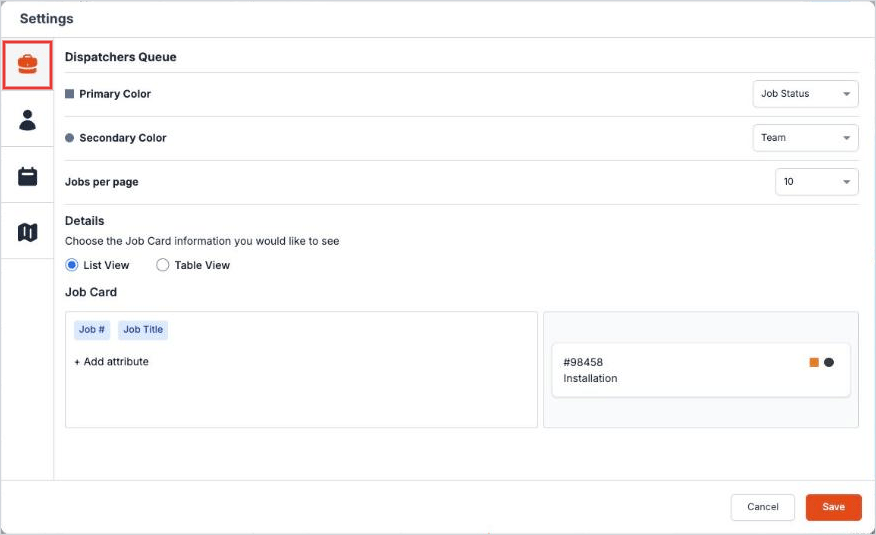
Choose how job cards look in the dispatchers queue.
To customize the dispatchers queue:
- Open Settings and select Dispatchers Queue.
- Under Primary Color and Secondary Color, select the attribute to highlight.
- Under Jobs per page, select the number of jobs to show on each page.
- Under Details, select List View or Table View.
- Under Job Card, click + Add attribute to add details to the job card. The preview on the right shows how the card looks.
- Click Save.
Note: When you select Table View, you can also choose whether the table appears on the left or at the bottom of the board.
Additional elements in the dispatchers queue
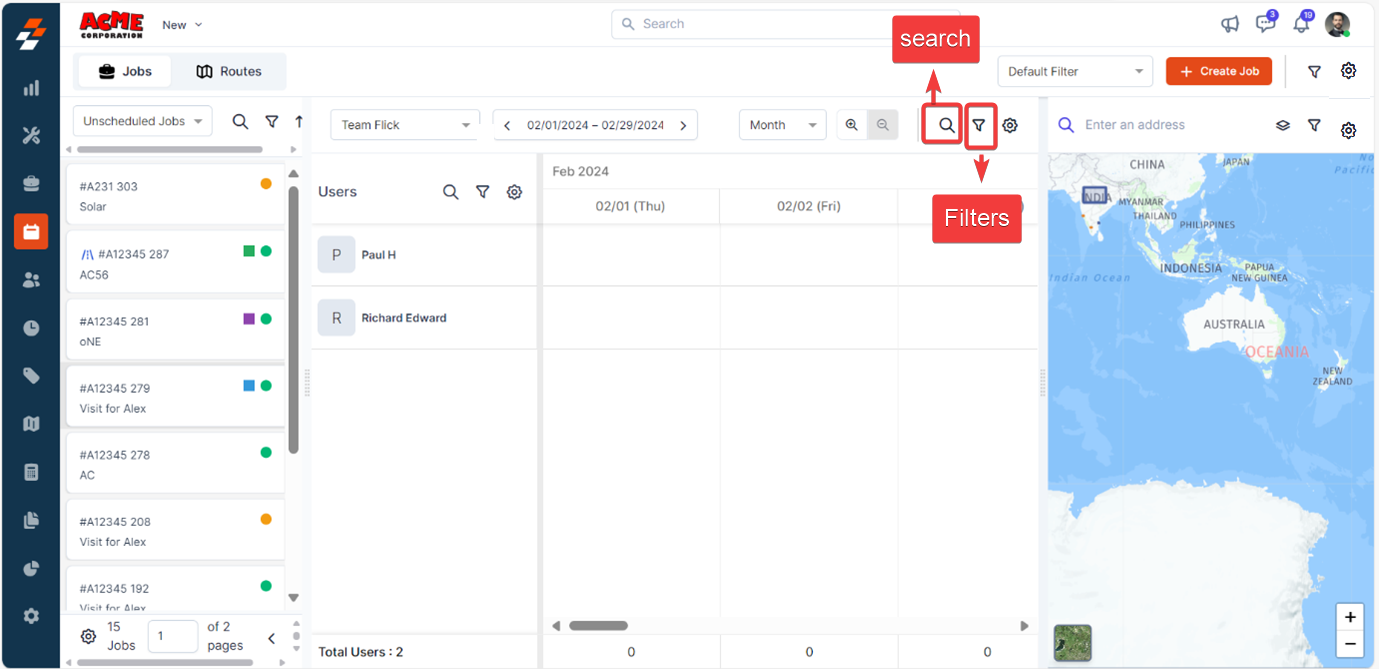
You can use the Search, Filter, Sort, and Hide options to manage jobs and routes in the dispatchers queue.- Search: Search for unassigned routes and jobs by job type.
- Filter: Apply advanced filters to view the jobs or unassigned routes you need.
Apply and manage quick filters in the dispatchers queue
Apply and manage quick filters in the dispatchers queue
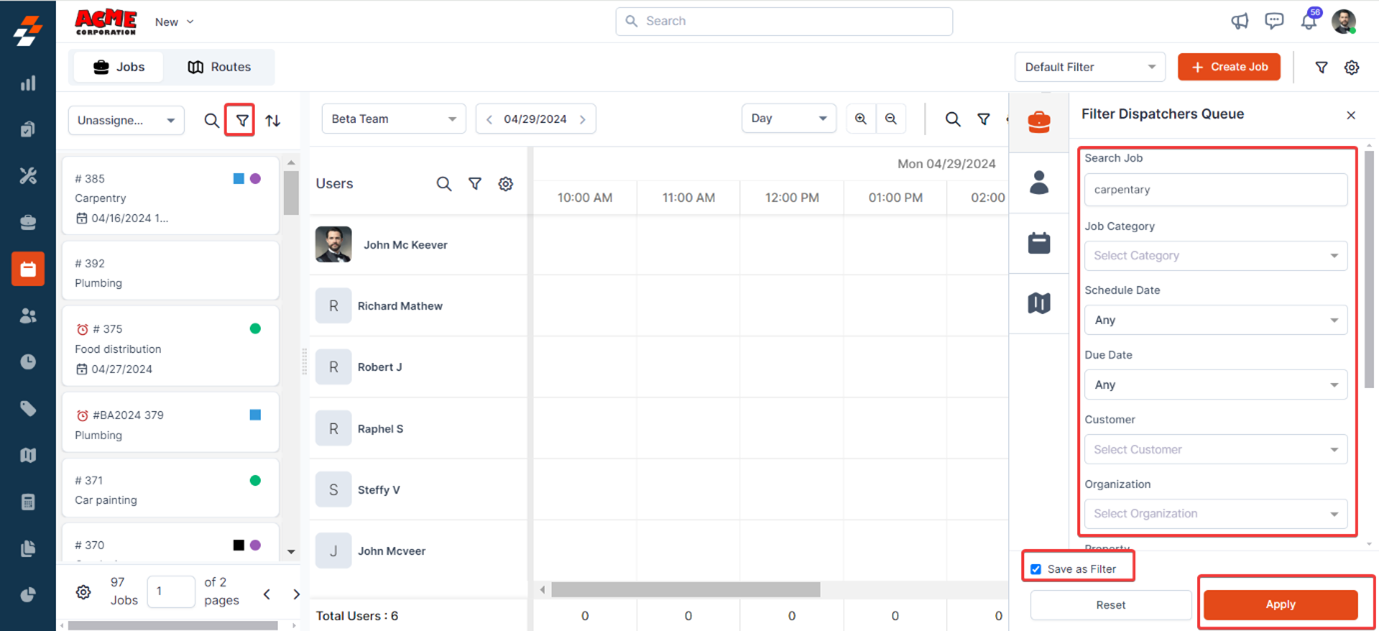
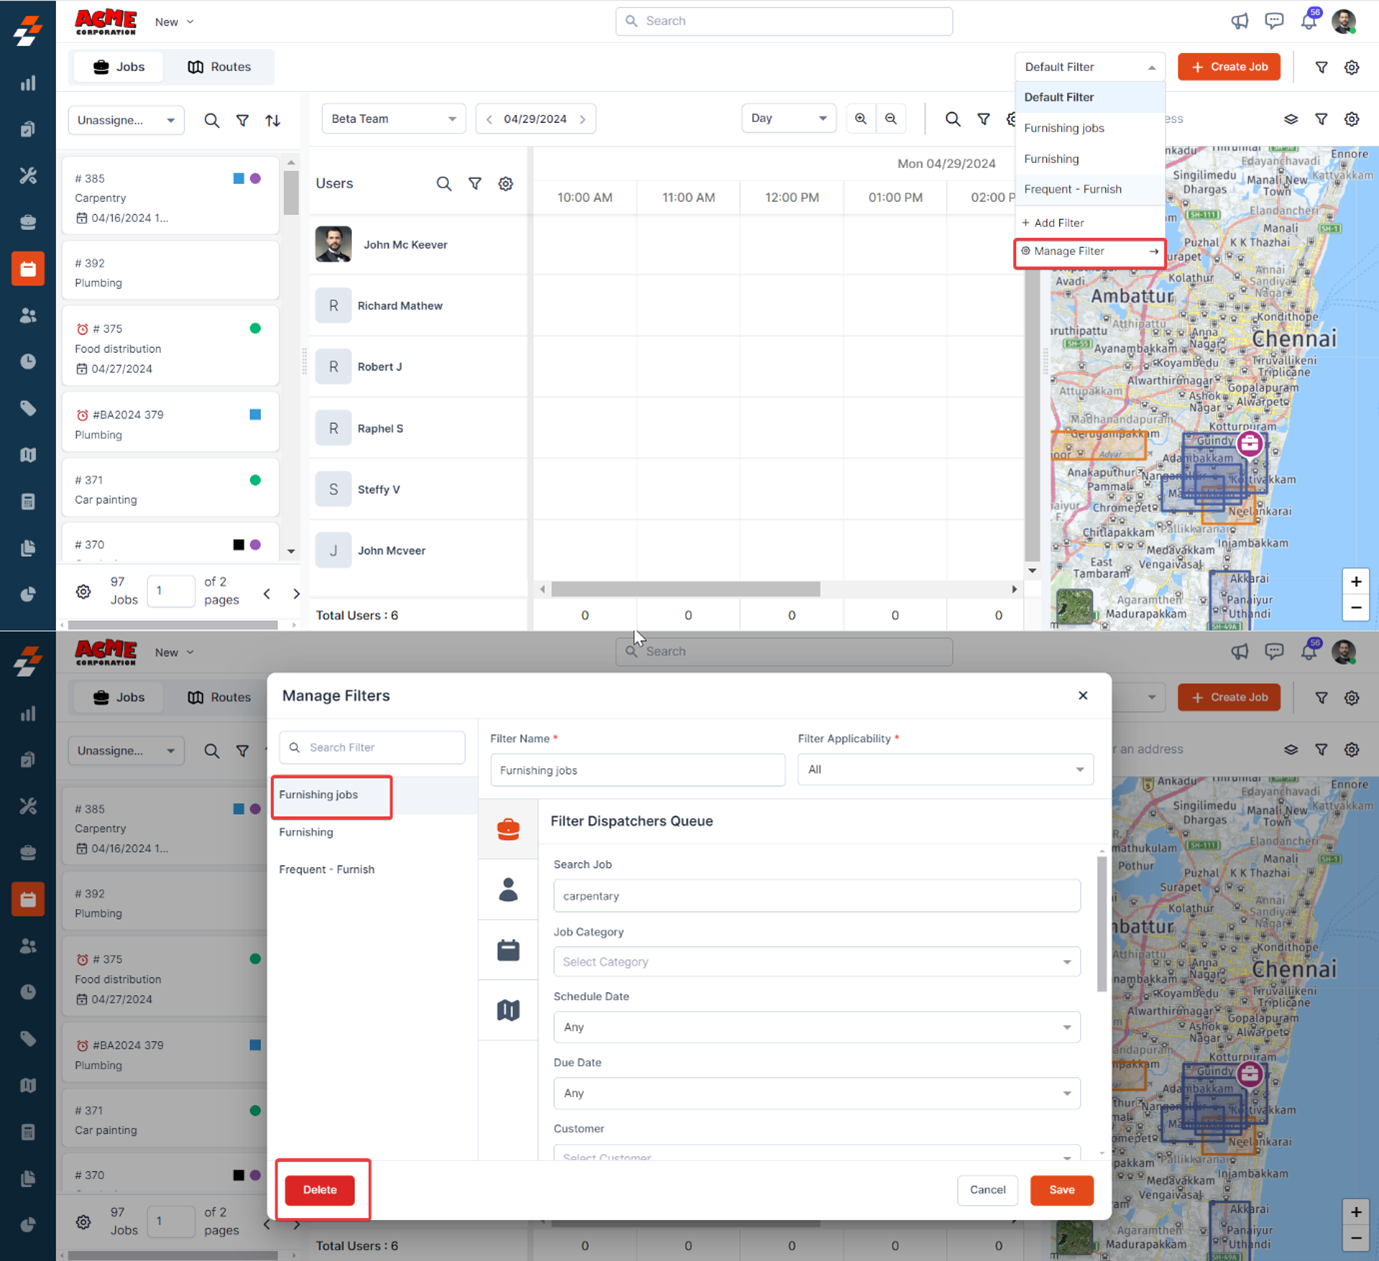
- Click Advanced Filter and set the filter criteria.
- Turn on Save as Filter to save the filter for future use.
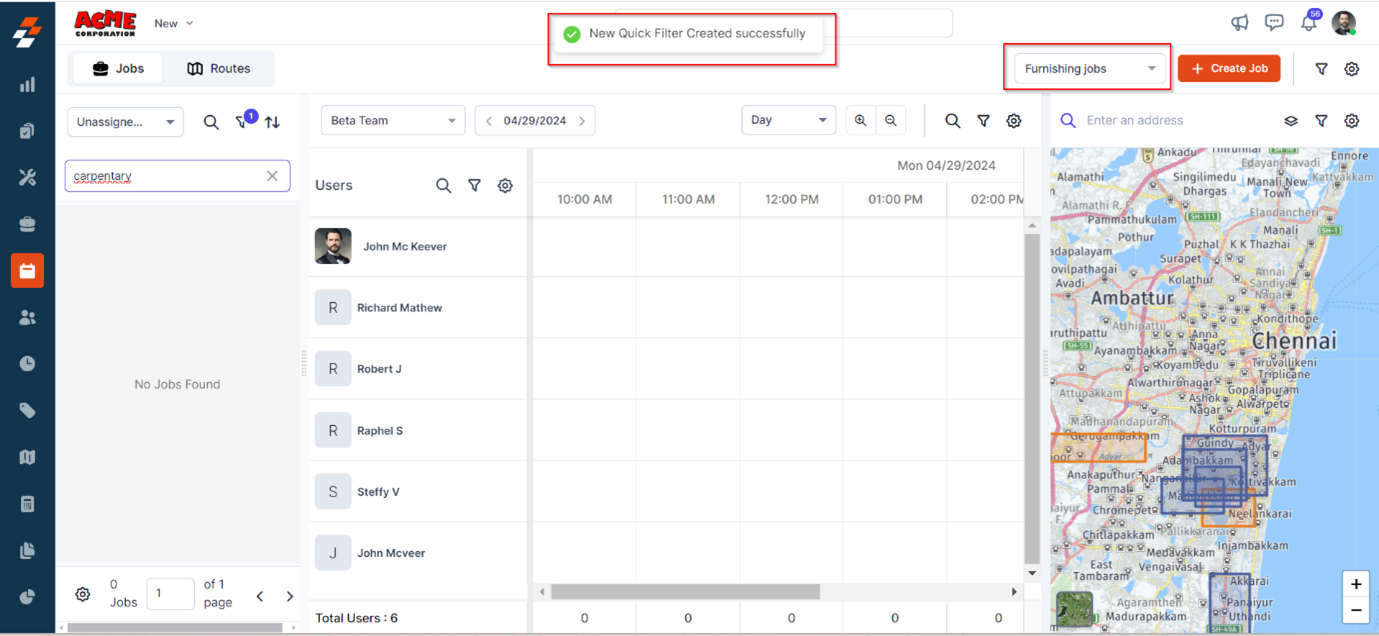
- The saved filter is added to the Quick Filter box at the top right of the screen with the name default filter. Select it from the dropdown, or add more filters as needed.
- To manage saved filters, click Manage Filter. You can add, edit, or delete filters from here.
- Sort: Sort jobs or routes by Scheduled Date, Due Date, Job #, or Job Priority.
- Hide: Collapse the dispatchers queue to give the scheduler and map more space.
Note: To show the queue again, click the expand icon at the left of the scheduler toolbar.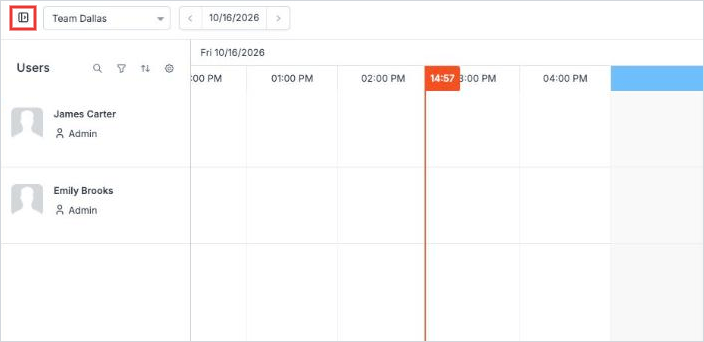
Users settings
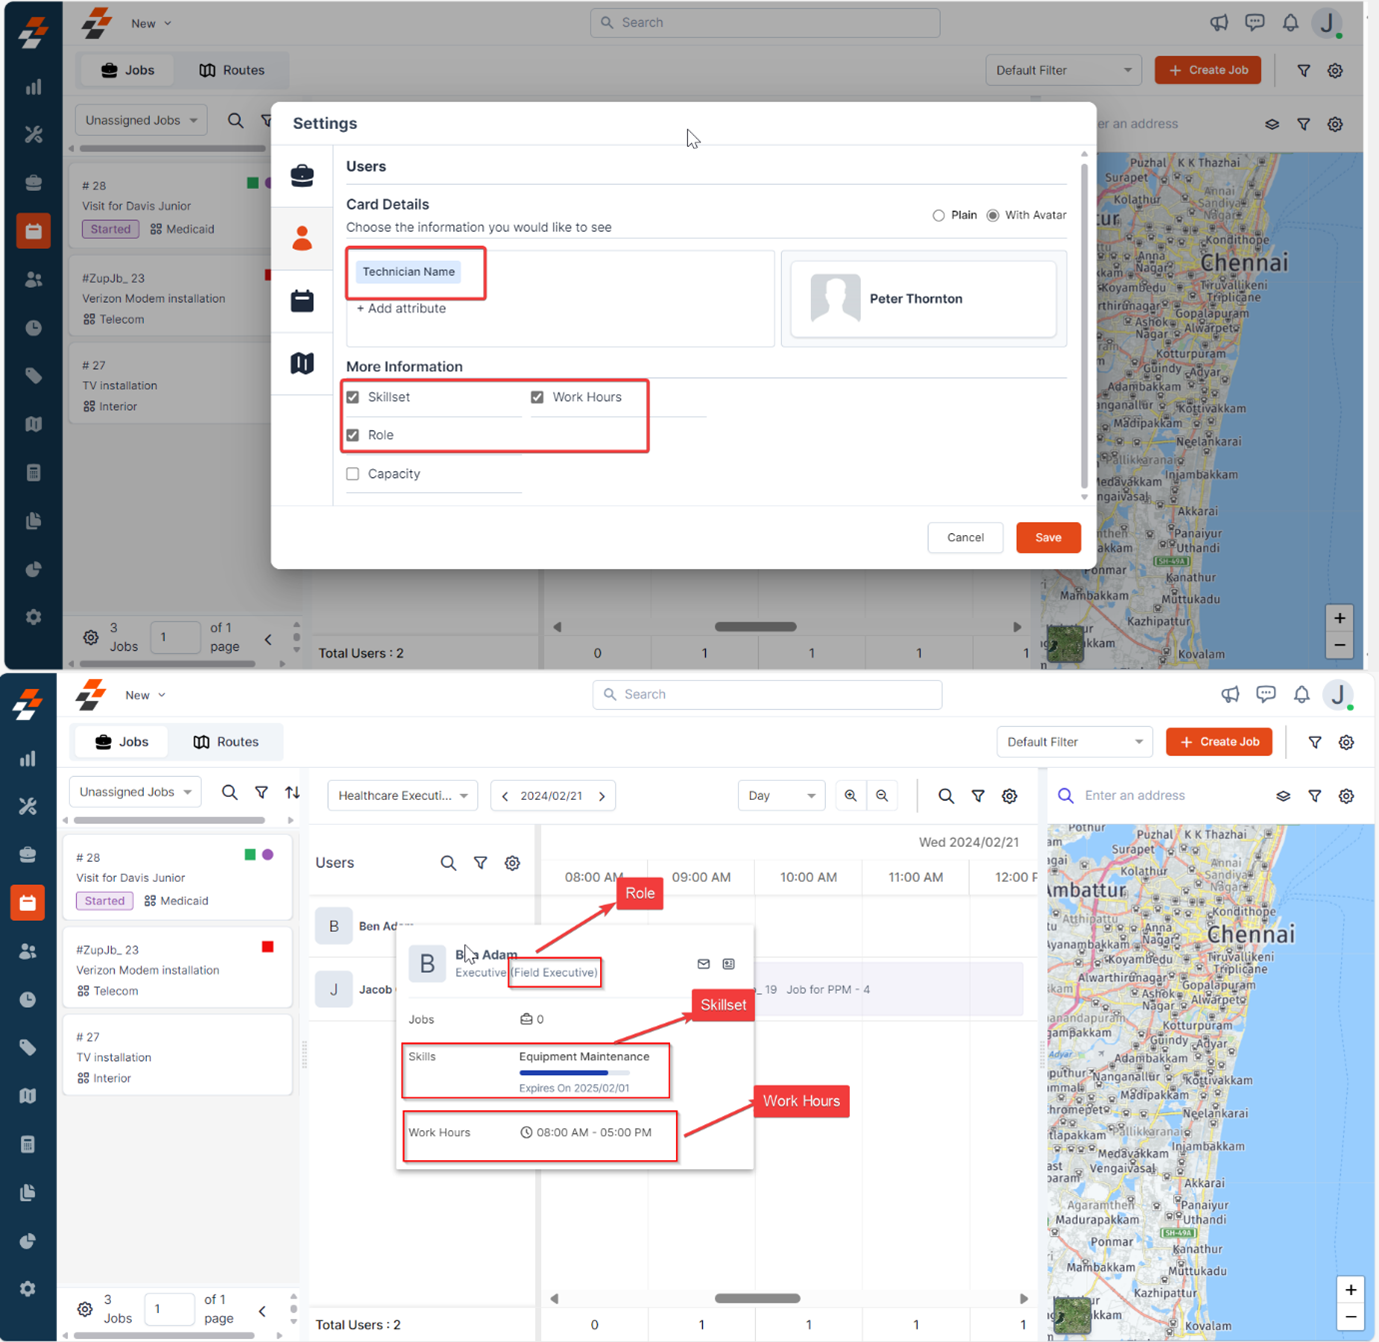
Choose what appears on user cards and in the details that show when you hover over a user. To customize user cards:- Open Settings and select Users.
- Under Card Details, select Plain or With Avatar.
- Click + Add attribute to add details to the user card. Technician Name is always shown. You can add:
- Role
- Skillset
- Job/Route count
- Shift Hours
- Work Hours
- Designation
- Under More Information, select the details to show when you hover over a user: Skillset, Role, Capacity, or Work Hours.
- Click Save.
Additional elements in users
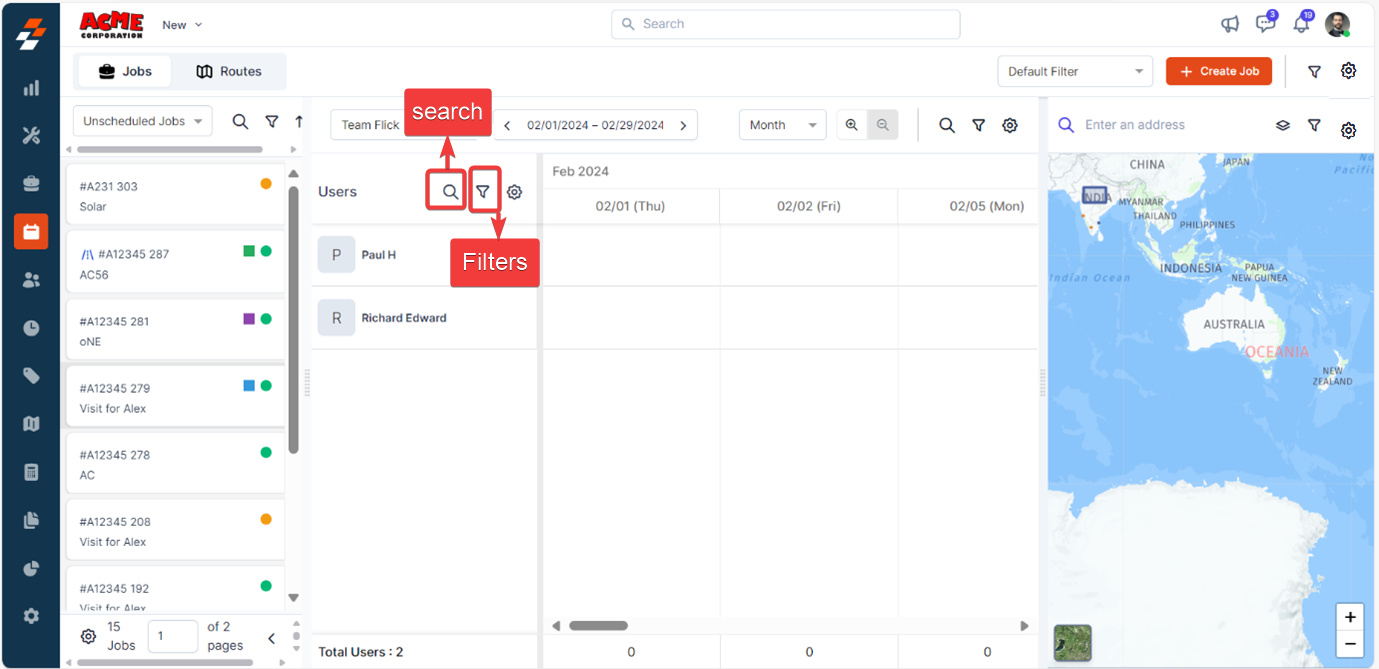
Use the Search and Filter options to find specific users within a team.- Search: Search users by name or skillset.
- Filter: Filter users by criteria such as skillset, and save filters for later.
Scheduler settings
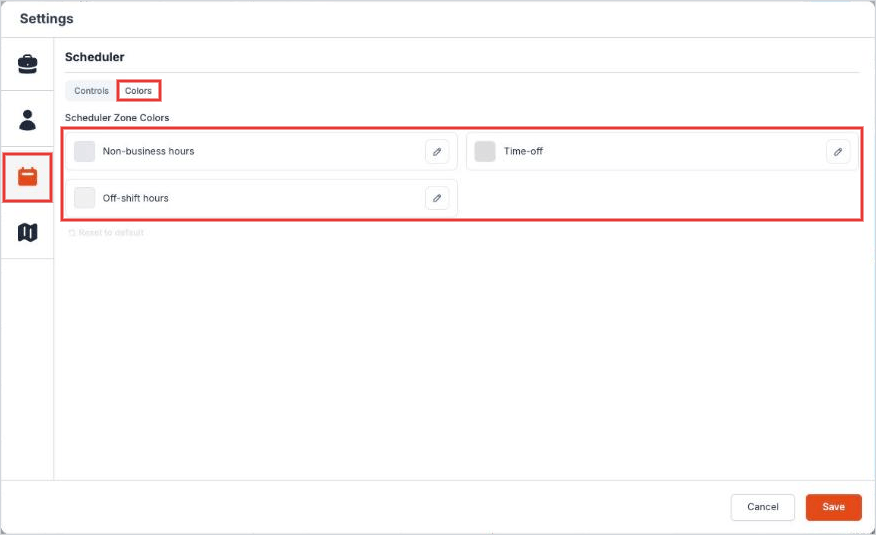
Scheduler settings have two tabs: Controls and Colors.- Controls
- Colors
The Controls tab sets how job cards look on the scheduler, how the scheduler behaves, and what it displays.Job card information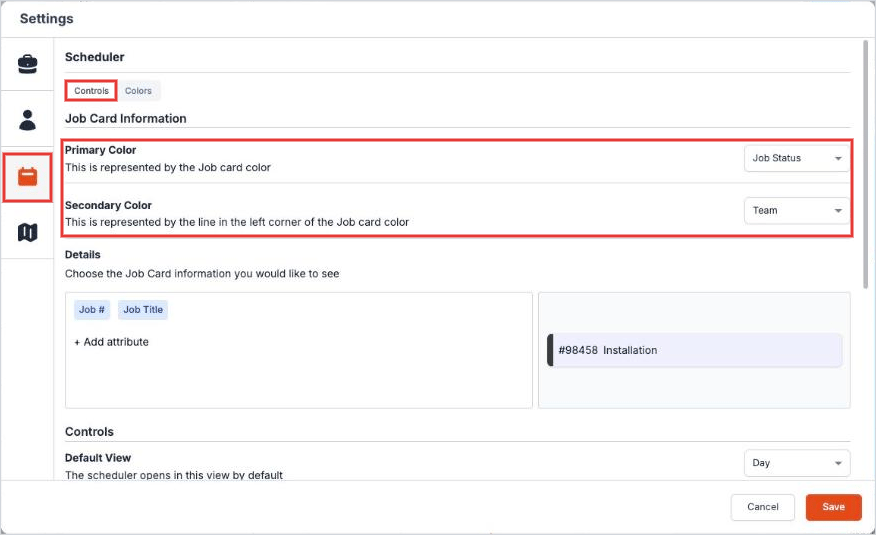
Set custom colors and icons for map entities
Set custom colors and icons for map entities
You can set custom colors and icons for jobs, customers, assets, and properties shown on the map.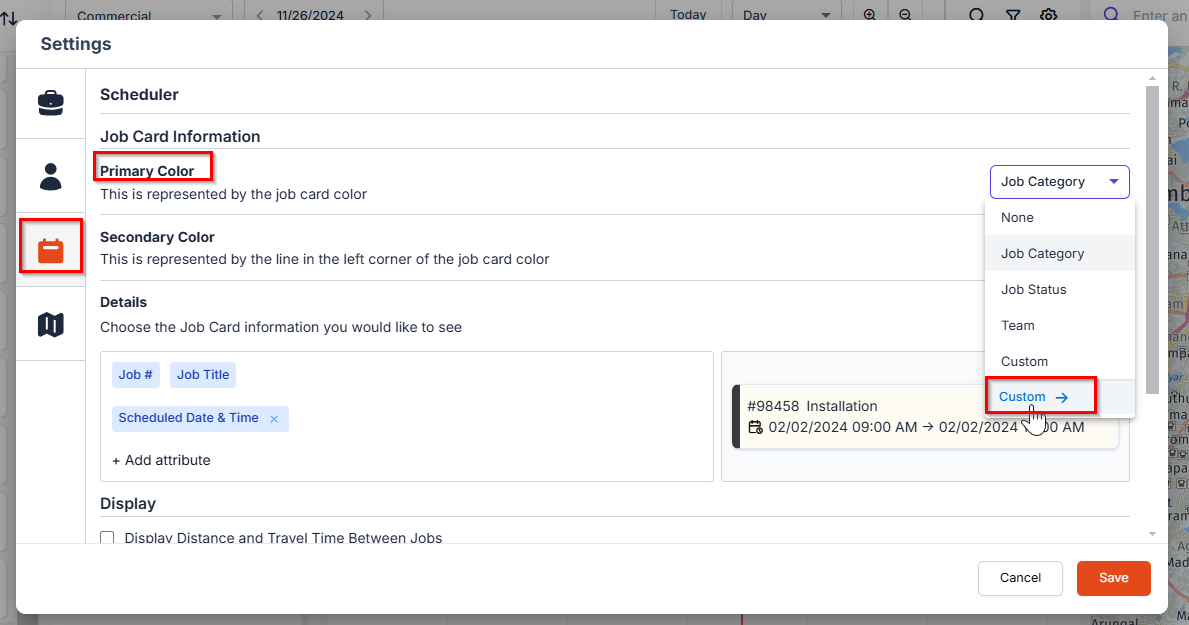
- Open the Primary Color dropdown and click Custom.
- In the sidebar, select colors and icons for each entity.
- Click Save.
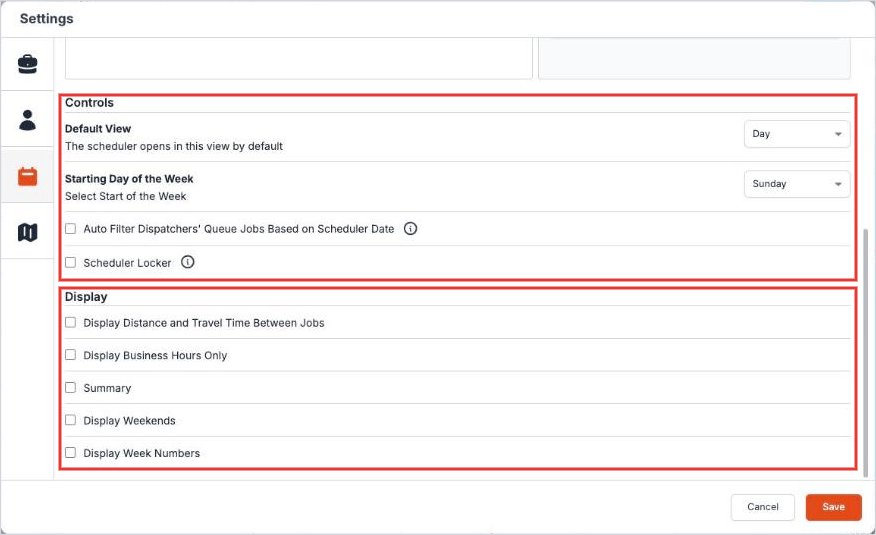
Controls
- Default View: Choose whether the scheduler opens in the Day, Week, or Month view.
- Starting Day of the Week: Choose the first day of the week.
- Auto Filter Dispatchers’ Queue Jobs Based on Scheduler Date: Show only jobs for the scheduler’s selected date in the queue.
- Scheduler Locker: Add a lock icon to the scheduler toolbar that turns drag-and-drop off and on.
Display
- Display Distance and Travel Time Between Jobs: Show the distance and travel time between a technician’s jobs.
- Display Business Hours Only: Show only your business hours.
- Summary: Show the number of jobs for each day, week, or month.
- Display Weekends: Show Saturday and Sunday.
- Display Week Numbers: Show the week number of the year.
- Open Settings and select Scheduler.
- On the Controls tab, set the job card colors and details.
- Under Controls and Display, choose the options you need.
- Click Save.
Additional elements in the scheduler
Use the Search and Filter options to manage jobs and routes on the scheduler.- Search: Search for specific jobs.
- Filter: Filter jobs by category, due date, customer, priority, skills, and tags. Save filters for later.
Map settings
Choose what the map shows and how it filters.
To customize the map:
- Open Settings and select Map.
- Select Enable Map View, and choose whether to turn on Display Nearby Jobs and Independent Map Filters.
- Under Default Layers, select the layers to show.
- To change the colors and icons of map entities, click Customize colors and icons. For details, see Map.
- Click Save.
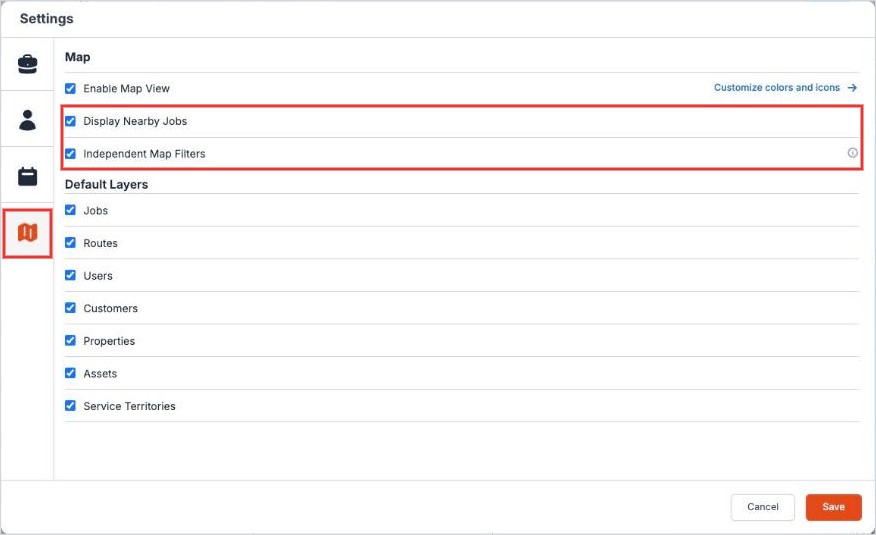
Note: You can select default layers only when Enable Map View is turned on.
Additional elements in the map
Use the Filter option to view route locations on the map. Select a route and click Apply.