

Navigation: Settings -> Miscellaneous -> Custom Dashboard
- From the settings, select “Miscellaneous.” From the “Custom Dashboards” section, choose “+ New Dashboard.”
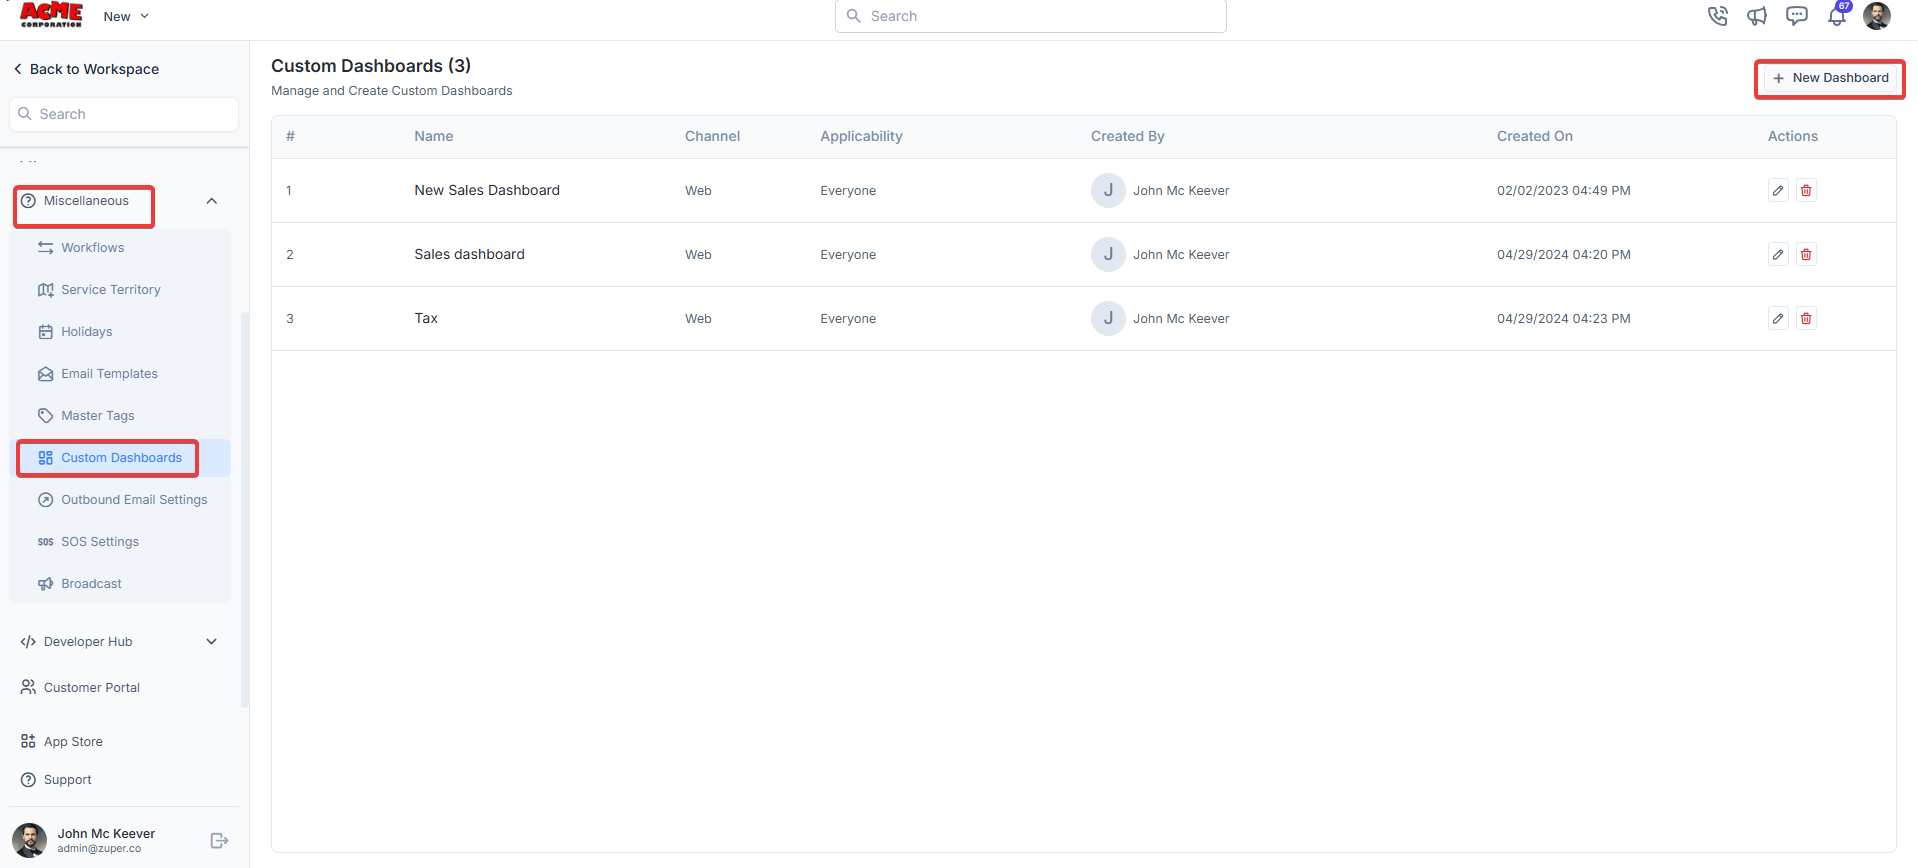
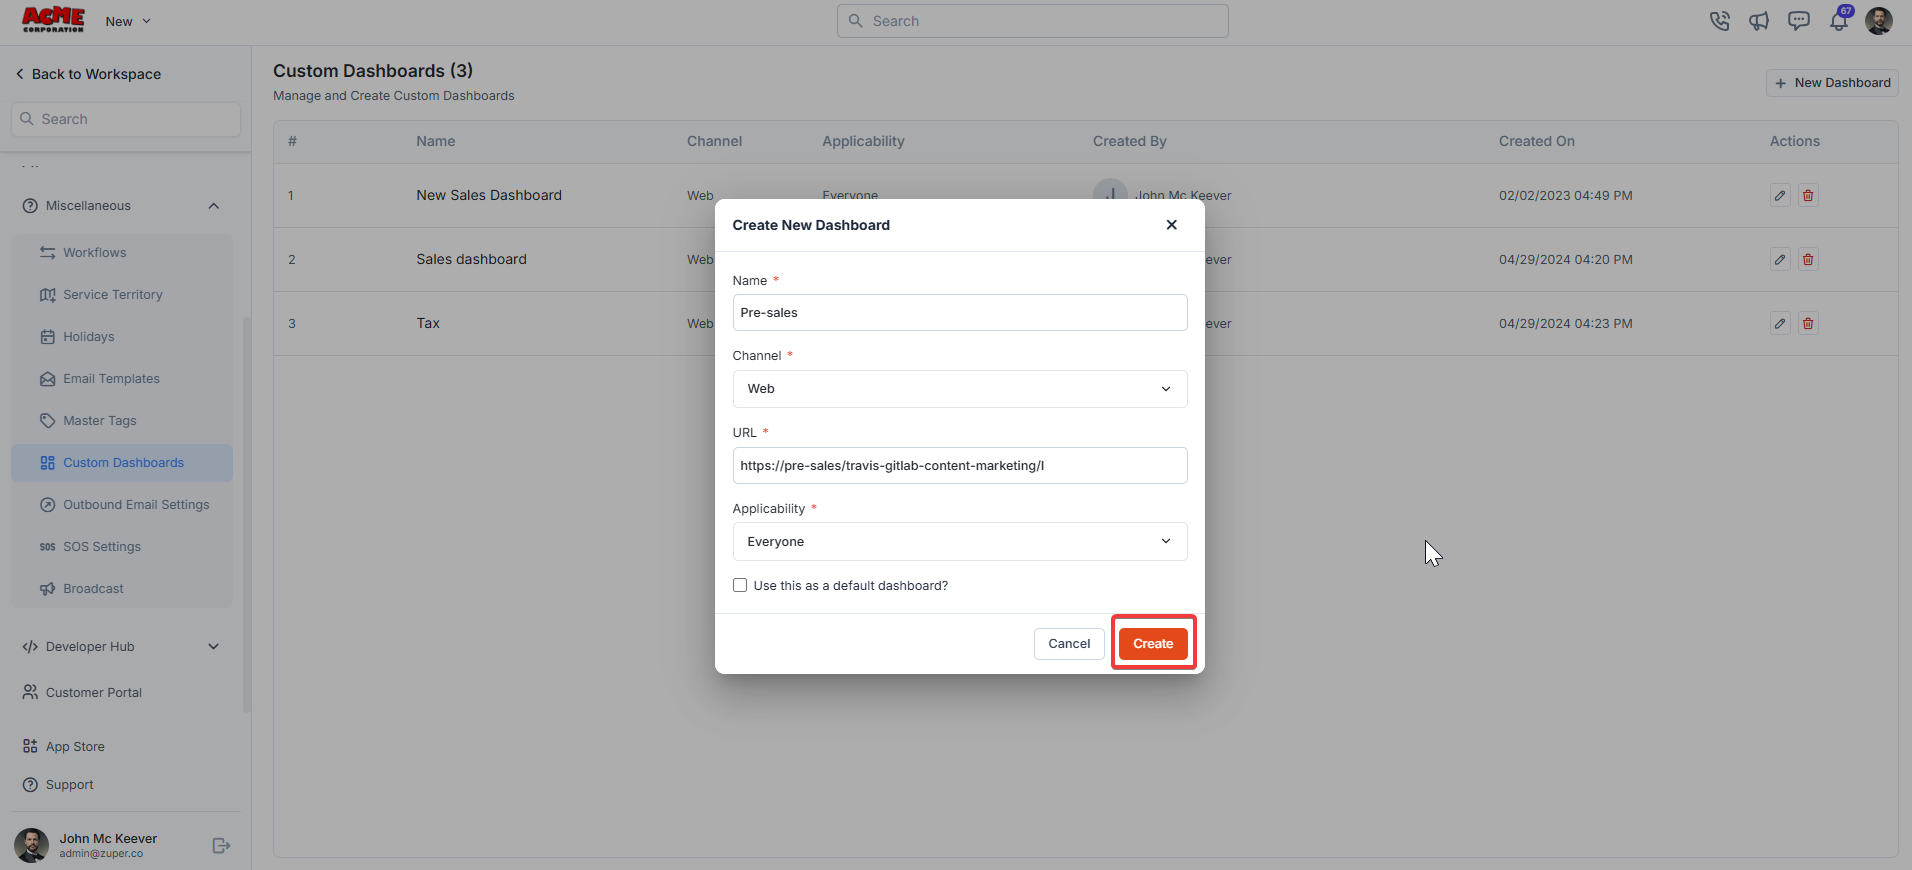
- A “Create New Dashboard” dialog box appears. Fill in the following details.
- Name: Enter a unique name for your dashboard.
- Channel: Select the channel where the dashboard will be available.
- URL: Provide the URL of the dashboard content. This could be a link to a third-party analytics tool or a custom dashboard URL (A sample URL: https://pre-sales.travis-gitlab-content-marketing/ll).
- Applicability: Choose who can access the dashboard (e.g., Everyone or specific roles/users).
- Use this as a default dashboard?: Check this box if you want this dashboard to be the default view for the selected users.
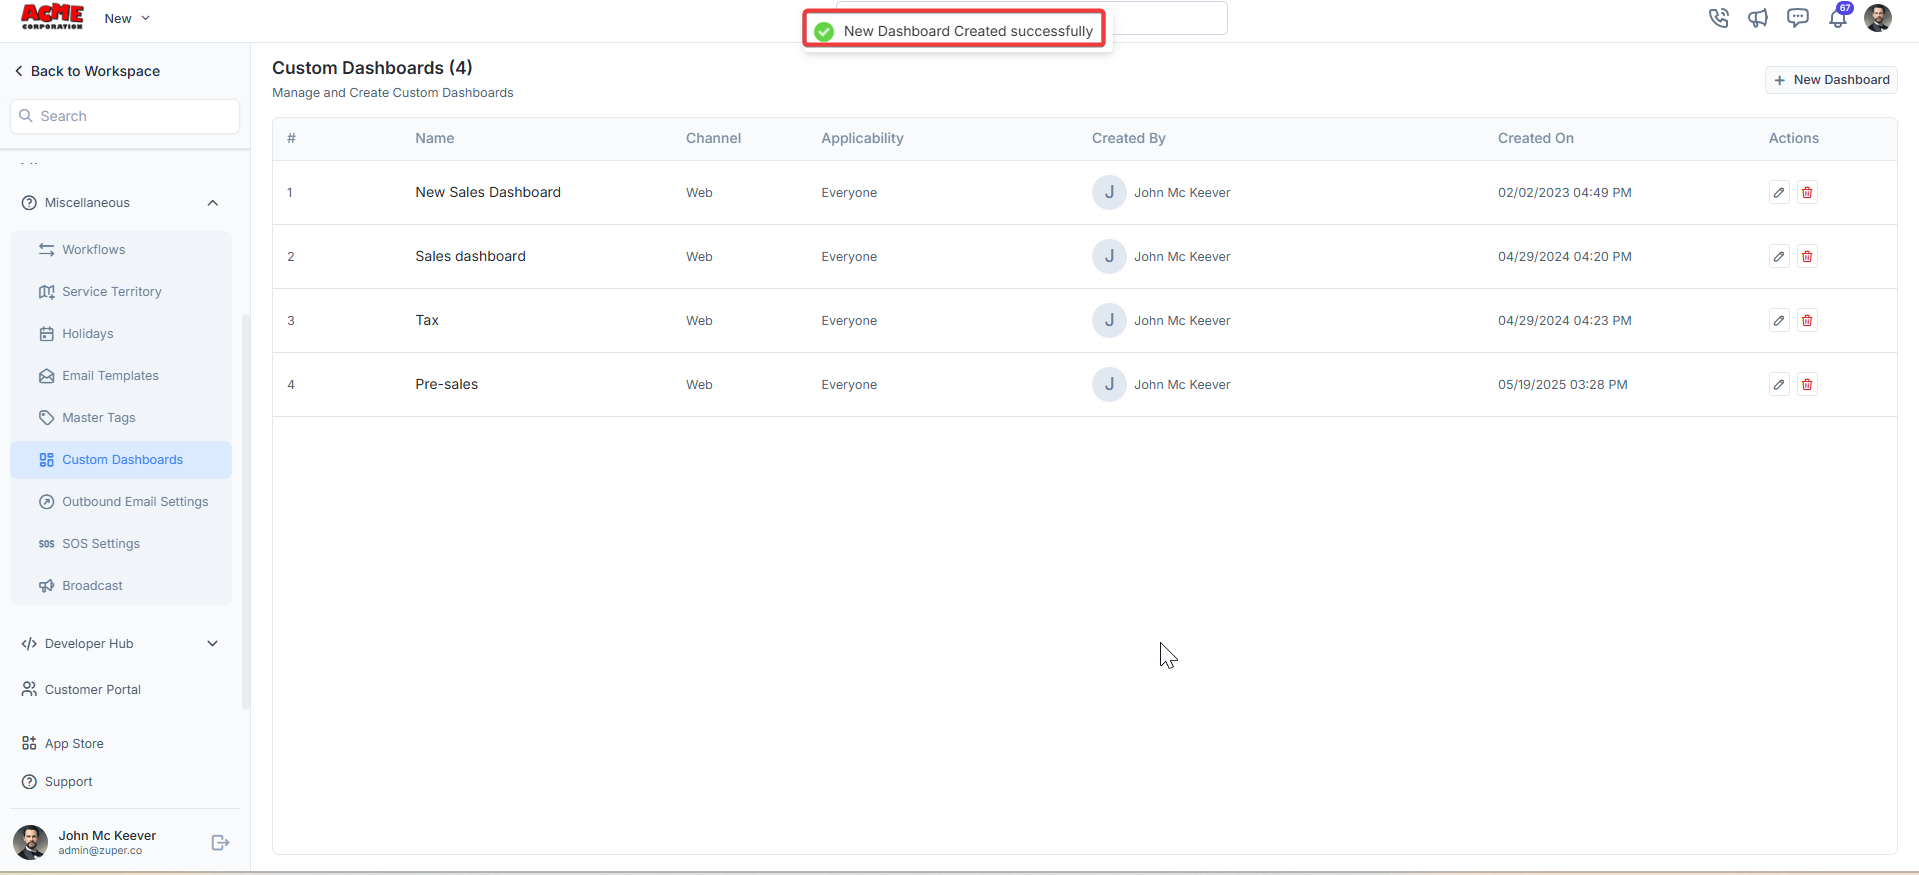
- The “Custom Custom Dashboard” is successfully created.
Best Practices
- Naming: Use descriptive names for dashboards to easily identify their purpose (e.g., “Sales Dashboard”, “Tax Overview”).
- Access Control: Set the Applicability field thoughtfully to ensure only the intended users can access sensitive data.
- Default Dashboards: Use the default dashboard option for frequently used dashboards to save time.