Installing Zapier in Zuper
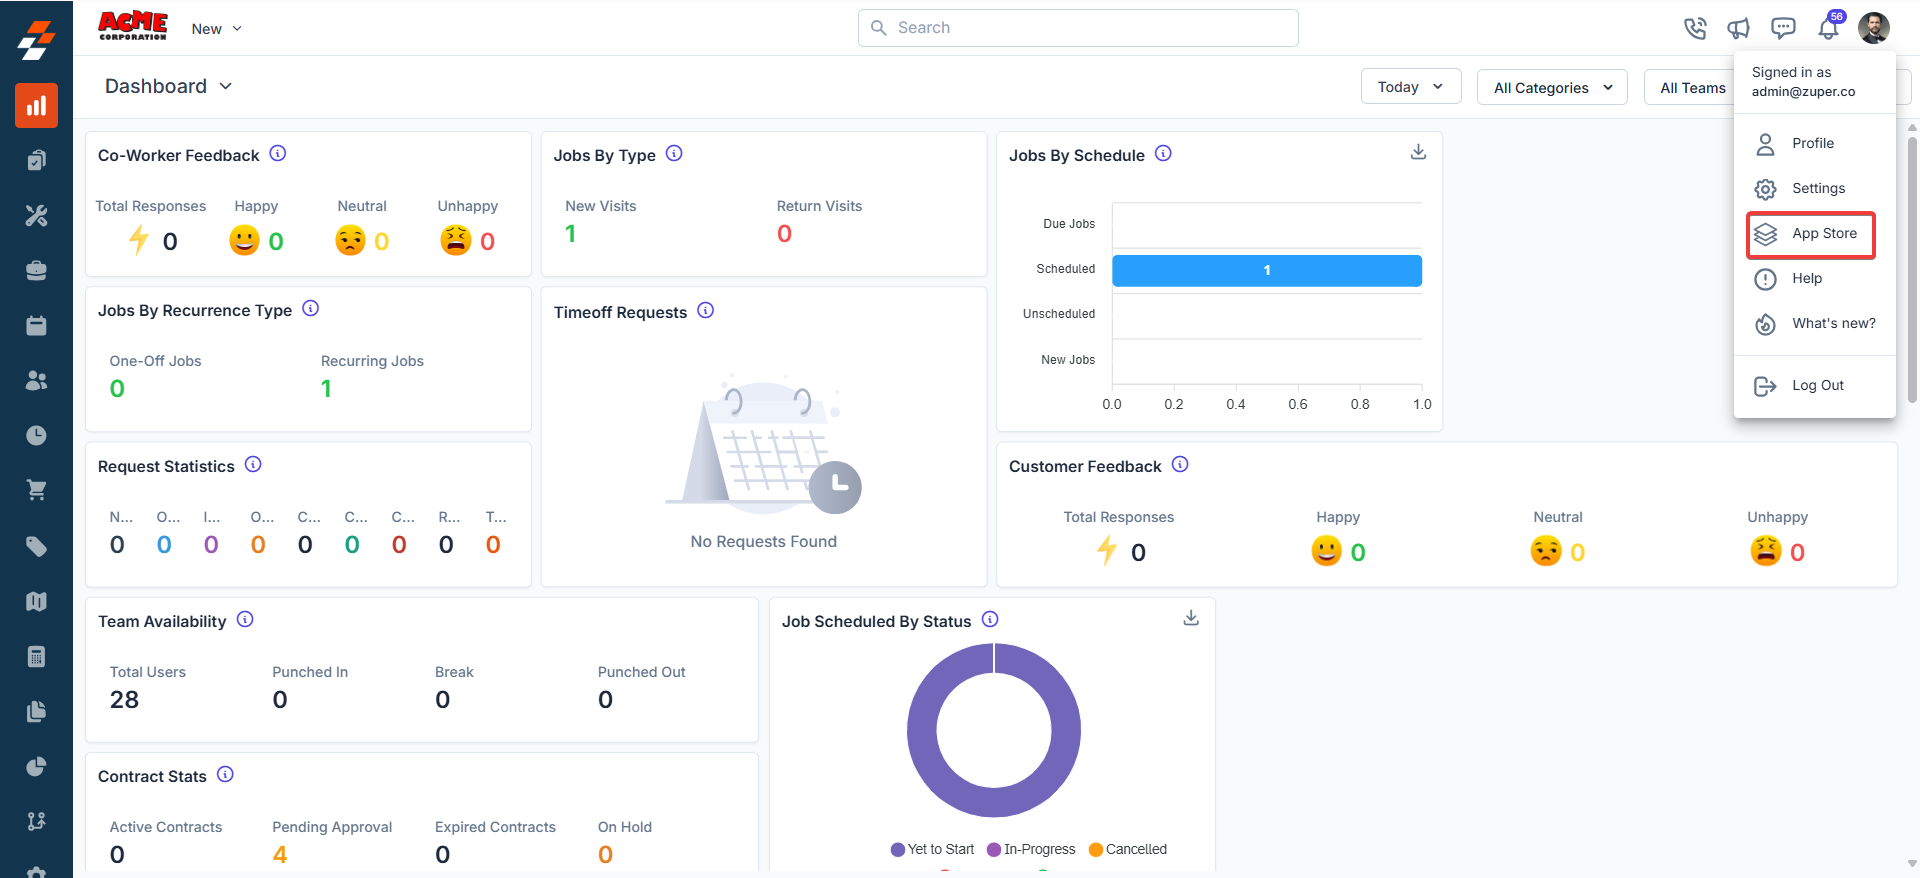
Follow these steps to connect Zapier with Zuper:- Log in to your Zuper account. Click your profile picture in the top-right corner and select App Store.
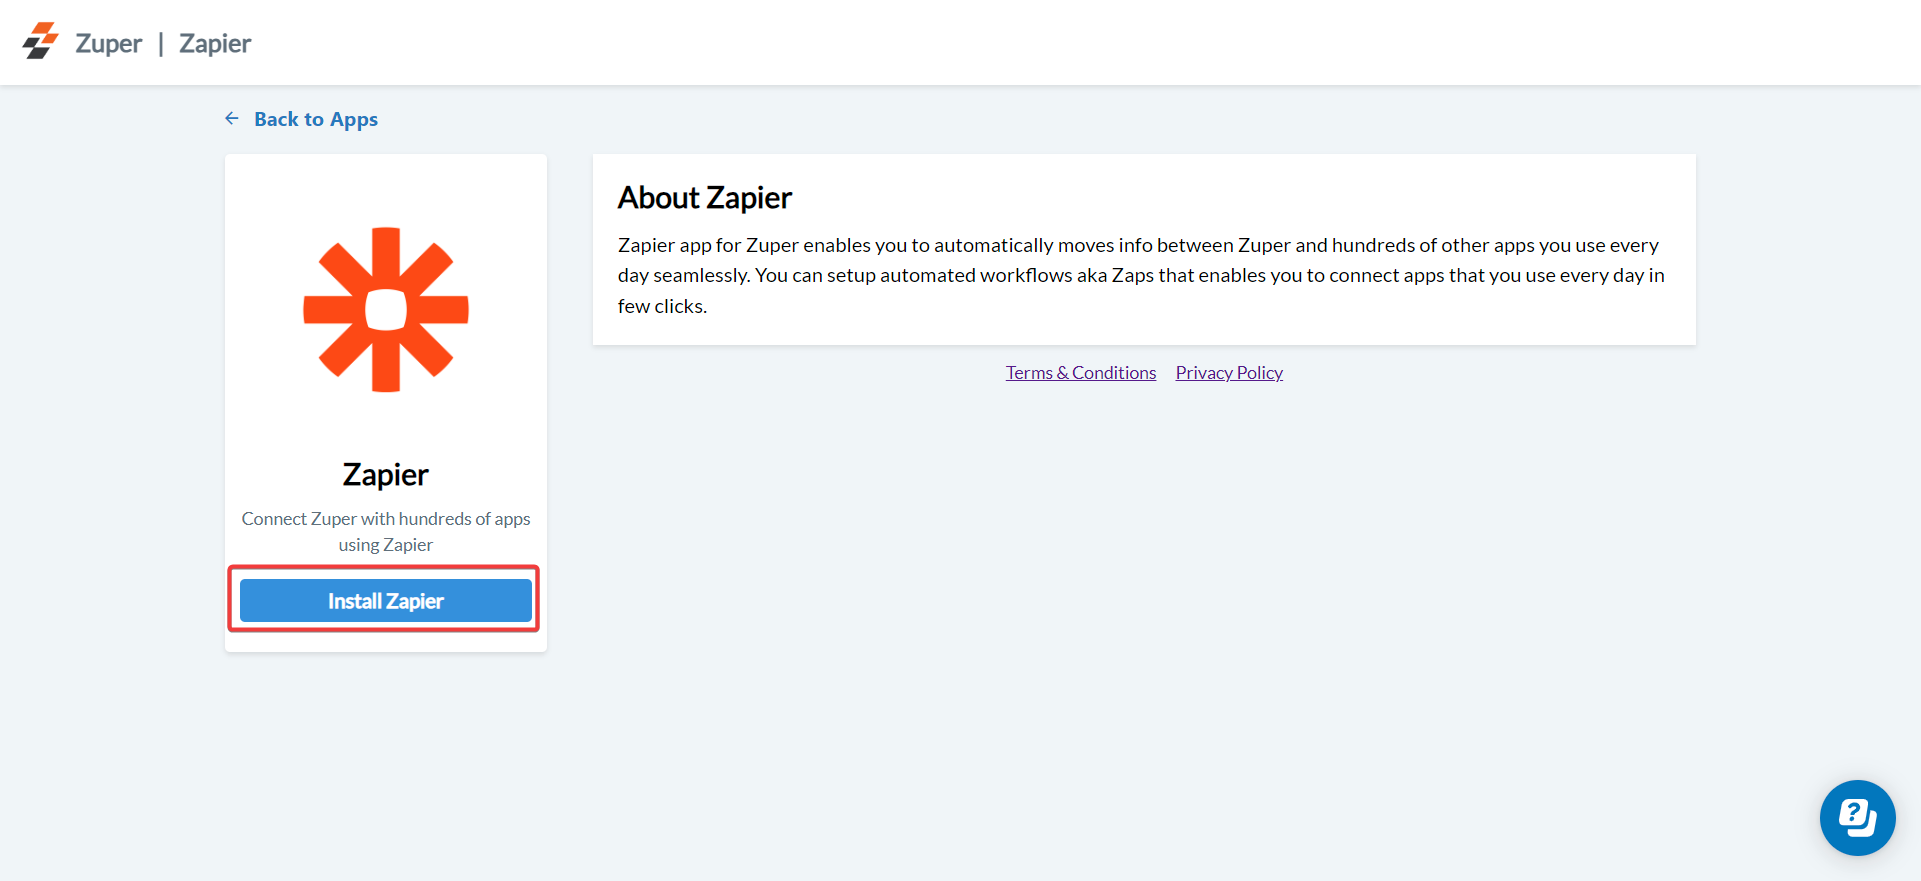
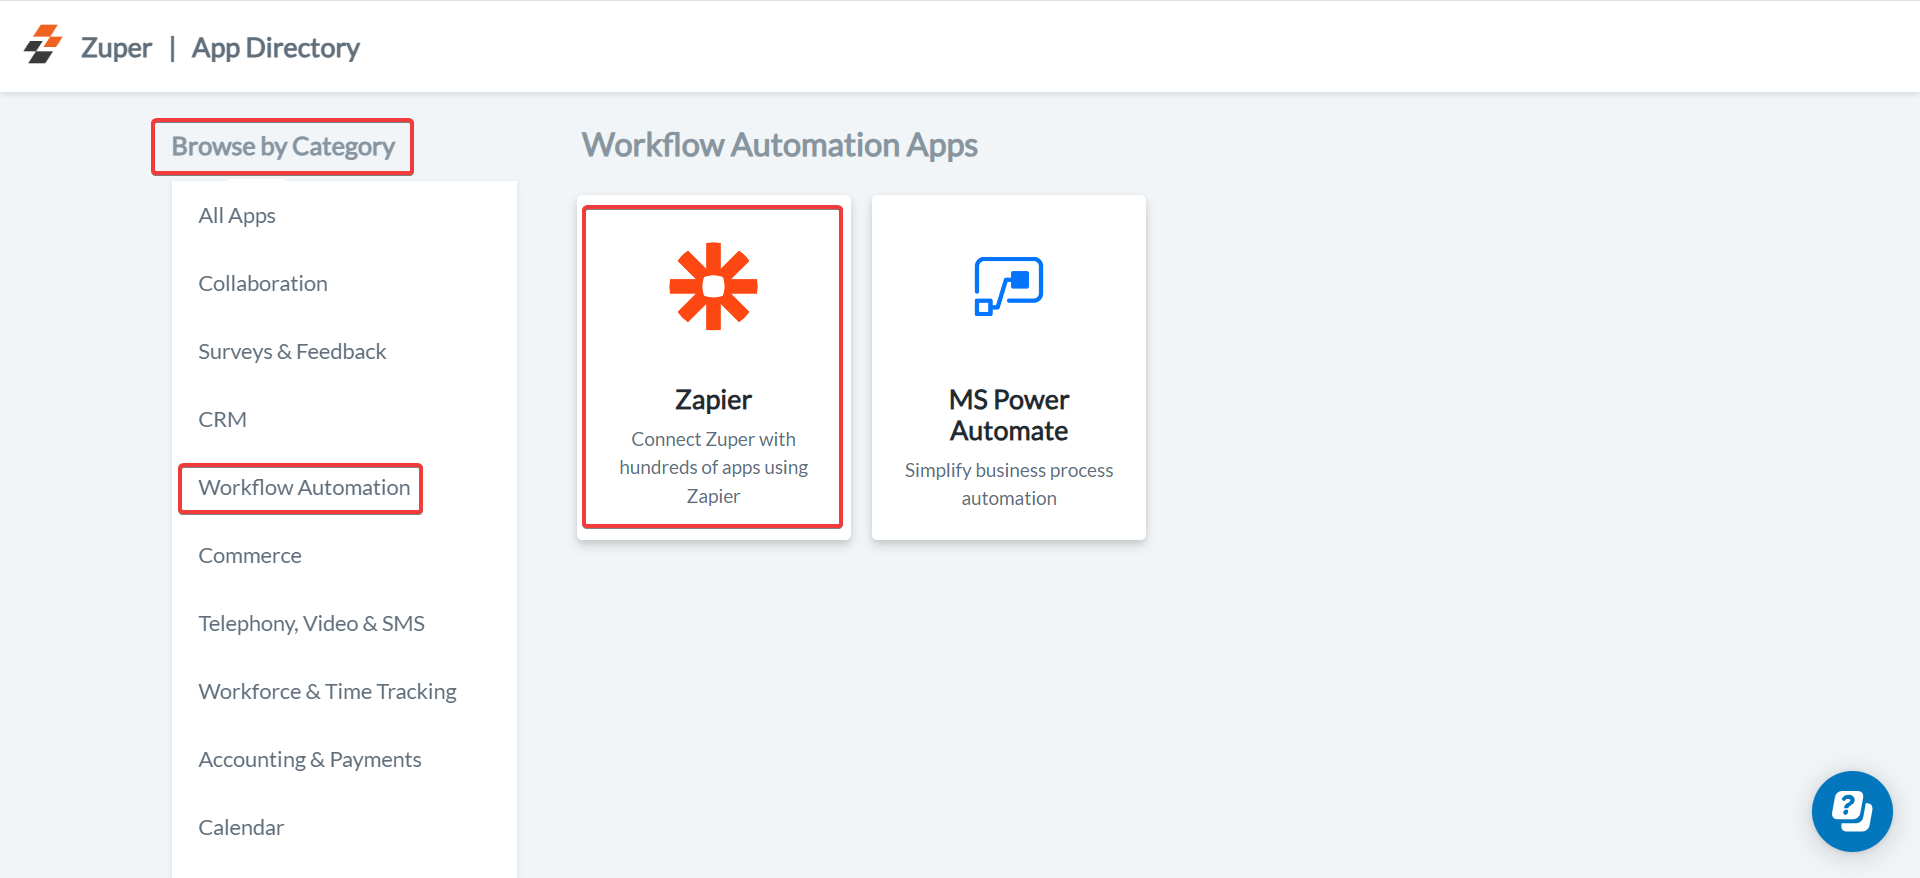
- Under the “Browse by Category,” select the “Workflow Automation” option and choose “Zapier.” Click Install Zapier.
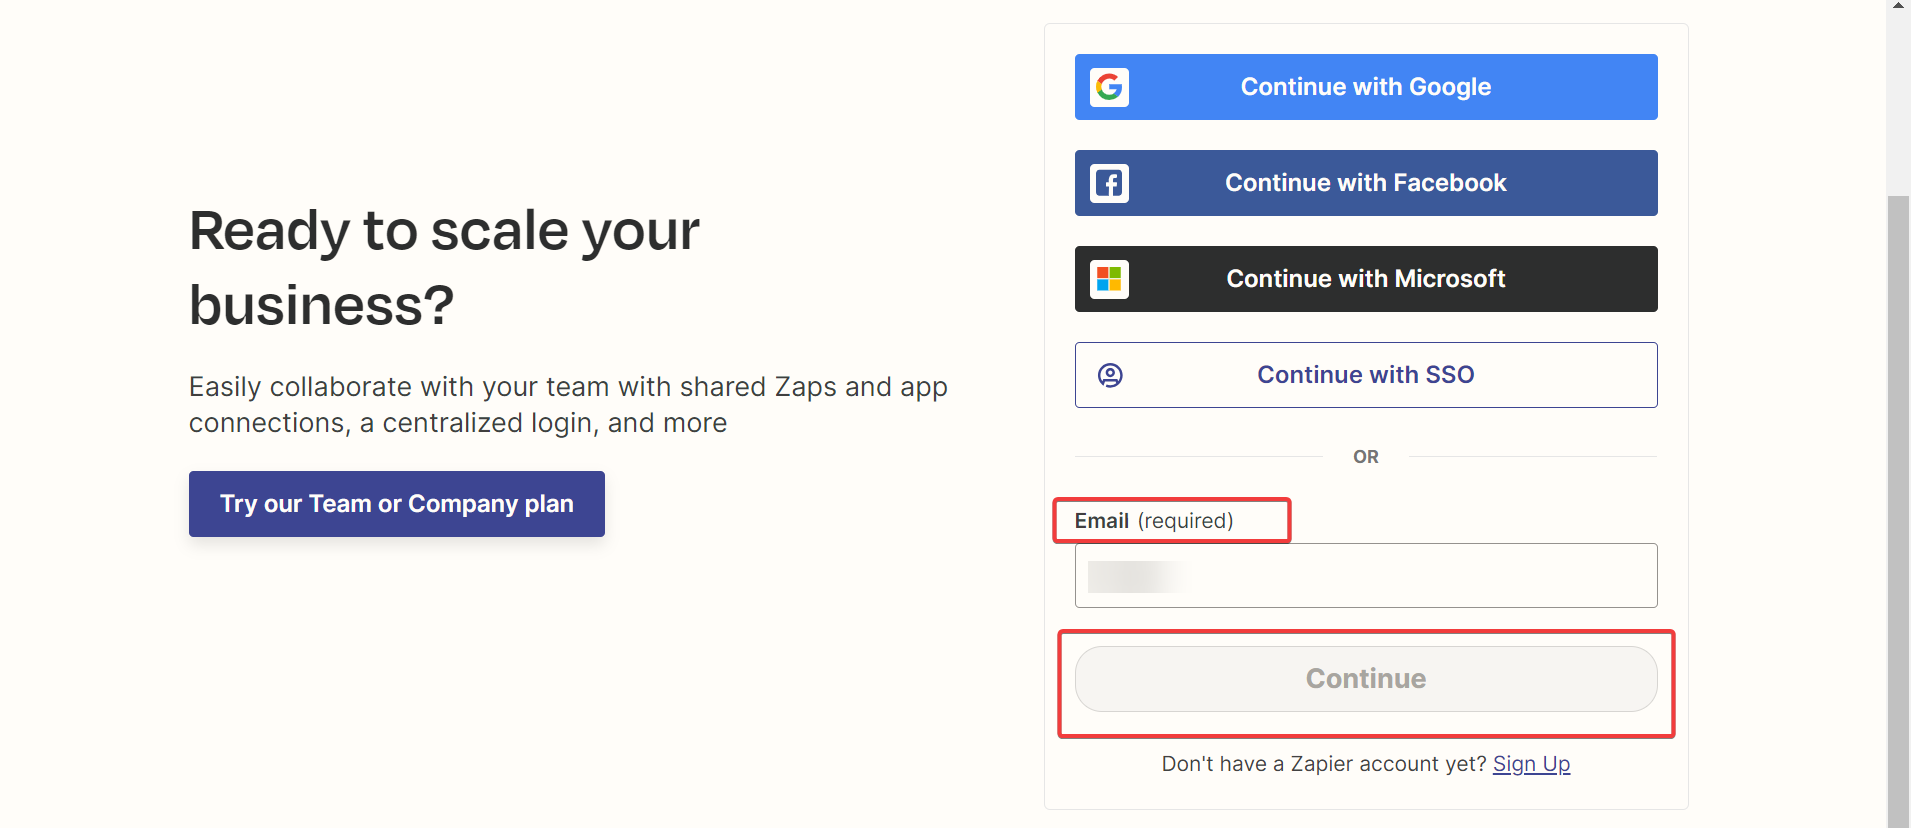
- You will be redirected to the Zapier login page. Enter your Zapier Email ID (Mandatory) and click Continue.
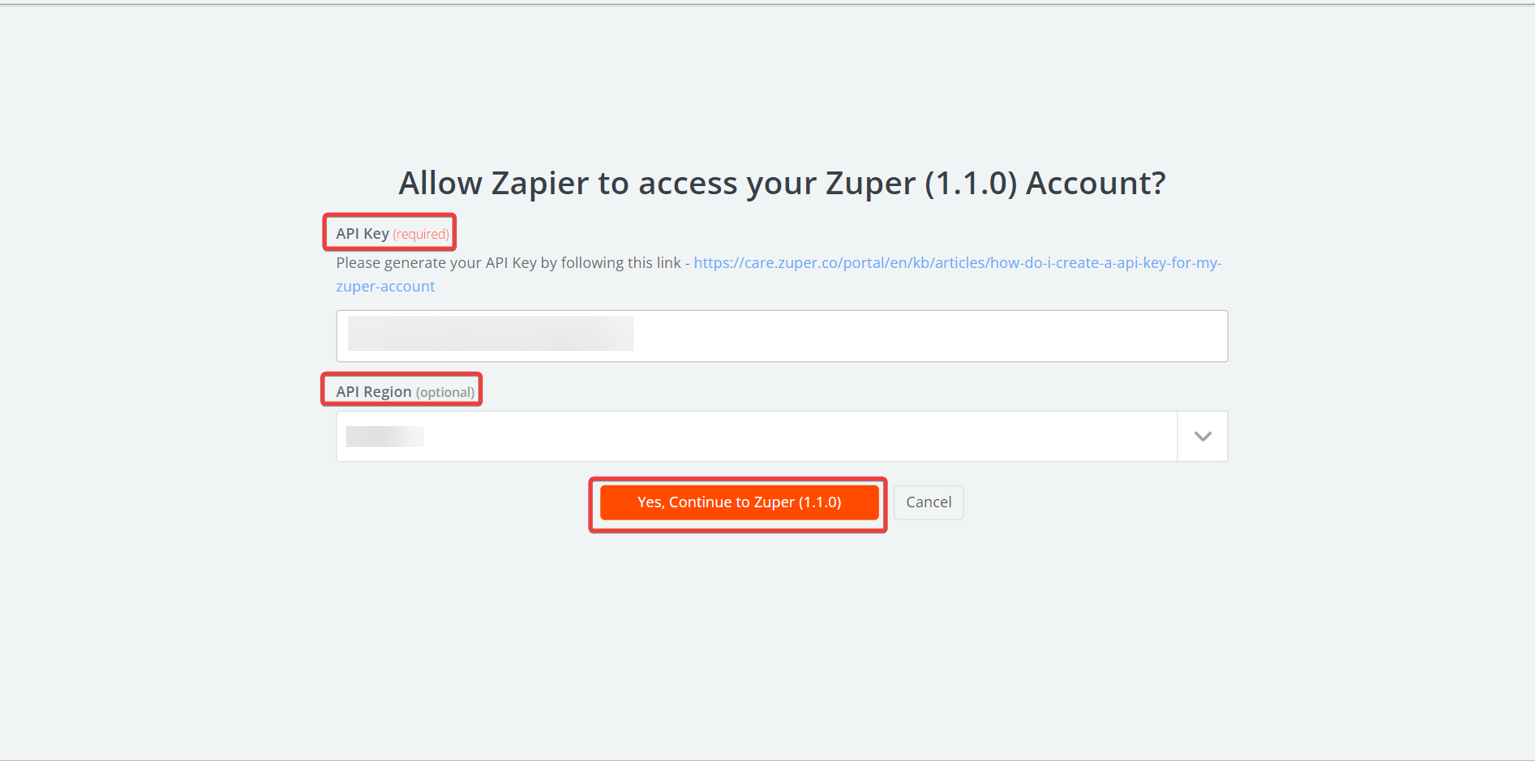
- Provide the following:
- API Key (Mandatory): Generate a Zuper API key. Refer to How to Create an API Key for Your Zuper Account for guidance.
- API Region (Optional): Specify the region for your Zuper account.
- Click Yes, Continue to Zuper.
How the Zuper-Zapier Integration Works
Zapier uses Zaps, or automated workflows triggered by events in one app to perform actions in another. Below are examples of common Zaps for Zuper modules. These can be combined or customized for complex workflows.i. Create an Organization
- In Zapier, create a new Zap and select Zuper as the action app.
- Choose Create a New Organization as the event and click Continue.

-
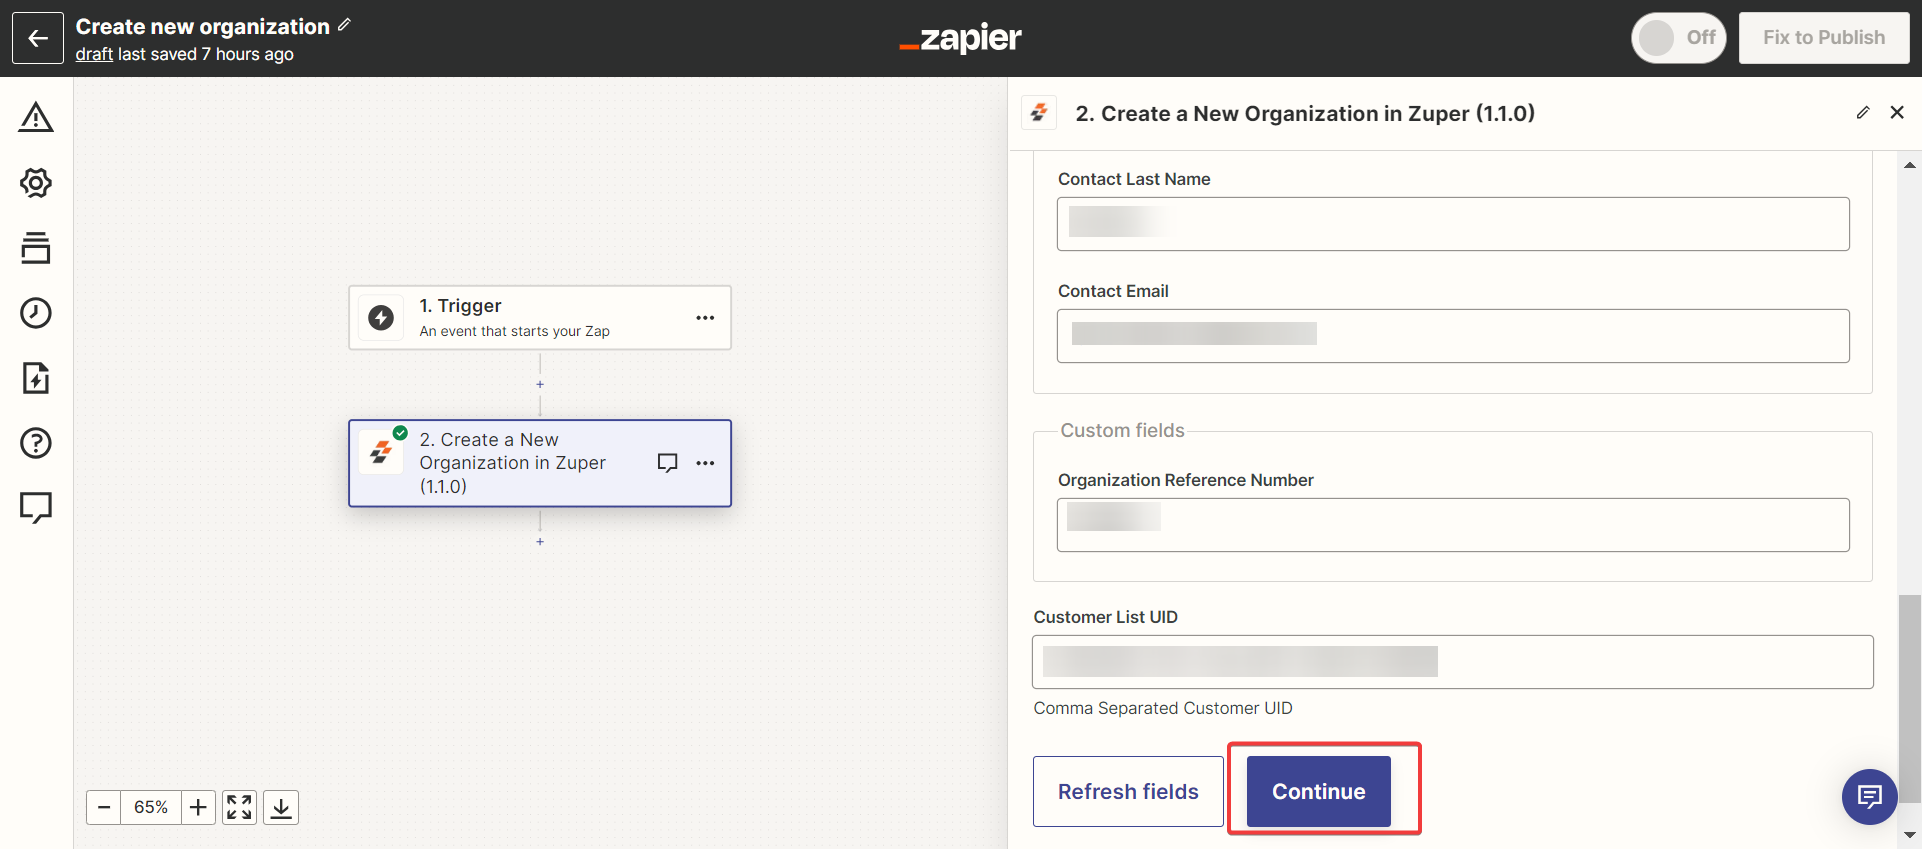
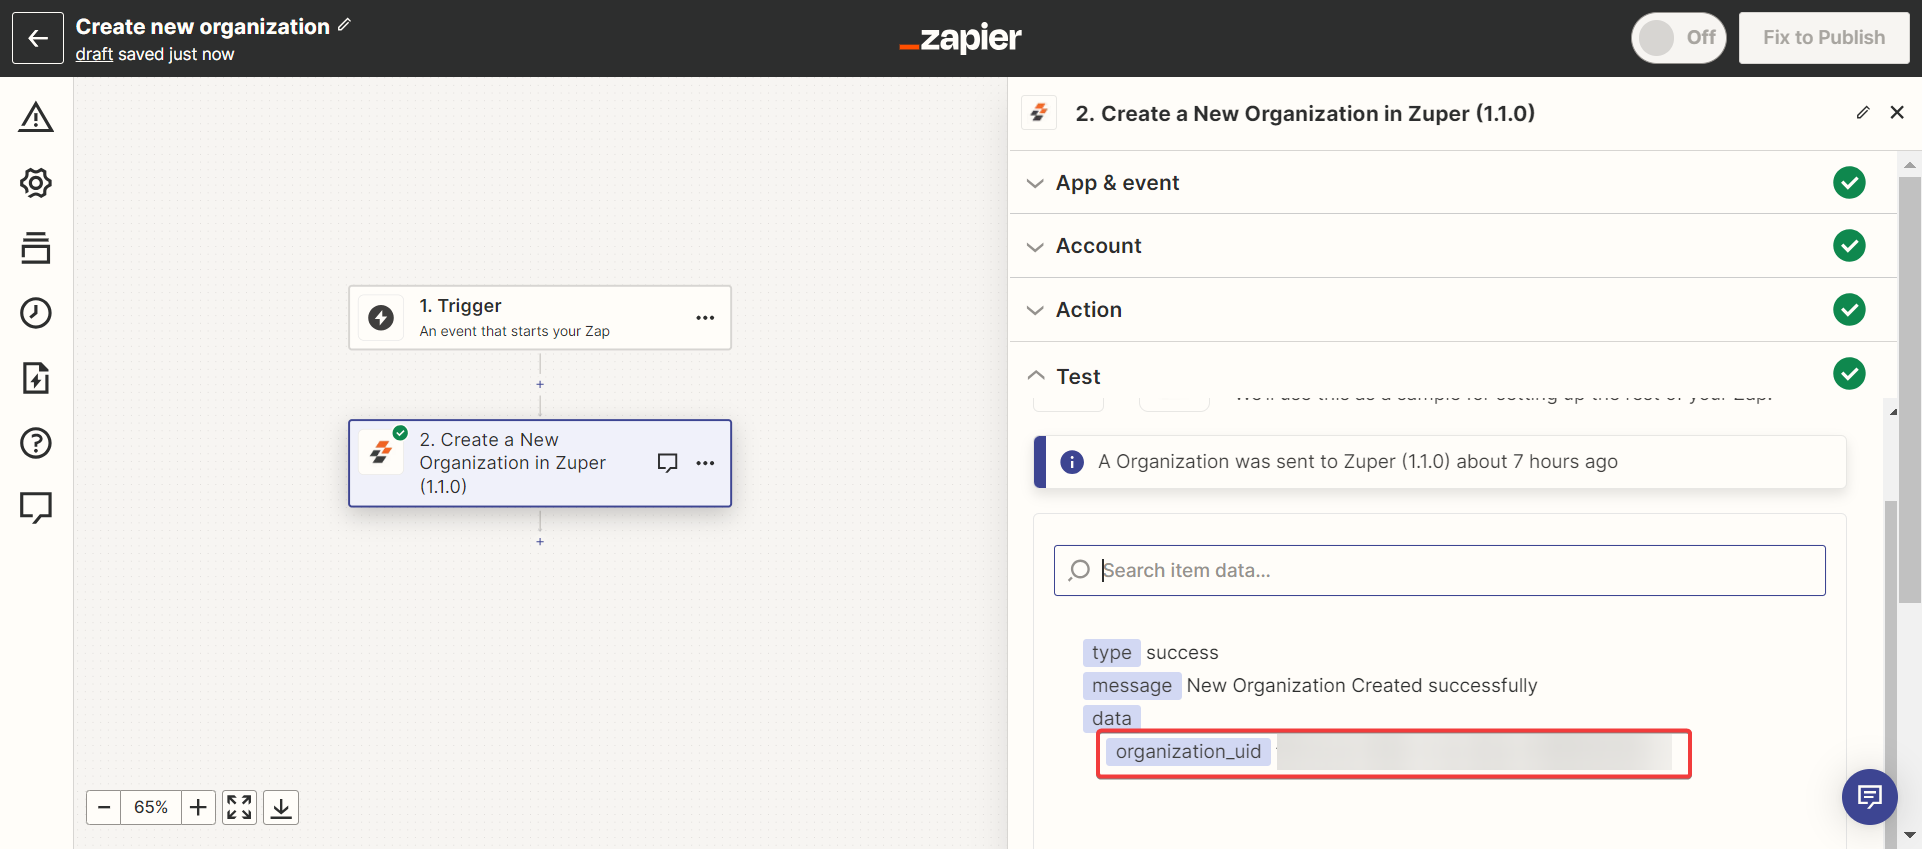
Choose the Event. Fill in the Action, Account, and create an Organization, then validate the flow by
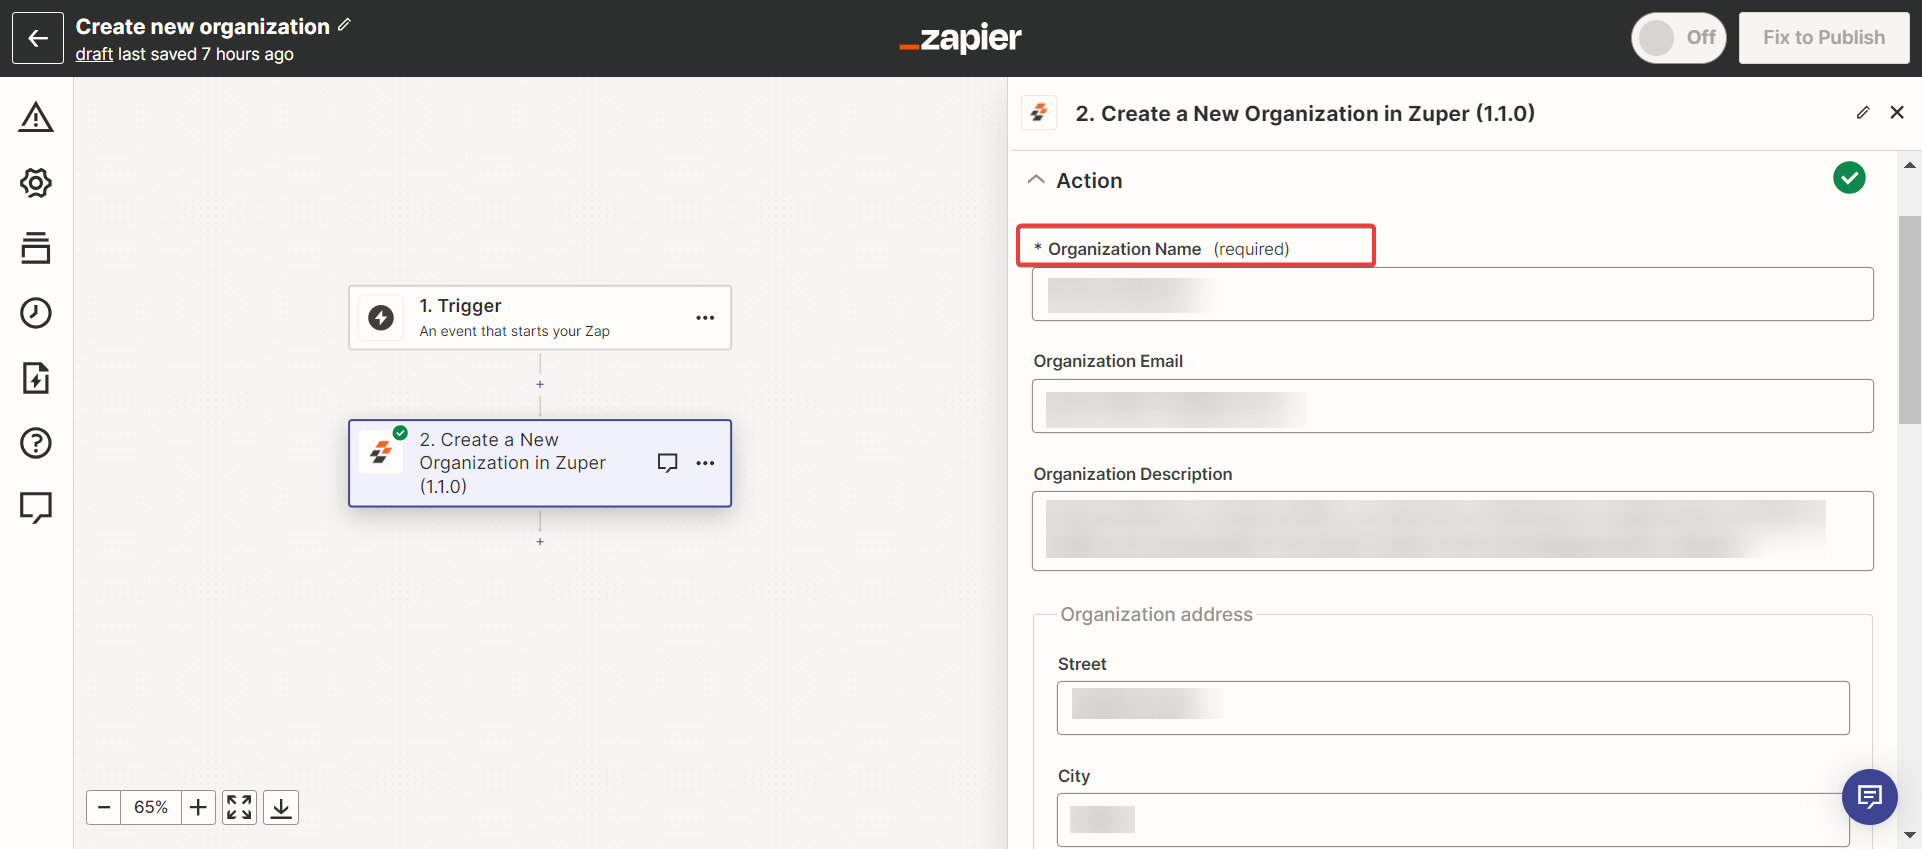
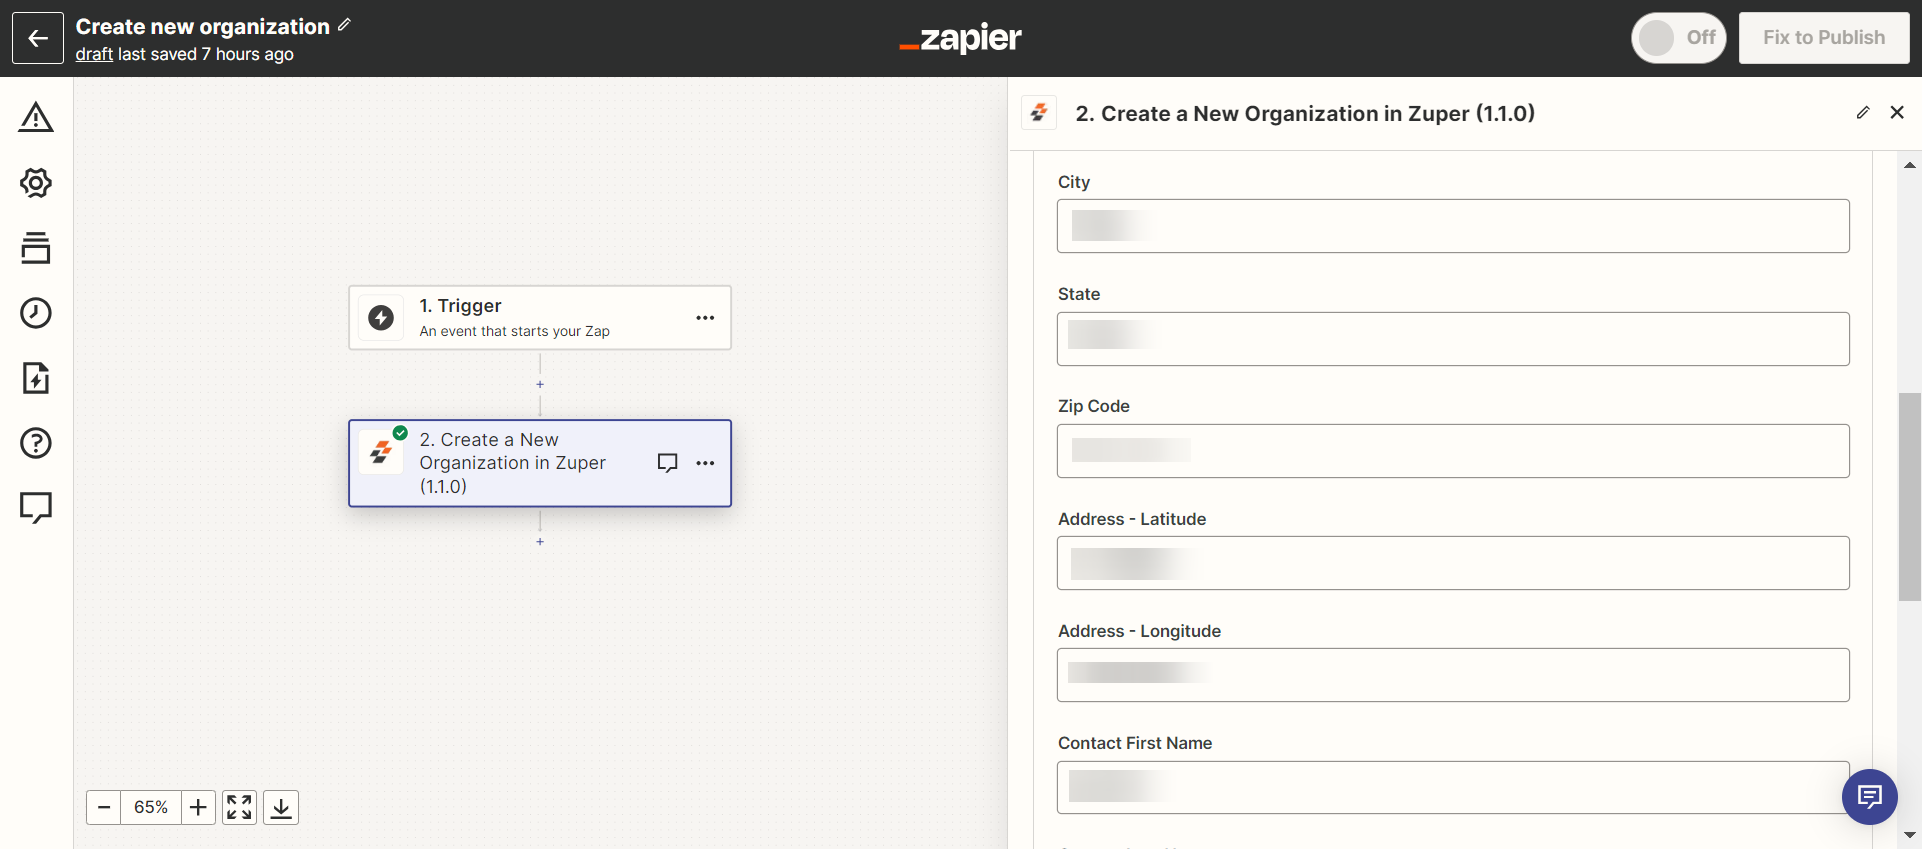
Enter the Organization Name (Mandatory) and fill in the optional fields.
1) Event - For creating the organization, use “Create a New Organization” from the drop-down list and click the “Continue” button. (As we are going to choose the Organization’s UID, in this case, we are choosing an Organization).
2) Account - Choose the current Zuper account that you use to act.
3) Action - In the “Choose Required Field” section, you can choose the organization, enter the organization’s name, and enter the active or inactive status of the organization.
Note: Link each organization to one customer and one property only.
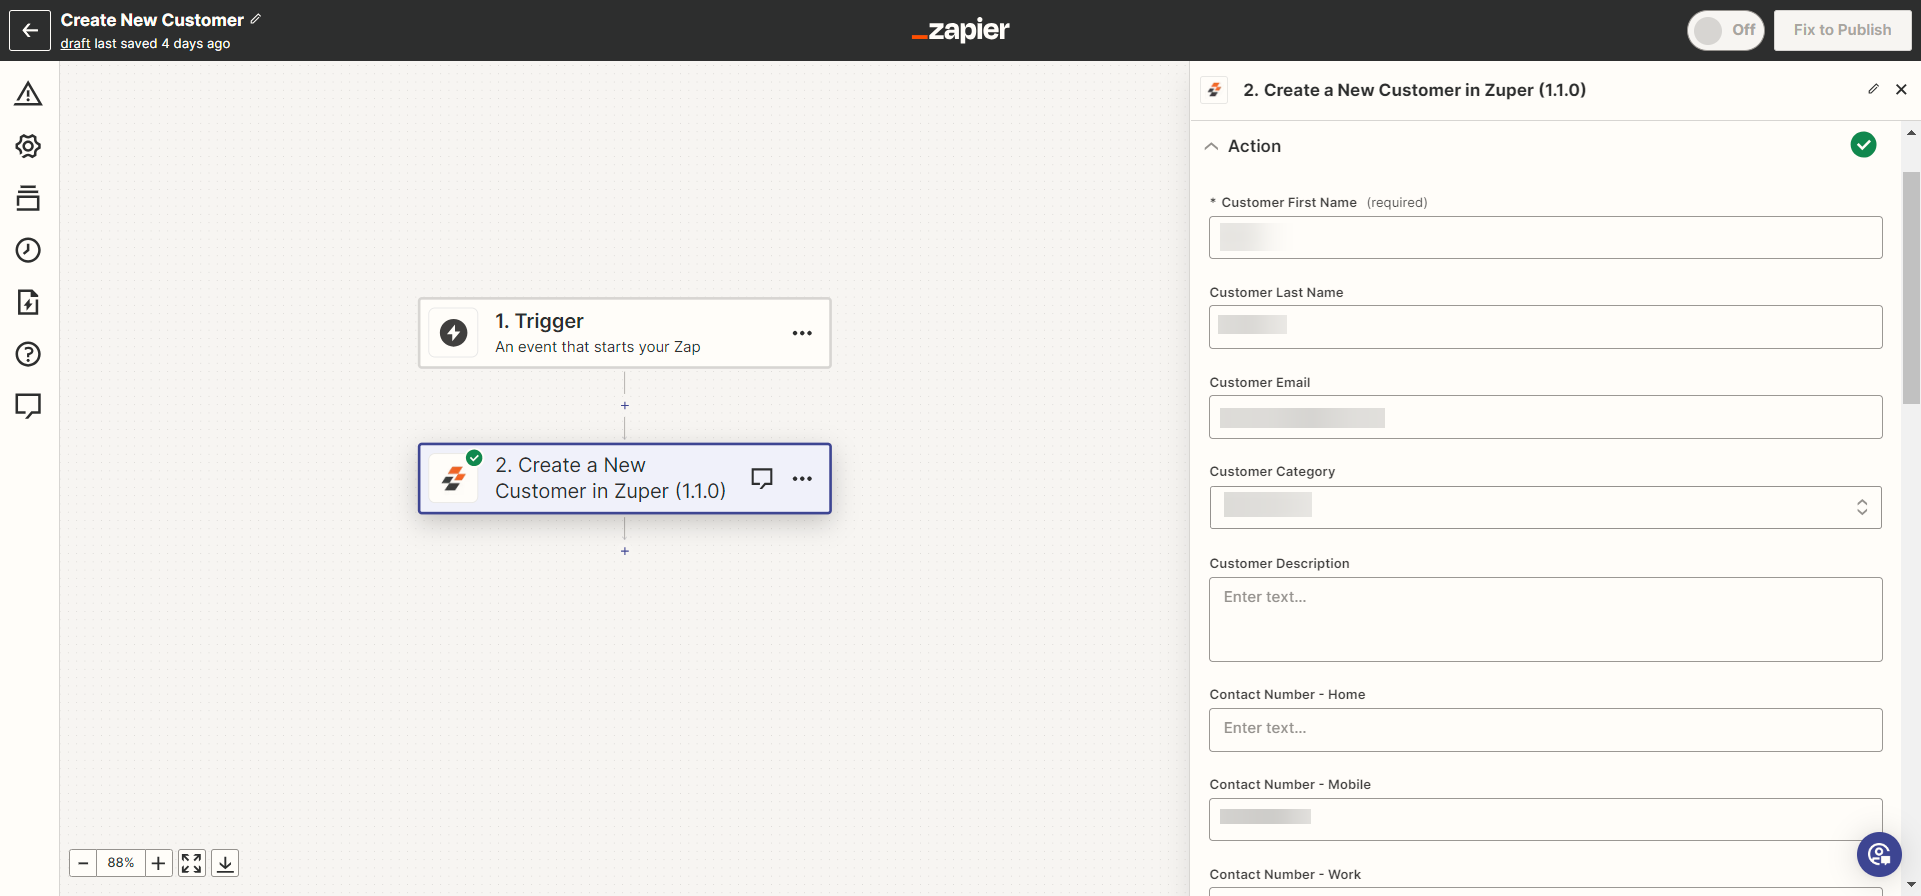
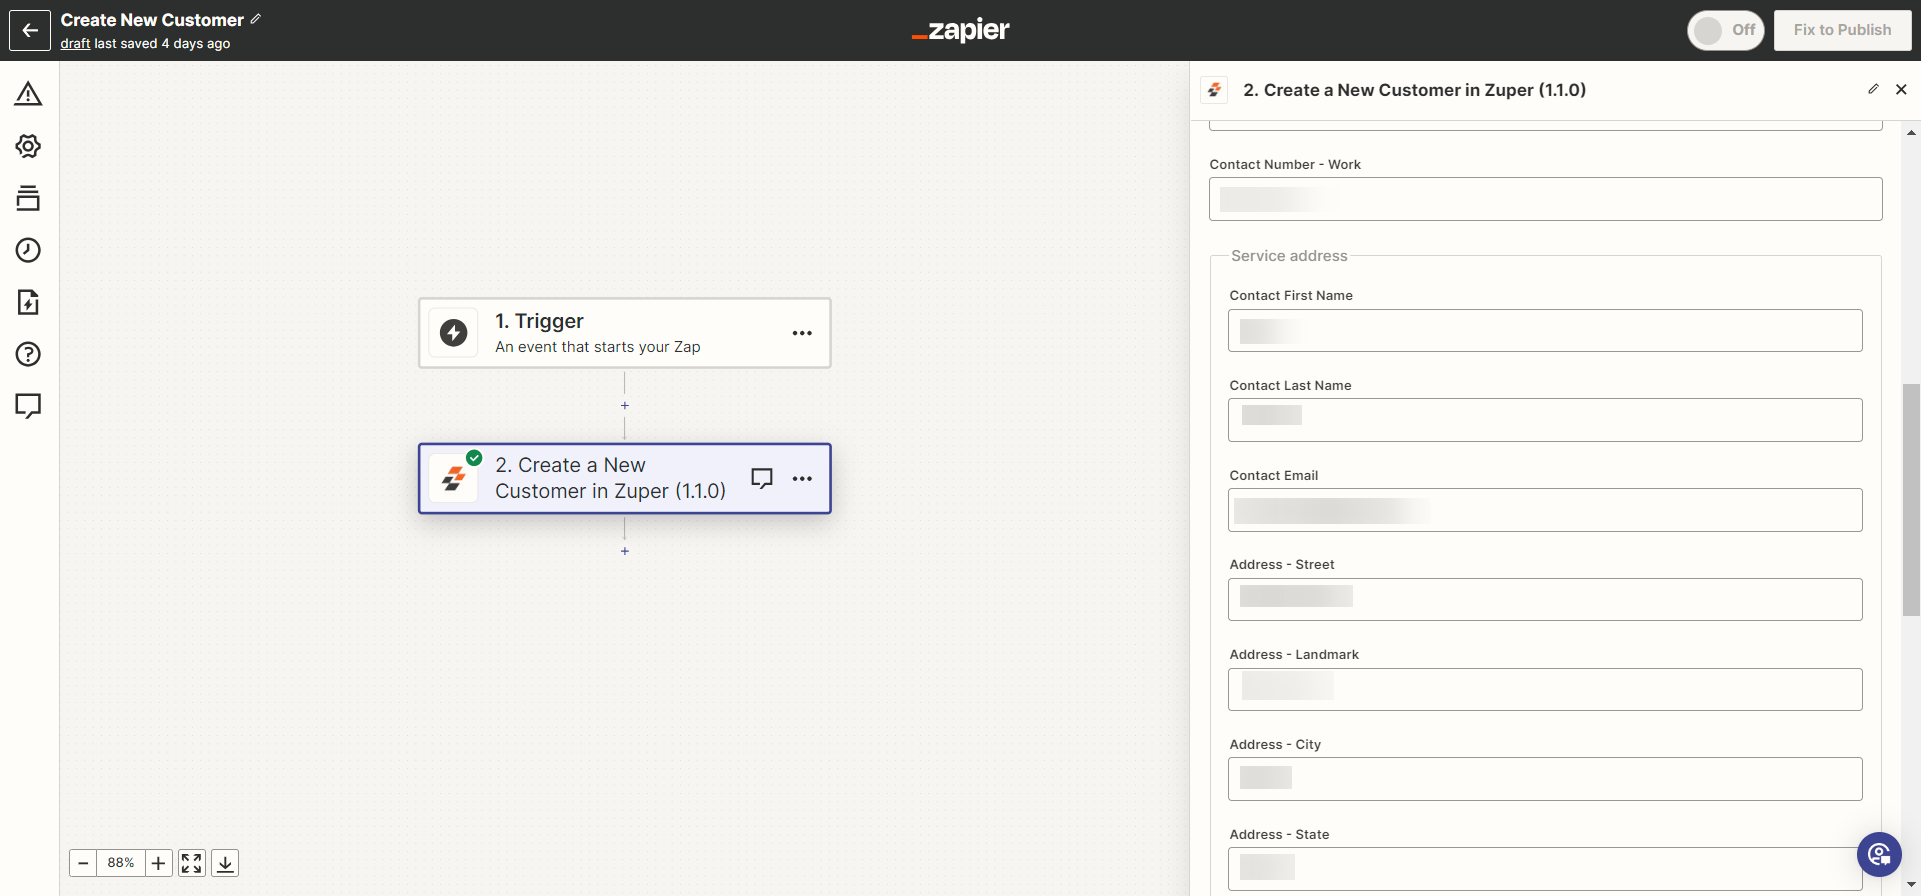
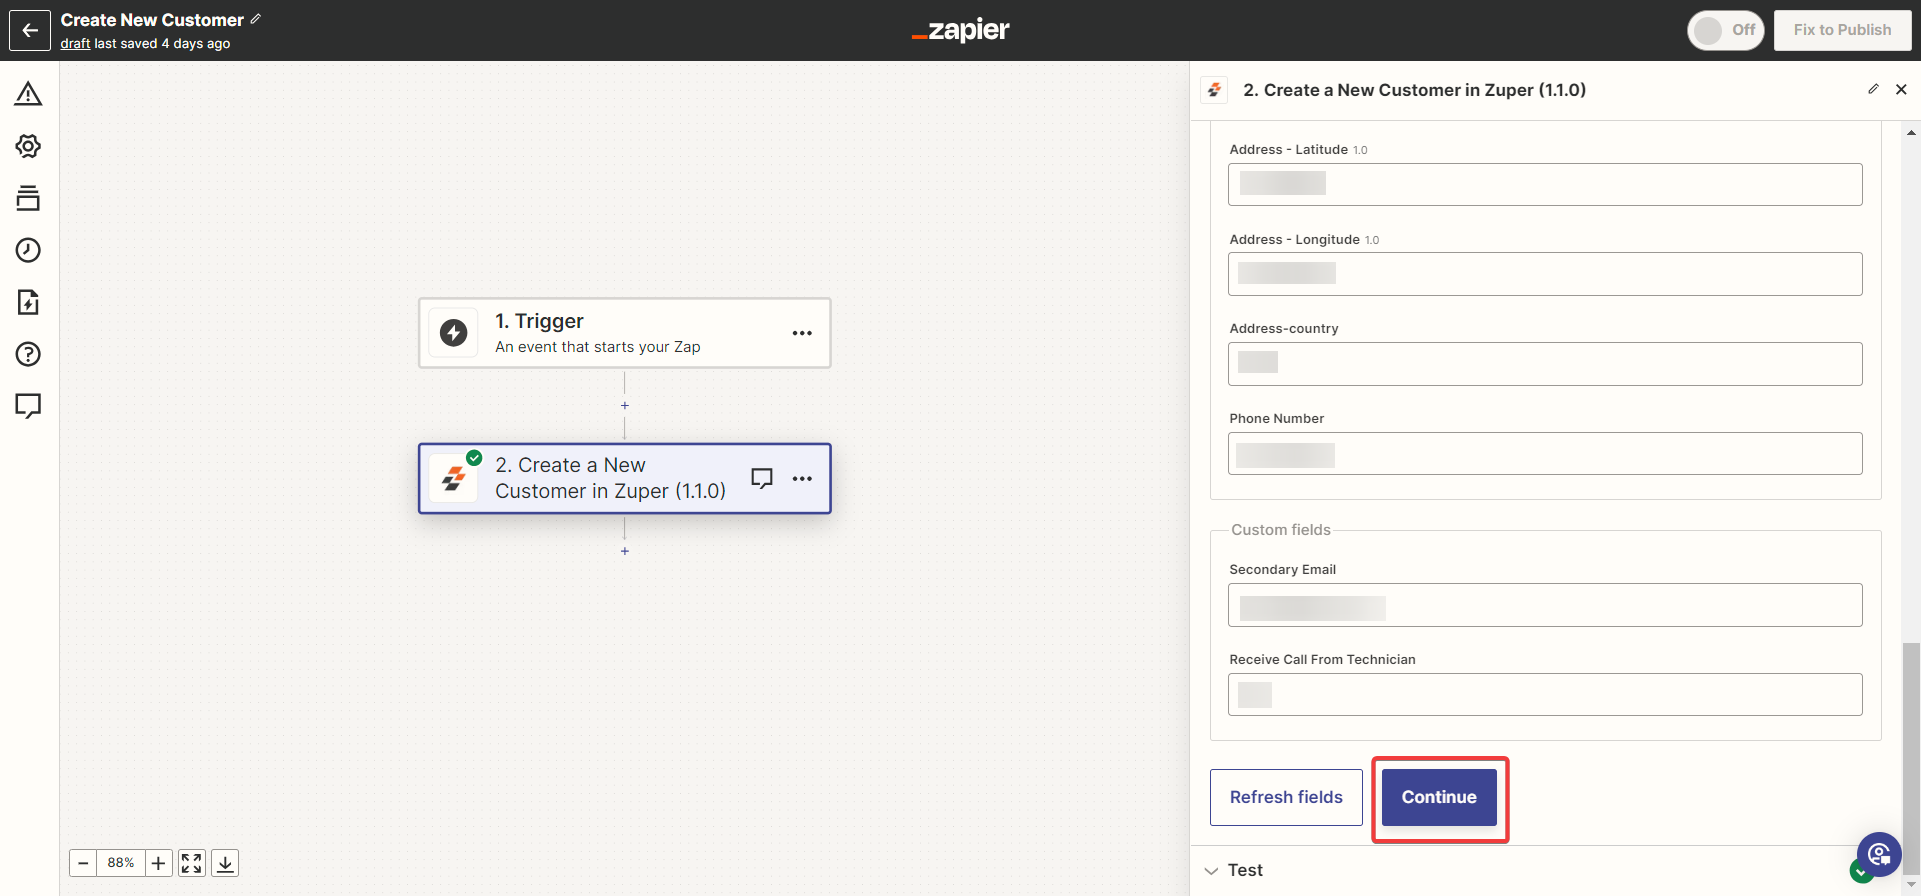
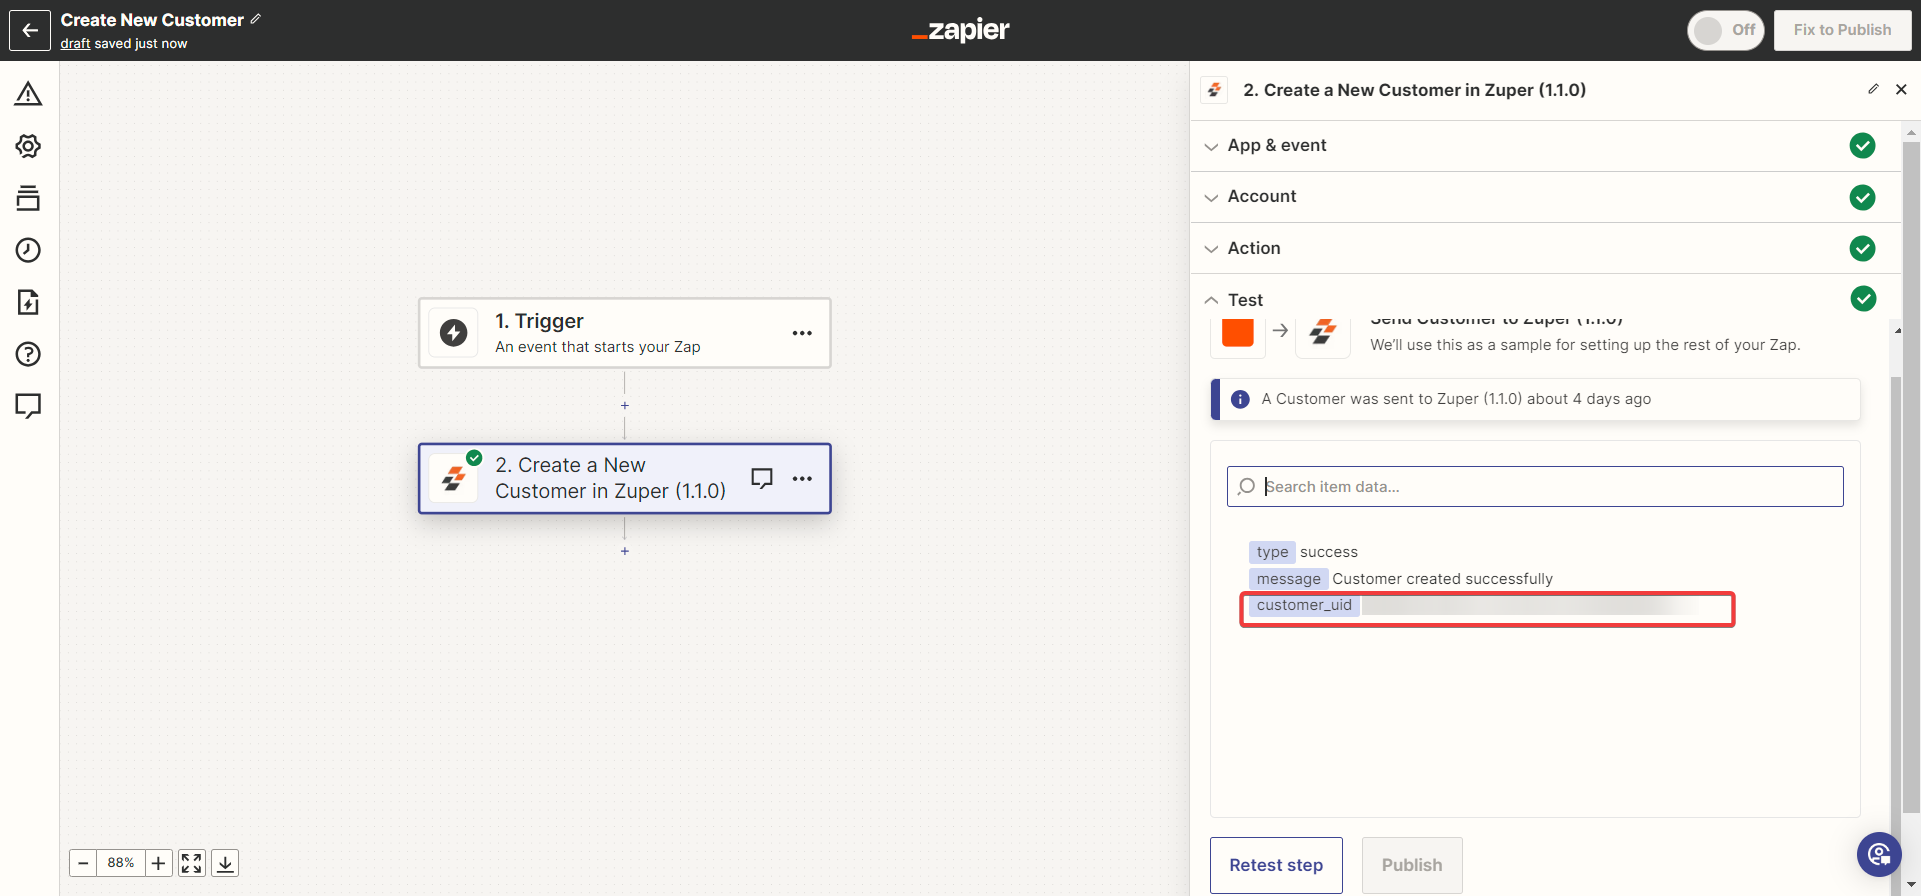
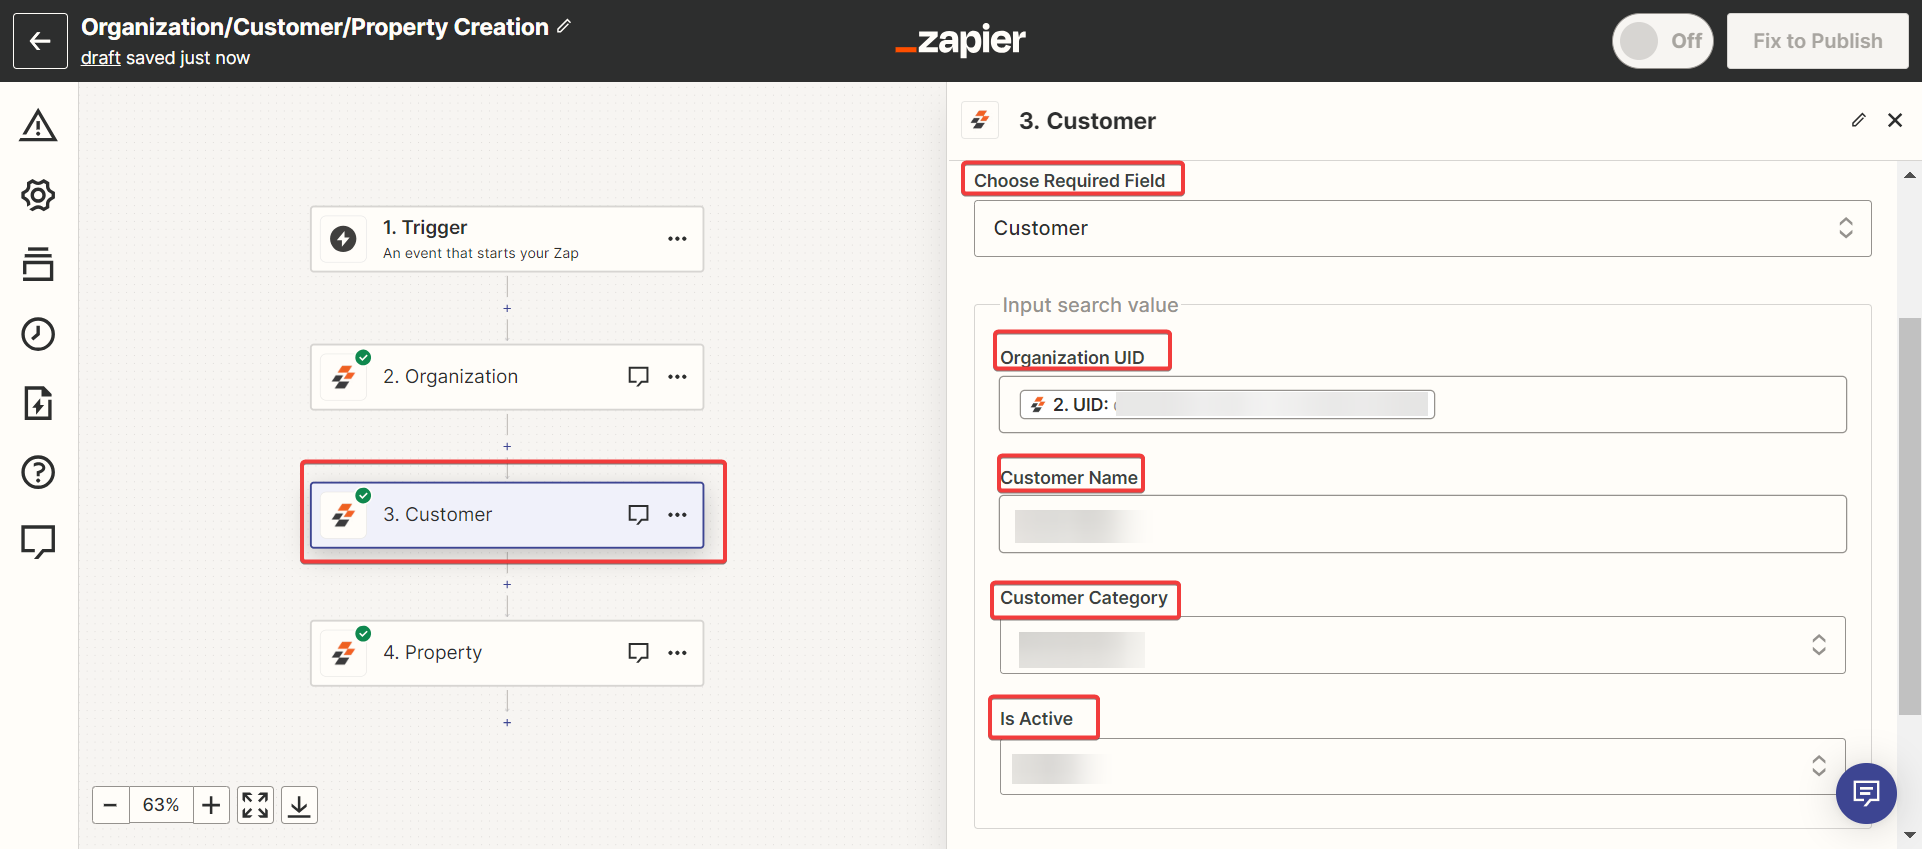
ii. Create a Customer
- Enter the “Event name” and click the “Continue” button. Choose the Event. Fill in the Action, Account, and create a Customer, then validate the flow by
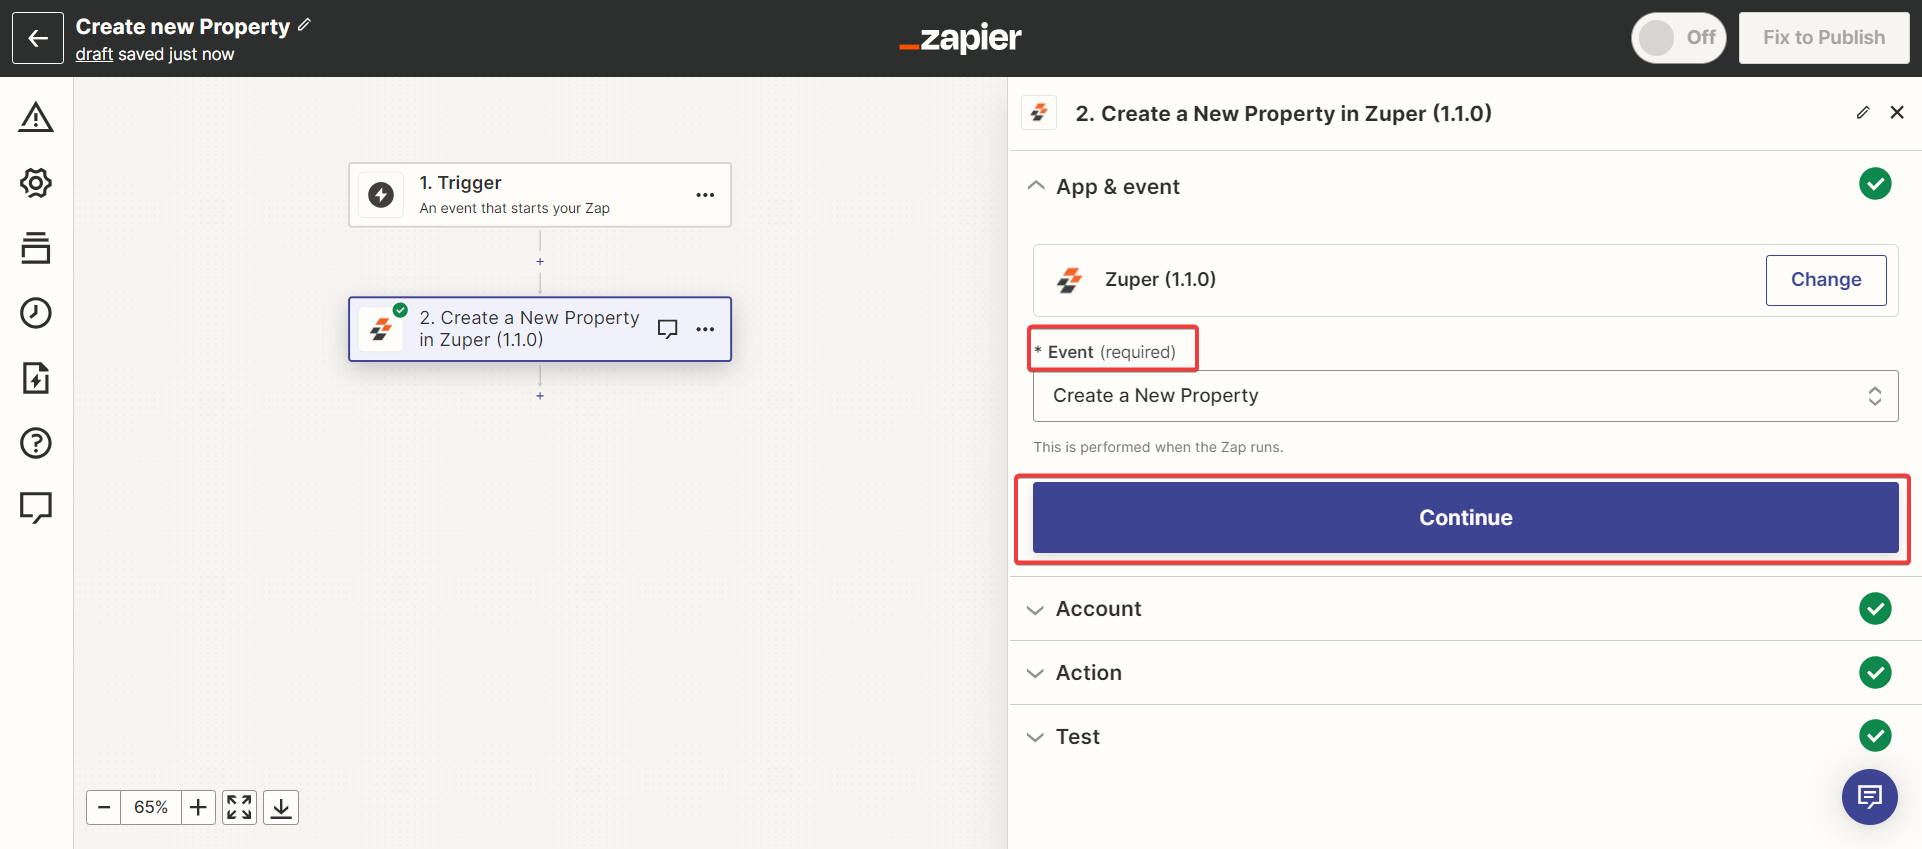
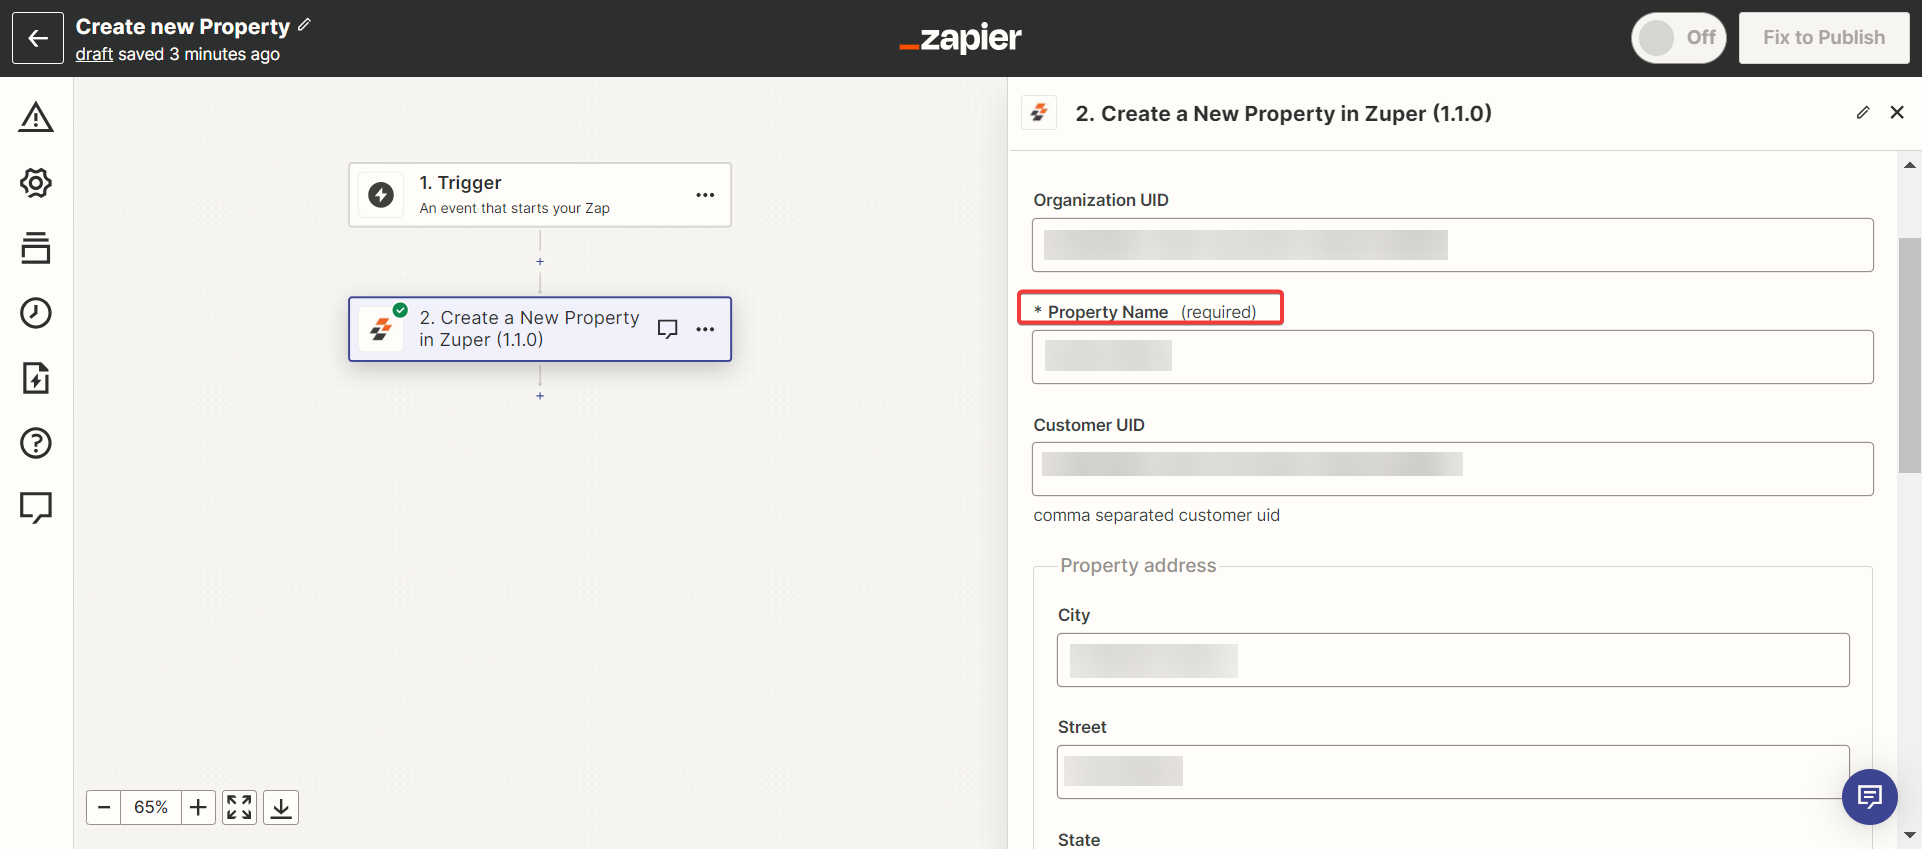
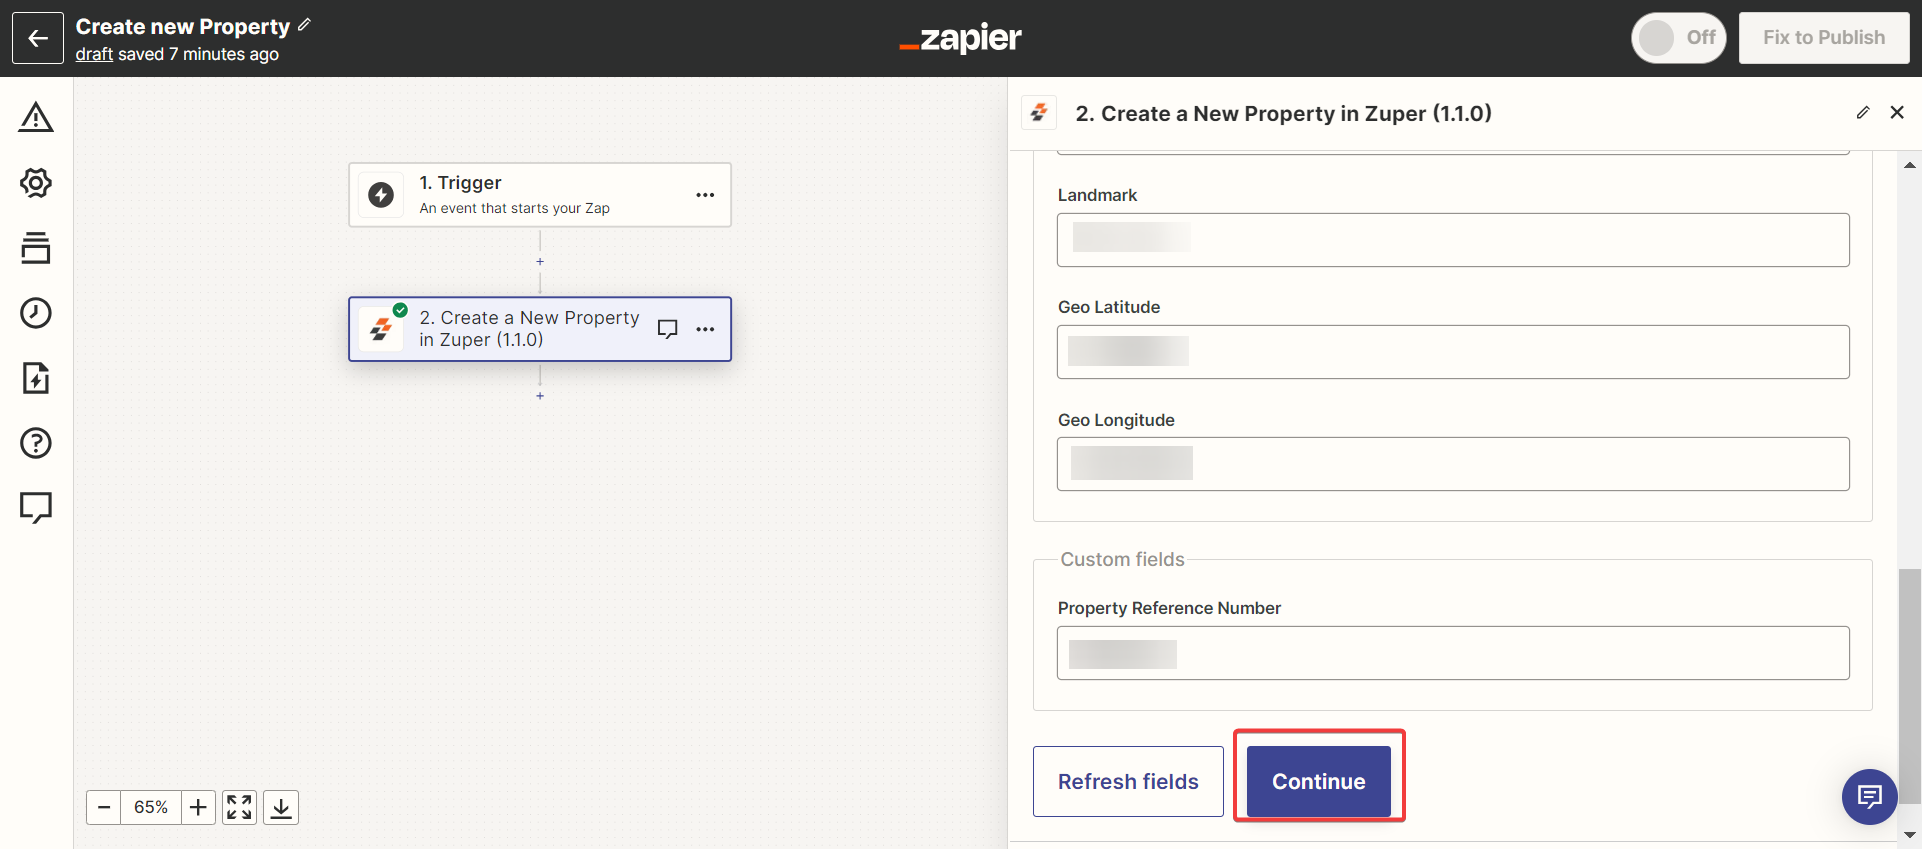
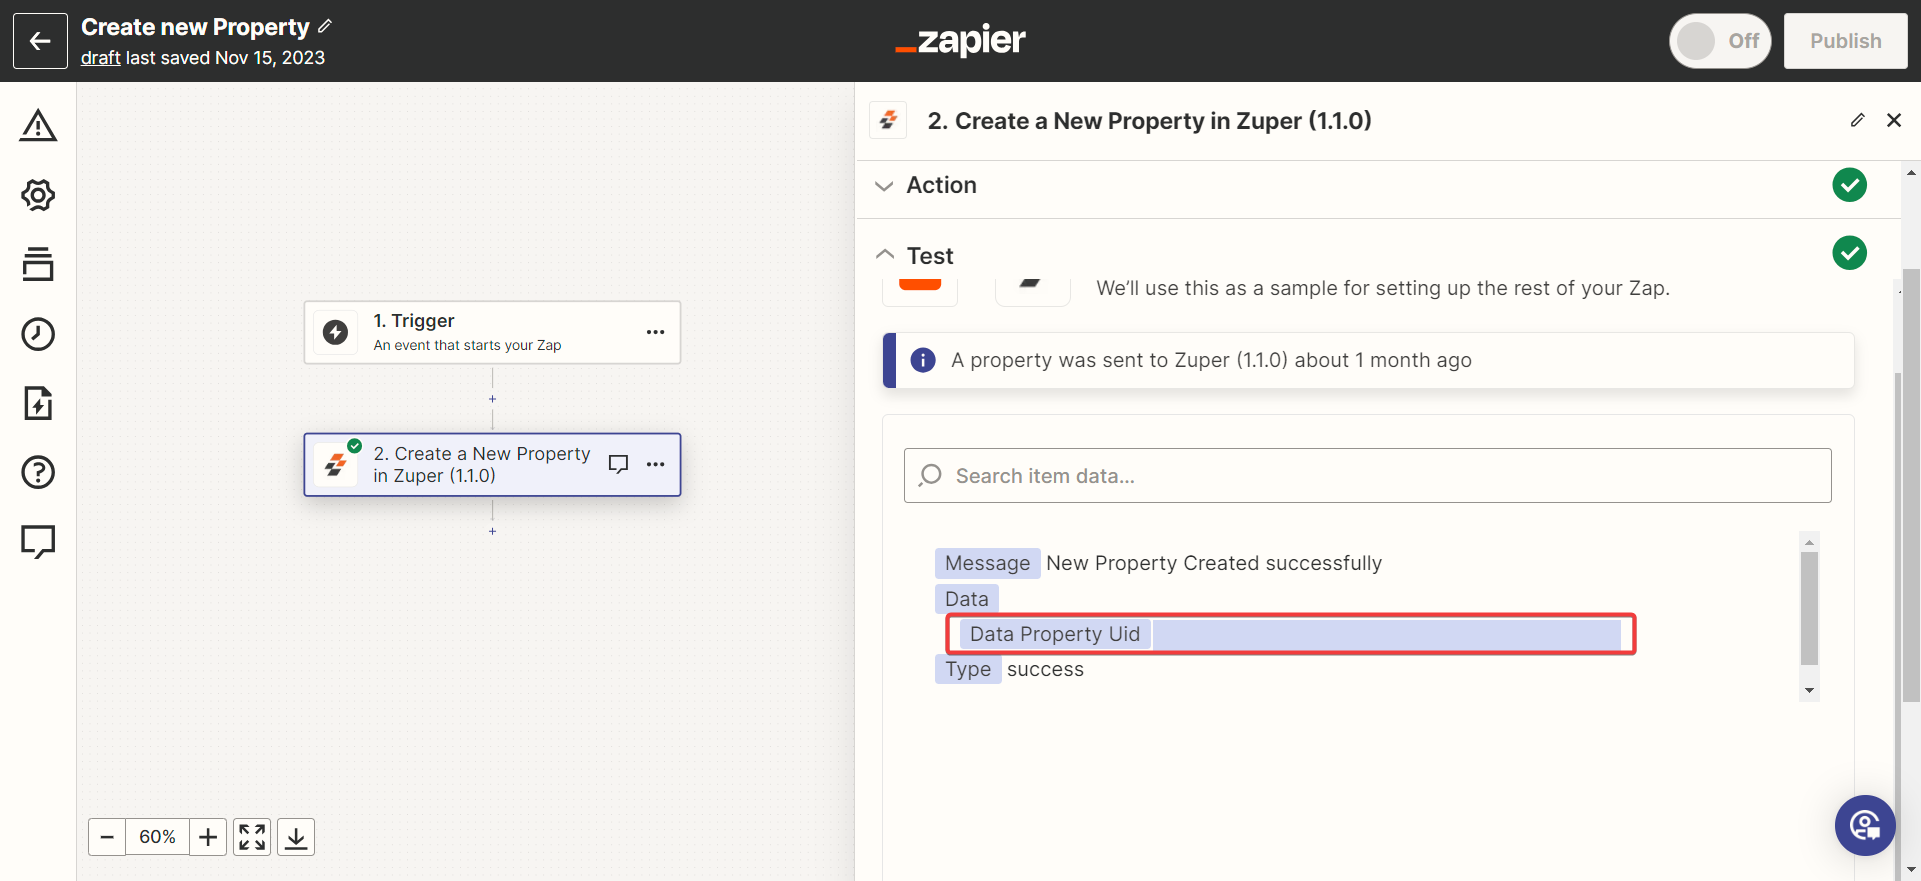
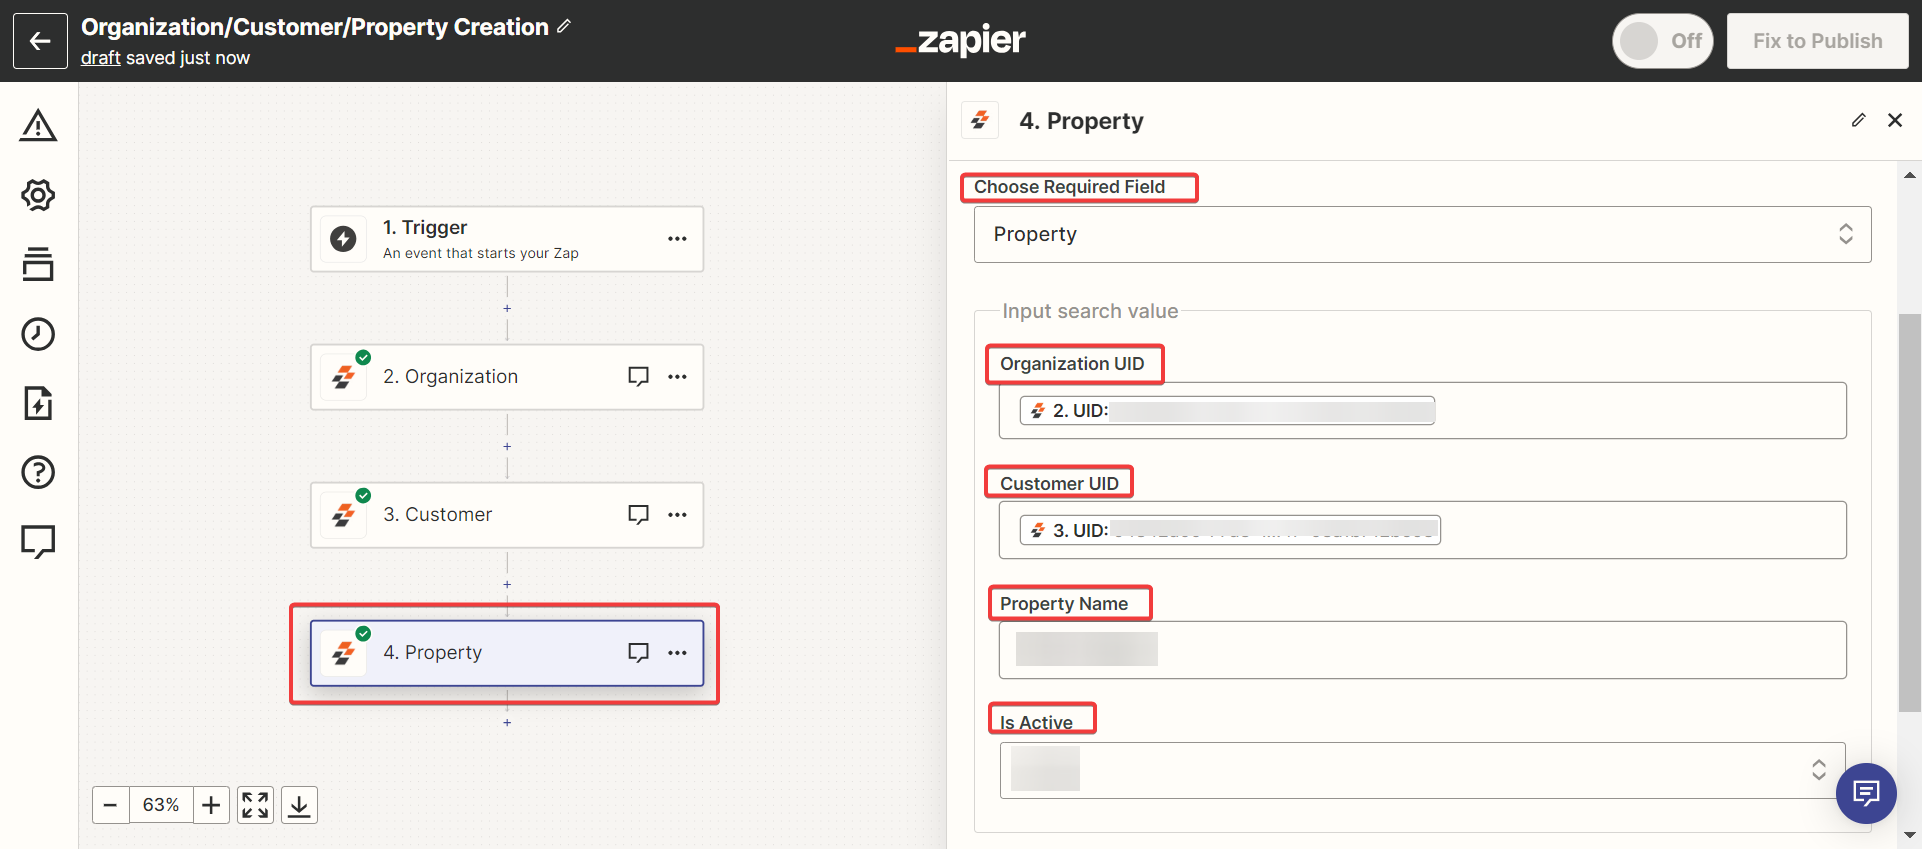
iii. Create a Property
- Enter the “Event name” and click the “Continue” button. Choose the Event. Fill in the Action, Account and create a Property, then validate the flow by
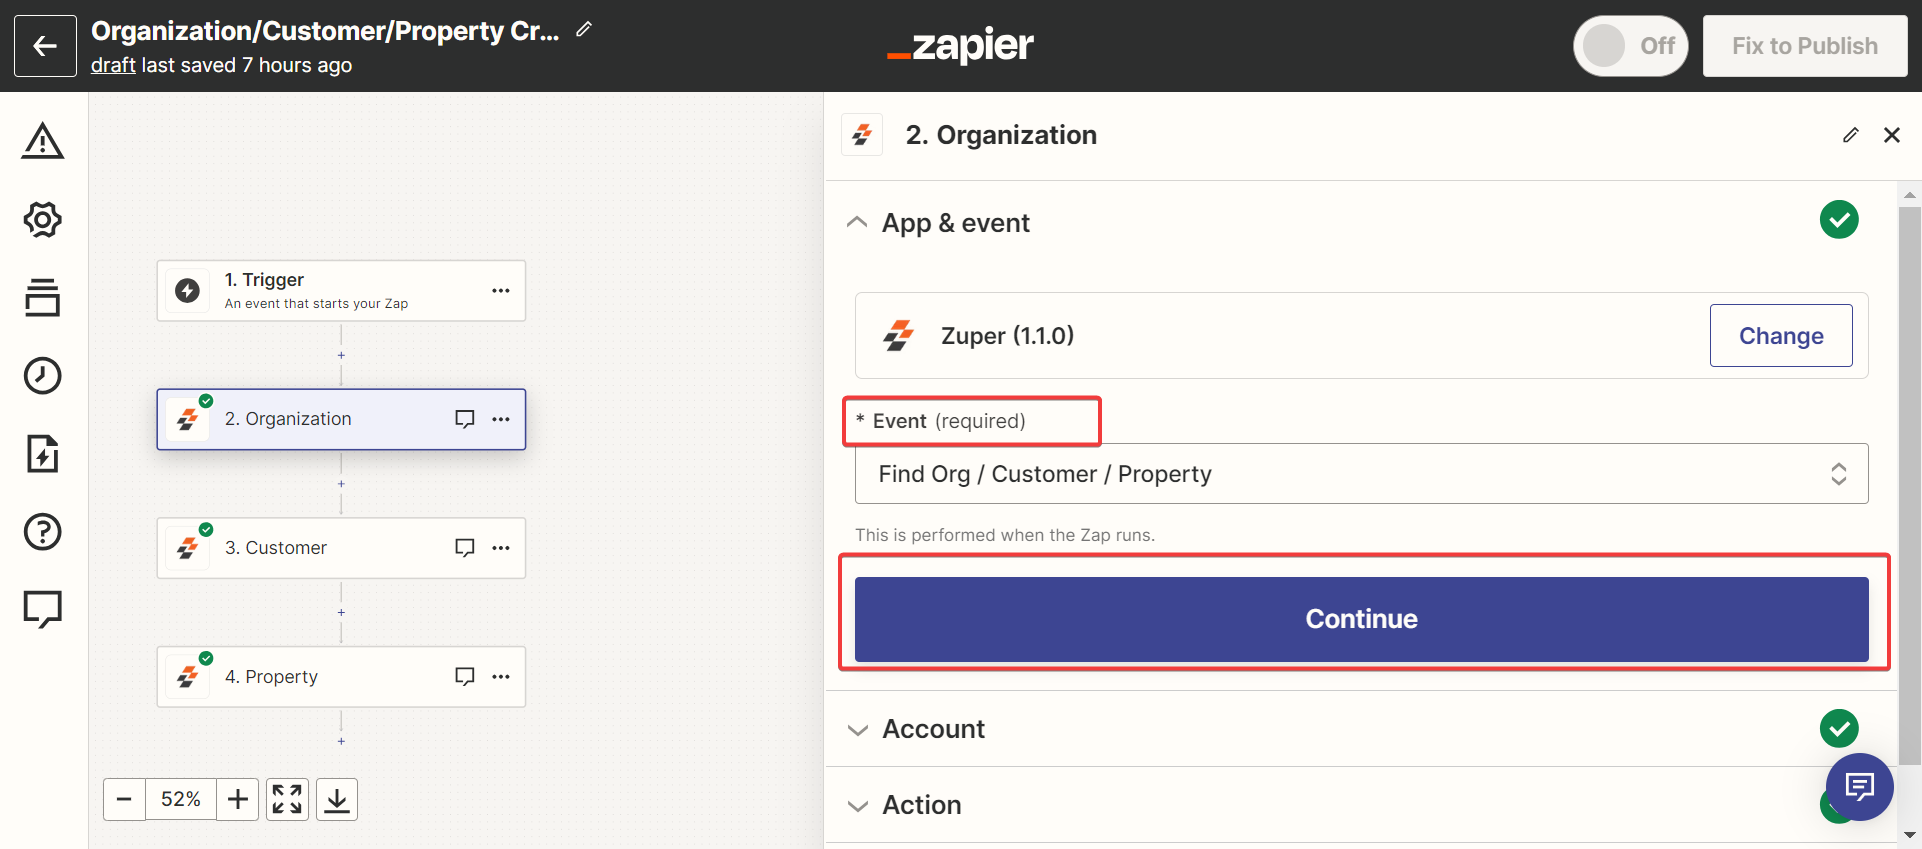
iv. Find Organization/Customer/Property
- The Find Organization, Customer, or Property Zap is used when creating a Job, Invoice, Quote, or Asset.
- This Zap is a one-stop solution for finding and selecting the exact organization/customer/property while using it in other modules.
- Select the “Organization” and create the new action.

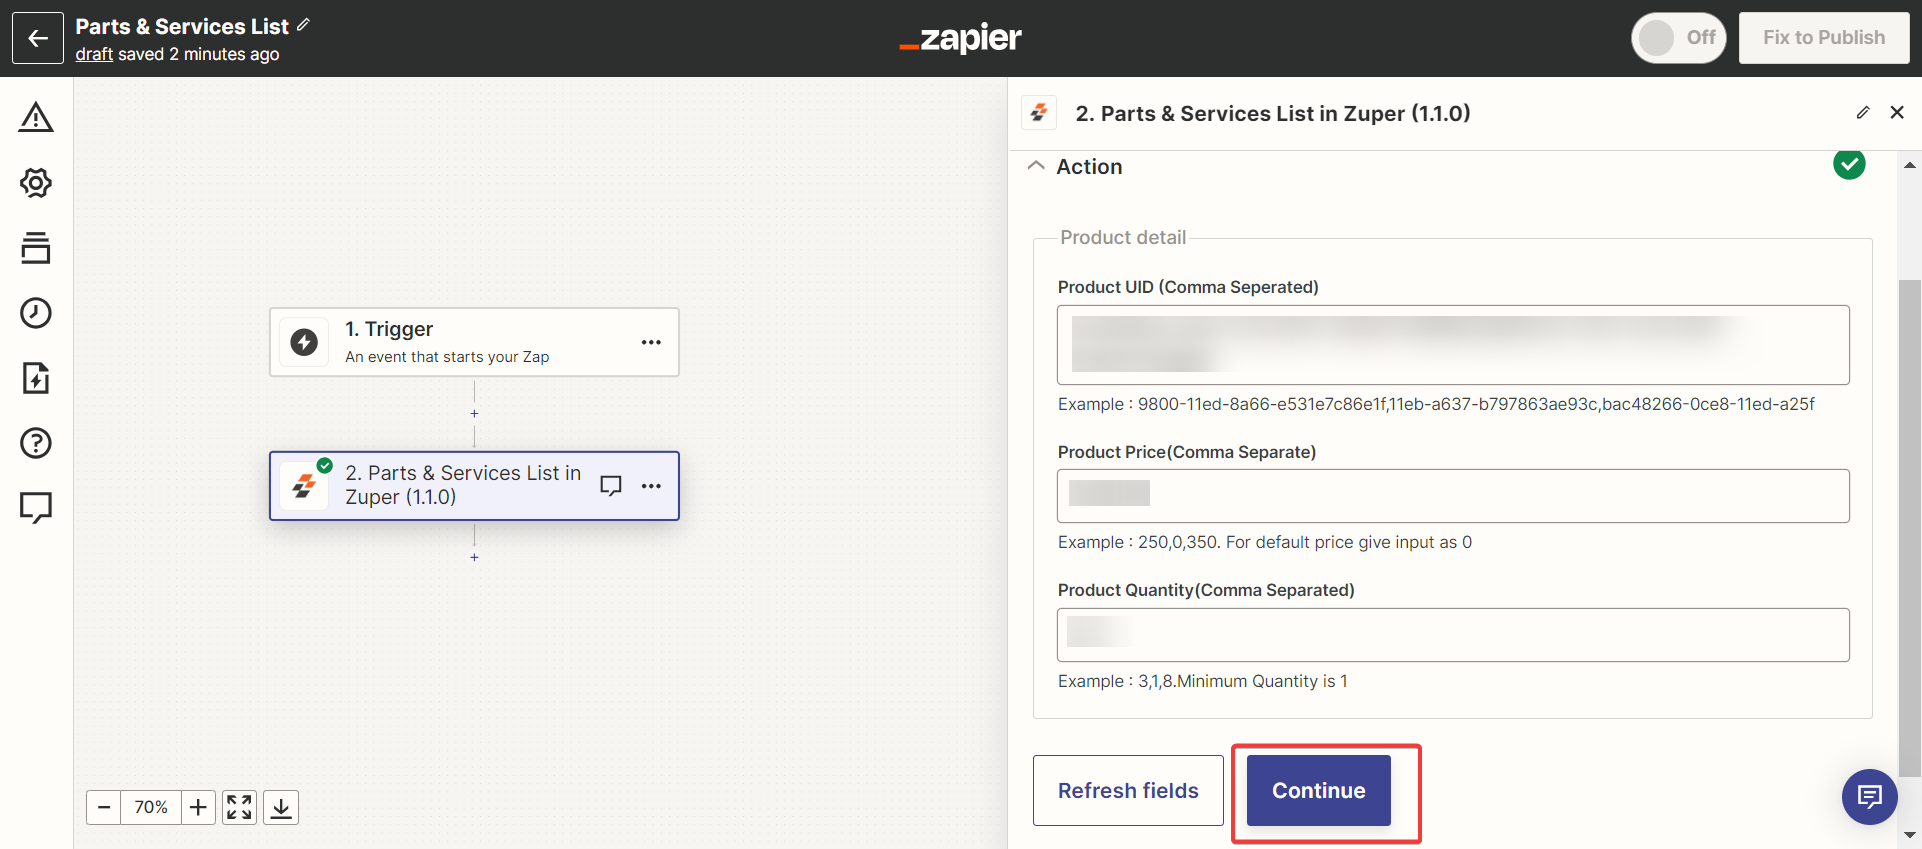
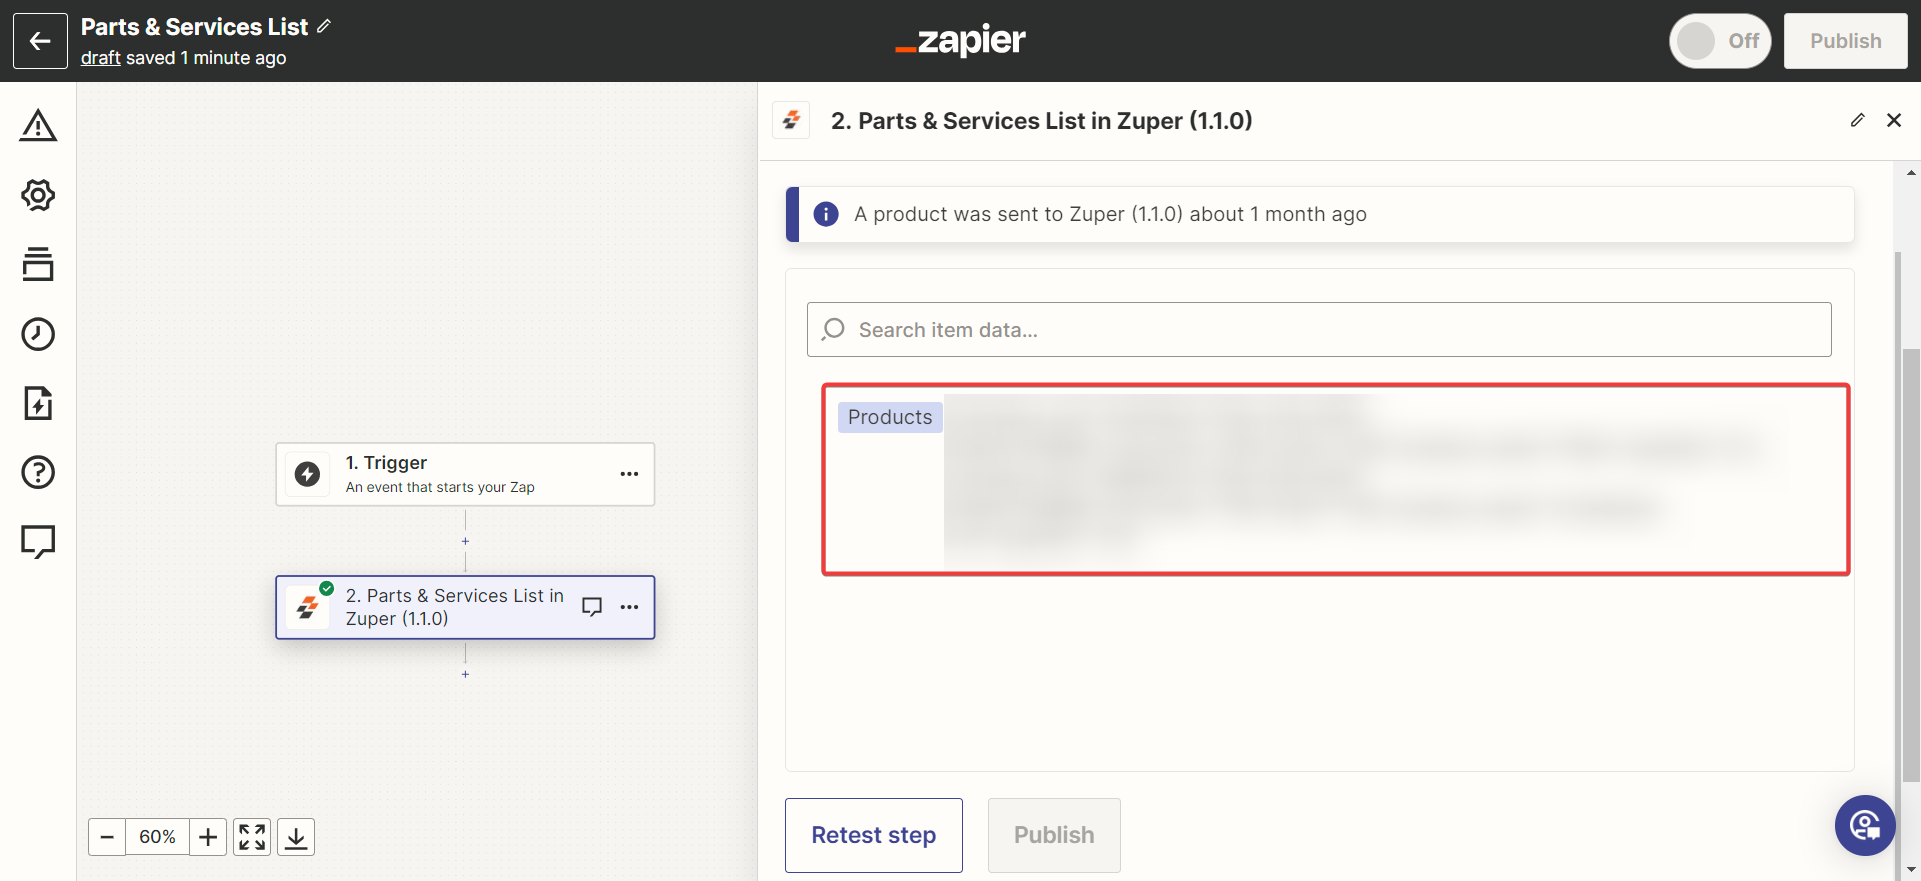
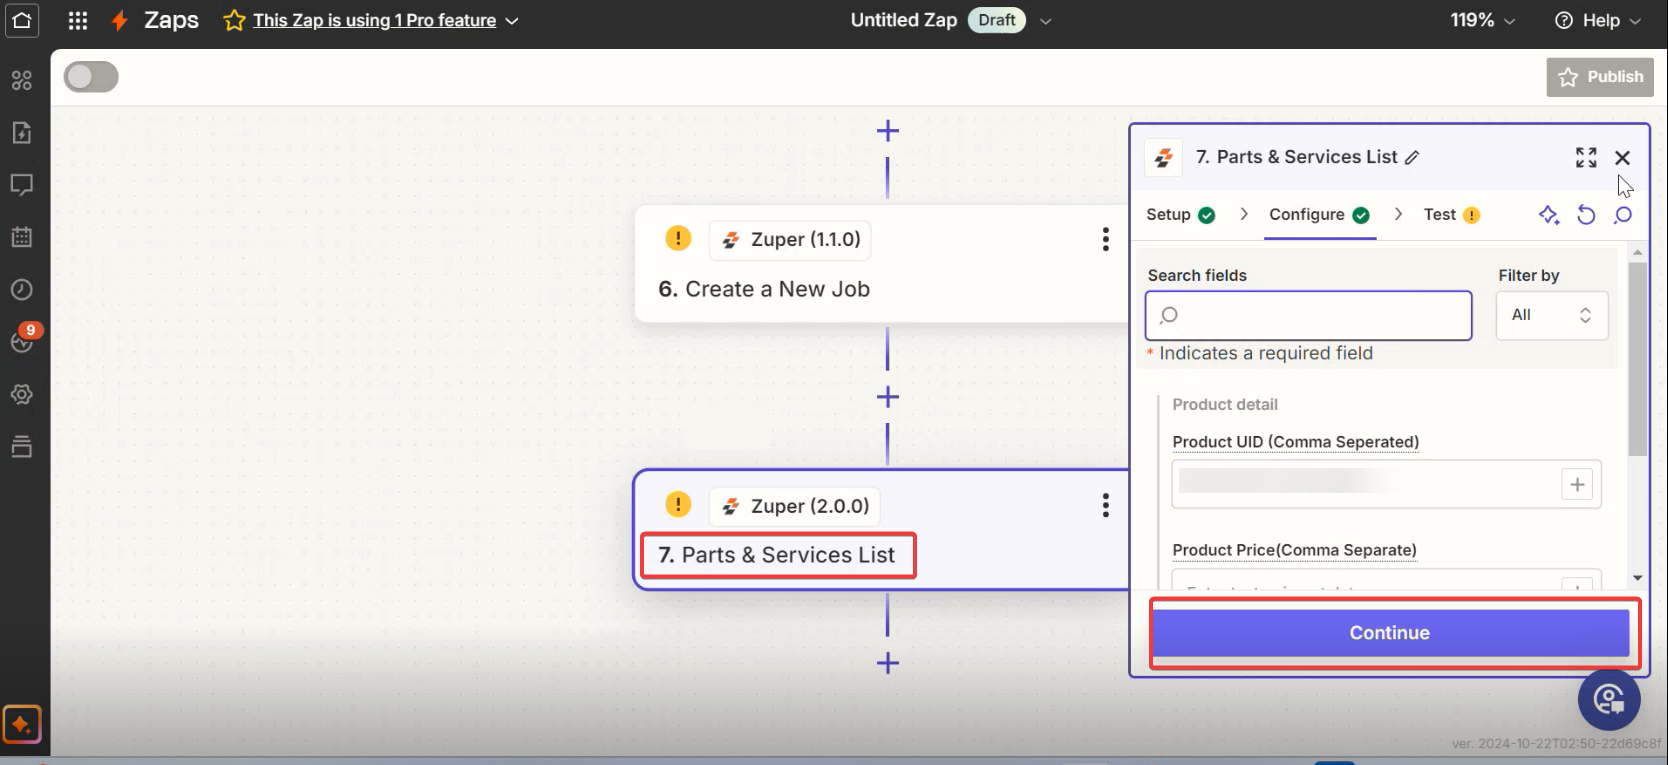
v. Create Parts & Services List
The same zap can be reused in the various modules with the predefined parts and services created. The Product zap is first created, and we can link the same in the Jobs, Invoices, and Quotes creation process.- Enter the “Event name” and click the “Continue” button. Choose the Event. Fill in the Action, Account, and create a Customer, then validate the flow by
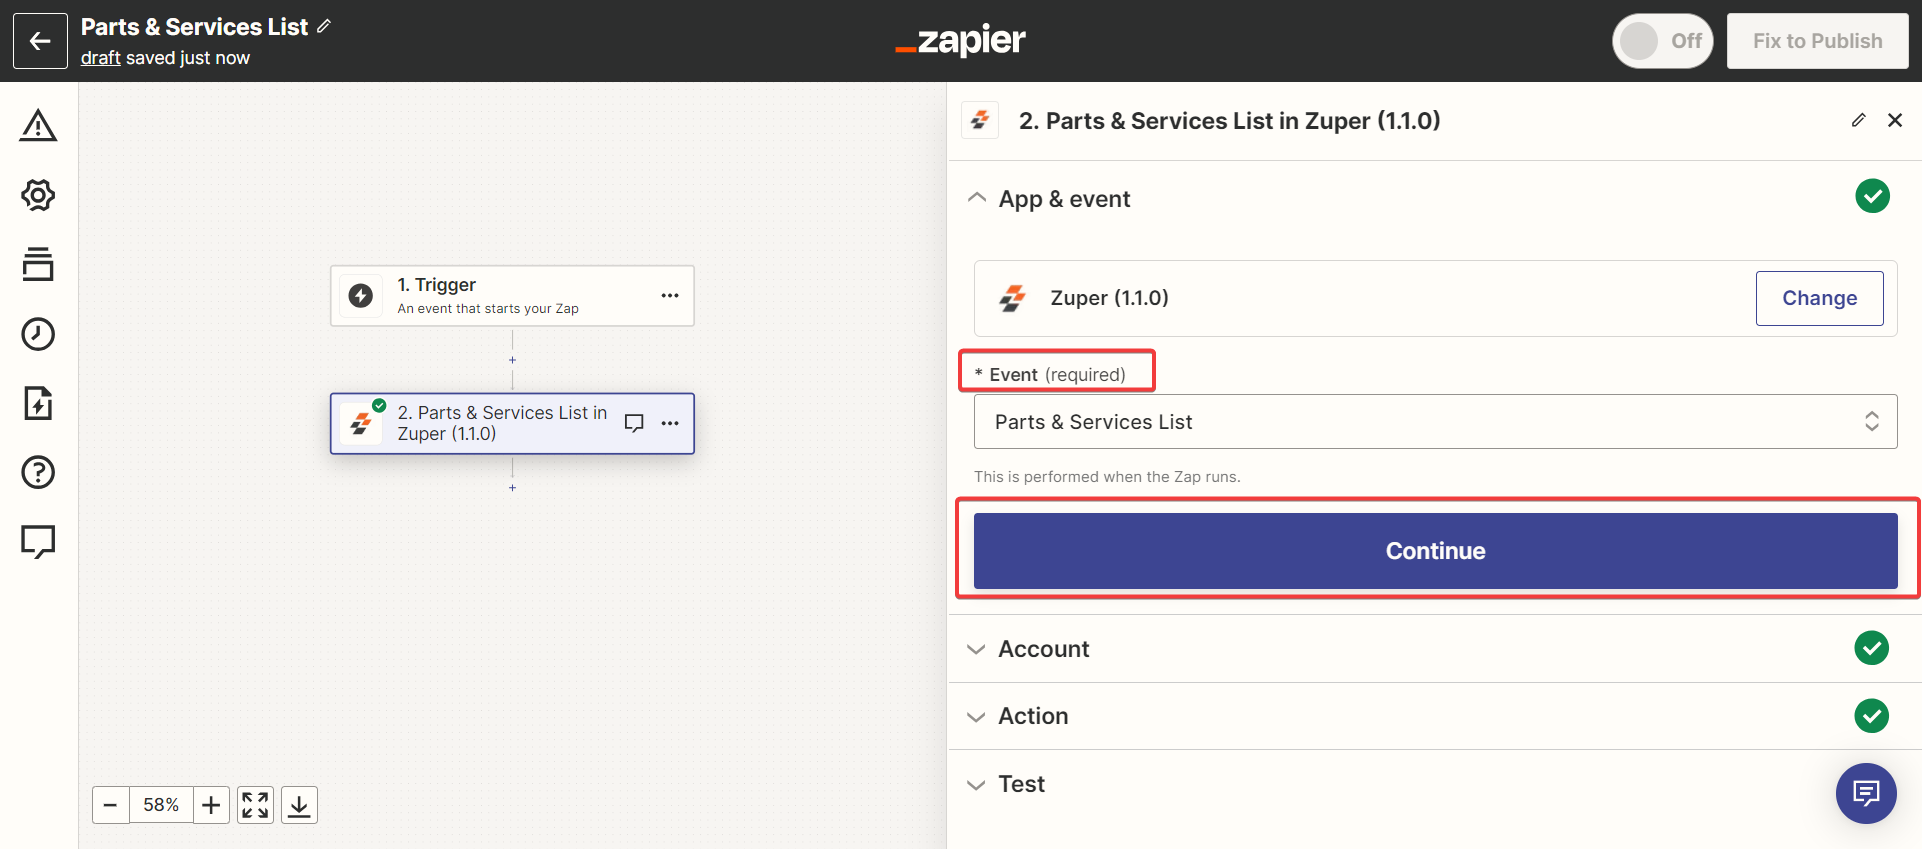
- Under the “Action” section, enter the details.
Note: The number of Product UIDs and Product Quantity count should be equal.
vi. Create an Asset
You can use the “Find Organization / Customer / Property” zap to create an asset.- Enter the “Event name” and click the “Continue” button. Choose the Event. Fill in the Action, Account, and create a Customer, then validate the flow by
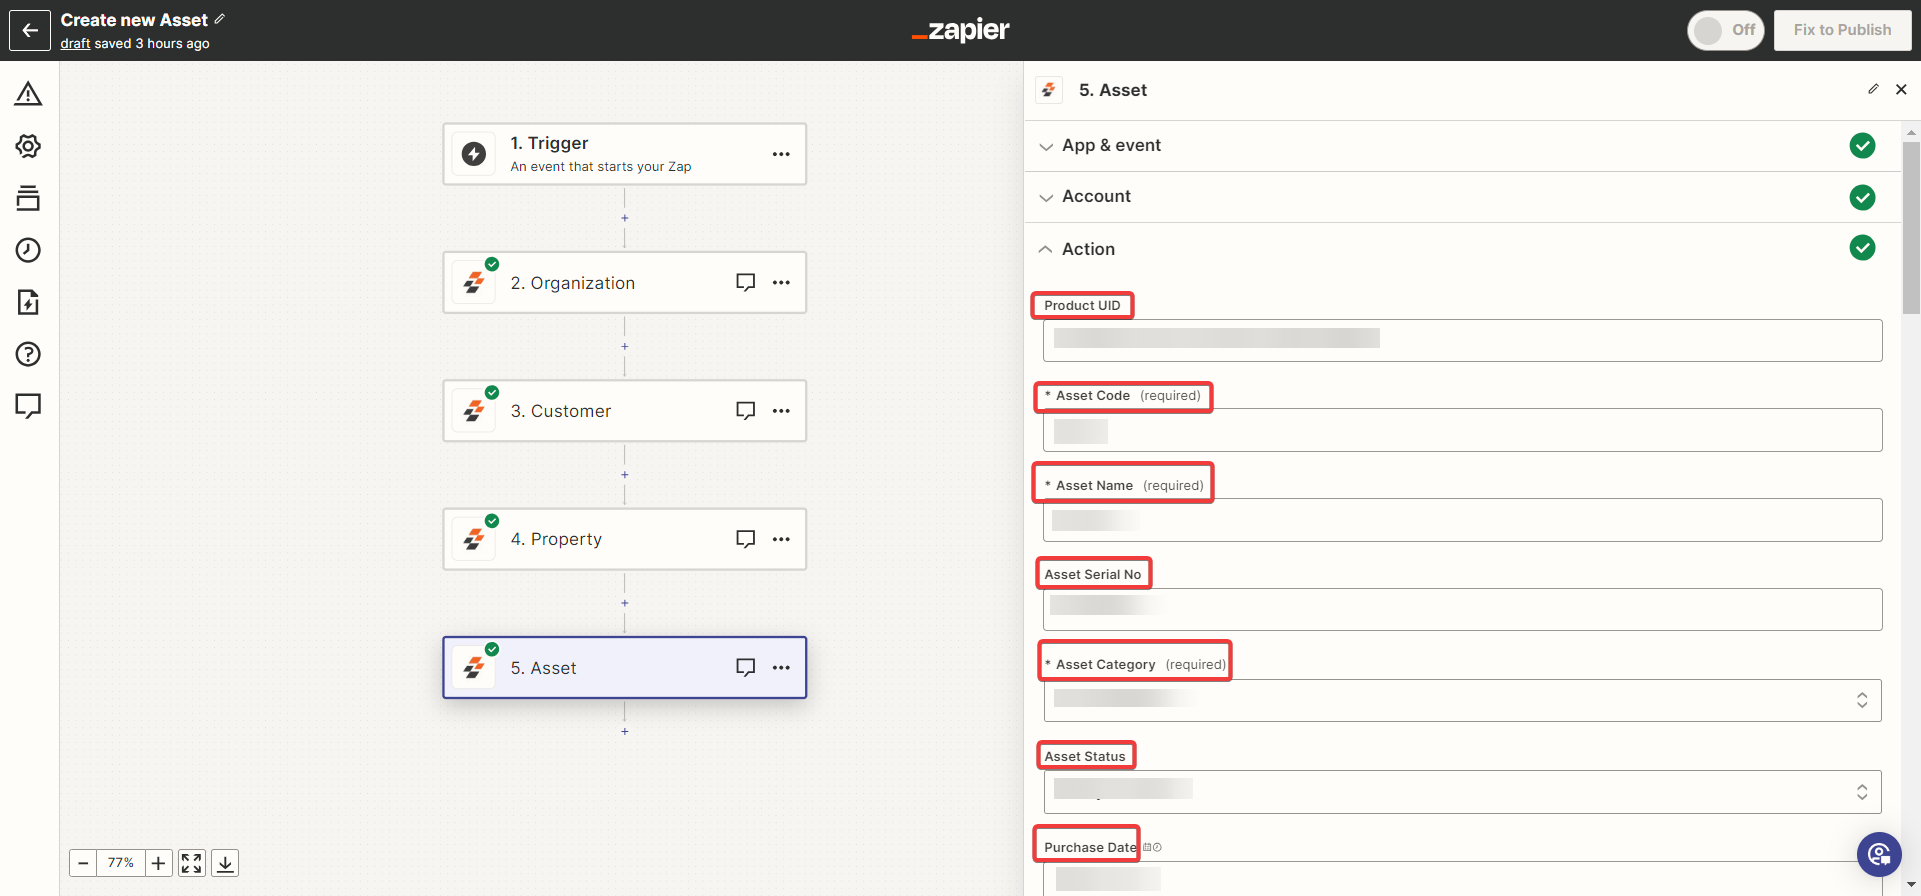
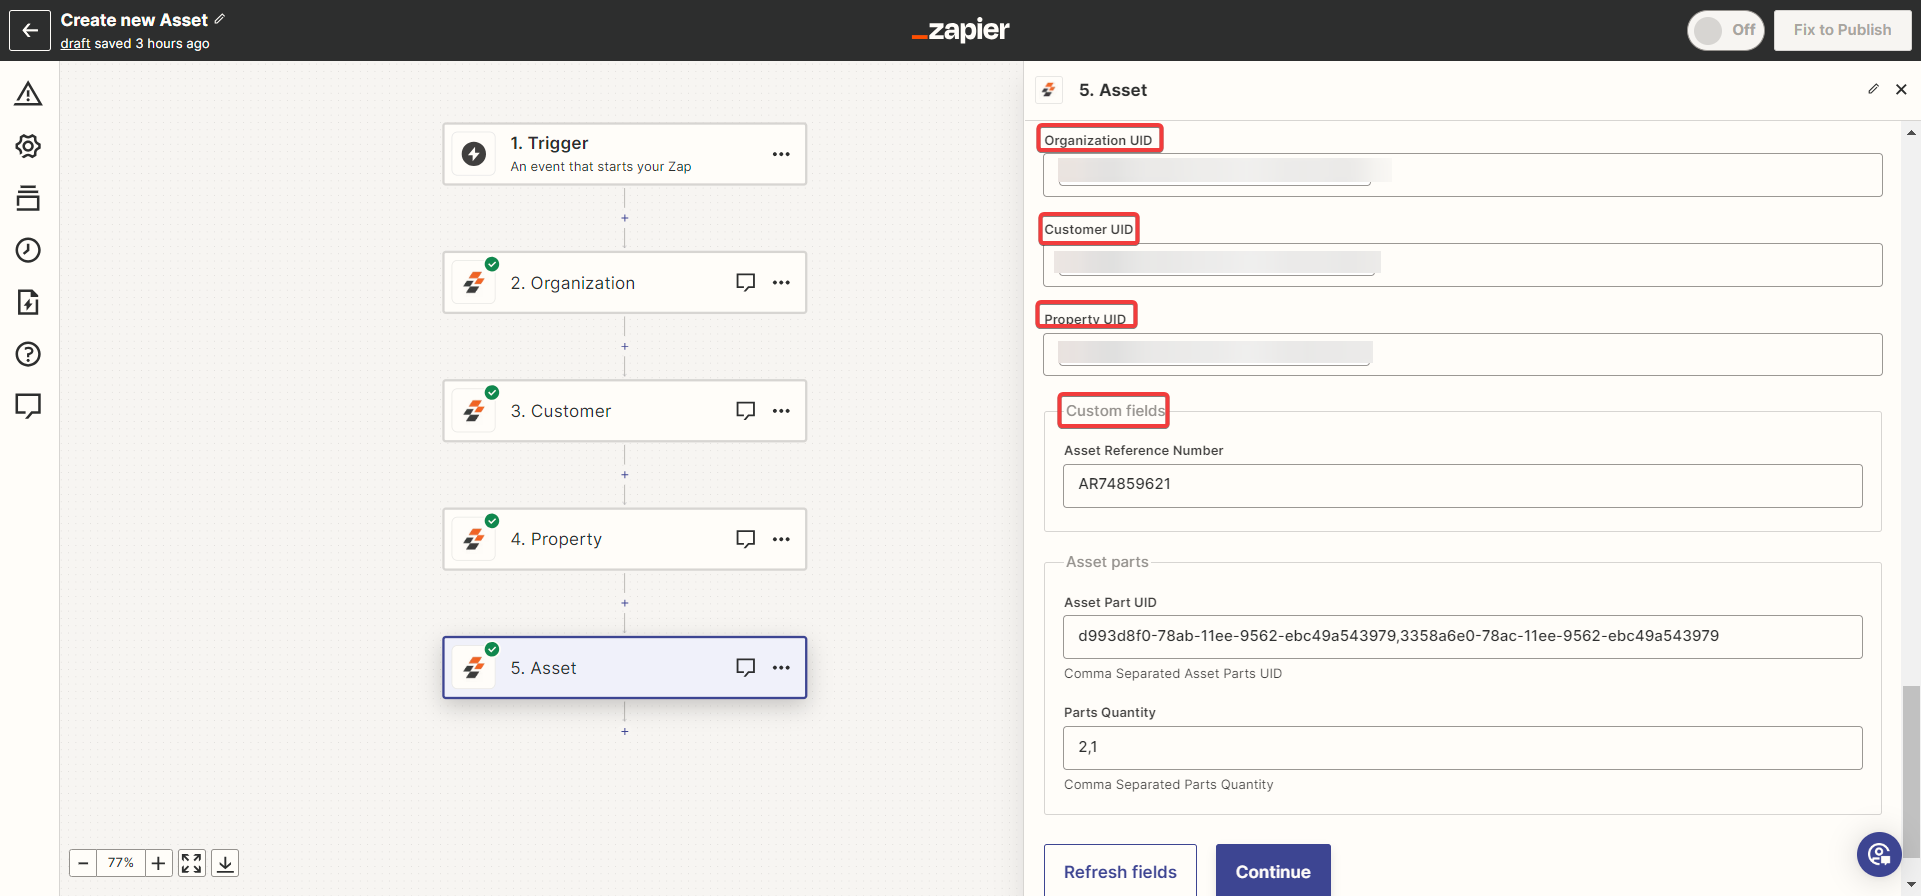
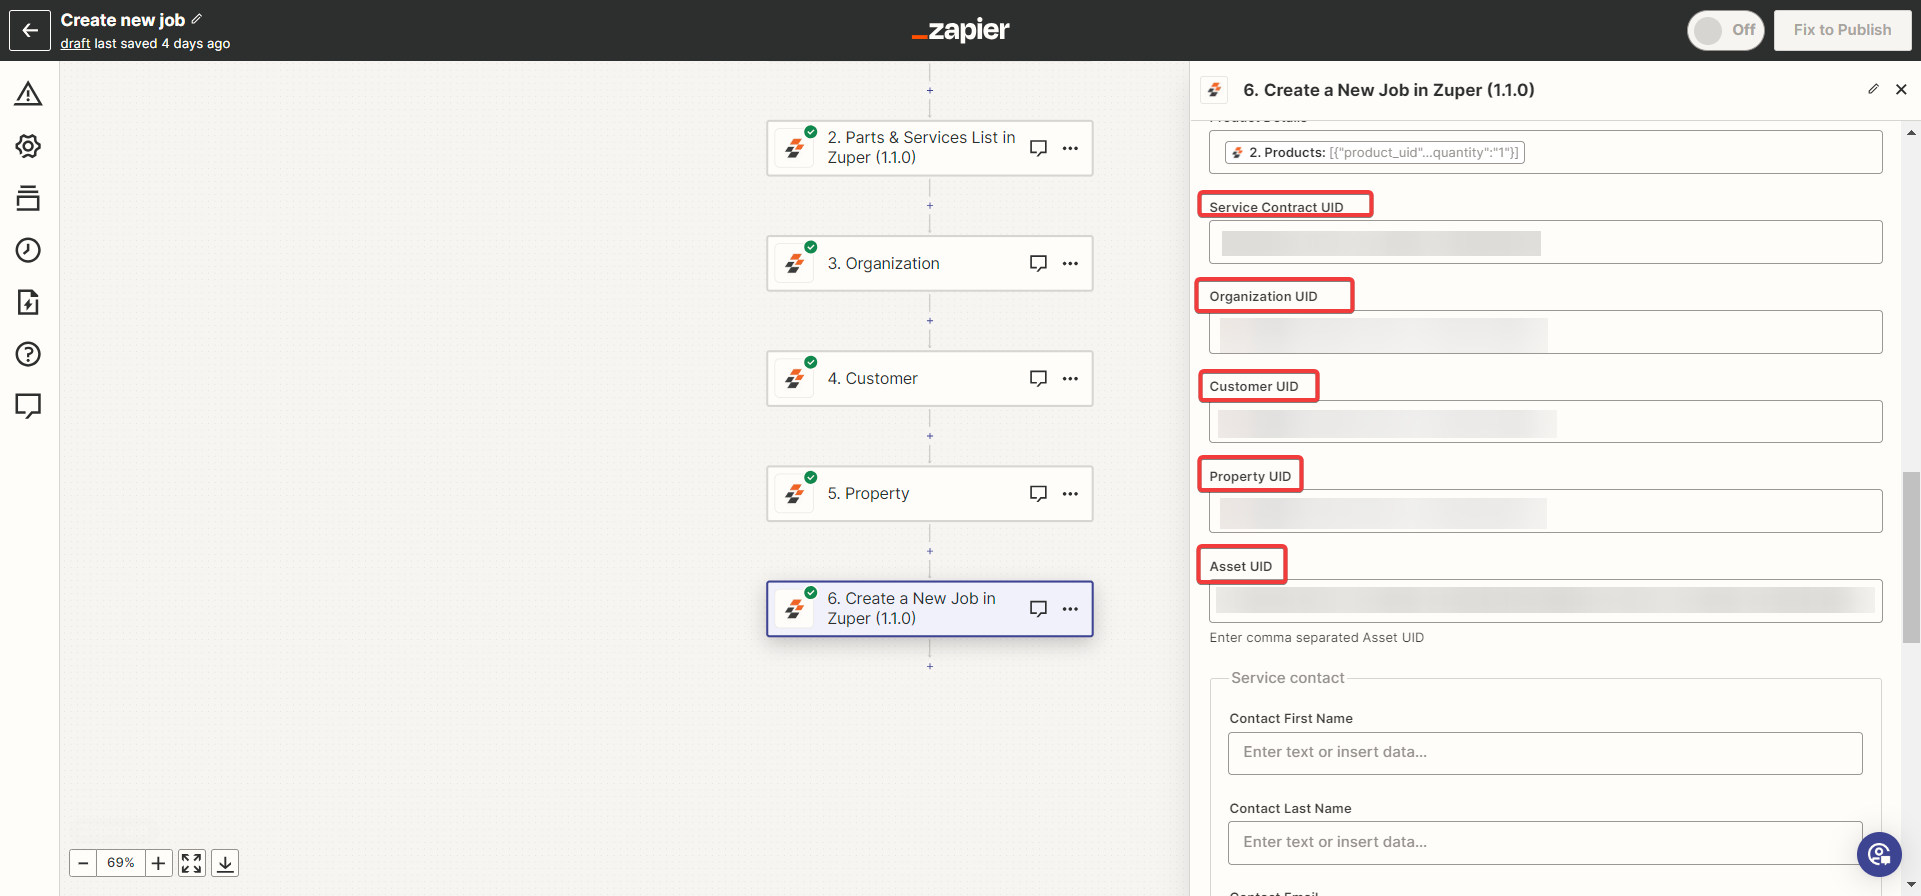
- Choose the Organization UID, Customer UID, and Property UID and other Custom fields.
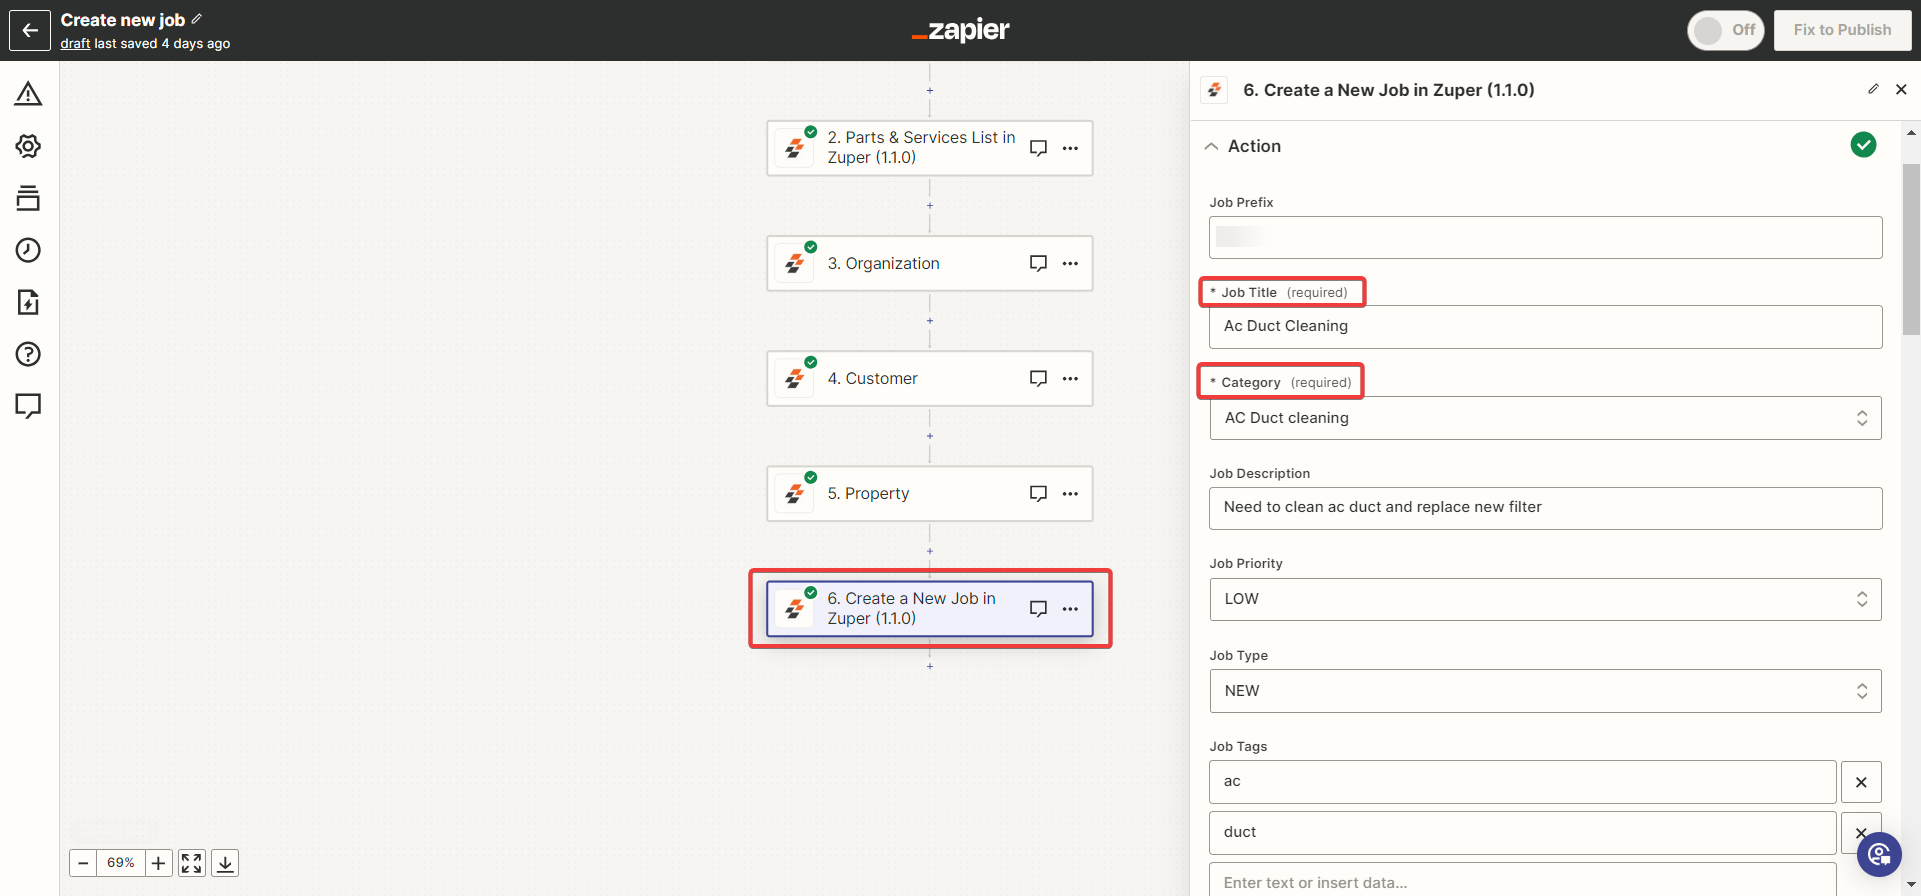
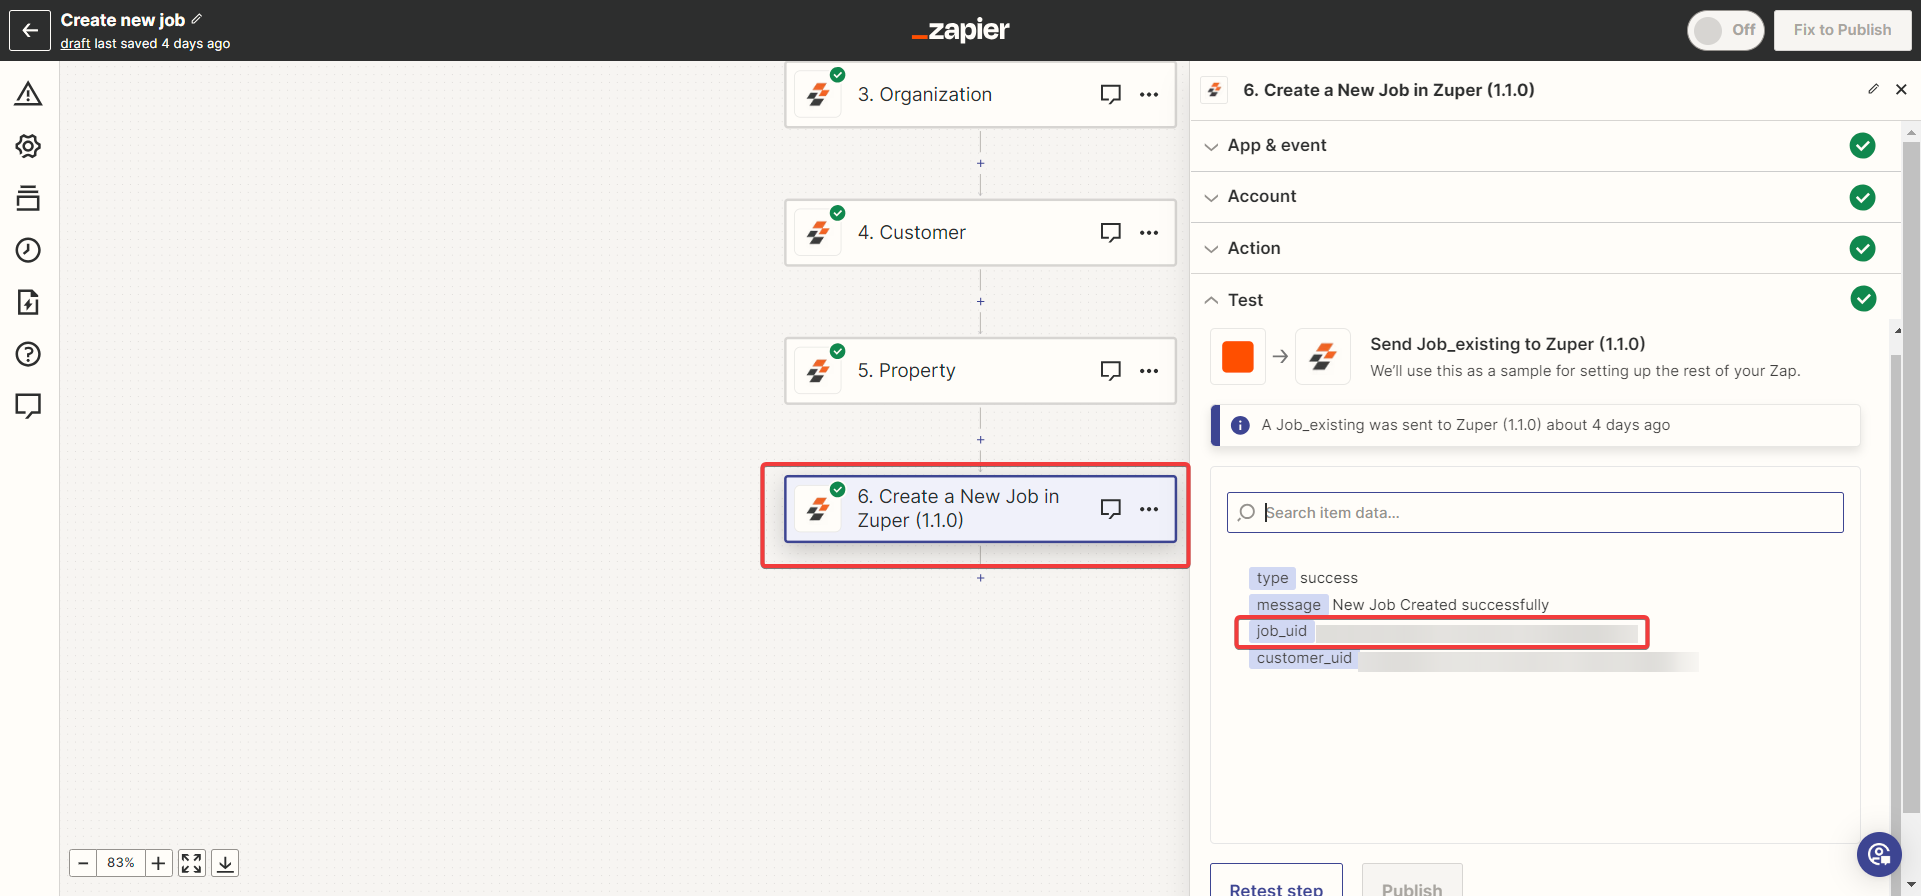
vii. Create a New Job
With all the details created from the various steps in the above section. Now you can create a new job.- Enter the mandatory Job details
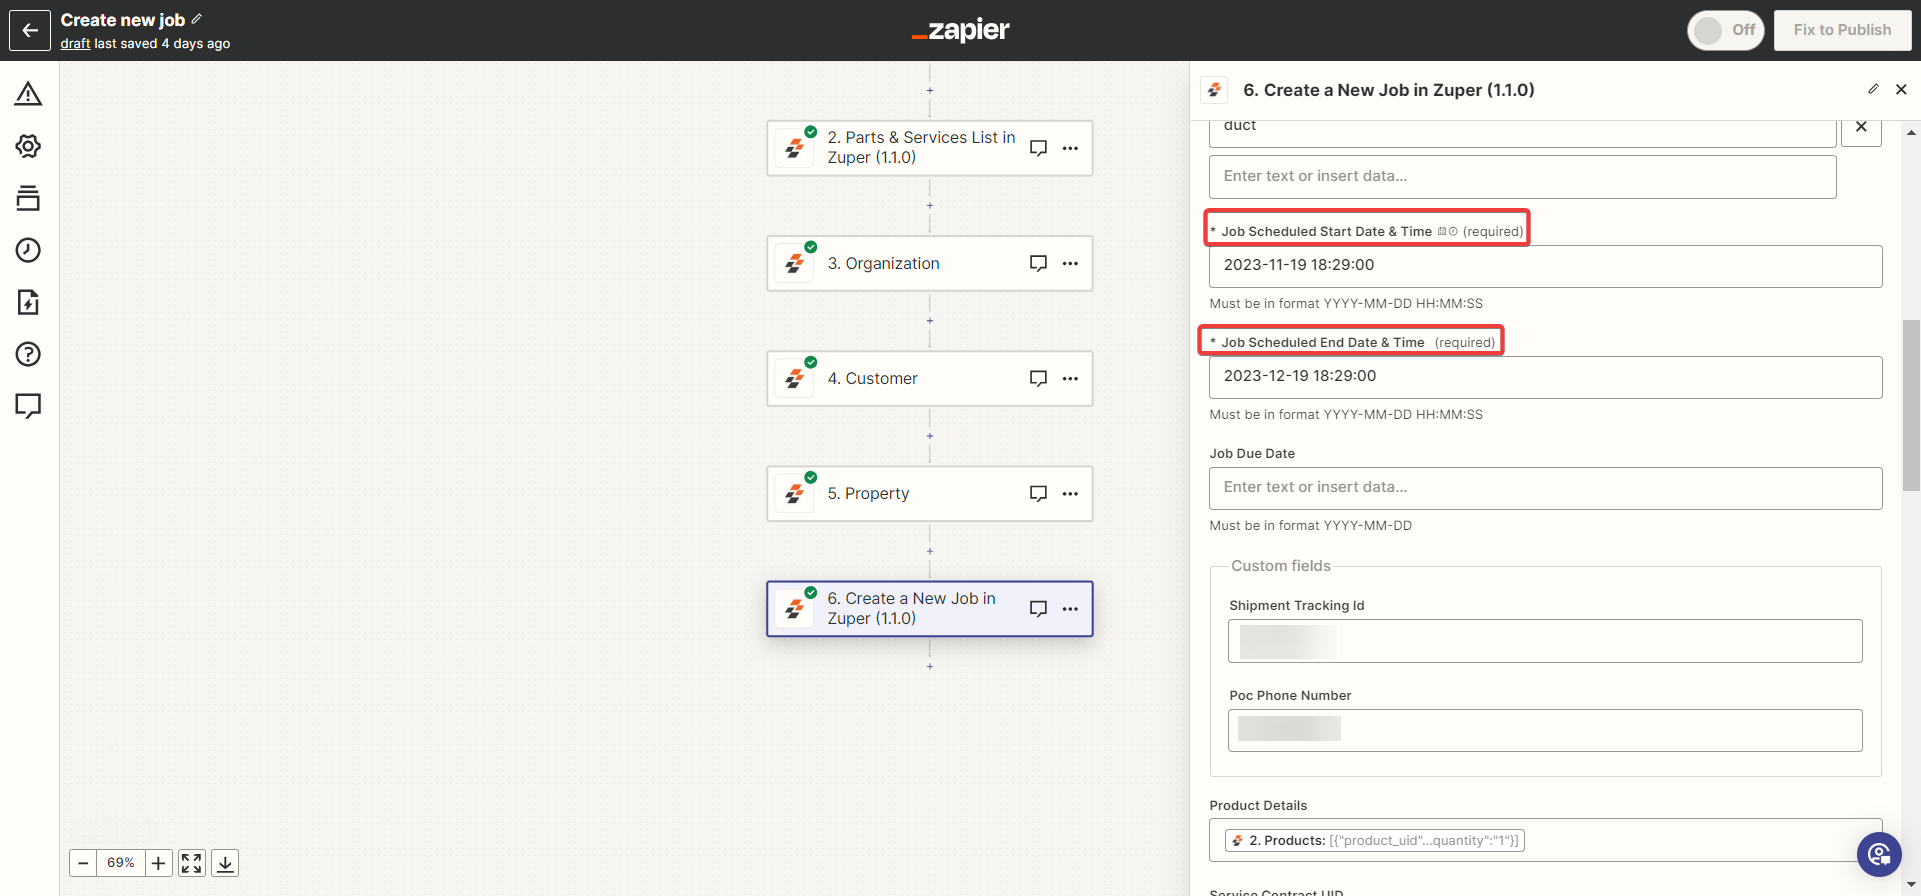
Job scheduled End Date & Time (Mandatory) - Choose the end date and time of the Job.
Note: The date and time format should be YYYY-MM-DD HH:MM:SS
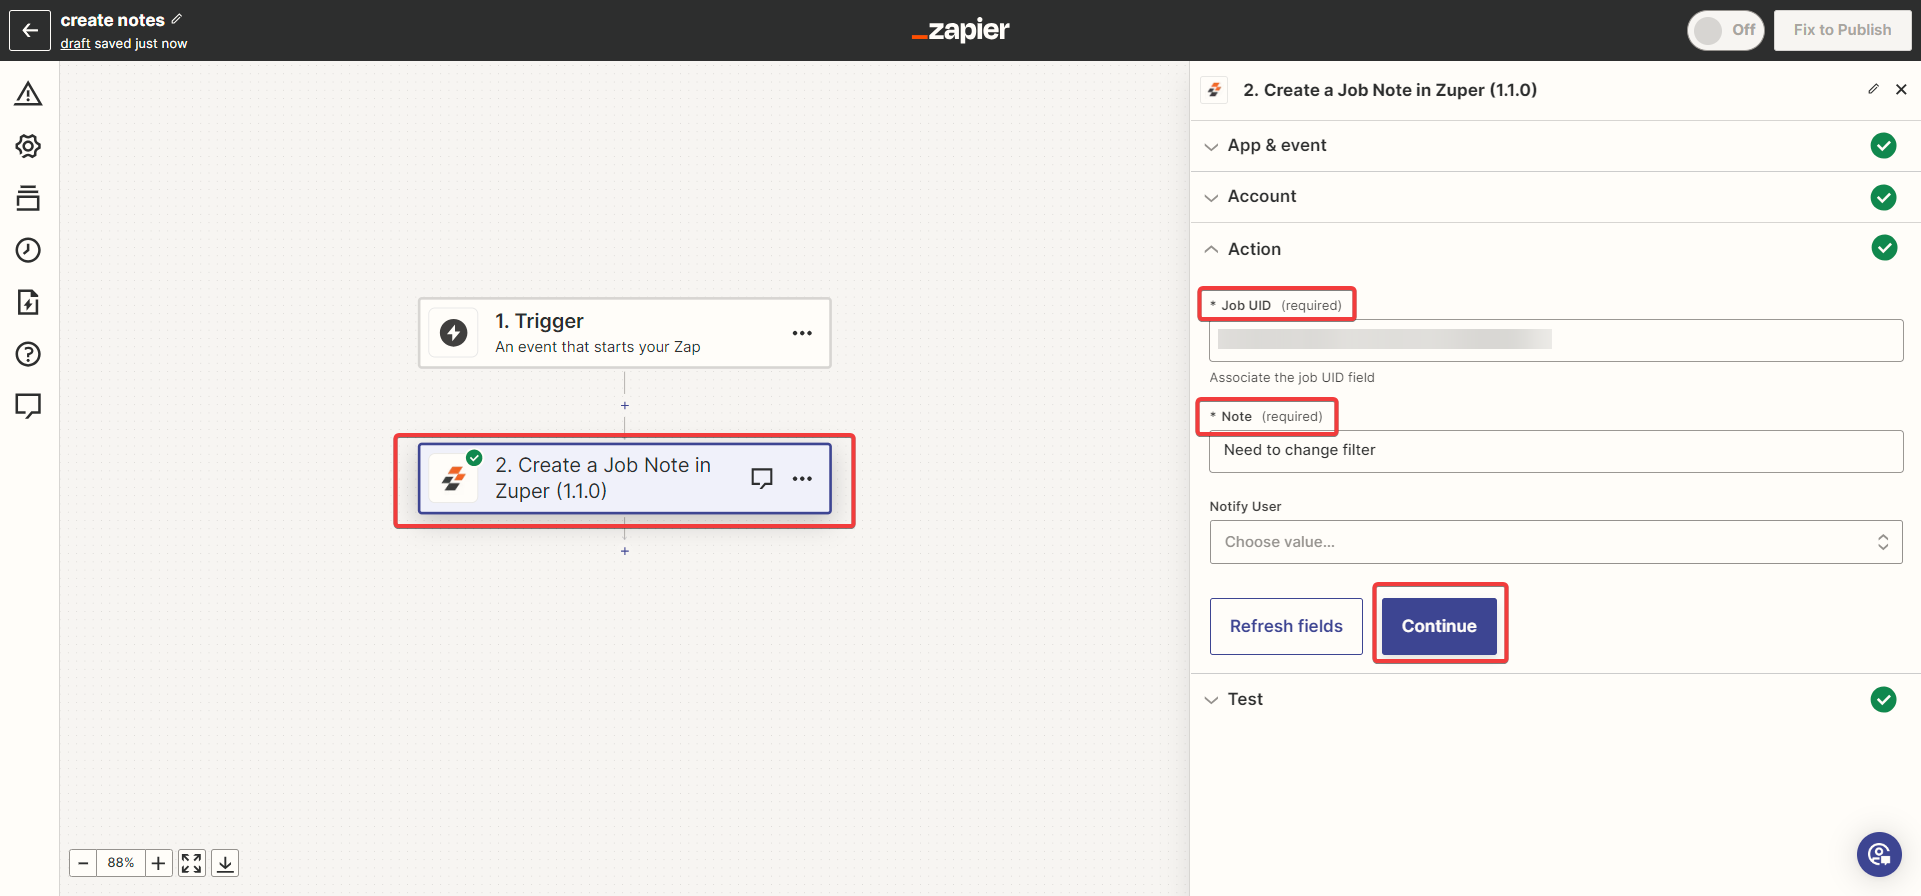
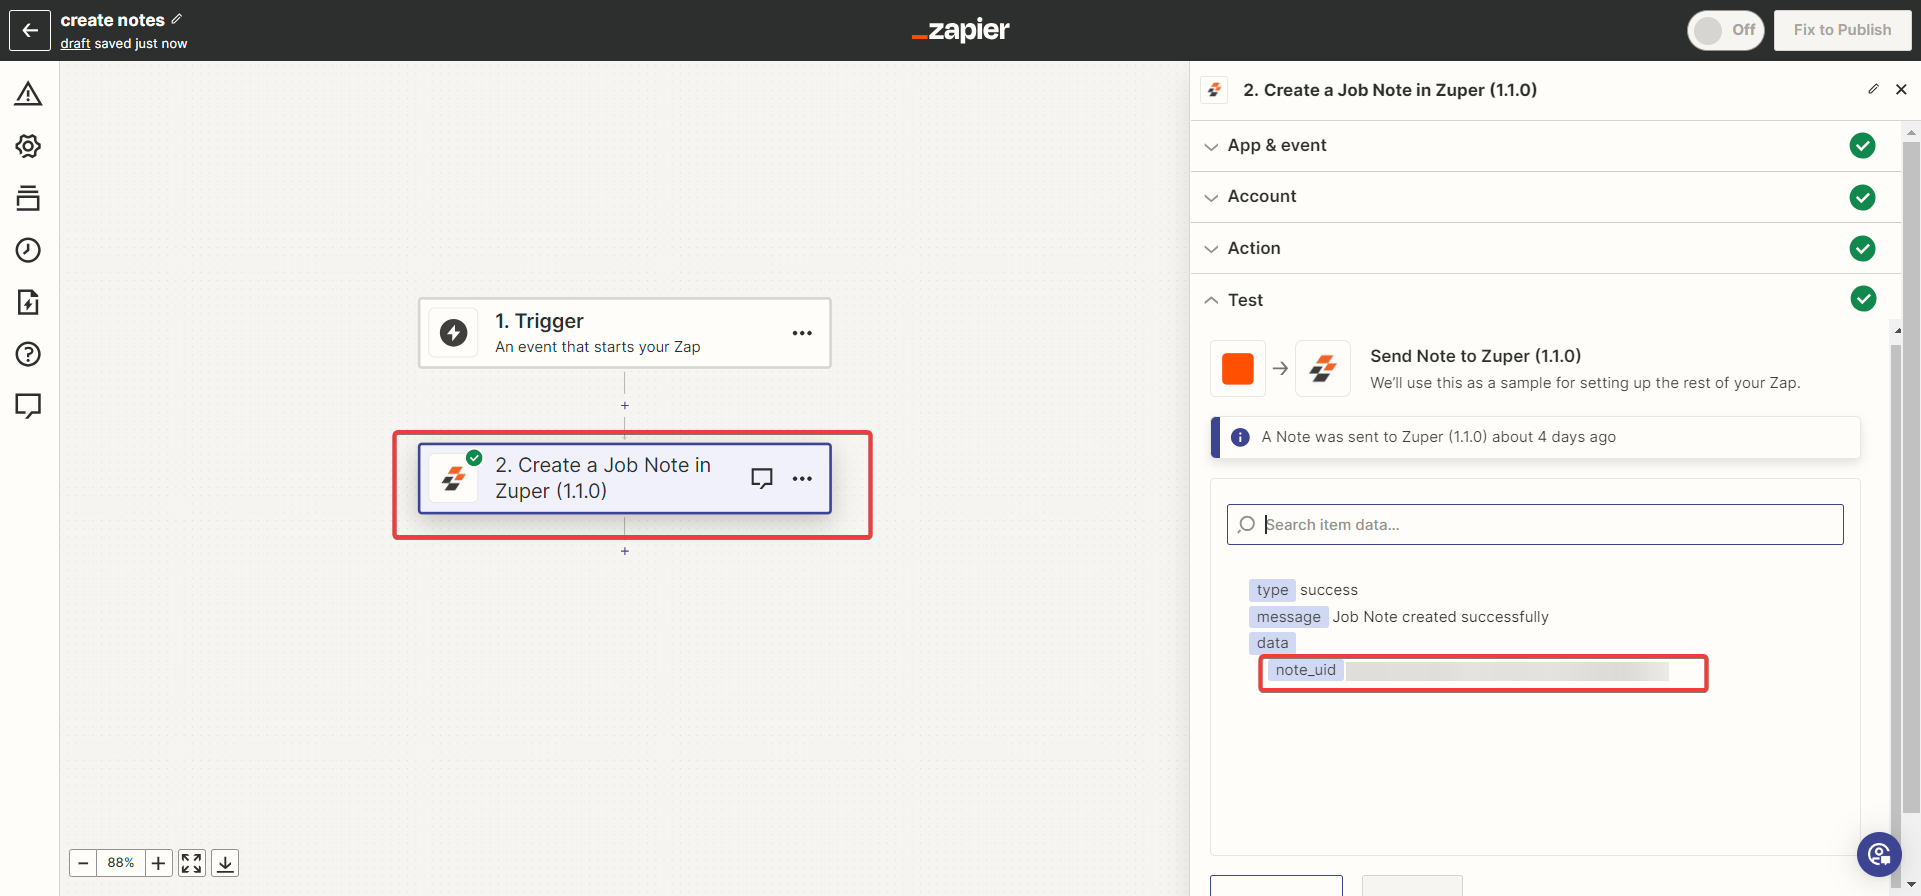
VIII. Create a Job Note
You can create a Job note that is related to the work order. 1. Enter the “Event name” and click the “Continue” button. Choose the Event. Fill in the Action, Account, and create a Job UID and Note, then validate the flow by,- Enter the (Mandatory fields) and fill in the optional fields.
- Job UID (Mandatory Field) - Select the Job UID from the list.
- Note (Mandatory Field) - Enter the job-related notes.
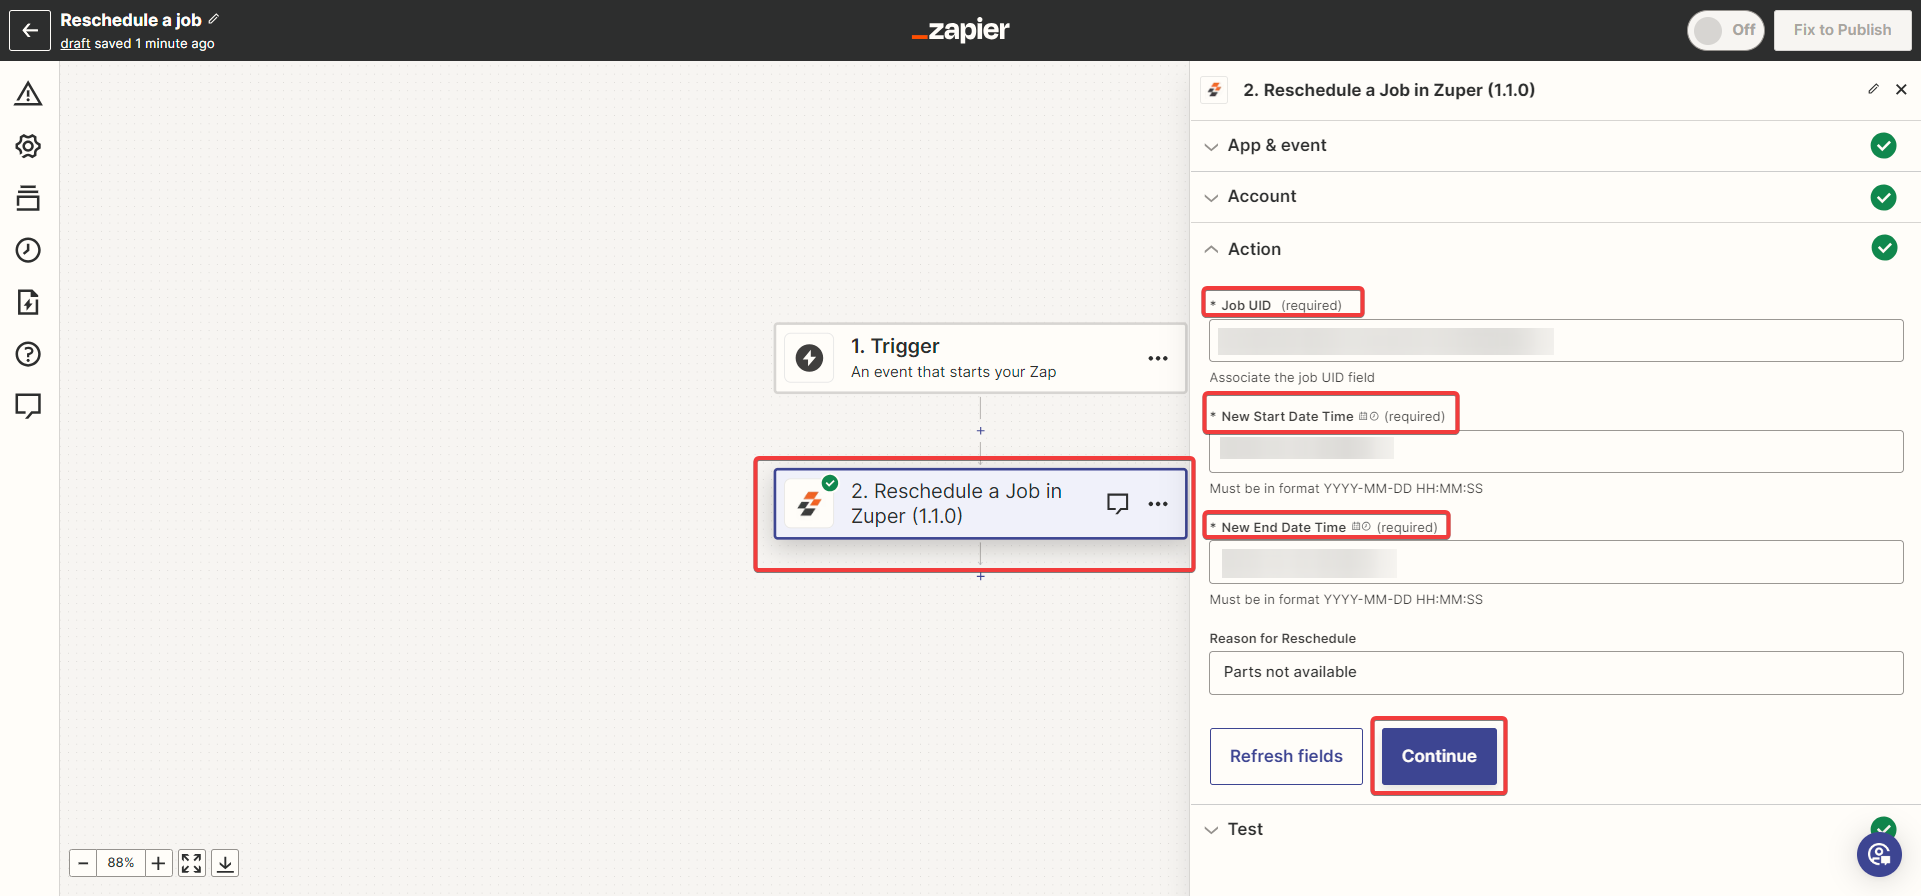
ix. Reschedule a Job
When the Job schedule needs a change, you can reschedule the Job date and timings. 1. Enter the “Event name” and click the “Continue” button. Choose the Event. Fill in the Action, Account, and Reschedule Job, then validate the flow by, Enter the Mandatory fields and fill in the optional fields.- Job UID (Mandatory Field) - Select the Job UID from the list.
- New Start Date & Time (Mandatory) - Choose the new start date and time of the Job.
- New End Date & Time (Mandatory) - Choose the new end date and time of the Job.

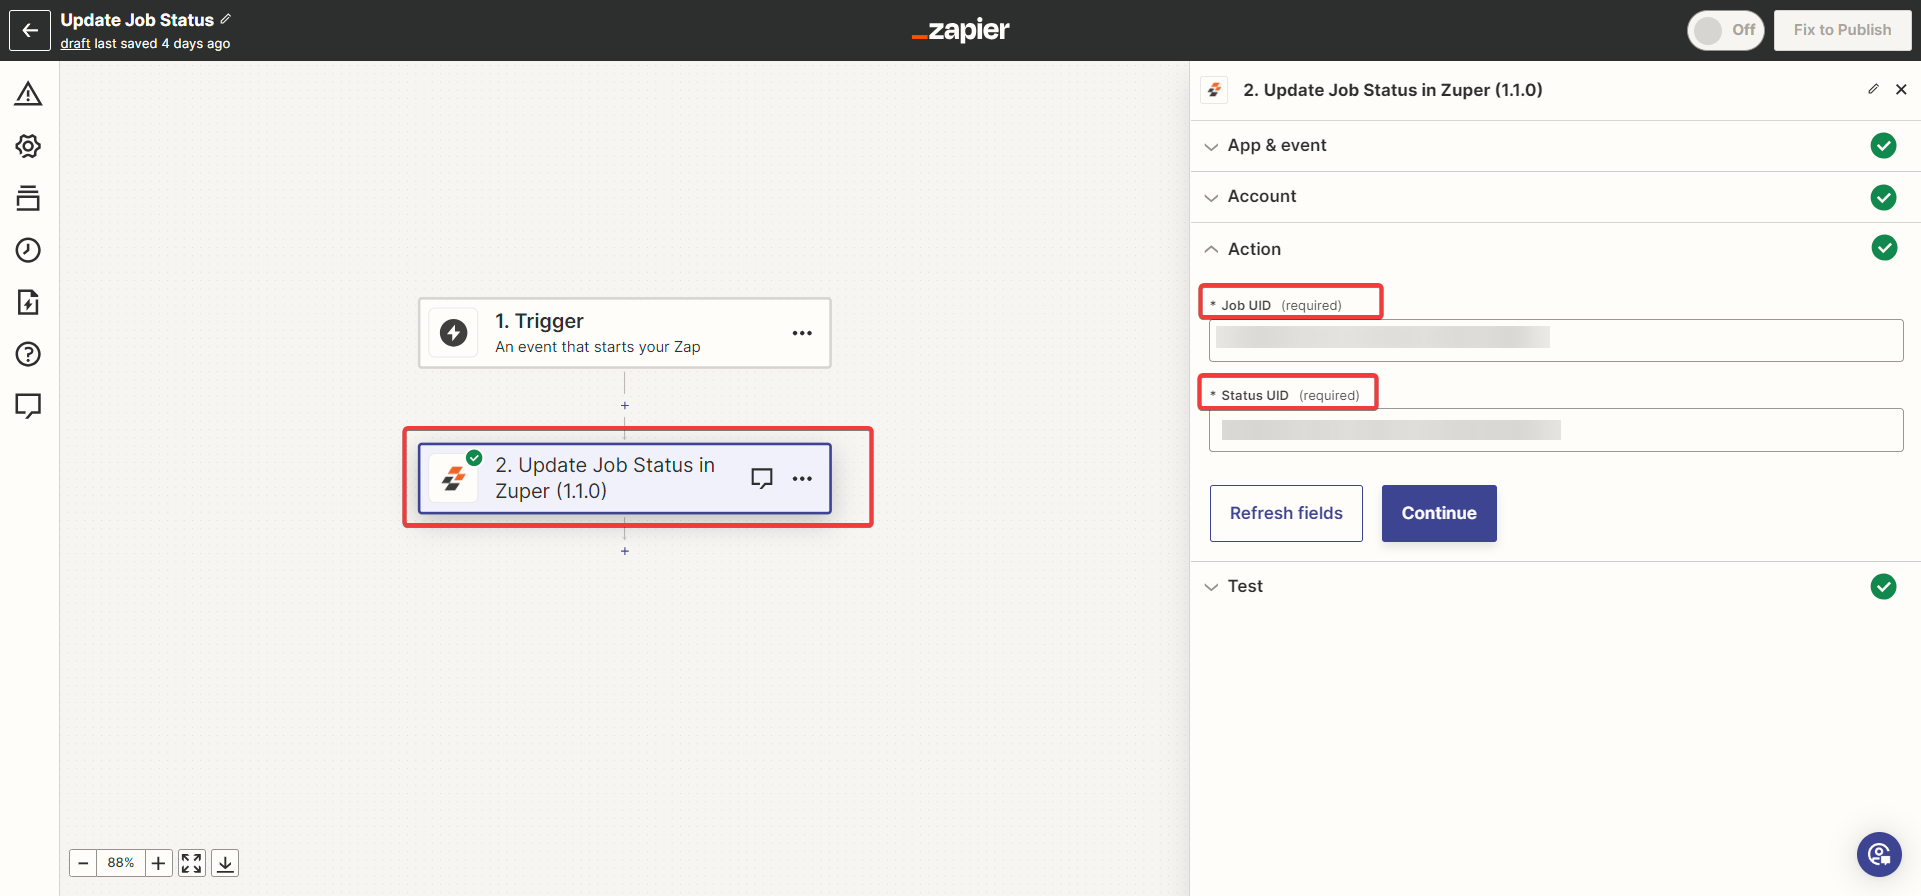
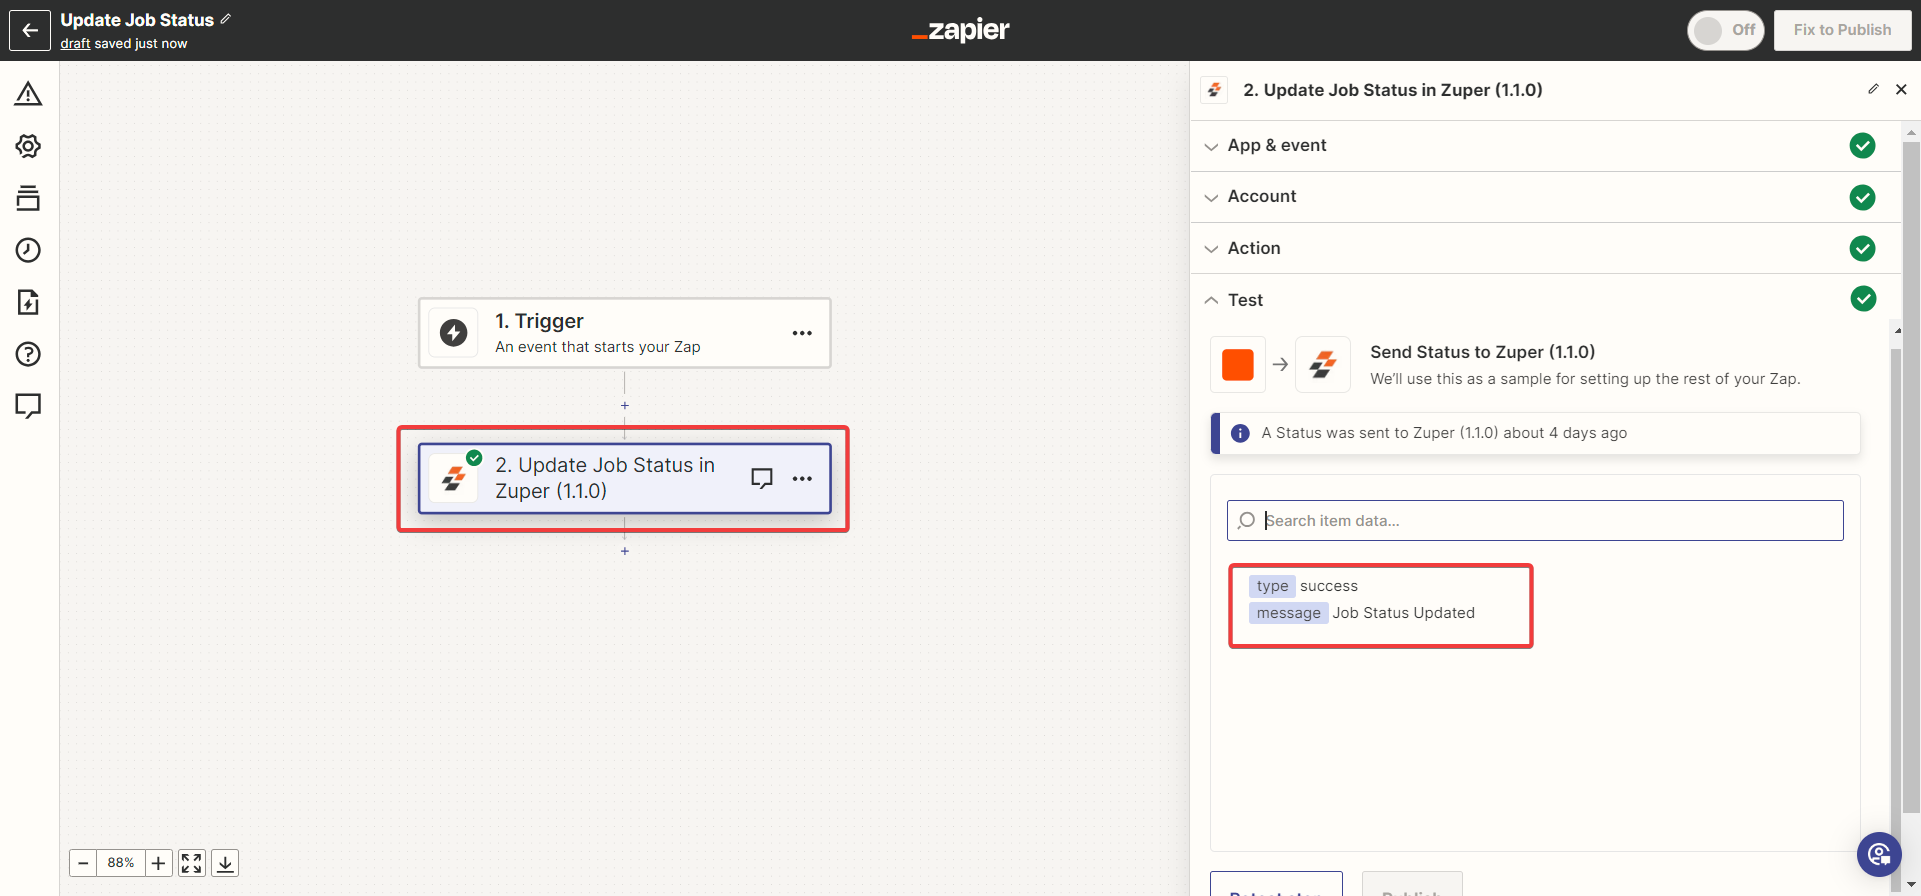
x. Update a Job Status
When the Job status needs to changed, you can update the Job status using the Job UID. 1. Enter the “Event name” and click the “Continue” button. Choose the Event. Fill in the Action, Account, and status update, then validate the flow by, Enter the Mandatory fields and fill in the optional fields.- Job UID (Mandatory Field) - Select the Job UID from the list.
- Status UID (Mandatory) - Choose the status UID of the Job.
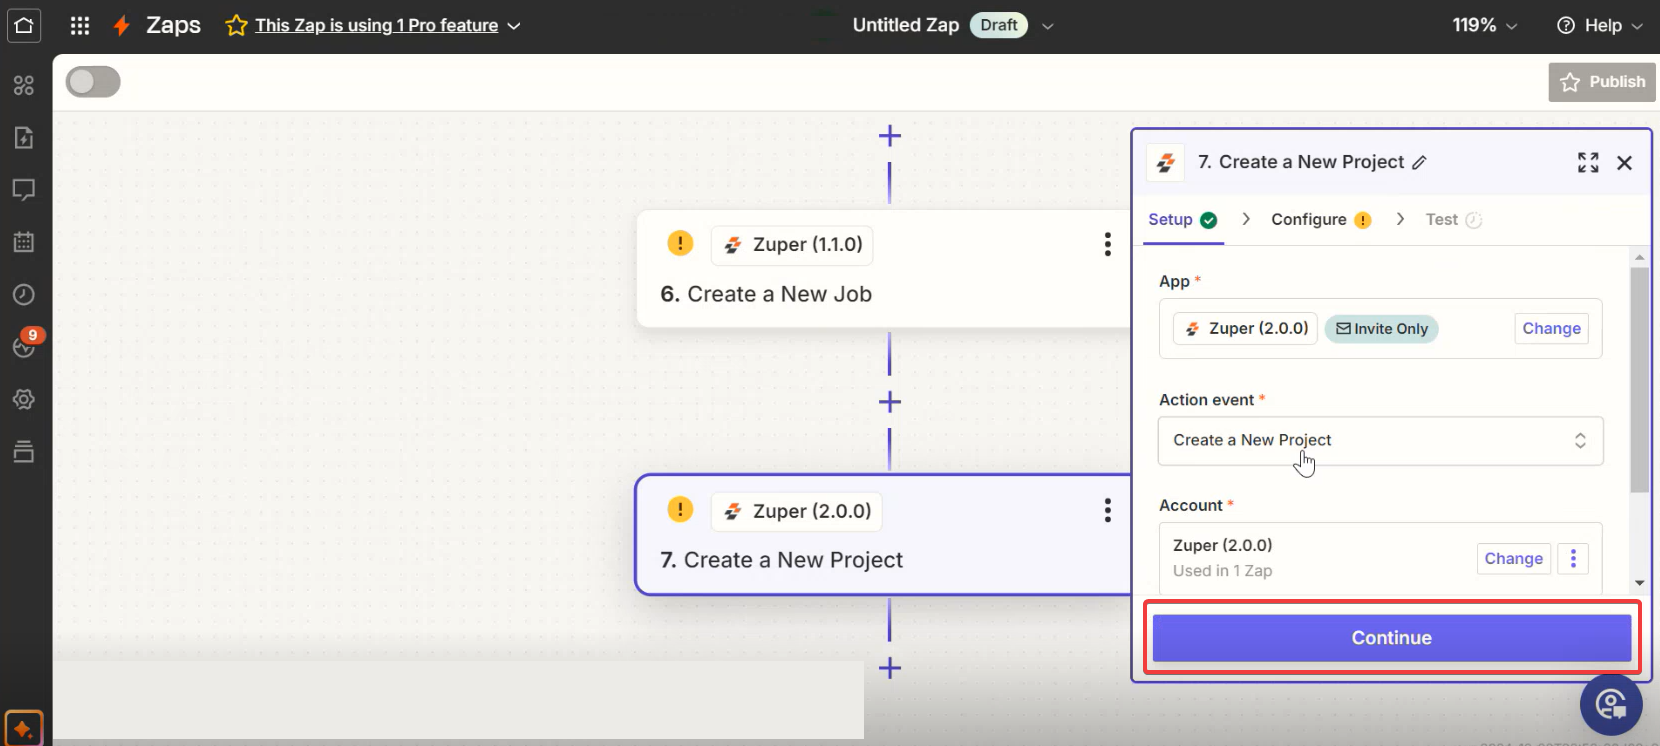
xi. Create a New Project
Creating a project involves multiple steps. We must enter/choose the various details and create a new project.- Select the “Action Event” as “Create a New Project” and click the “Continue” button within the Zuper app action in the Zap.
- Connect your Zuper account to the Zap by entering your API key.
- In the “Configure” section, enter the project details in the respective fields. Ensure that you’ve added all the required fields.
- The Project Category values set in Zuper will appear for selection in a dropdown here.
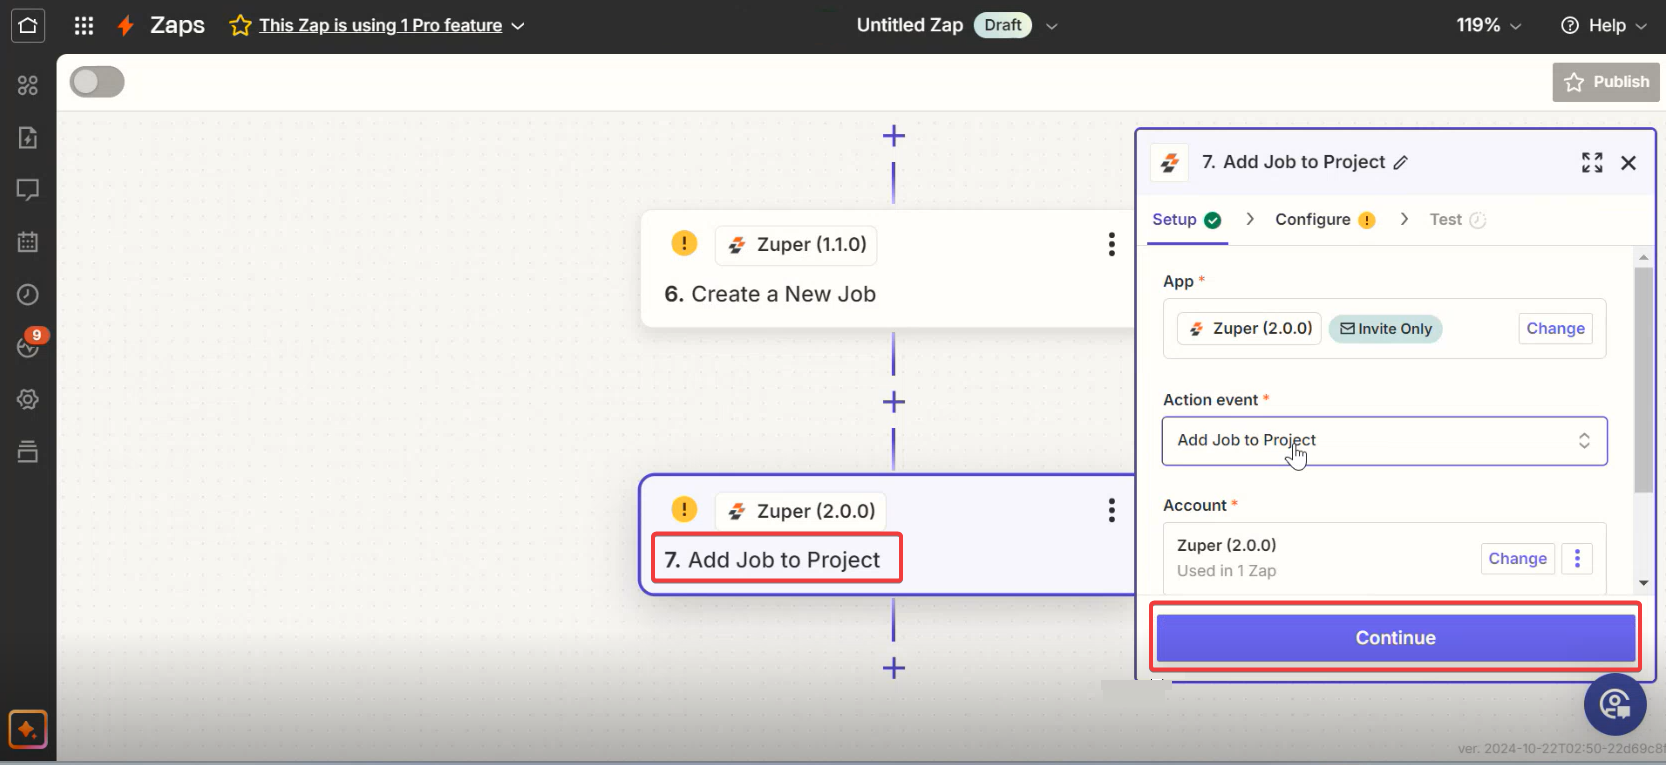
Add job to the project
- Enter the “Event name” and click the “Continue” button.
- Choose the Event. Fill in the Action, Account and add job to project, then validate the flow by adding:
Add Parts and Services
- Enter the “Event name” and click the “Continue” button.
- Choose the Event. Fill in the Action, Account and add parts and services, then validate the flow by
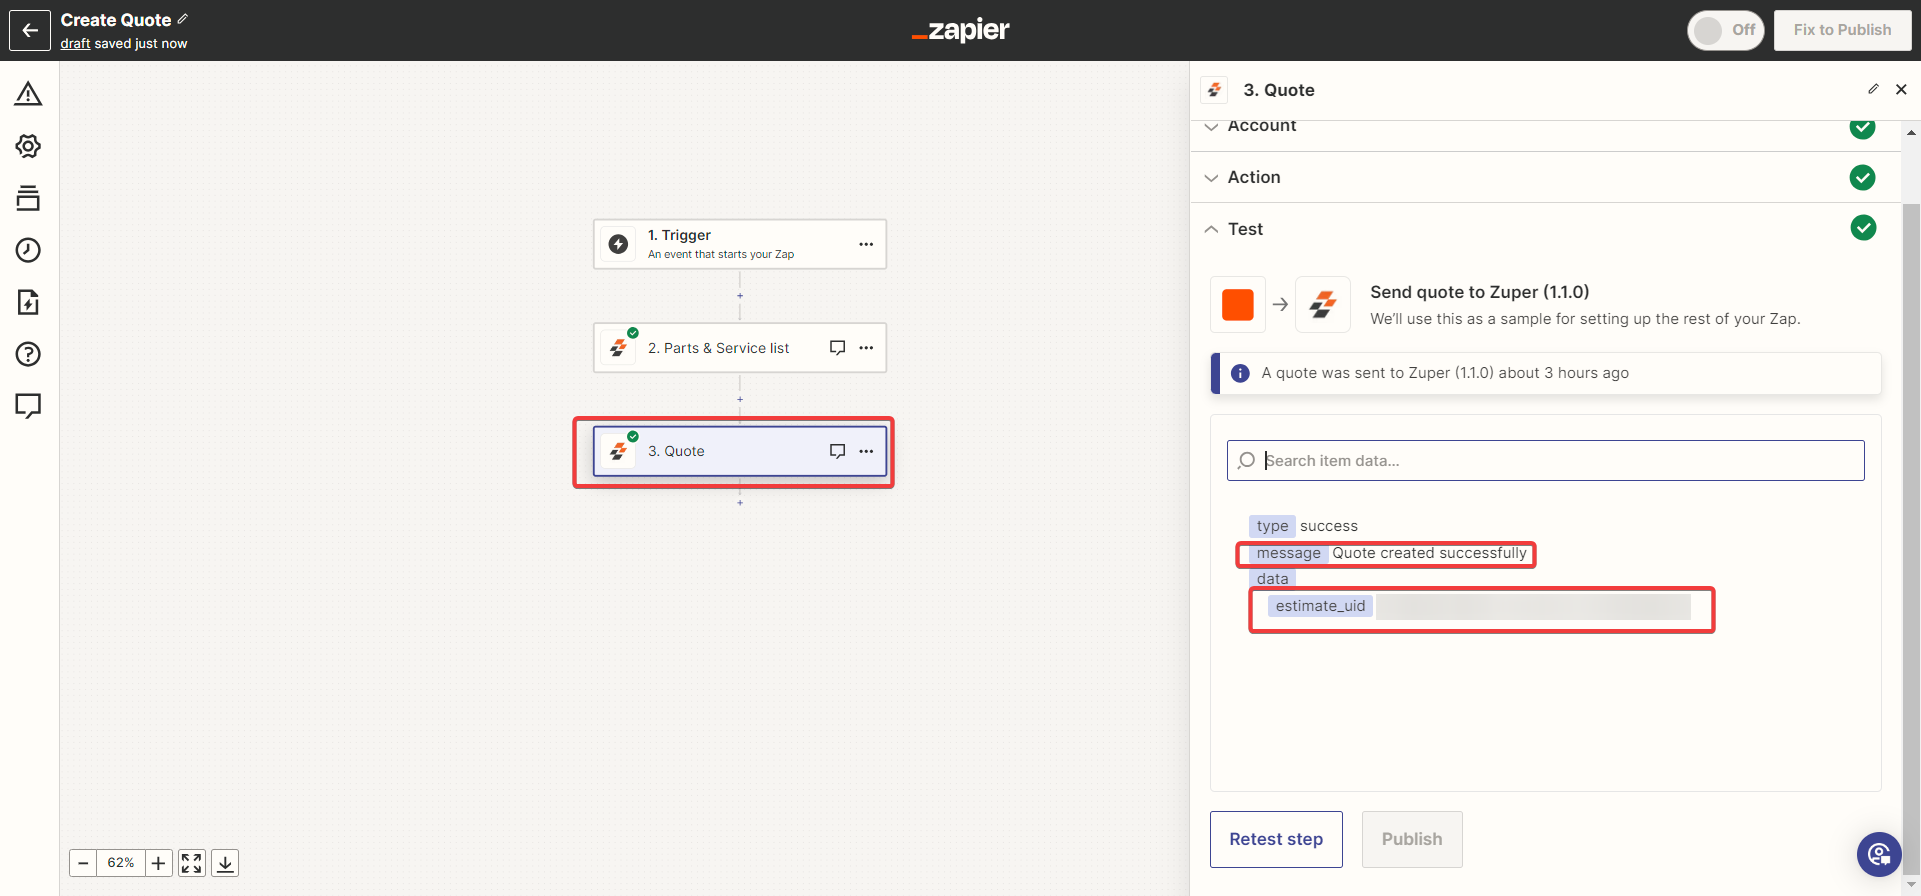
xii. Create a New Quote
There are two ways to provide organization/customer/property UID while creating the quote / invoice / job. a. Directly type and provide the UID. (We used this flow in Quote creation below). b. We can use “find organization / customer / property” zap (We used this flow in Invoice creation) With all the details created from the various steps in the above section. Now you can create a new Quotation.- Enter the Quotation details.
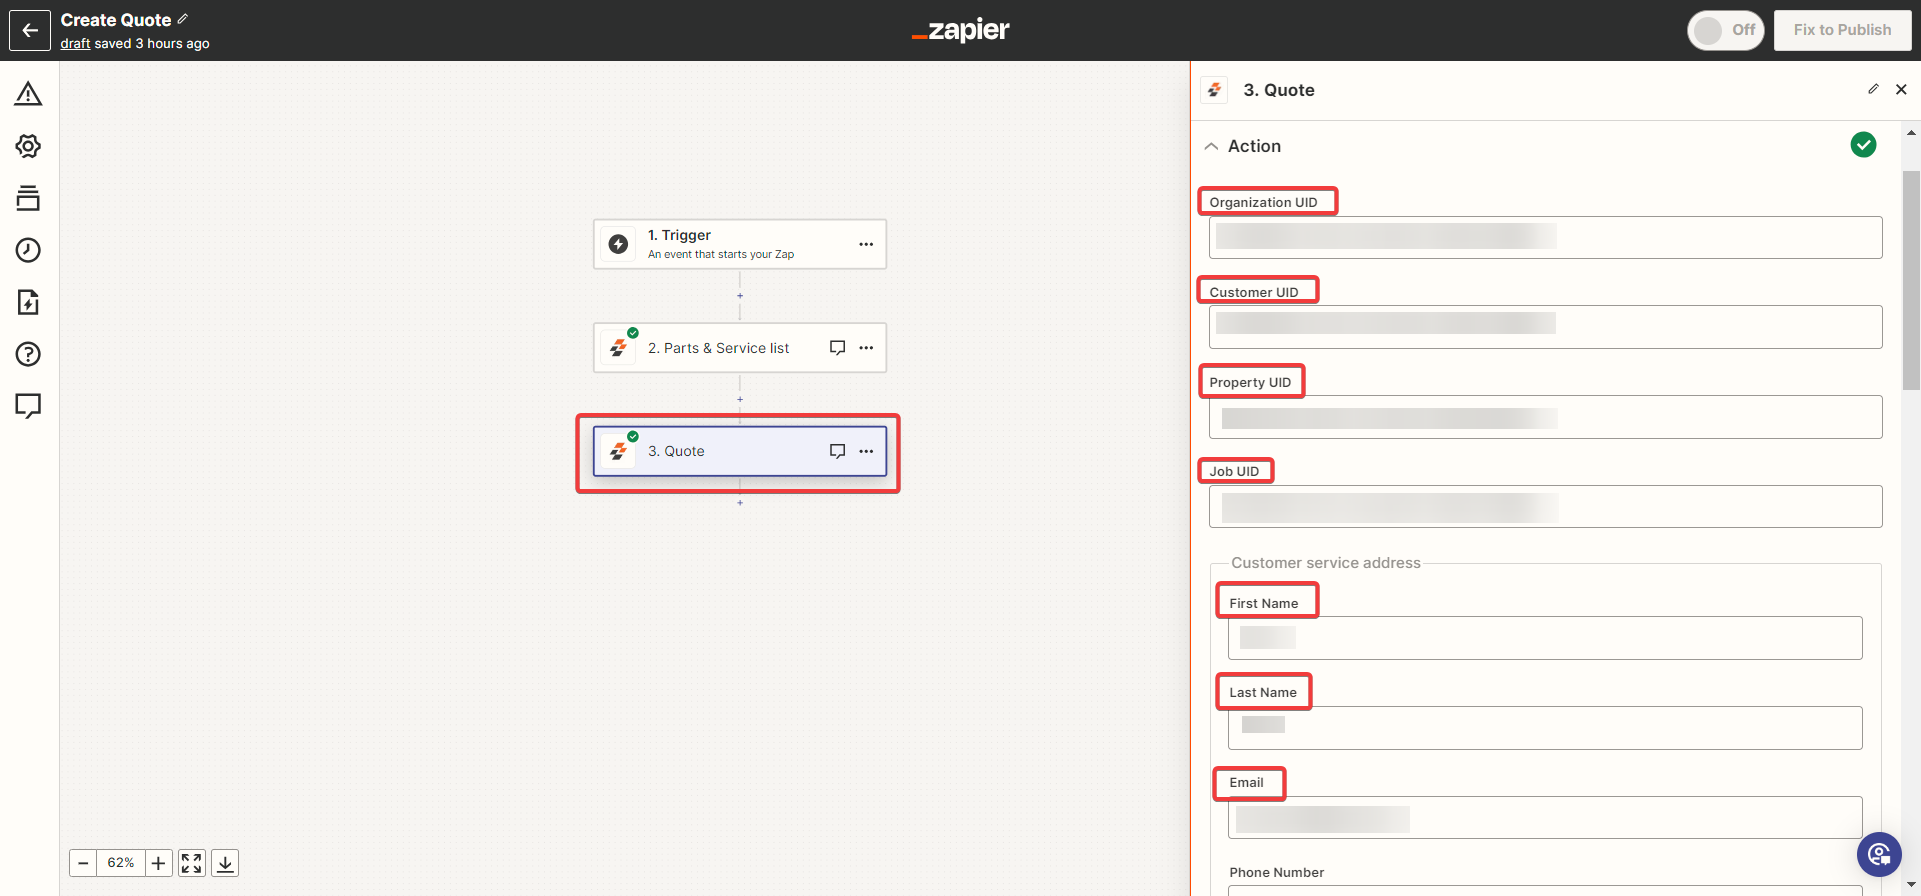
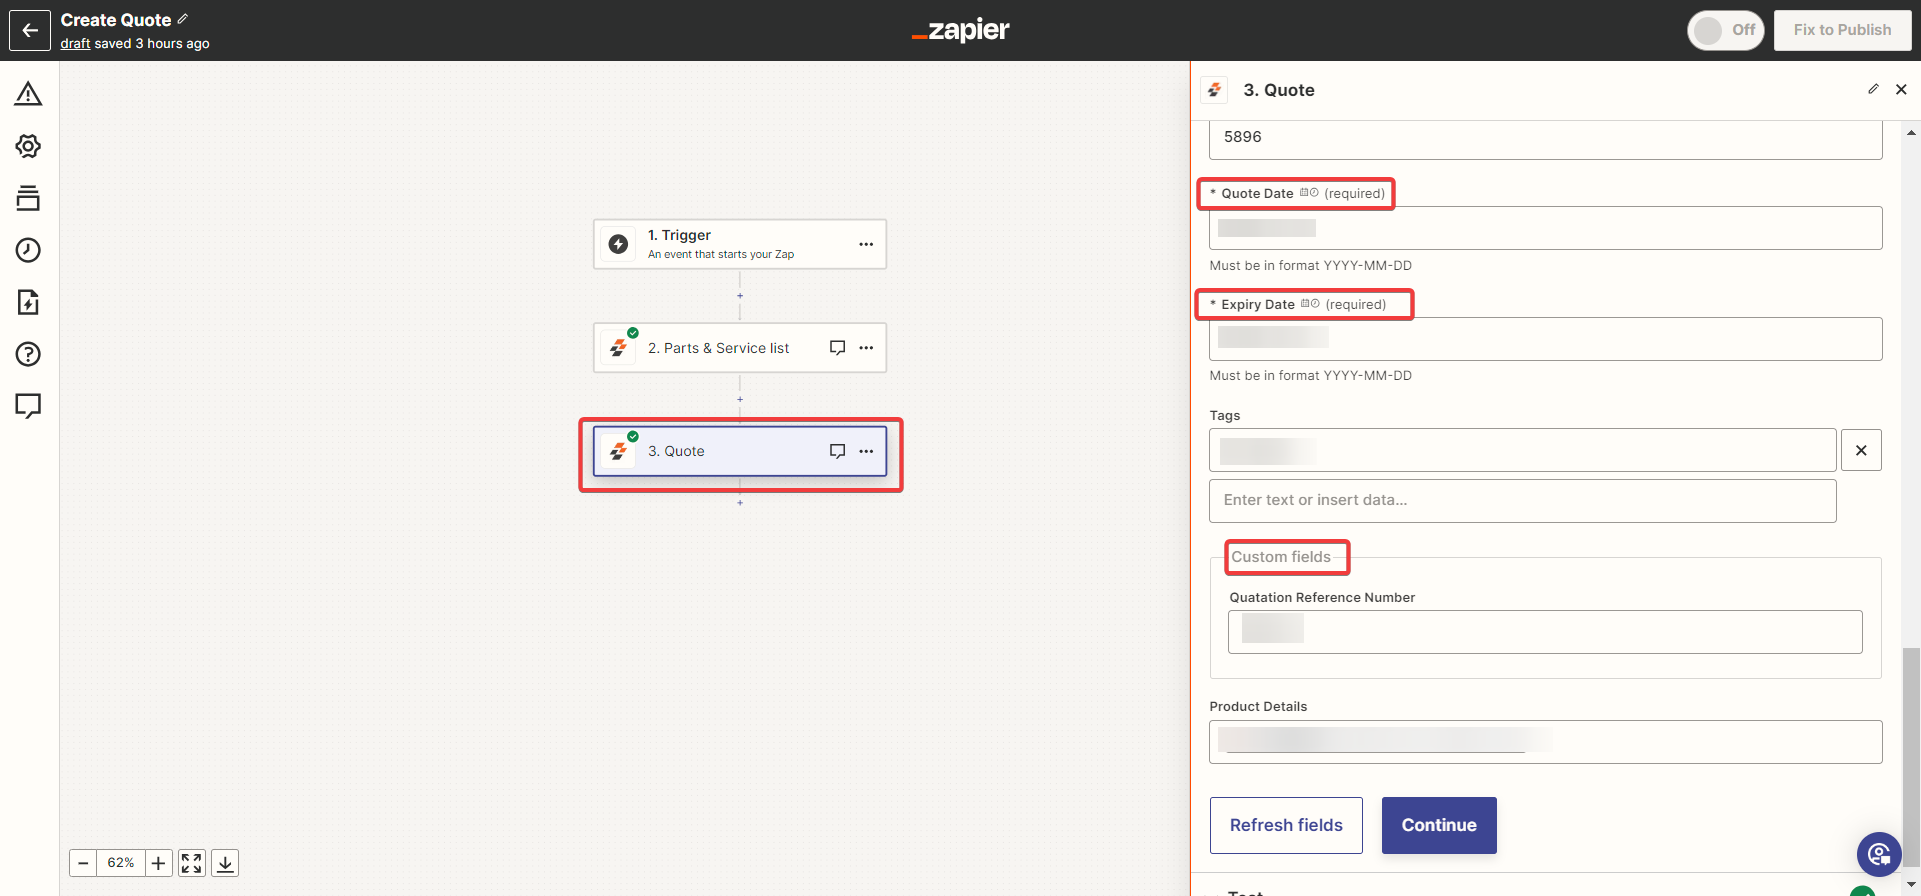
- Enter the Mandatory Quotation fields.
Note: The date and time format should be YYYY-MM-DD HH:MM:SS
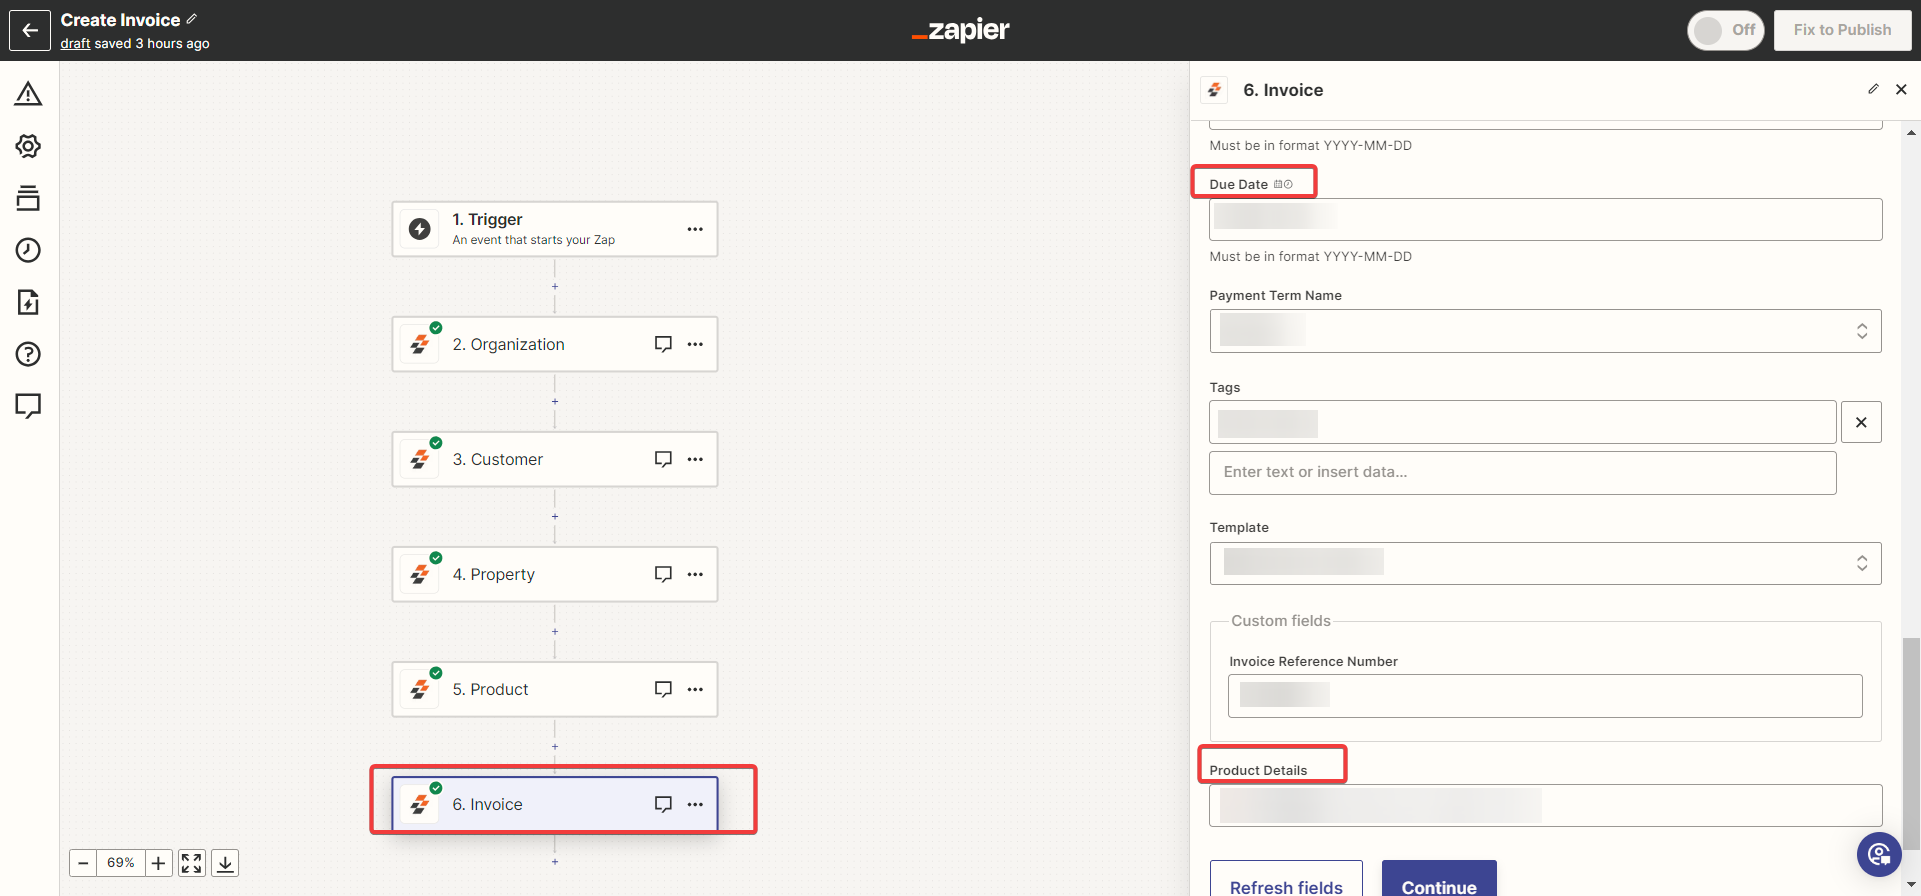
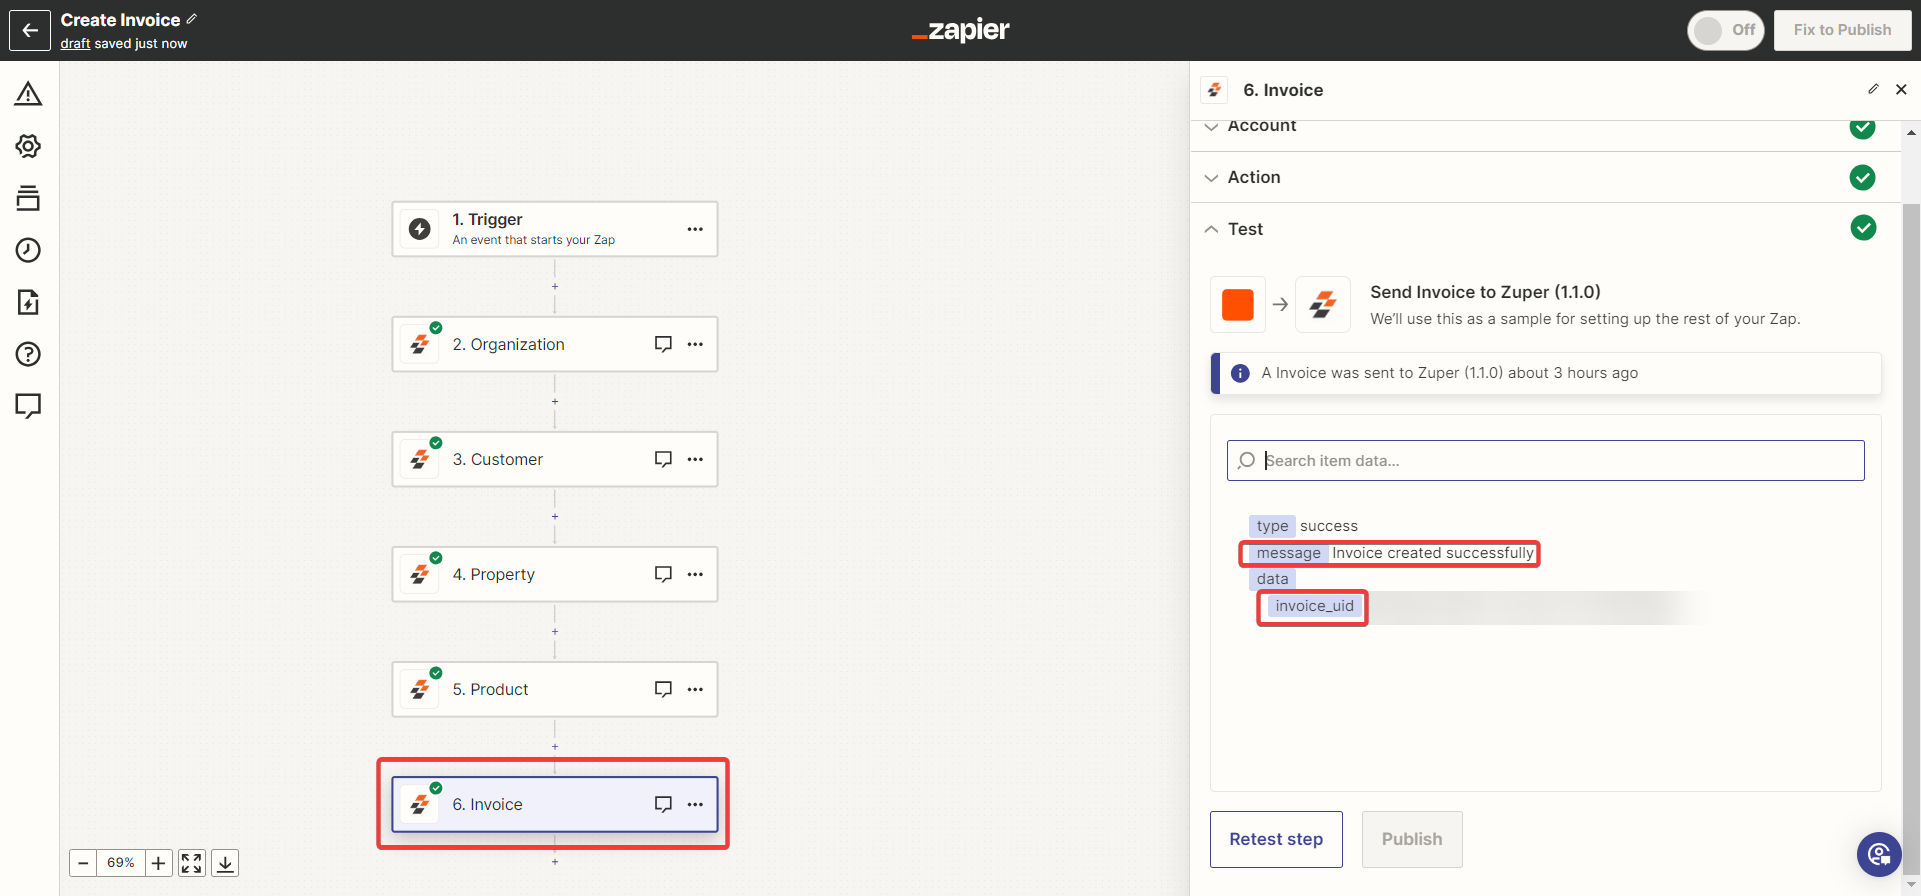
xiii. Create a New Invoice
There are two ways to provide organization/customer/property UID while creating the quote/invoice/job. a. We can use “find organization/customer/property” zap (We used this flow in Invoice creation below). b. Directly type and provide the UID. (We used this flow in Quote creation in the previous section). With all the details created from the various steps in the above section. Now you can create a new Invoice.- Enter the Invoice details.

Uninstalling Zapier from Zuper
To remove the Zapier integration:- Log in to your Zuper account. Click your profile picture in the top-right corner and select App Store.
- Under the “Browse by Category,” select the “Workflow Automation” option and choose “Zapier.” Click “Uninstall.”
- Uninstall the App:
- Click Uninstall App.
- The Zapier app will be uninstalled successfully.
- Product UID, Qty, and Price should be the exact count in Part & Service List Zap - Please ensure to map the respective count of product UID based on the count entered in the Zap
- Org/Customer/Property are inter linked for the smooth integration to happen. - Please ensure that the organization, customer & property are associated in Zuper for smoother integration
- Job, Invoice, and Quote need to use Part and Service List zap, and create Asset need to use Product UID - For modules that require parts & services, please use the Product UID in the Zap. You can also use the lookup action to find the product UID using the name or SKU
- In new Assets, while adding asset parts UID, Qty should be in the exact count; also, we can only add “parts” and not add products and services. - While creating assets through Zap, please ensure to add only Product UID, which is of type “PART” configured in Zuper. Items of type “PRODUCT” / “SERVICE” are not supported for inclusion in Asset.