Navigation: Settings -> Modules -> Customers-Contacts - > Customers-Contacts General Settings
Customer-contact General settings
General settings control the core behavior of every customer and contact record in Zuper. Use these toggles to set up unique identifiers, debt alerts, payment options, and portal access before your team starts adding records. Select the “Settings” module from the left panel. Under the “Modules,” choose the “Customer/Contact.” Select the “Customer/Contact General Settings.”
Choose the field Zuper uses to identify each customer or contact record uniquely. This prevents duplicate records and helps your team find the right customer quickly. Show a bad debt alert upon choosing a customer/contact
Toggle to Yes to display a warning when a customer with an outstanding bad debt balance is selected on a job or invoice. Toggle to No to turn off this alert.
Enable this setting if your team regularly works with customers who have overdue balances. The alert appears at the point of selection, so your team can take action before work begins.
Toggle to Yes to let your team store a customer’s payment card against their record. Toggle to No to turn off this option. Enable billing cycle
Toggle to Yes to activate billing cycle functionality for customers and contacts. Toggle to No to turn it off. Does customer/contact need an account manager
Toggle to Yes to allow an account manager to be assigned to each customer or contact record. Toggle to No to remove this option. Enforce geo-location in address
Toggle to Yes to require a verified geo-location when an address is entered on a customer or contact record. Toggle to No to allow addresses without location verification. Enable portal access by default
Toggle to Yes to automatically grant new customers and contacts access to your customer portal when their record is created. Toggle to No to require manual setup of portal access.
Enable lead source
Enable lead source
Lead source tracking lets you record where each new customer or job originates — for example, a website form, a phone call, or a referral. When this setting is on, the Lead Source field appears on customer, contact, and job records, and becomes available in filters, reports, and dashboards.Track lead source
Toggle to Yes to enable lead source tracking for new and existing customers and contacts. Toggle to No to turn off this field across all records.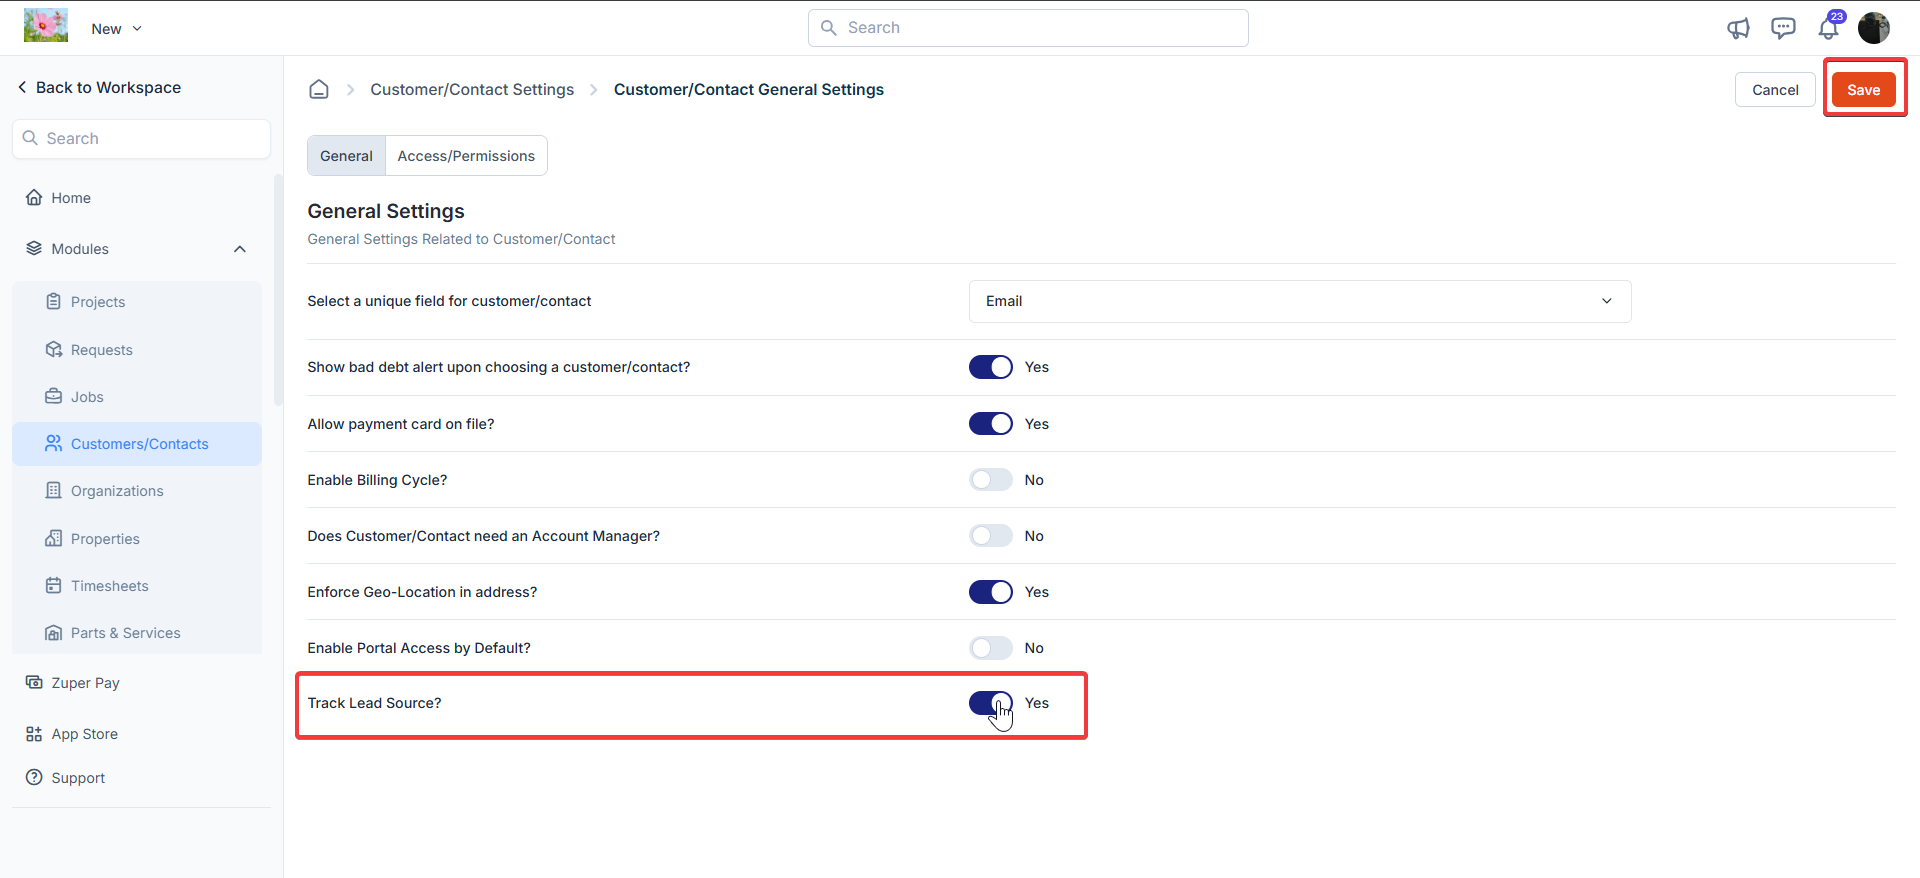
Navigation: Settings → Modules → Customer/Contact → Customer/Contact General Settings
Toggle to Yes to enable lead source tracking for new and existing customers and contacts. Toggle to No to turn off this field across all records.
You must also create individual lead sources before your team can select them on records. See Lead sources below for steps to add sources.
Auto-create property
Auto-create property
Automatically create property upon customer/contact creation
Toggle to Yes to have Zuper automatically create a linked property record each time a new contact is created. Toggle to No to turn off automatic property creation.
Toggle to Yes to have Zuper automatically create a linked property record each time a new contact is created. Toggle to No to turn off automatic property creation.
This setting must be enabled by your administrator. When it is on, every new contact generates a corresponding property record without any additional steps from your team — useful if your business always associates a service address with each contact.
Access / Permissions
Access and permissions settings control what team leaders and field executives can see and do within the Customers/Contacts module. Review these settings carefully — they affect what your field team can access on the mobile app.Navigation: Settings → Modules → Customer/Contact → Customer/Contact General Settings
Toggle to Yes to give team leaders visibility of all customer and contact records. Toggle to No to restrict their view. Can field executive create new customer/contact
Toggle to Yes to allow field executives to add new customer and contact records from the mobile app. Toggle to No to prevent this. Can field executive edit customer/contact details
Toggle to Yes to allow field executives to update existing customer and contact records. Toggle to No to make records read-only for field executives. Can field executive view all customers/contacts
Toggle to Yes to give field executives access to all customer and contact records. Toggle to No to limit their visibility. Does field executive require facial authentication to view customers/contacts
Toggle to Yes to require field executives to complete facial authentication before viewing customer or contact records. Toggle to No to remove this requirement. Can field executive view customers/contacts without punching in
Toggle to Yes to allow field executives to view records before they punch in to a shift. Toggle to No to require a punch-in before access is granted. Select Save at the top right of the page to apply your changes.
Create lead sources
Create lead sources
Lead sources are the specific channels you want to track — Website, Phone Call, Instagram, or Referral. Once you create a lead source here, your team can select it on customer, contact, and job records. Lead sources feed into your filters, dashboards, and reports, giving you a clear view of which channels bring in the most business.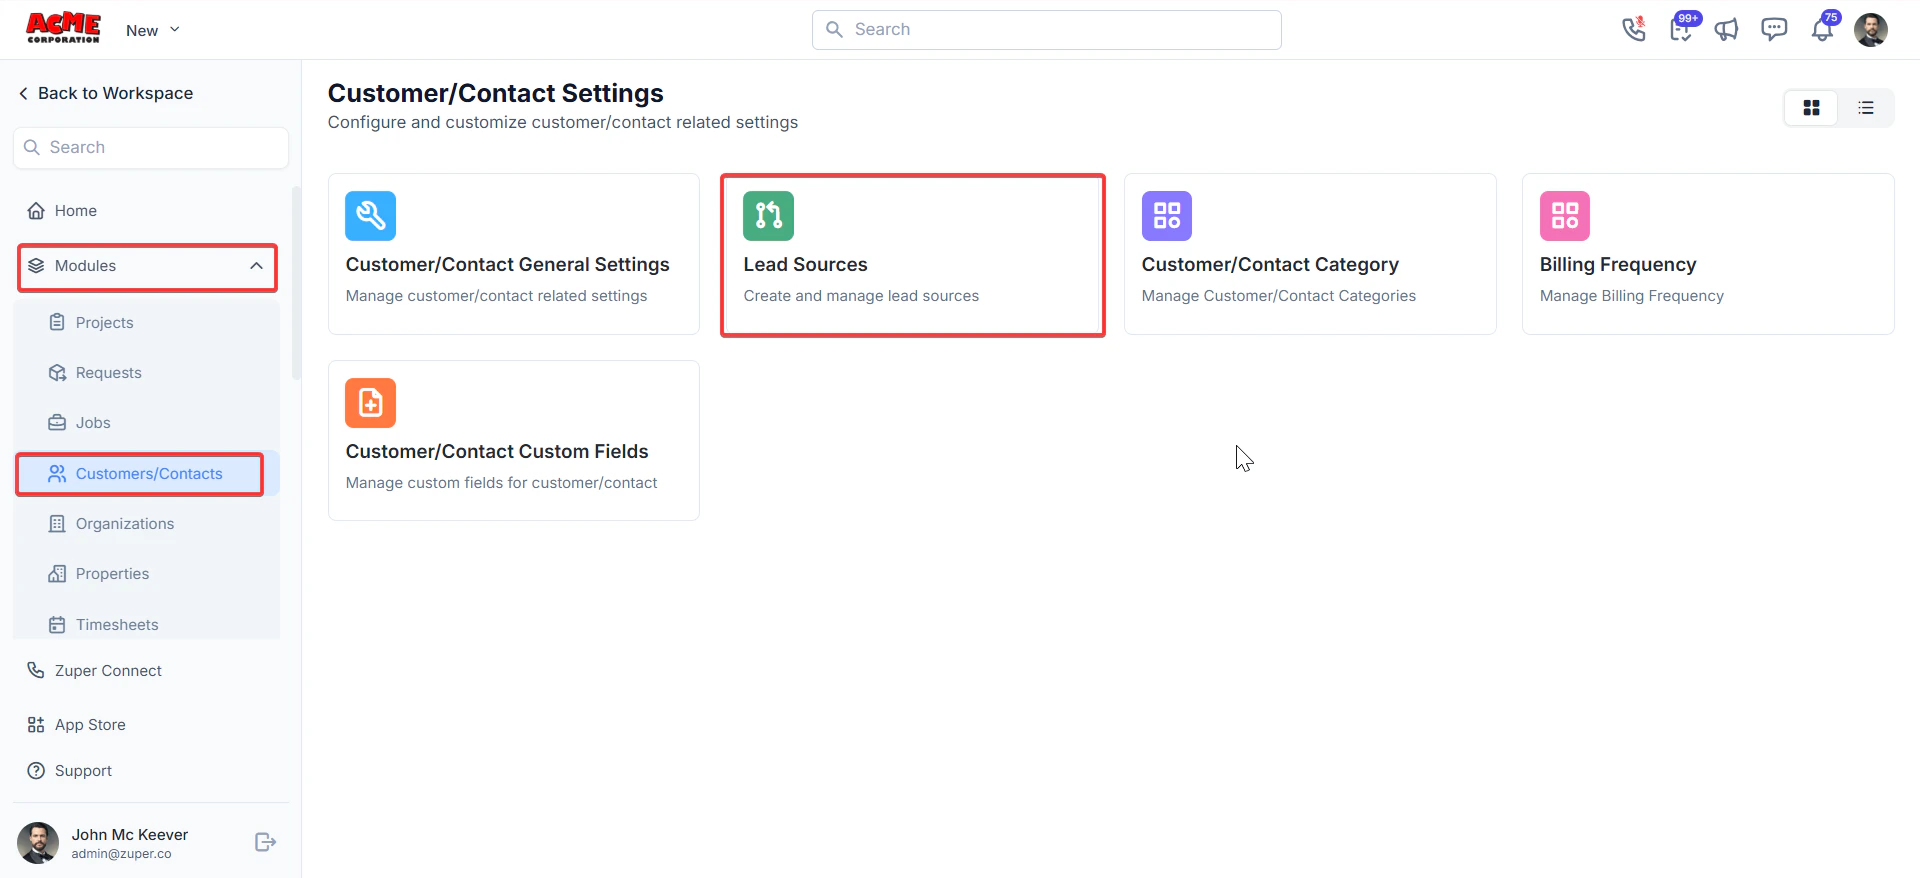
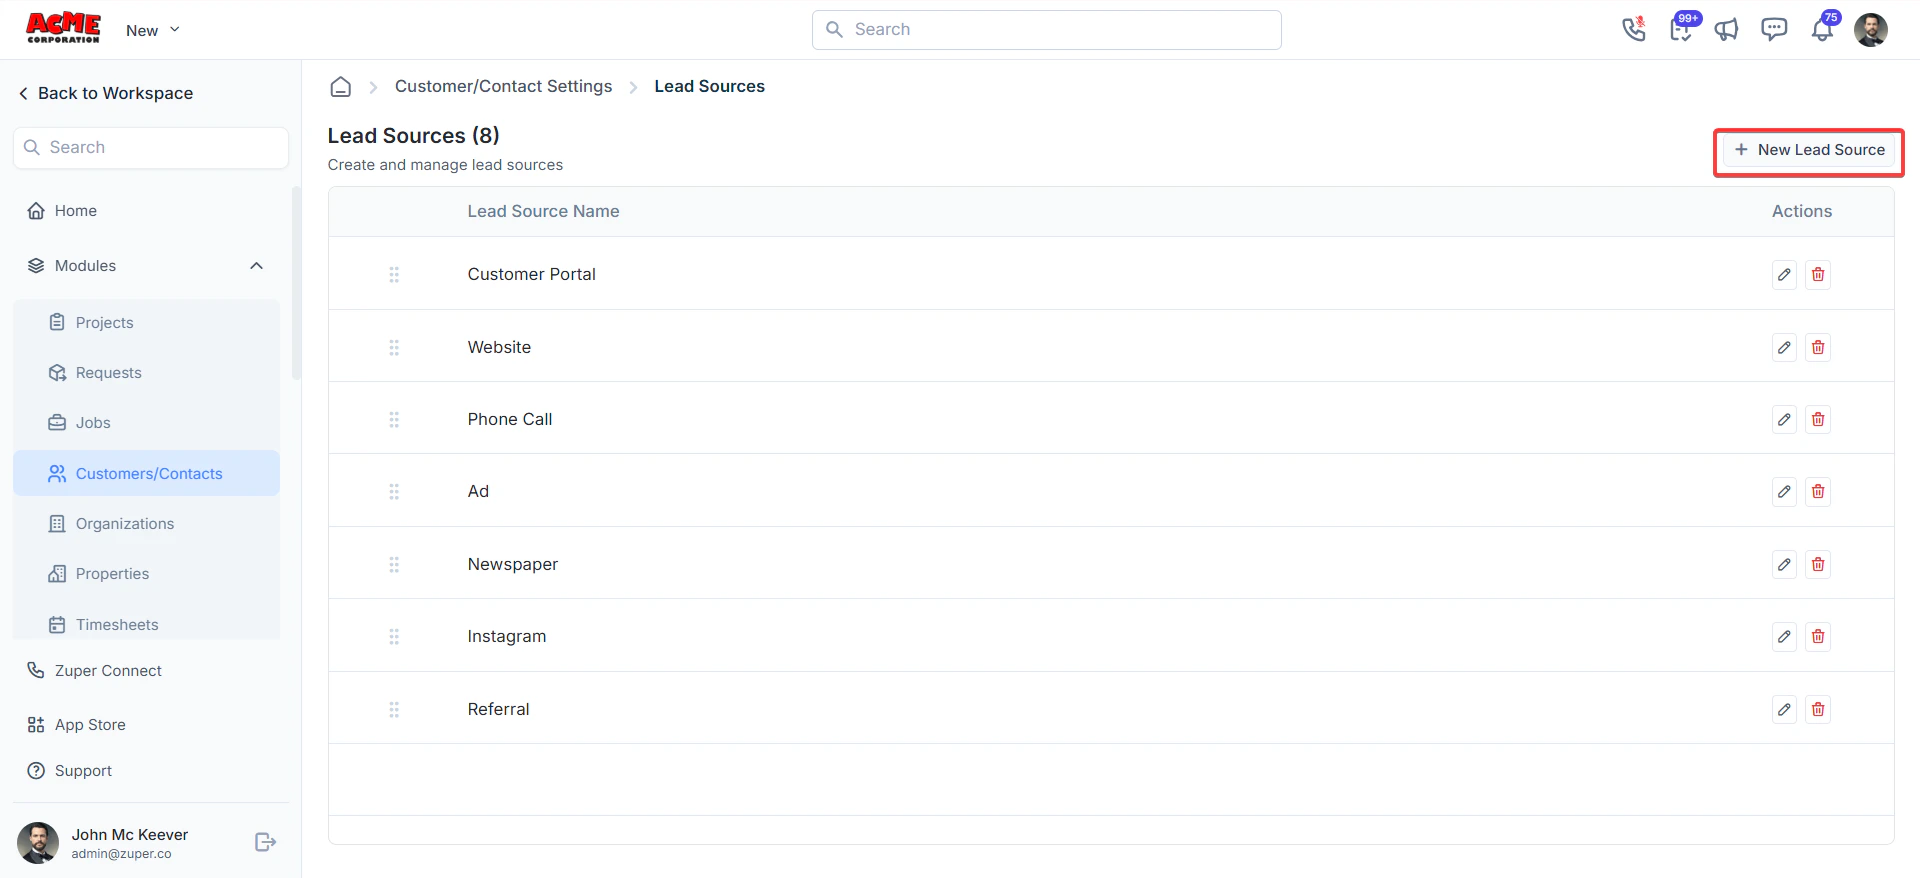
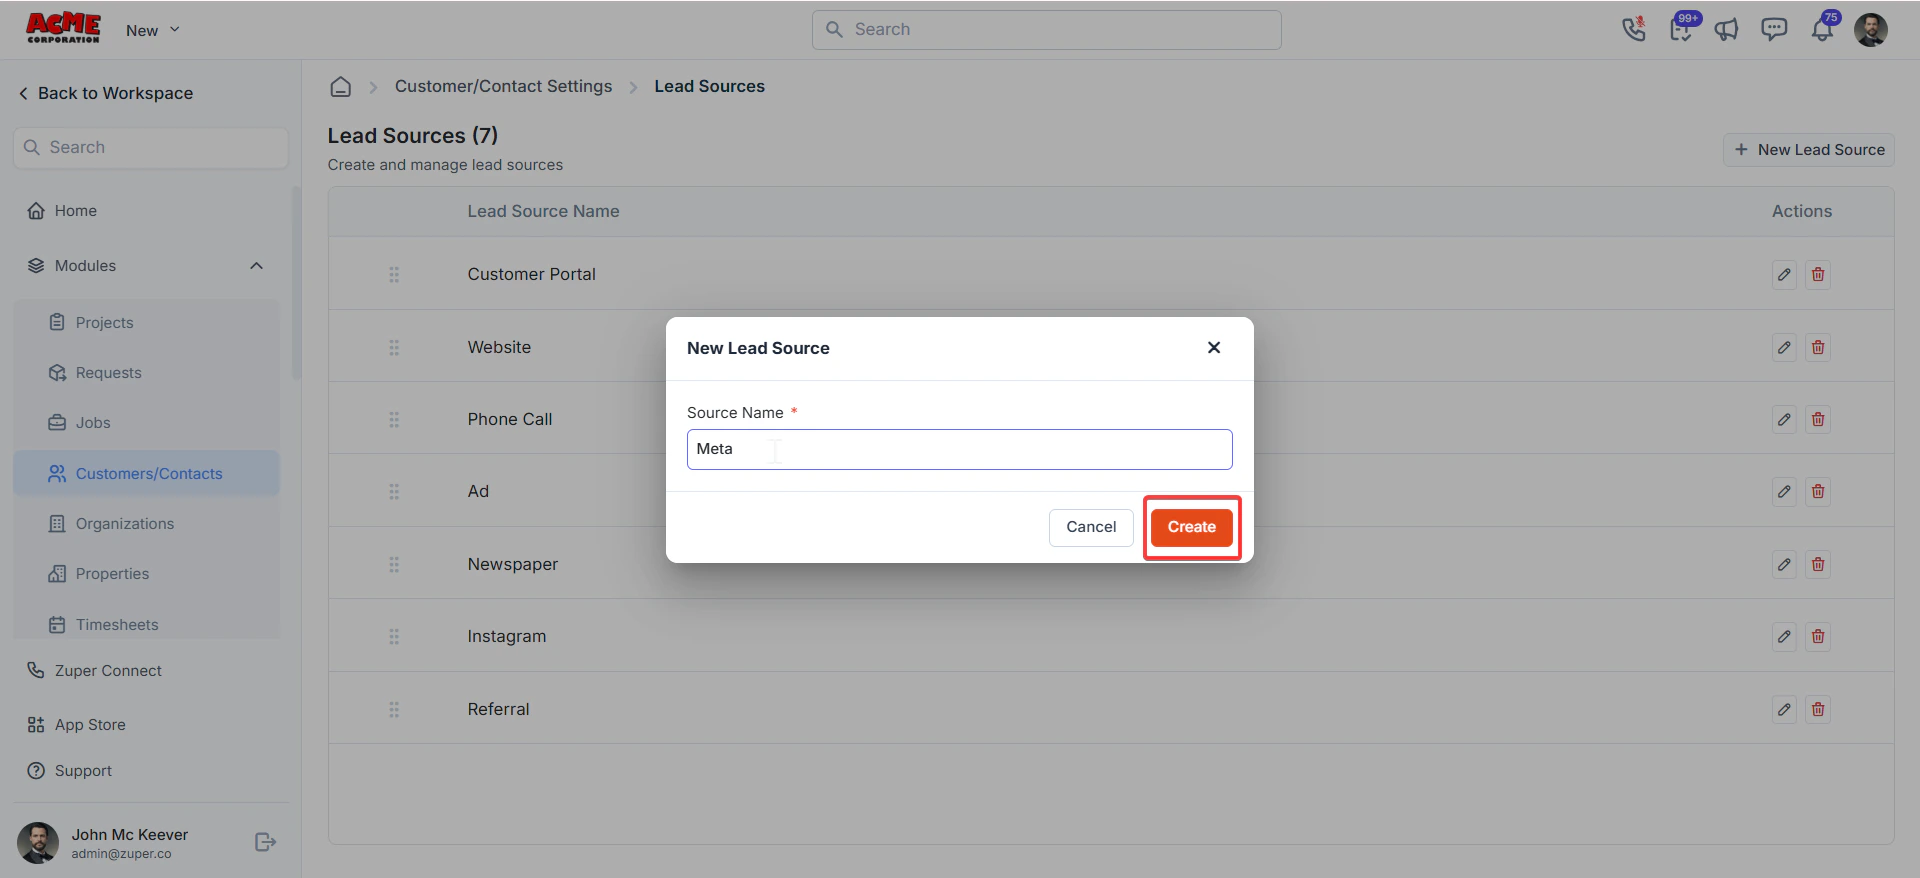
Navigation: Settings → Modules → Customer/Contact → Lead Sources
Add a lead source
- Select Settings from the left navigation panel.
- Under Modules, select Customer/Contact.
- Select Lead Sources.
- Select + New Source.
- Enter the source name in the field provided.
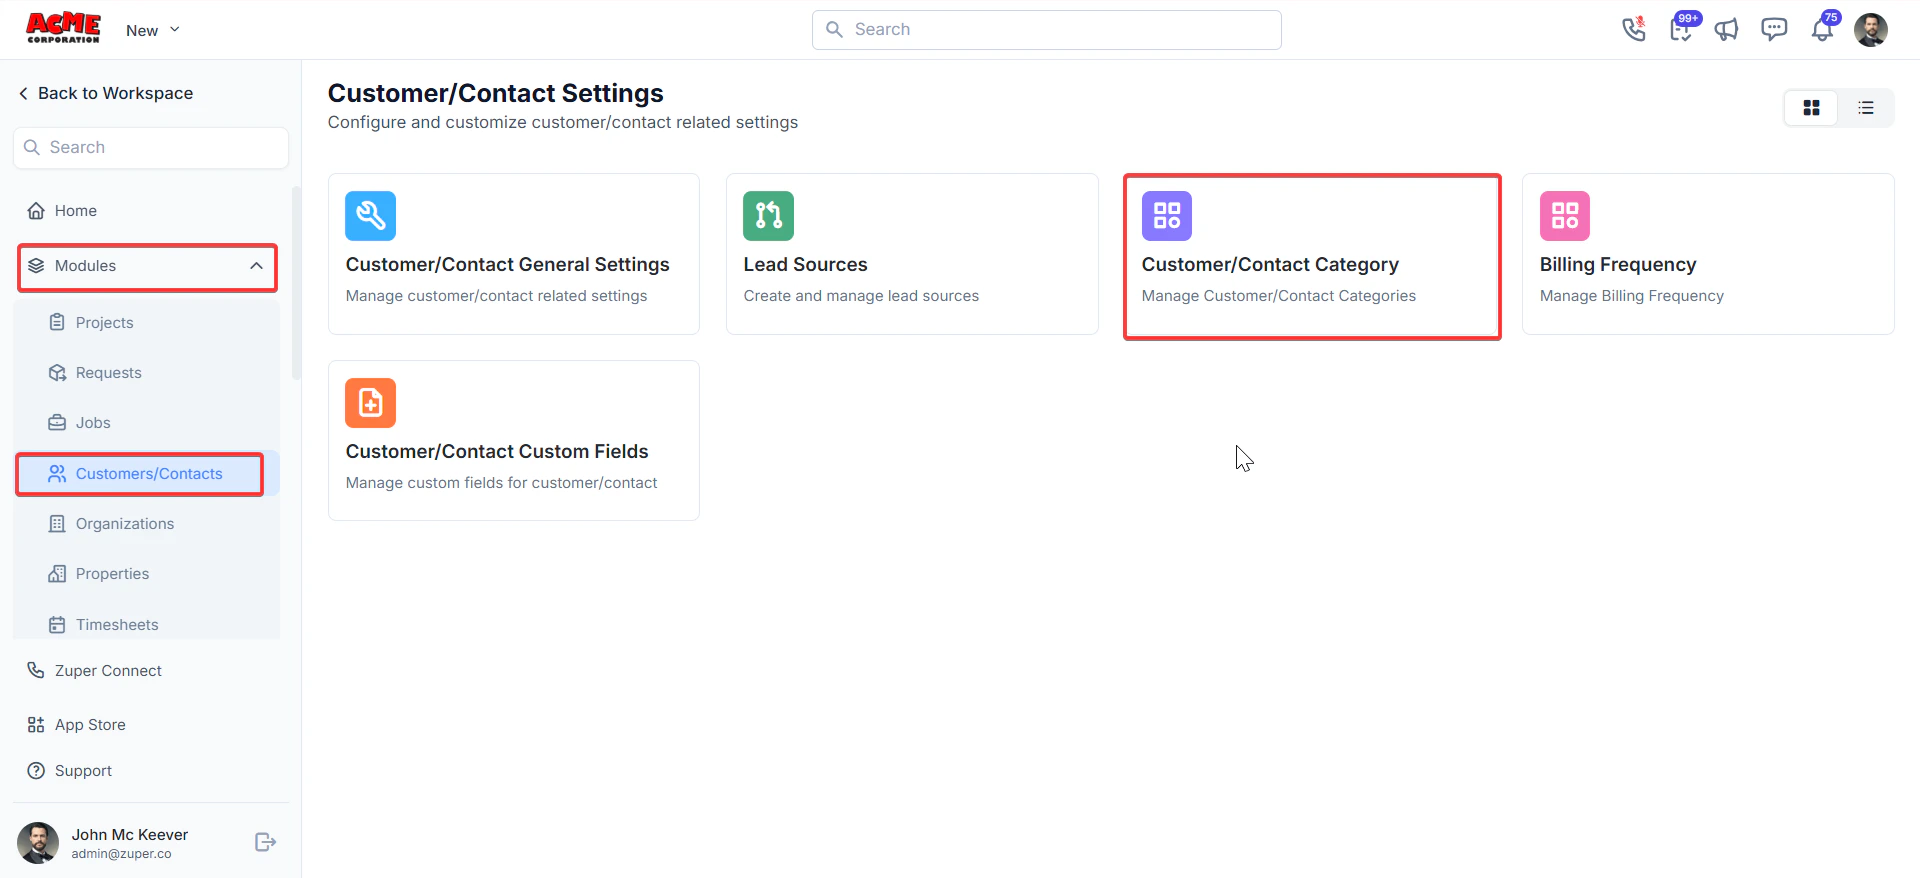
Customer/contact category
Categories let you group customers and contacts by type — for example, Residential, Commercial, or VIP. Each category can carry its own service level agreement (SLA) duration, so Zuper can track whether jobs for that group are completed on time.Navigation: Settings → Modules → Customer/Contact → Customer/Contact Category
- Select Settings from the left navigation panel.
- Under Modules, select Customer/Contact.
- Select Customer/Contact Category.
- Select + New Category.
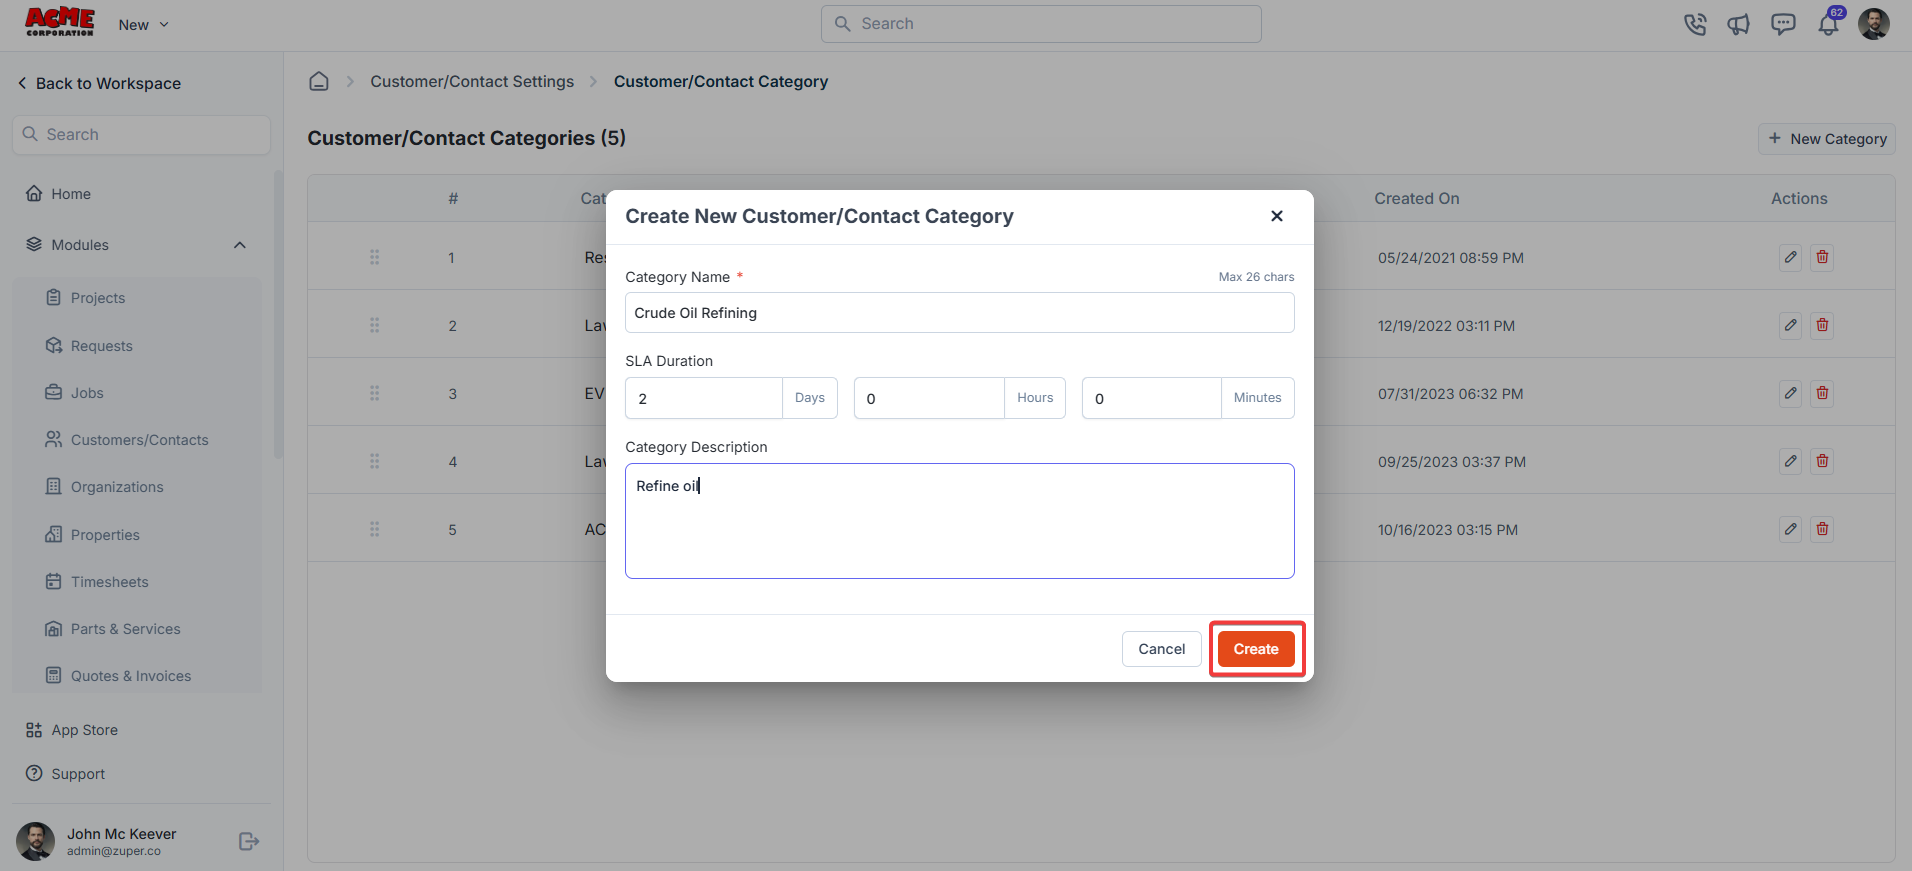
- Category name (required): Enter a name for the category.
- SLA duration: Set the expected time to complete service for customers in this category. Enter a value in days, hours, and minutes.
- Category description: Enter a brief description of the type of customers or contacts that belong to this category.
- Select Create. The new category appears in the list and is available for selection on customer and contact records.
Fields marked with an asterisk (*) are required. You cannot create a category without entering a category name.
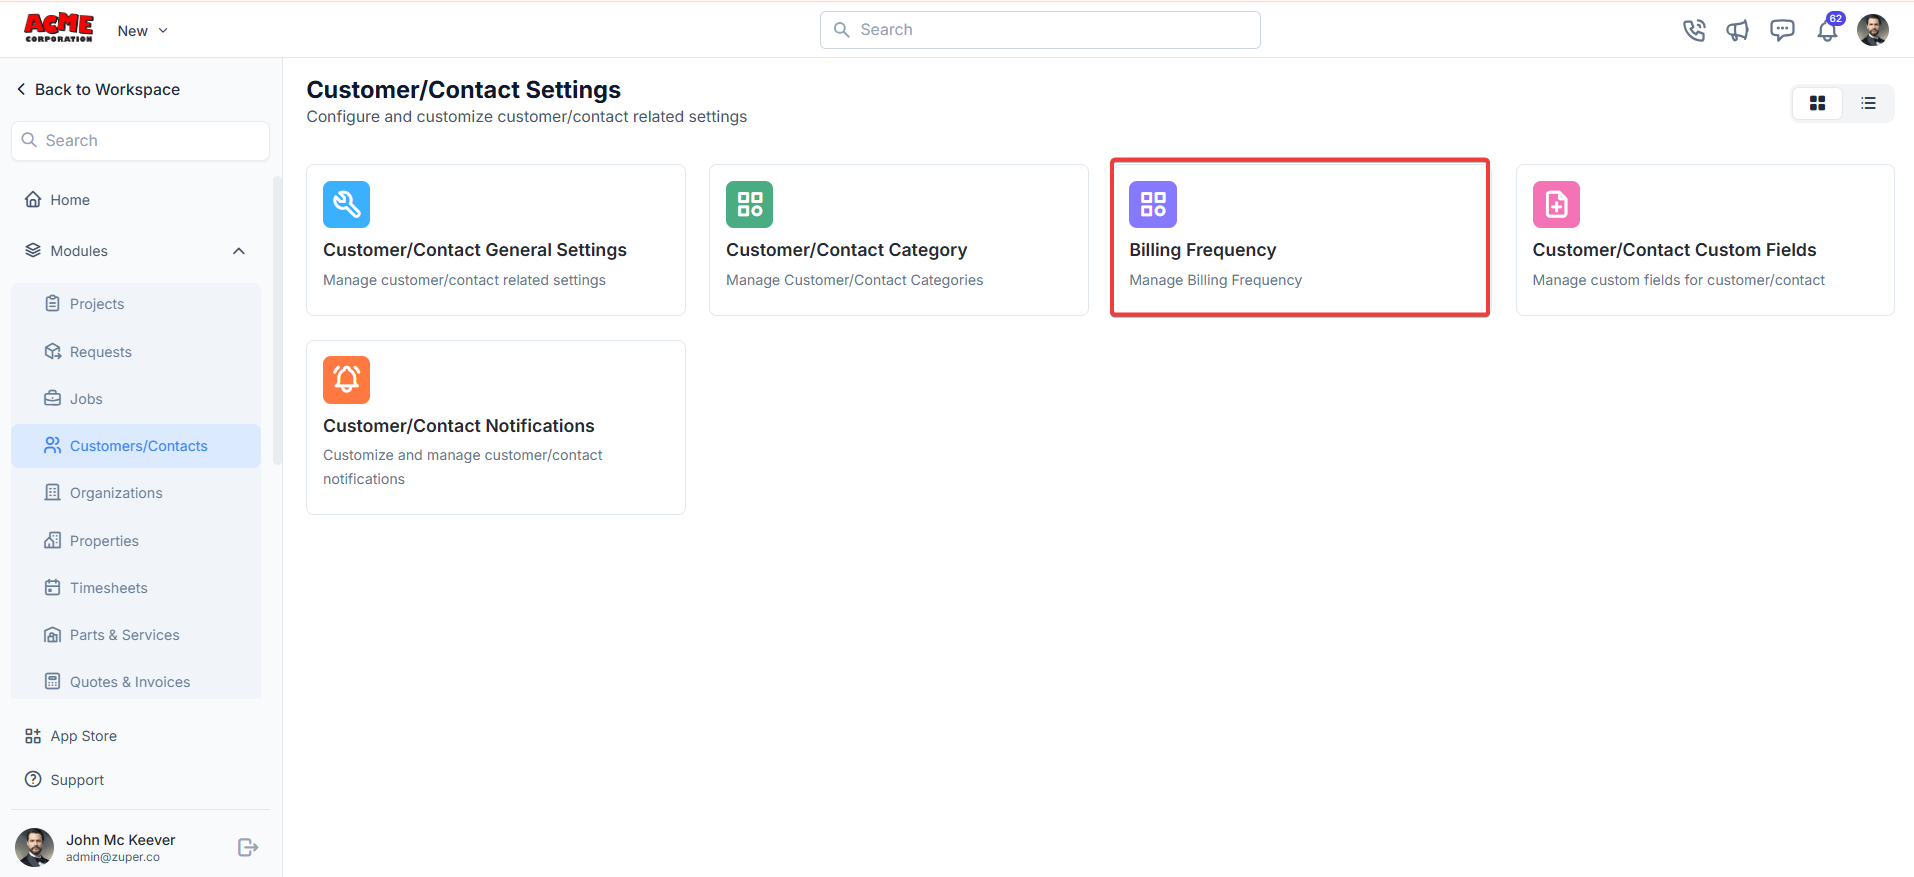
Billing frequency
- Select Settings from the left navigation panel.
- Under Modules, select Customer/Contact.
- Select Billing Frequency.
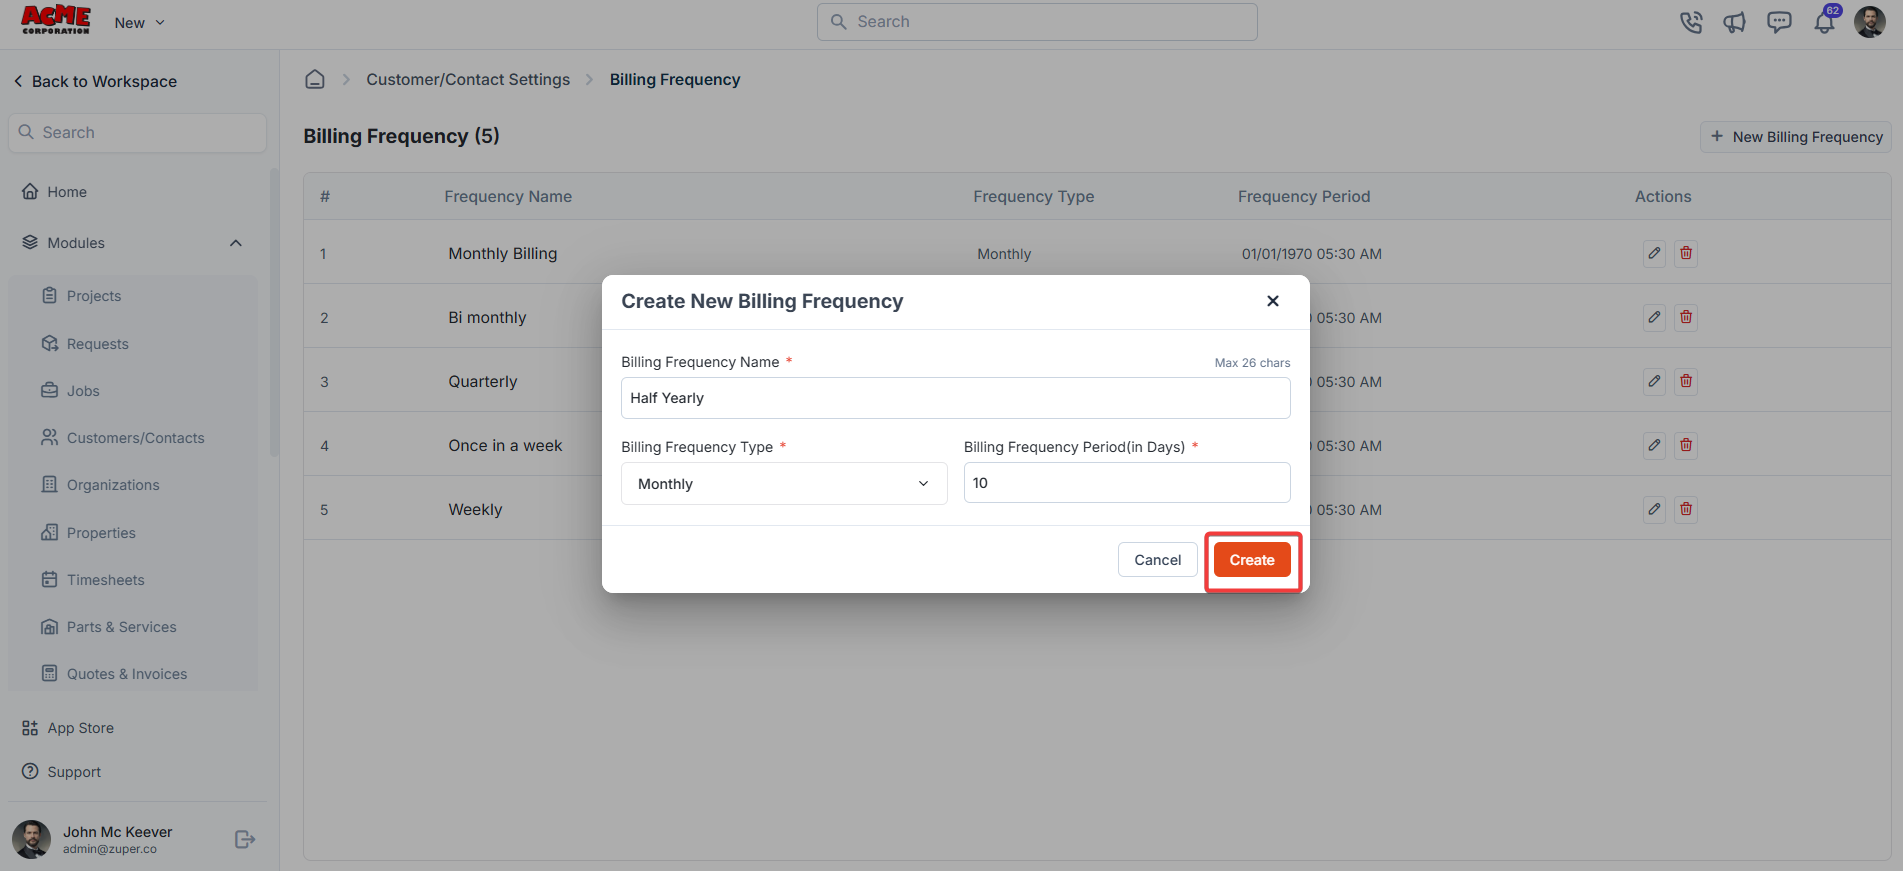
- Select + New Billing Frequency.
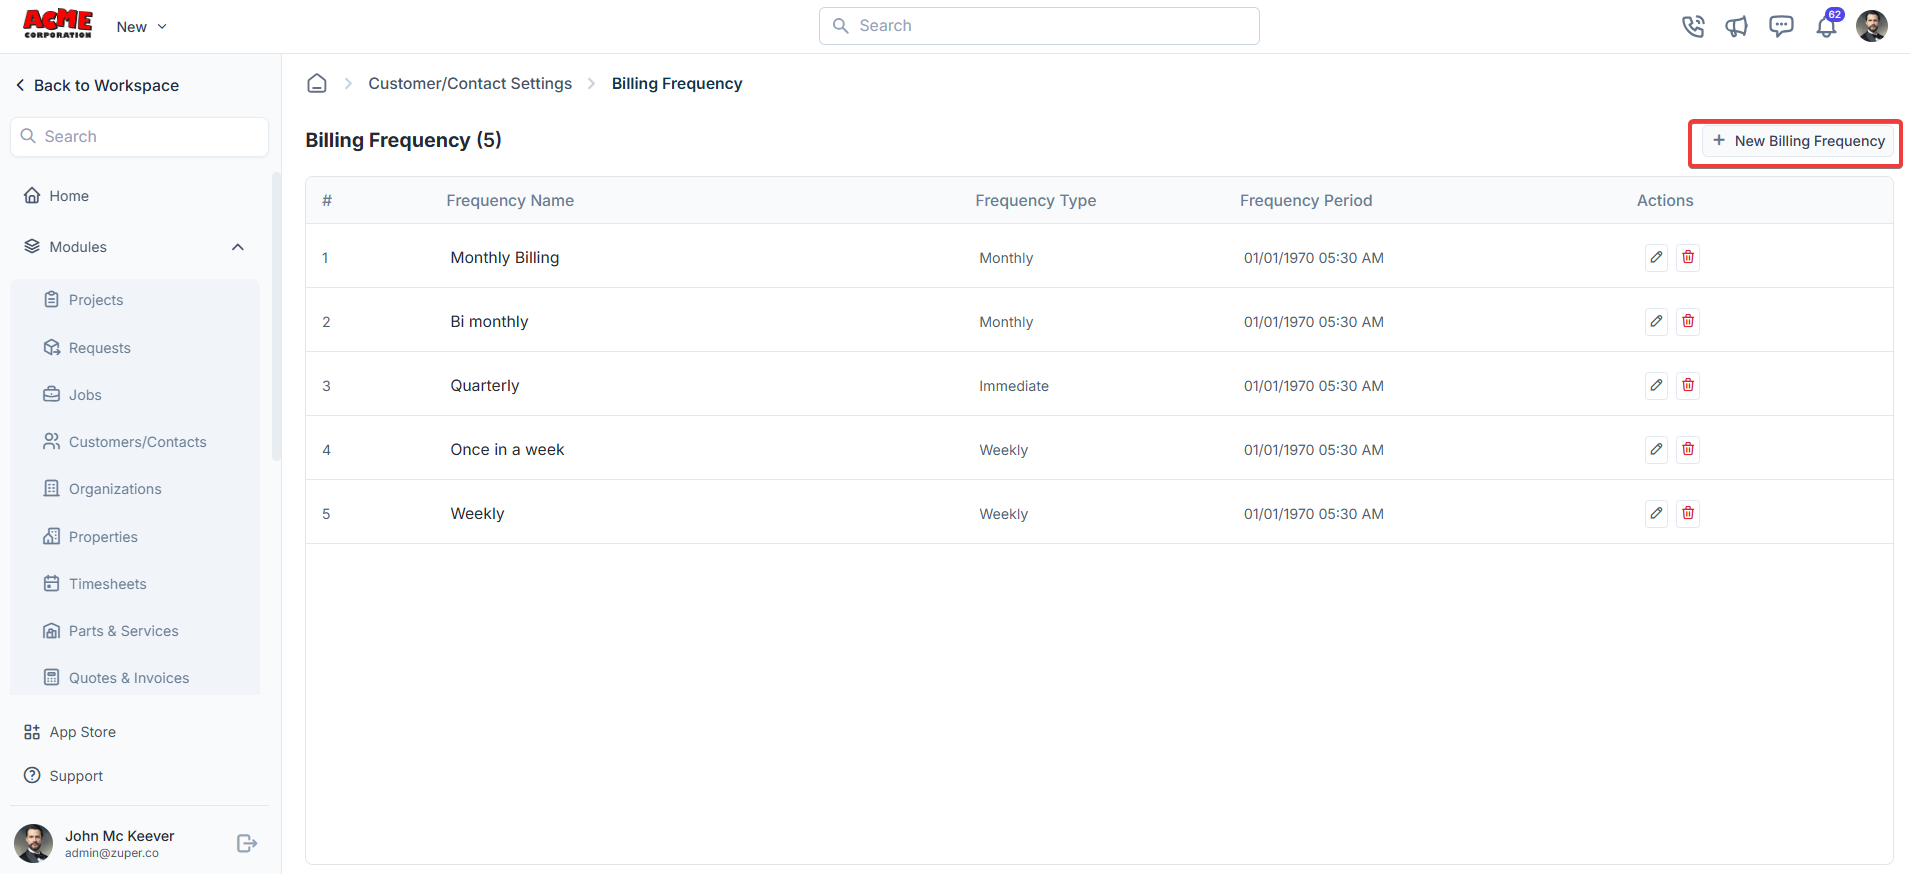
- Enter the following details:
- Billing frequency name: Enter a name for this frequency — for example, Monthly or Quarterly.
- Frequency type: Select the type that applies.
- Billing frequency period: Enter the number of days in the billing period.
- Enter the billing frequency, choose the frequency type, and the billing frequency period (in days).
The Enable Billing Cycle toggle in General Settings must be turned on before billing frequencies appear on customer and contact records.
Customers-contacts custom fields
Navigation: Settings -> Modules -> Customer-Contact -> Customer-Contact Custom Fields
- Select the “Settings” module from the left panel. Under the “Modules,” choose the ” Customer-Contact.” Select the “Customer-Contact Custom Fields.”
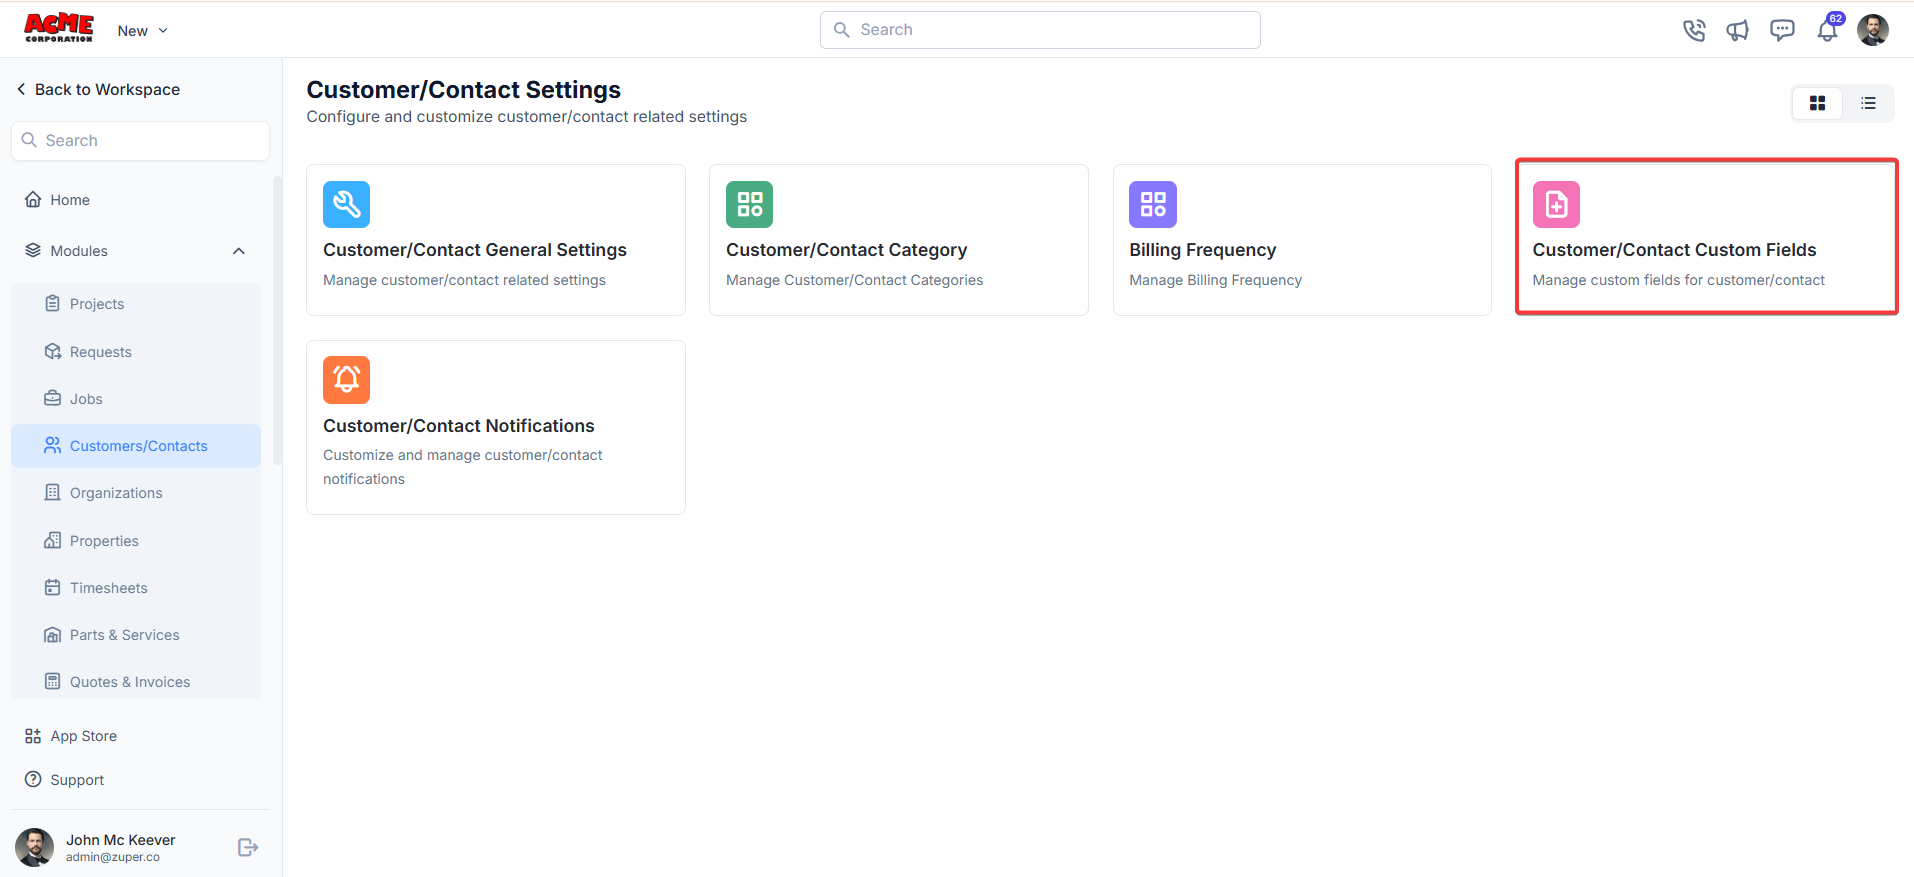
Navigation: Settings → Modules → Customer/Contact → Customer/Contact Custom Fields
Add custom fields
- Select Settings from the left navigation panel.
- Under Modules, select Customer/Contact.
- Select Customer/Contact Custom Fields.
- Drag a field type from the right panel onto the form layout. The following field types are available:
- Single-line input: Captures a single line of free text.
- Multi-line input: Captures multiple lines of free text — useful for notes or descriptions. Date
- Date input: Lets the user select a date from a calendar.
- Time input: Lets the user select a specific time.
- Date and time input: Lets the user select both a date and a time together. Selection
- Single-selection: Displays radio buttons where only one option can be chosen.
- Multi-selection: Displays checkboxes where one or more options can be chosen.
- Drop-down: Displays a drop-down list of options. Media
- Upload: Allows a file to be attached to the record. Miscellaneous
- Look up: Lets the user search for and select a product from the Parts and Services module.
Control field behavior
After you add a field, you can adjust how it behaves using the following options:| Option | What it does |
|---|---|
| Mark as required field | Makes the field mandatory before a record can be saved. |
| Mark as read only | Displays the field value but prevents users from editing it. |
| Mark as hidden field | Hides the field from all users. It does not appear on the form. |
| Hide to field executive/technician | Hides the field from field executives and technicians on the mobile app. |
- Select Create New to save the custom field group.
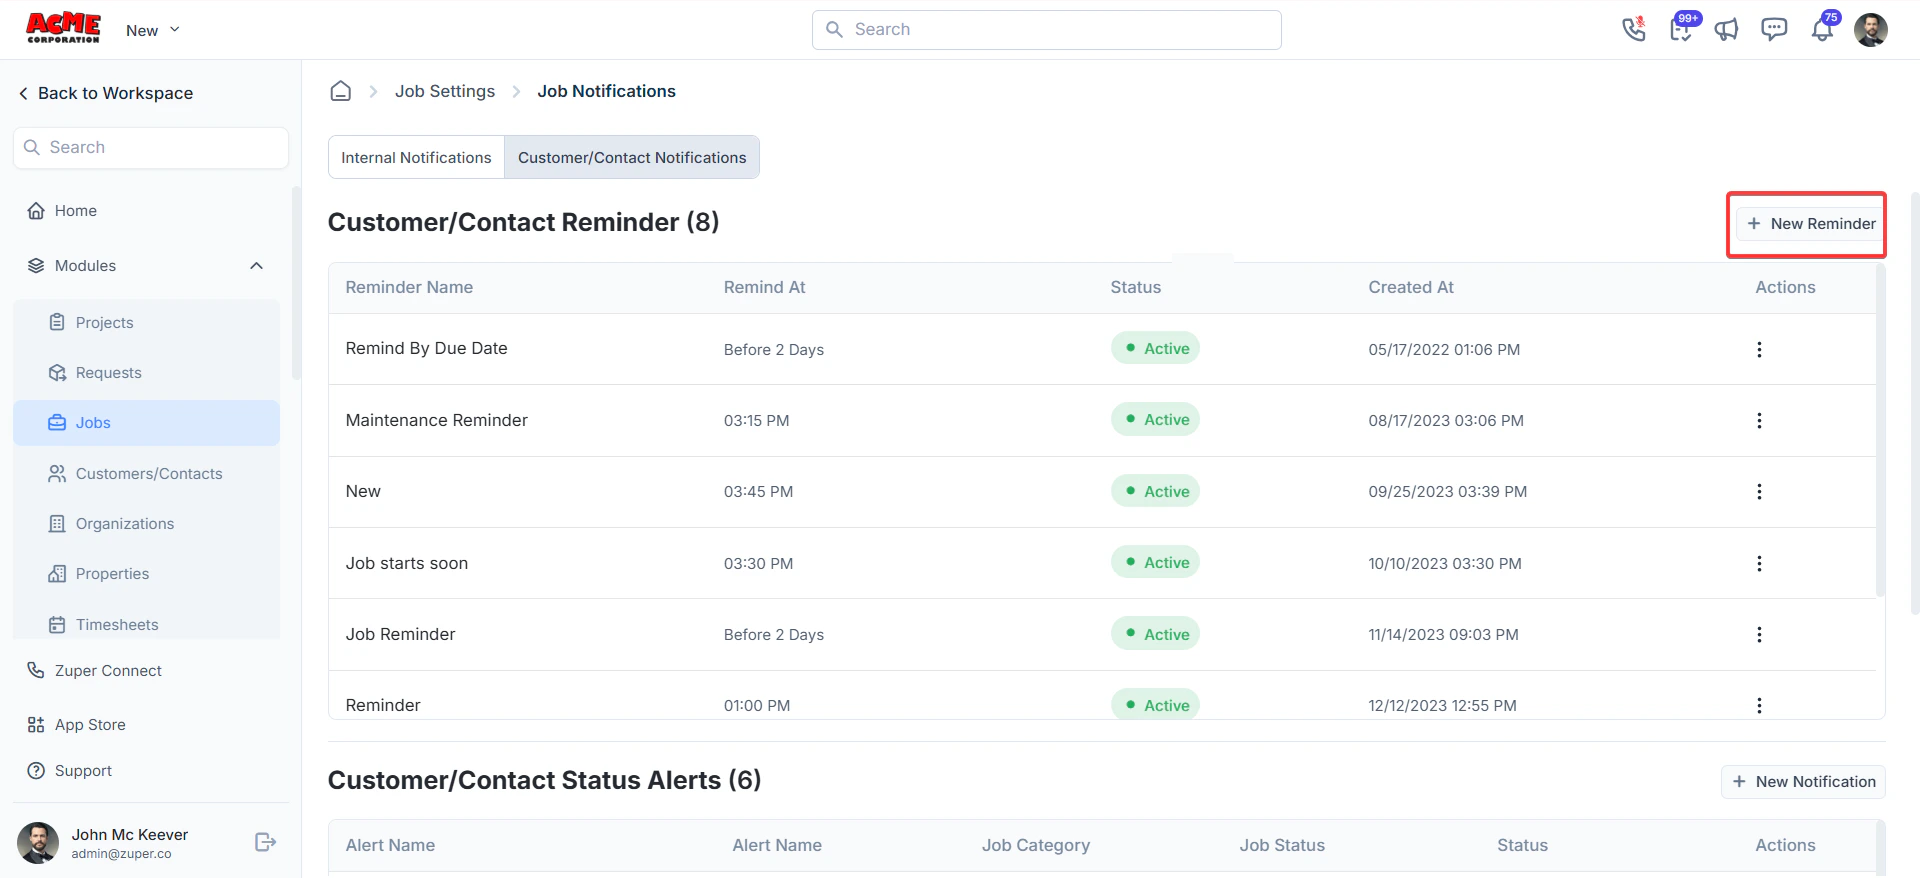
Customer/contact reminder
Reminders are automated messages sent to customers or your team at a set time before or after a job event. Use them to reduce no-shows, prompt action, or keep customers informed without manual follow-up.Navigation: Settings -> Modules -> Customer-Contact -> Customer-Contact Custom Notifications
- Select the “Settings” module from the left panel. Under the “Modules,” click “Customer/Contact Notifications.”
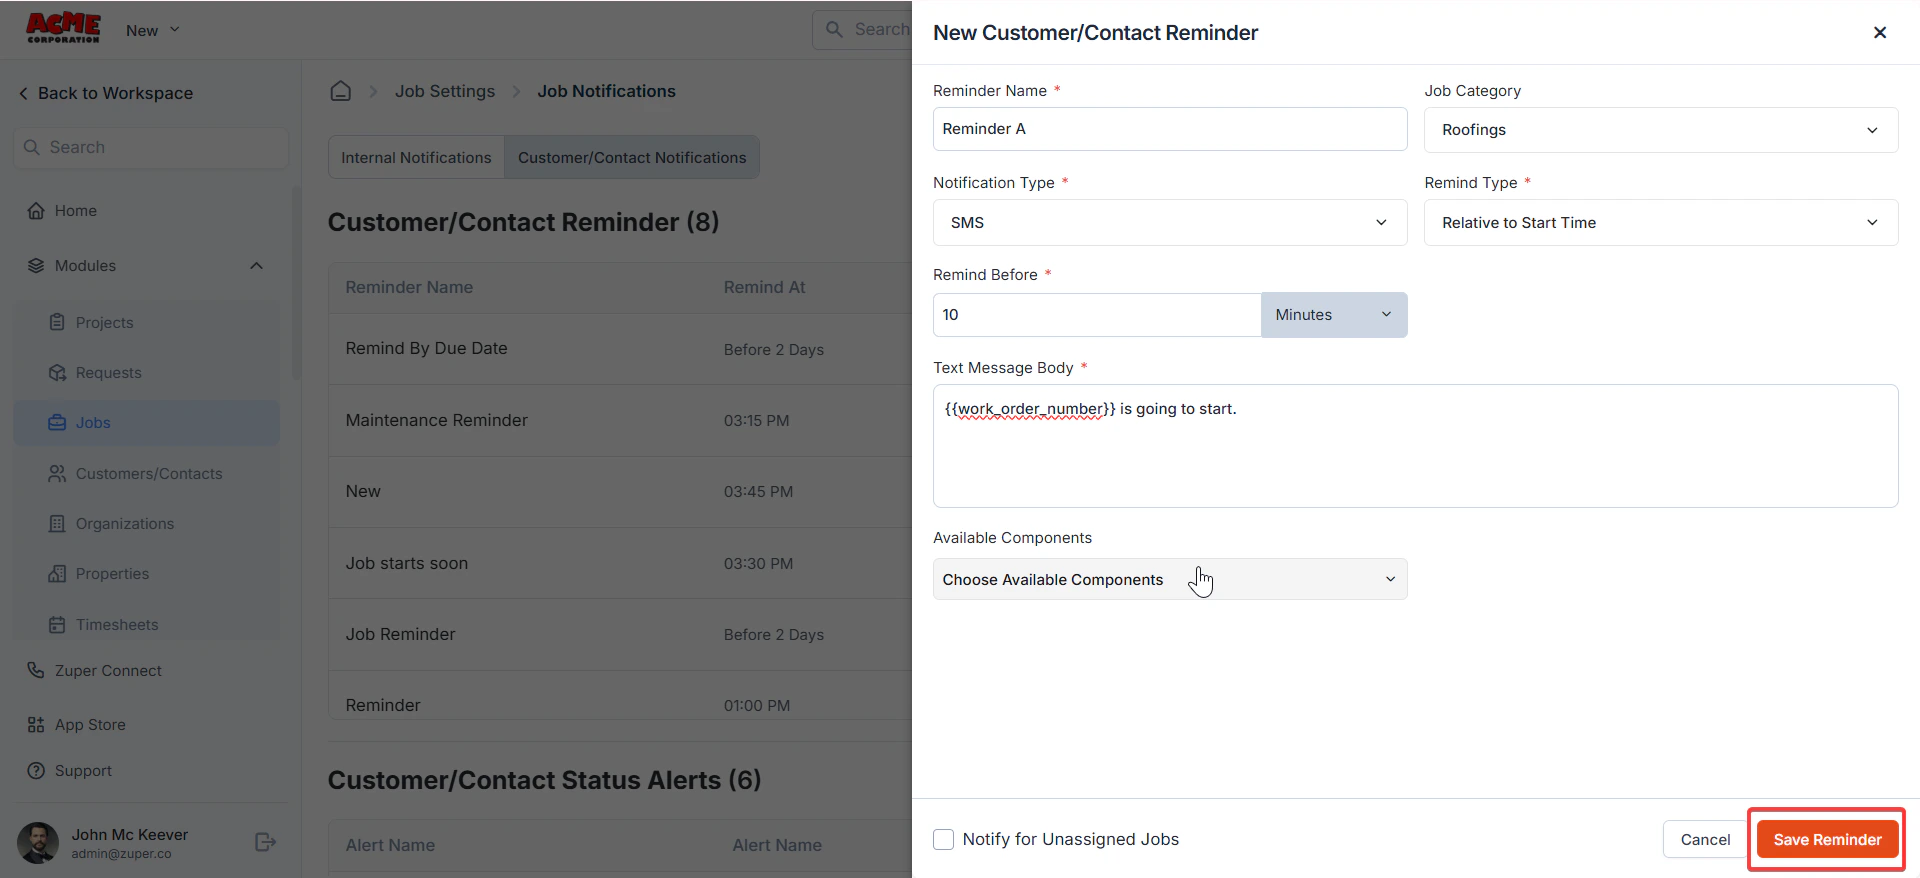
- Click “+ New Reminder.”
- Fill in the reminder details
- Reminder Name: Enter a name for the reminder.
- Job Category: Select the job category.
- Notification Type: Choose the type of notification.
- Remind Type: Select the reminder type.
- Remind At / Before: Set a specific time for the reminder.
- SMS / Email Body: Enter the message content. Use the Available Components dropdown to insert dynamic fields, such as customer fields or job details (e.g., “The scheduled job starts at…”).
- Notify for Unassigned Jobs: Check this box to receive a reminder to apply.
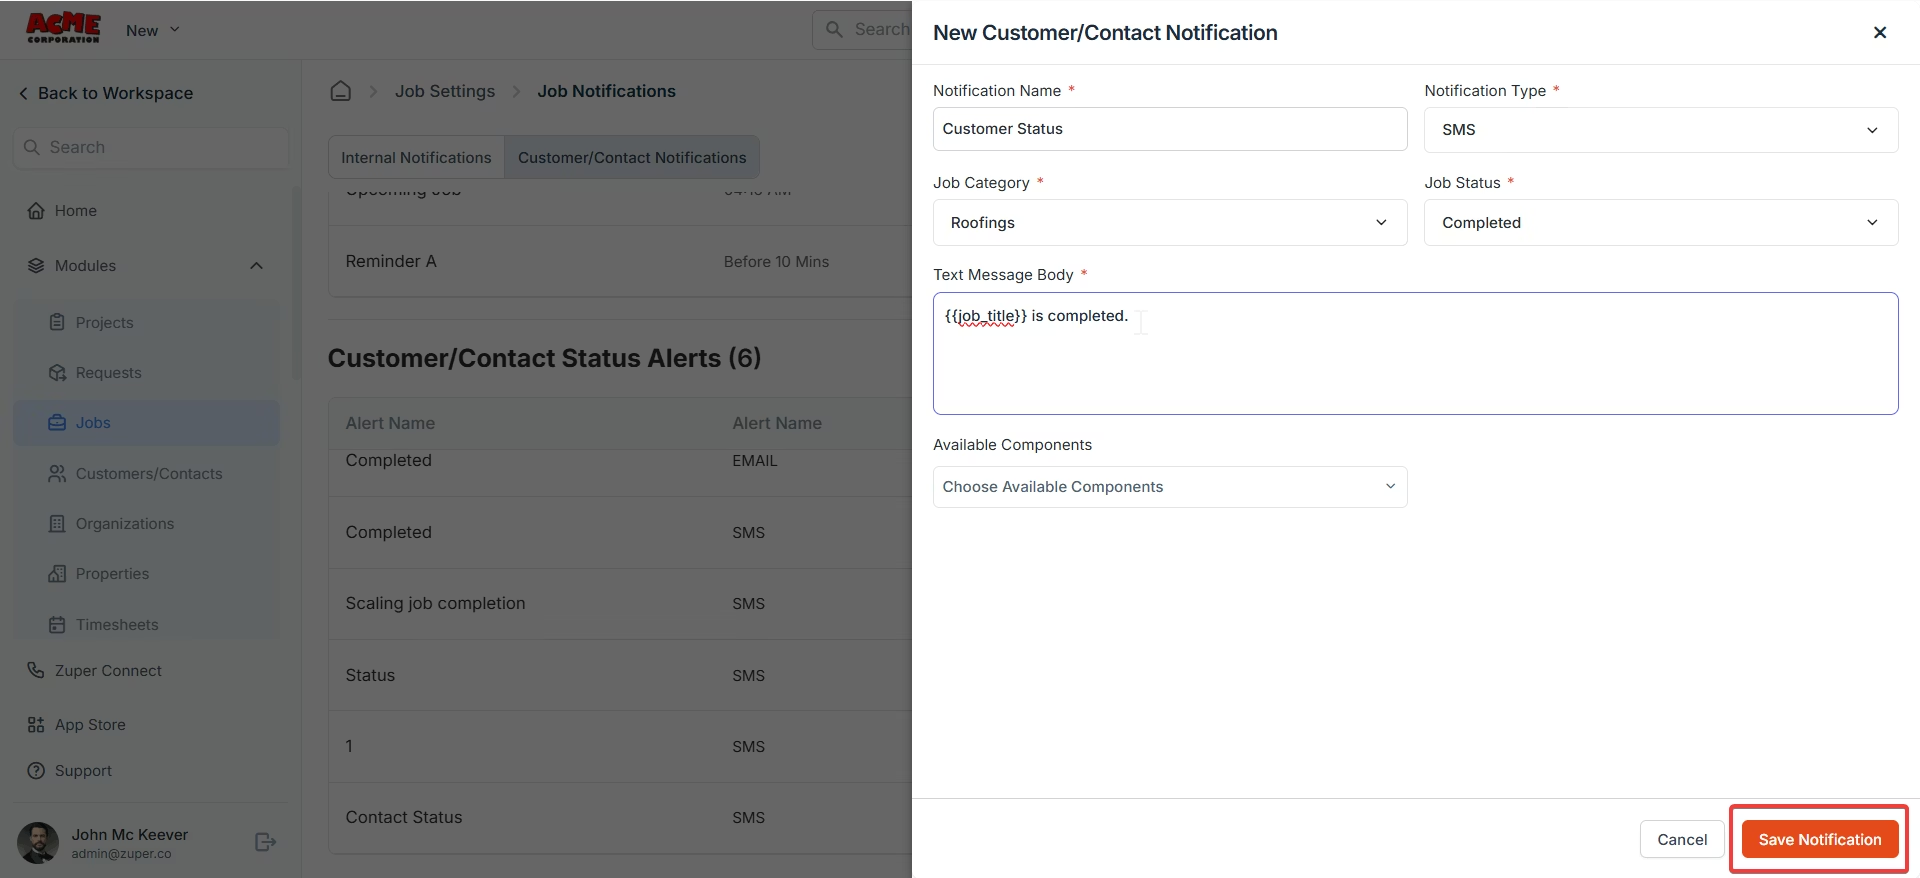
Customer/contact alerts
- Select the “Settings” module from the left panel. Under the “Modules,” click “Customer/Contact Notifications.”

- Click “+ New Notification.”
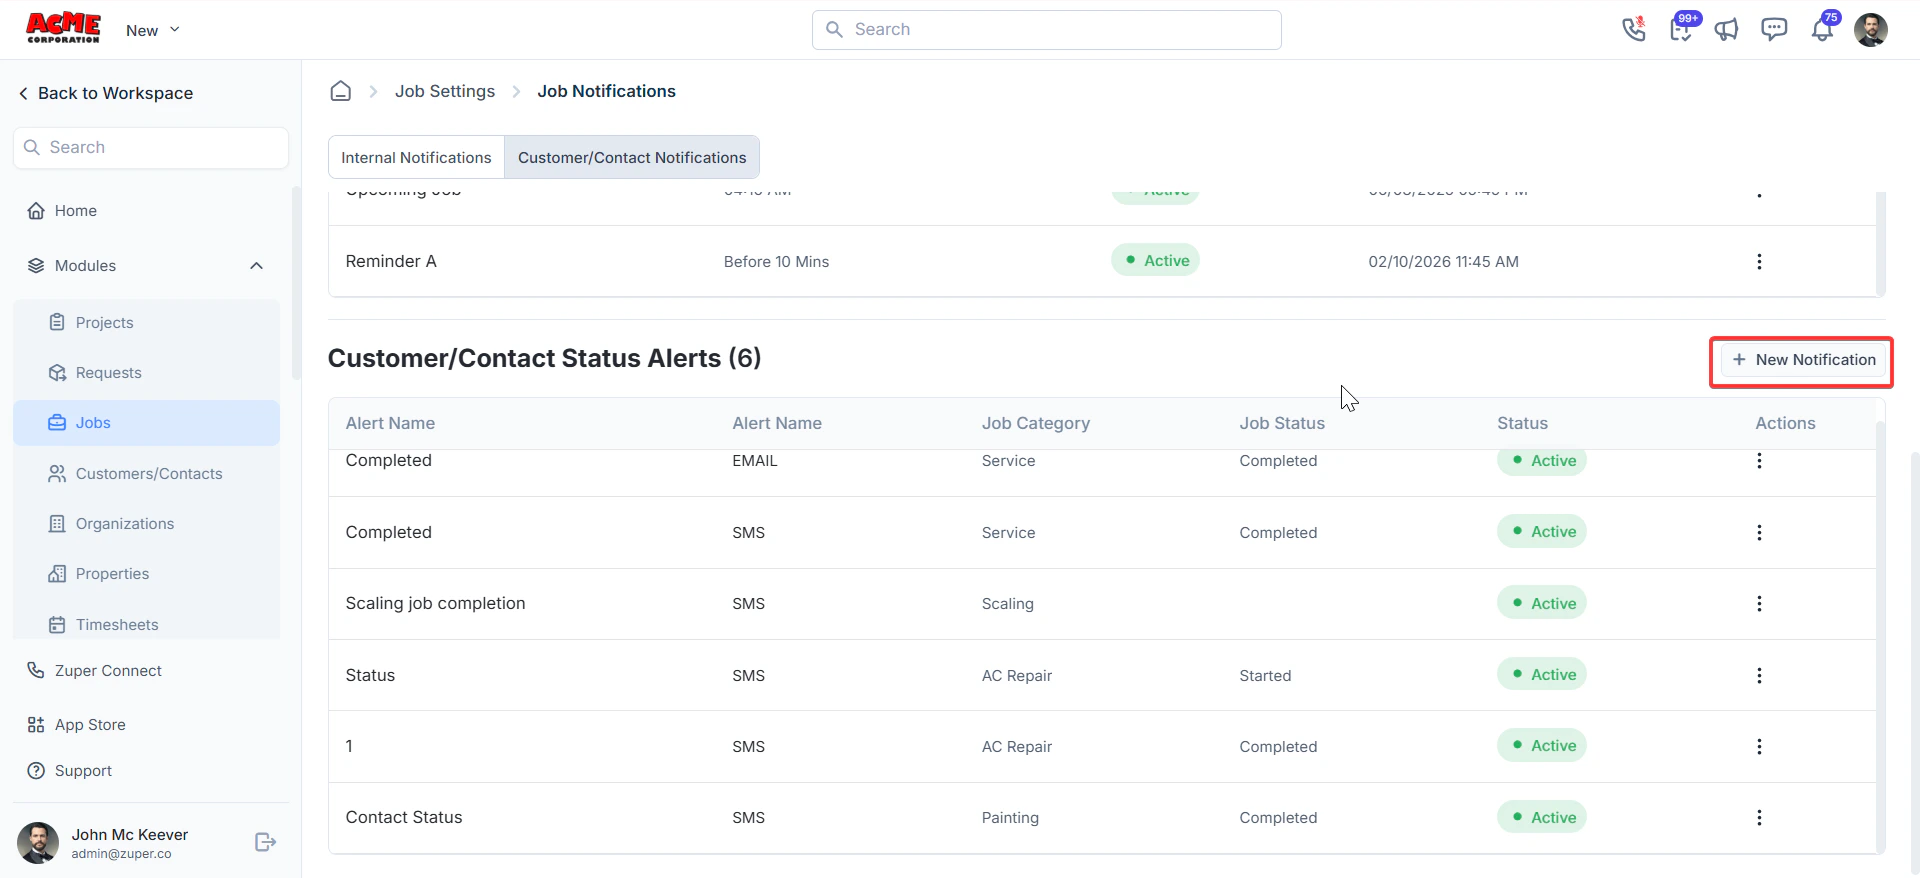
- Enter the following details:
- Notification name: Enter a clear, descriptive name for the alert — for example, “Job completed notification.”
- Notification type: Select whether the alert is sent by SMS, email, or both.
- Job category: Select the job category this alert applies to.
- Job status: Select the job status that triggers this alert — for example, Completed or On My Way.
- SMS/email body: Enter the message to be sent. Select the Available components drop-down to insert dynamic fields and personalize the message automatically.