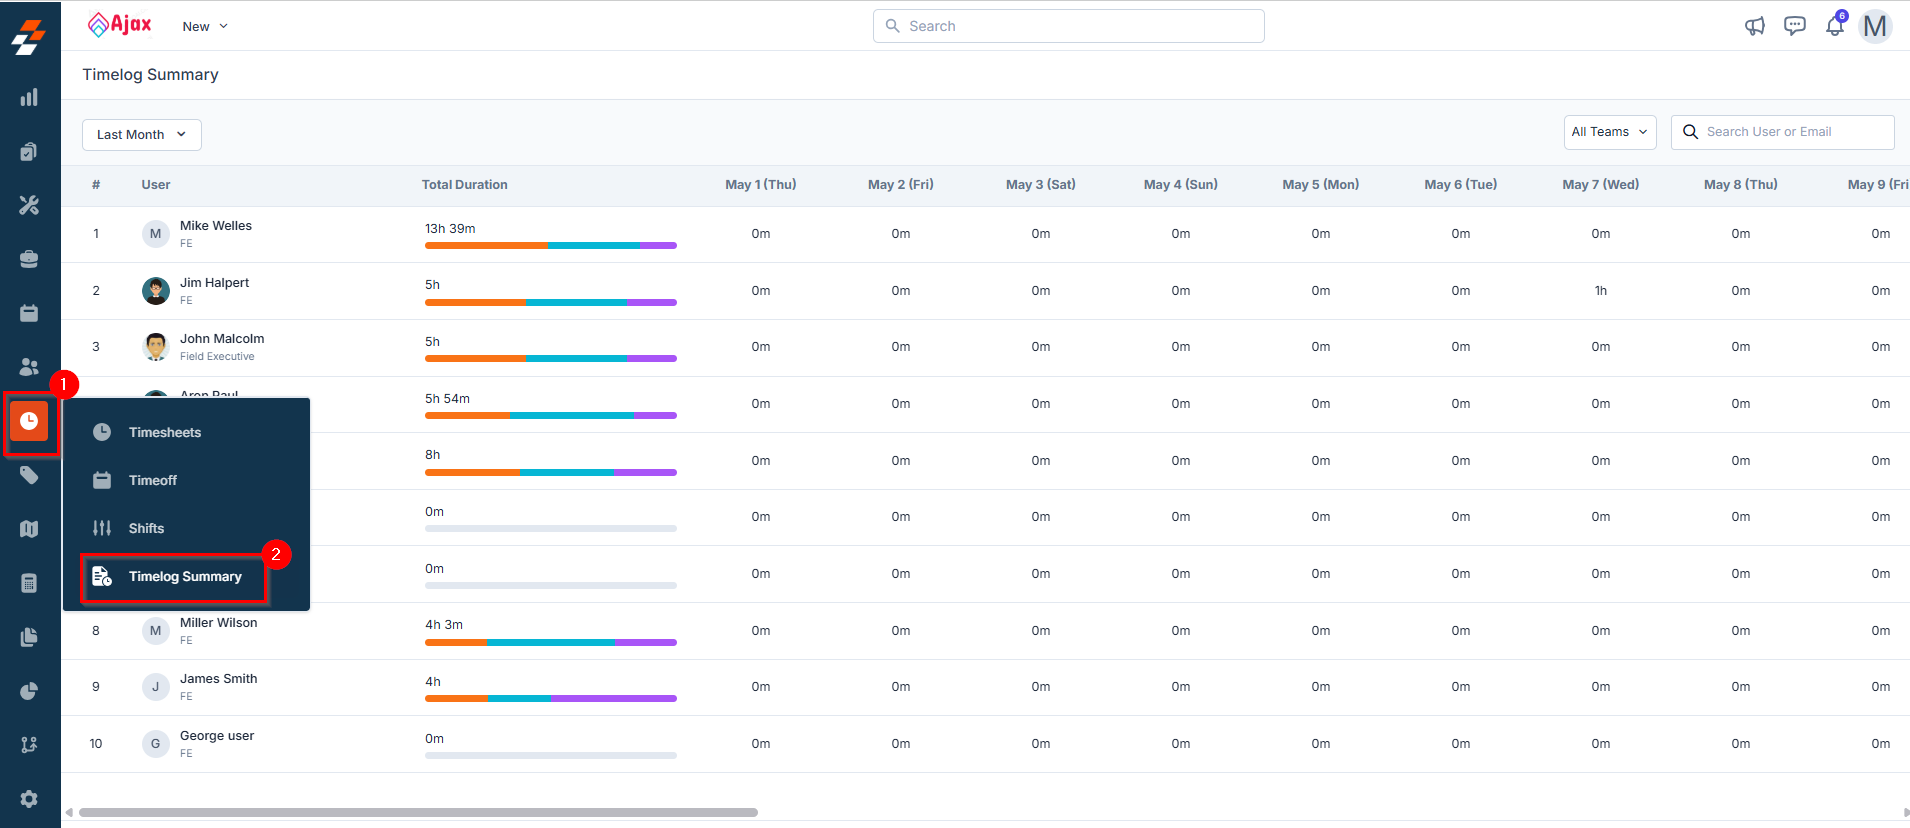
Navigation: Time-> Timelog Summary
Setting up permissions
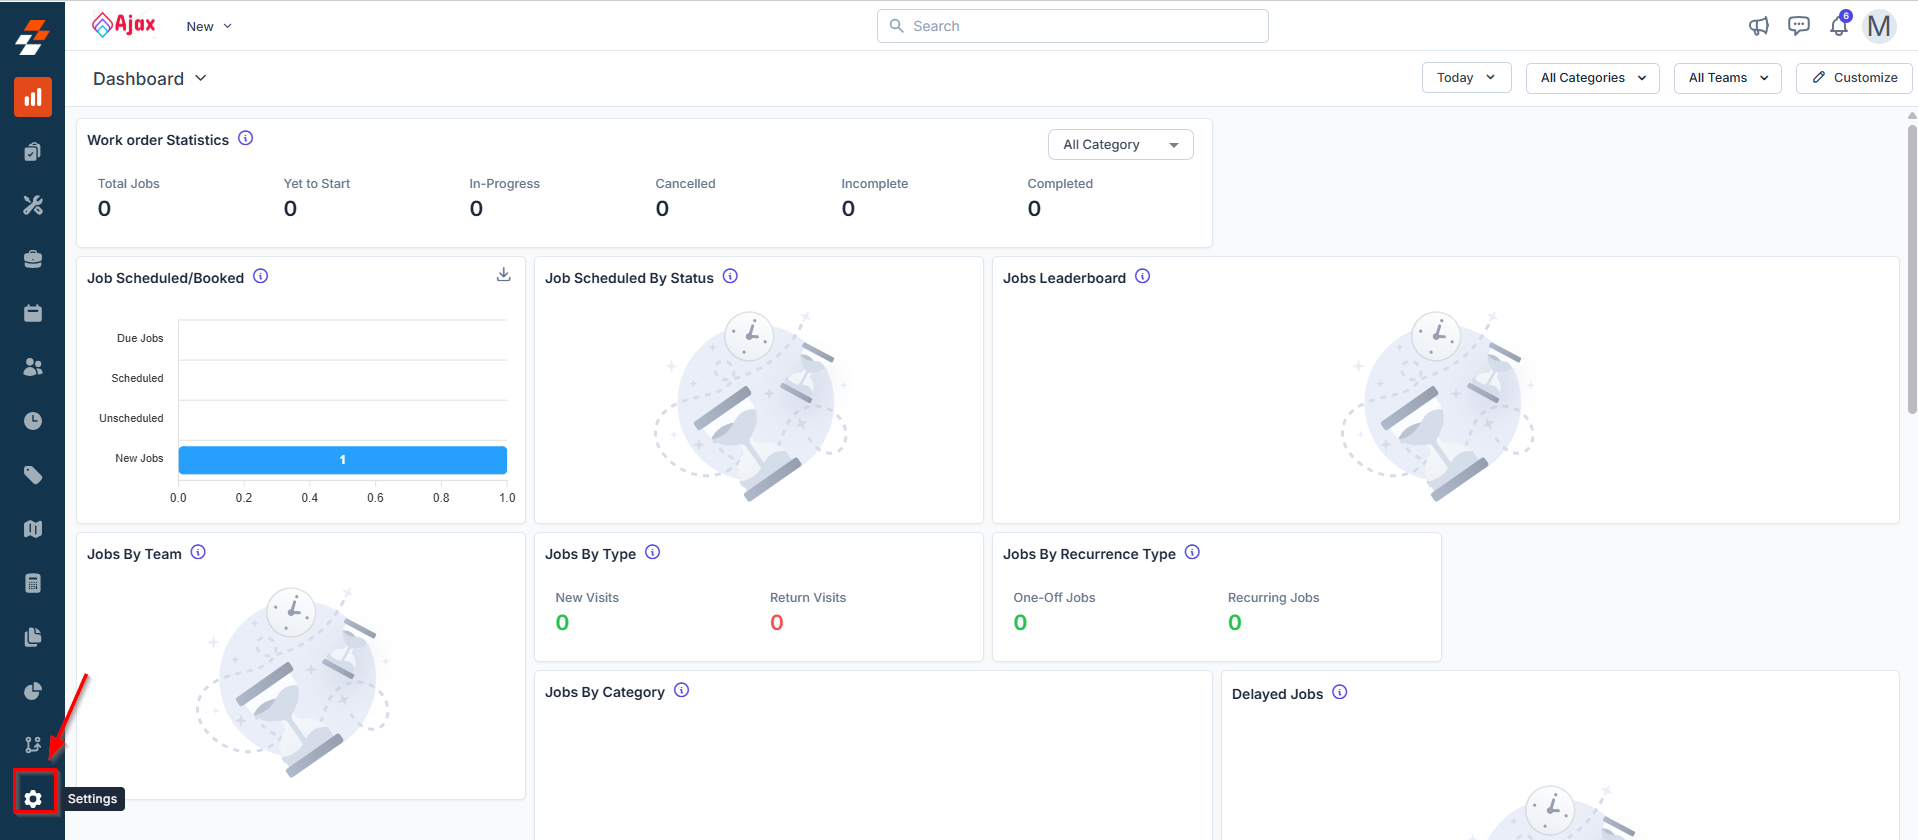
Before accessing the timelog summary feature, it’s important to configure role-based permissions to ensure that only authorized users, such as Admins, Team Leads, or Field Technicians, can view and manage time entries using the Timelog Summary feature in the Zuper web app. You can control access through custom roles and permissions. Follow these steps to assign the required permissions to user roles such as Admin, Team Lead, or Field Technician:- Go to the Settings module from the left navigation menu.
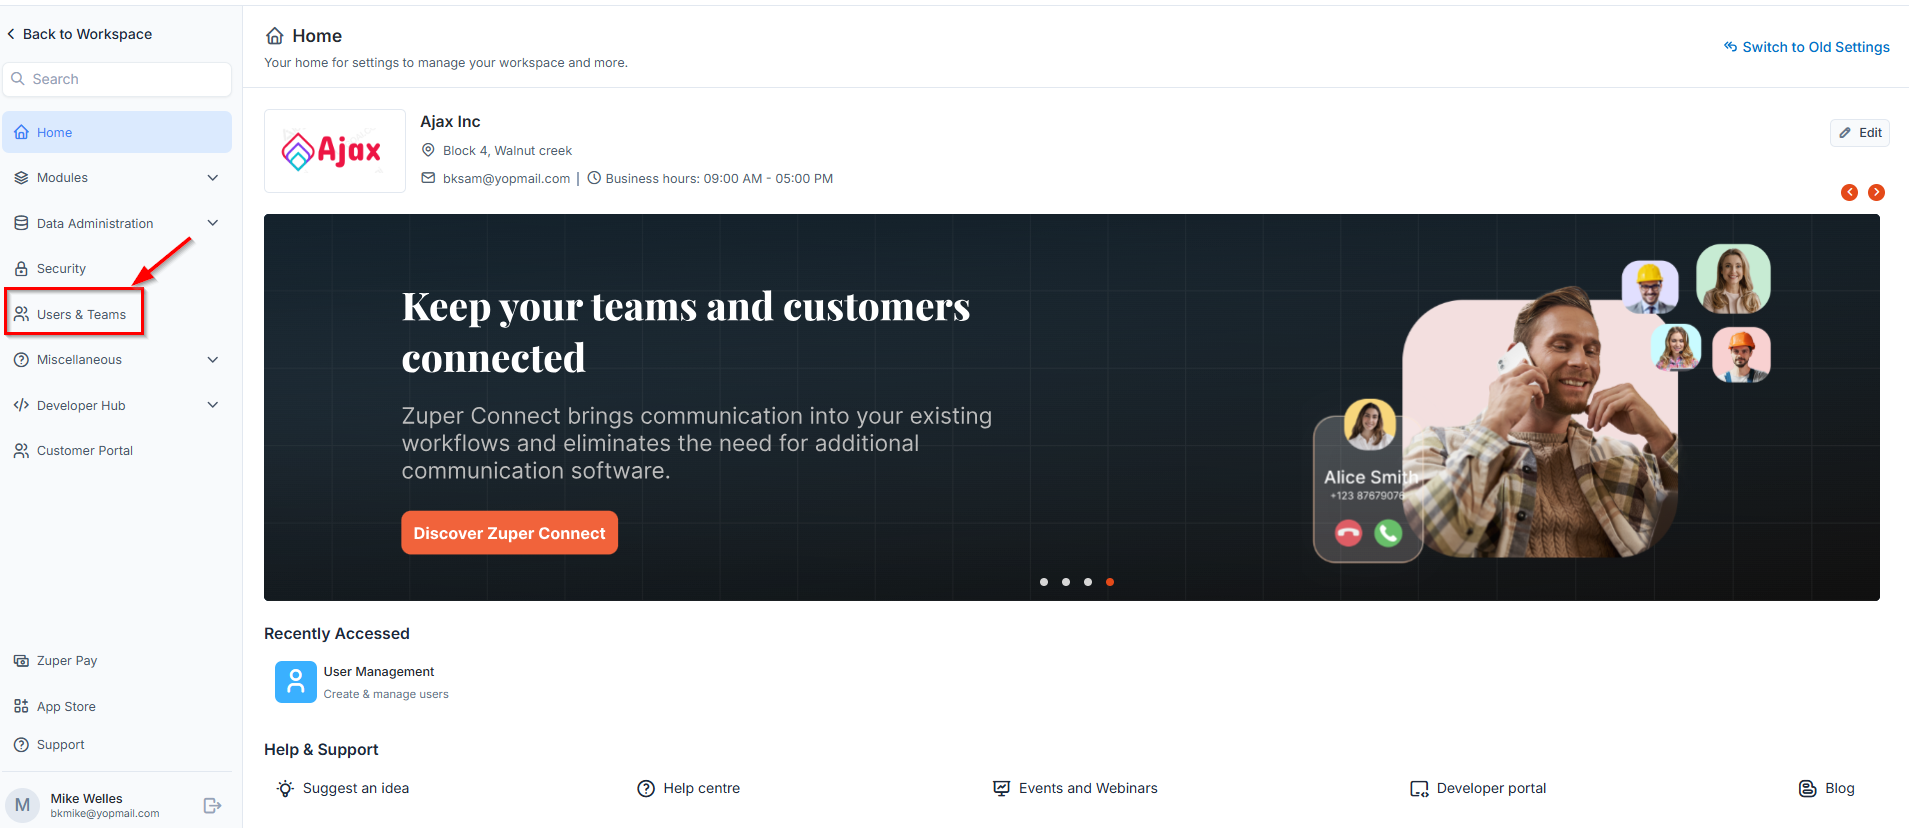
- Click Users & Teams. The Users & Teams settings page will open.
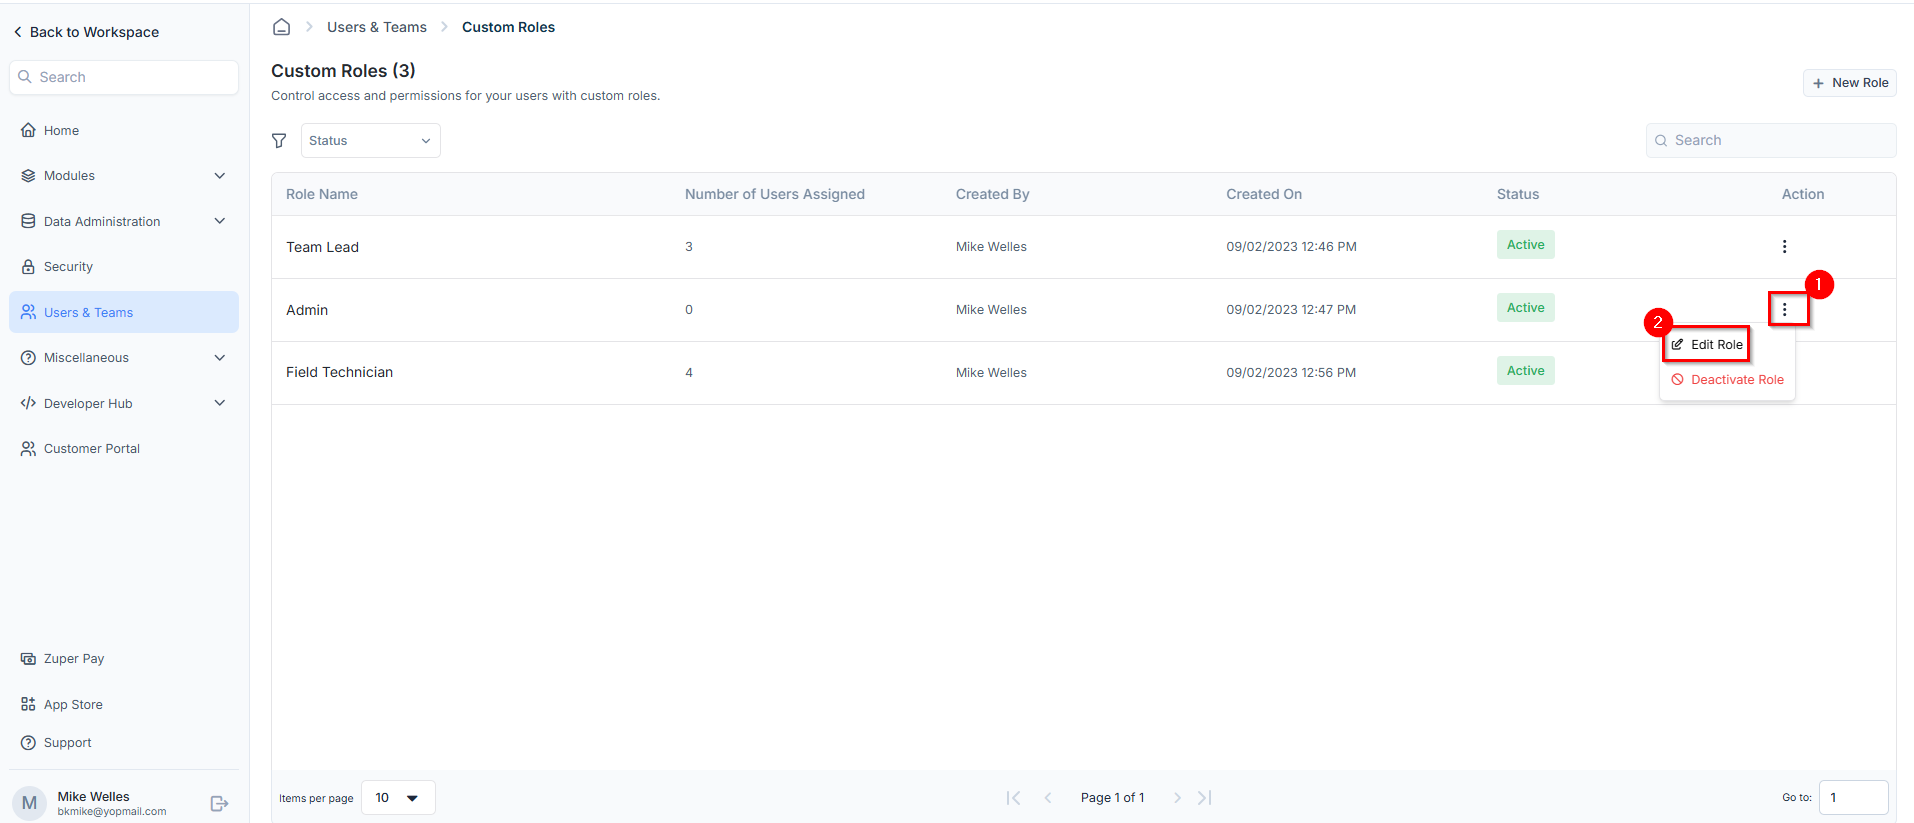
- Select the Custom Roles tab to view the list of existing roles (e.g., Admin, Team Lead, Field Technician).

- Click the kebab menu () under the Action column next to the role you want to modify, and select Edit Role.
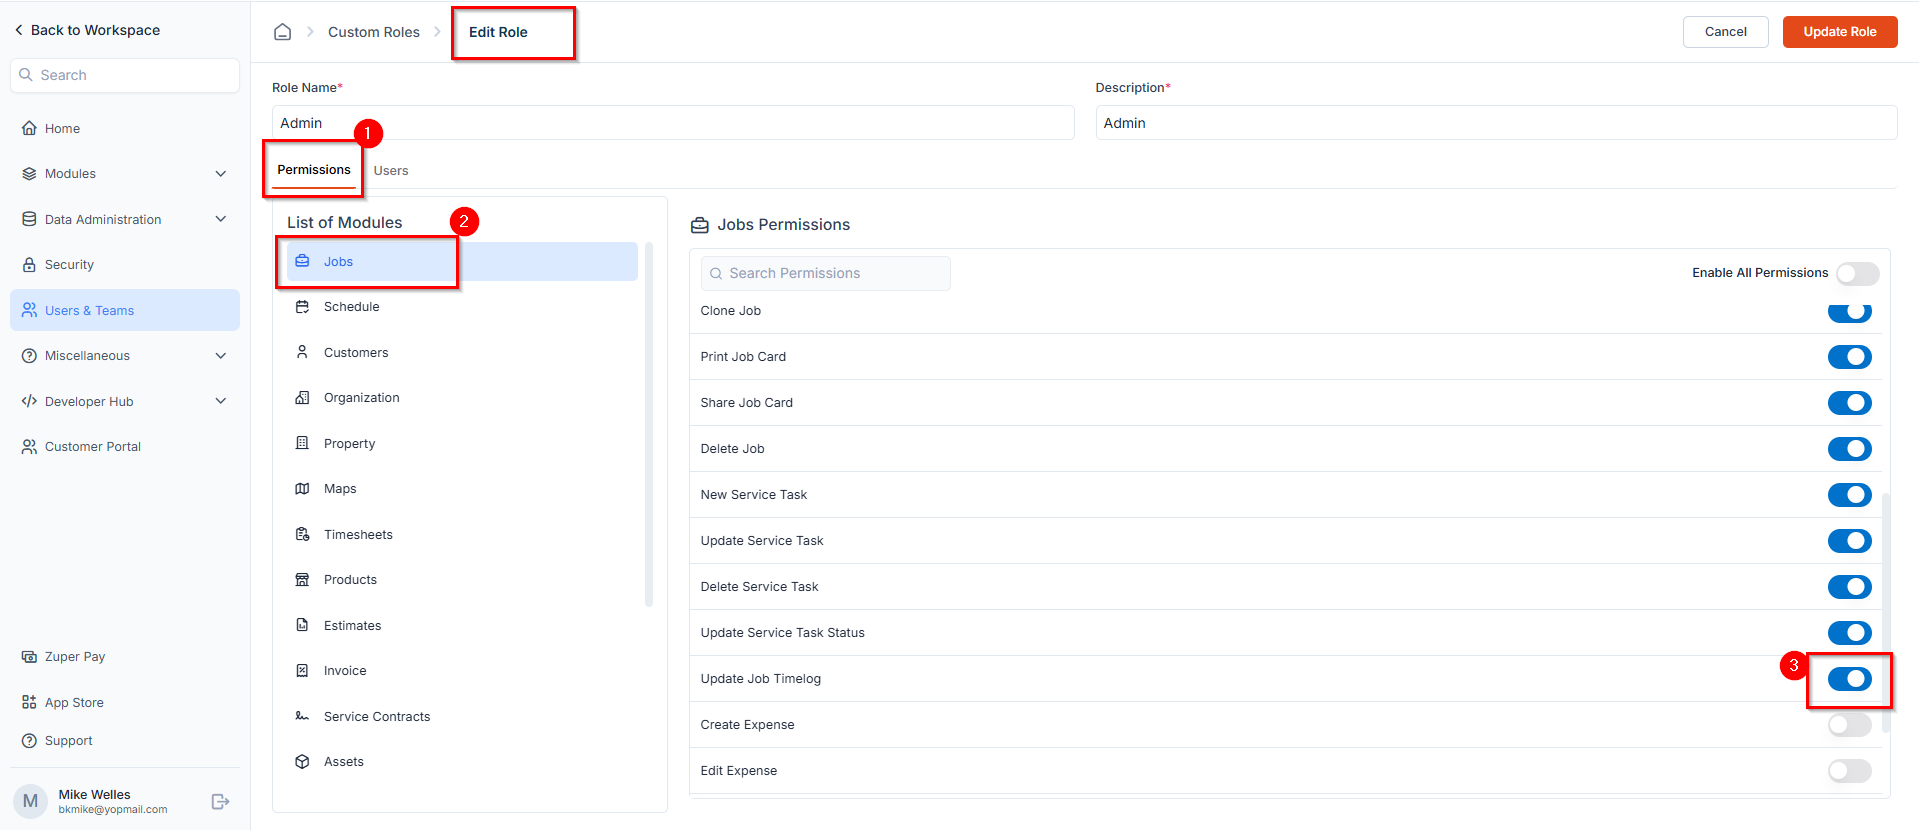
- On the Edit Role screen, click the Jobs module section under the Permissions tab and enable “Update Job Timelog.”
Best Practices
Best Practices
- Admins should have full access to job and timelog data for reporting and payroll.
- Team Leads may require edit access to manage their team’s time entries.
- Field Technicians typically require view only access, depending on workflow needs.
Accessing timelog summary
To view the consolidated summary of timelog entries across users, follow these steps:- Click the “Time” module from the left navigation menu and select the “Timelog Summary” option.
-
You will see a table view that presents a consolidated summary of users’ timelog entries based on the selected date range. The table includes the following columns:
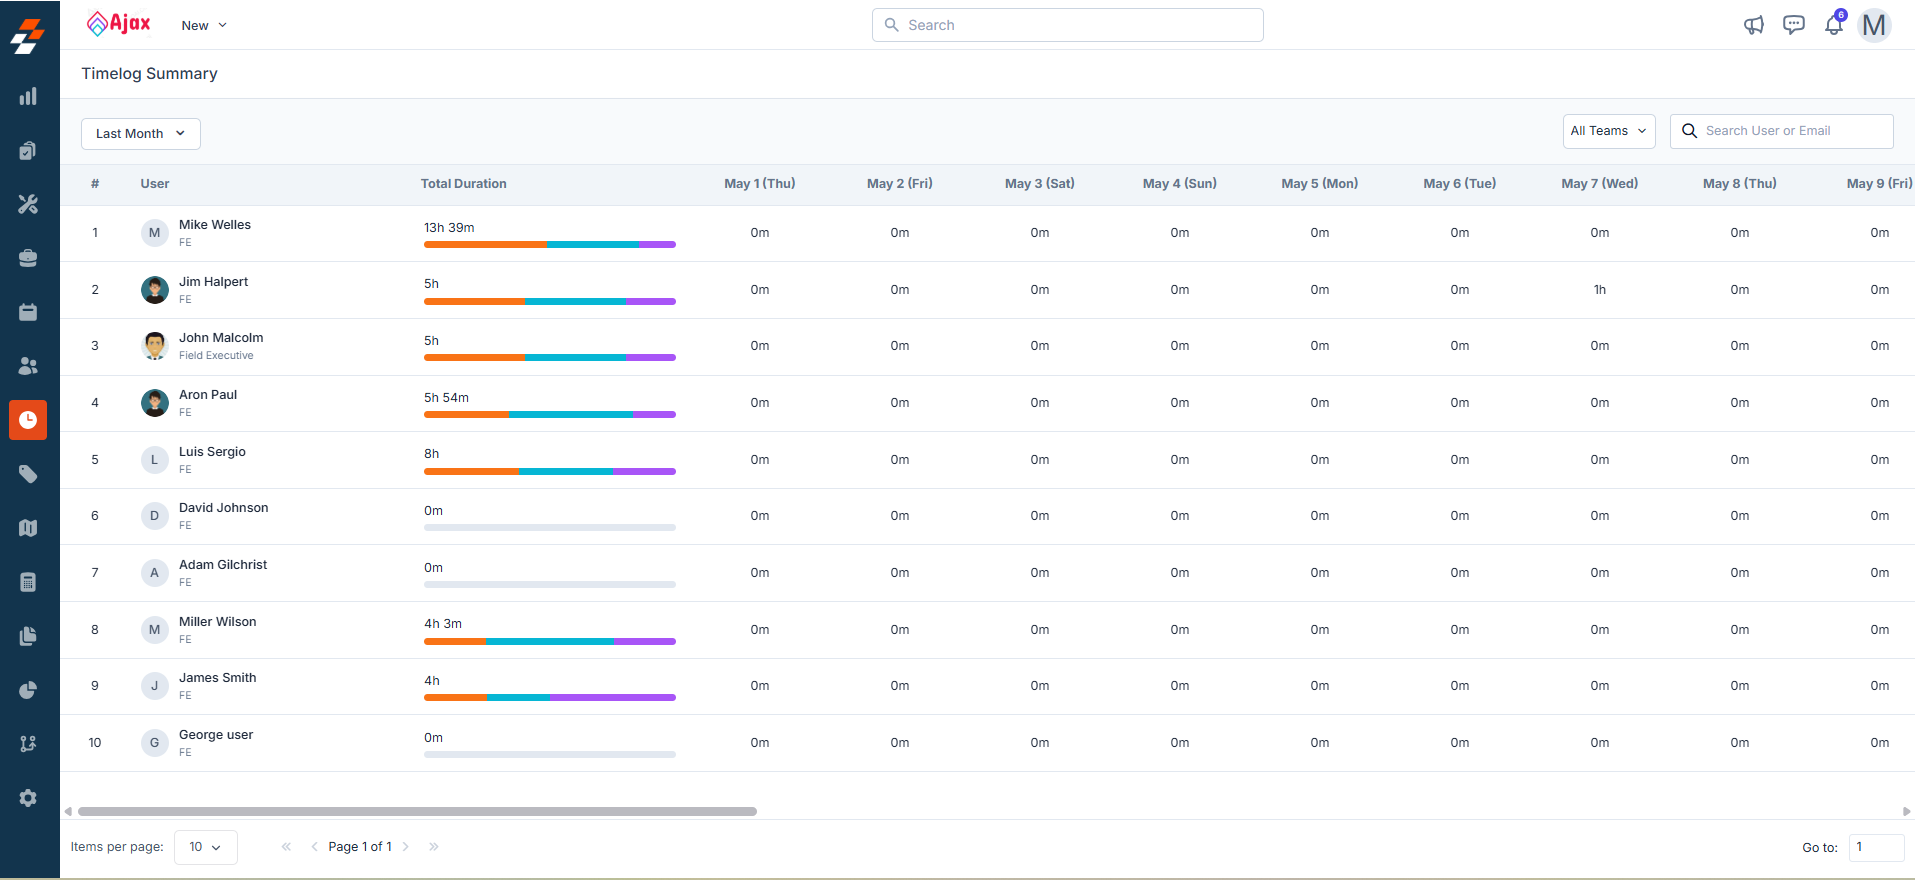
- Name: Displays the name of the users across the teams.
-
Total Duration: Shows the total number of hours logged by the user for the selected date(s). Hovering over the total hours displays a breakdown that includes:
- Travel hours (Orange): The time taken to travel between locations (e.g., from one job site to another or from the office to the customer site).
- Labour hours (Blue): The actual time spent performing job-related tasks.
- Break hours (Purple): Any non-working time, such as lunch or short rest breaks, during the day.
-
Date(s): Lists the date(s) within the selected range. You can choose from predefined ranges such as:
- This Week
- Last 7 Days
- Last 30 Days
- This Month
- Last Month
- Custom Range (up to a maximum of one month)
Note: Use the date picker at the top left of the page to select or adjust the date range. 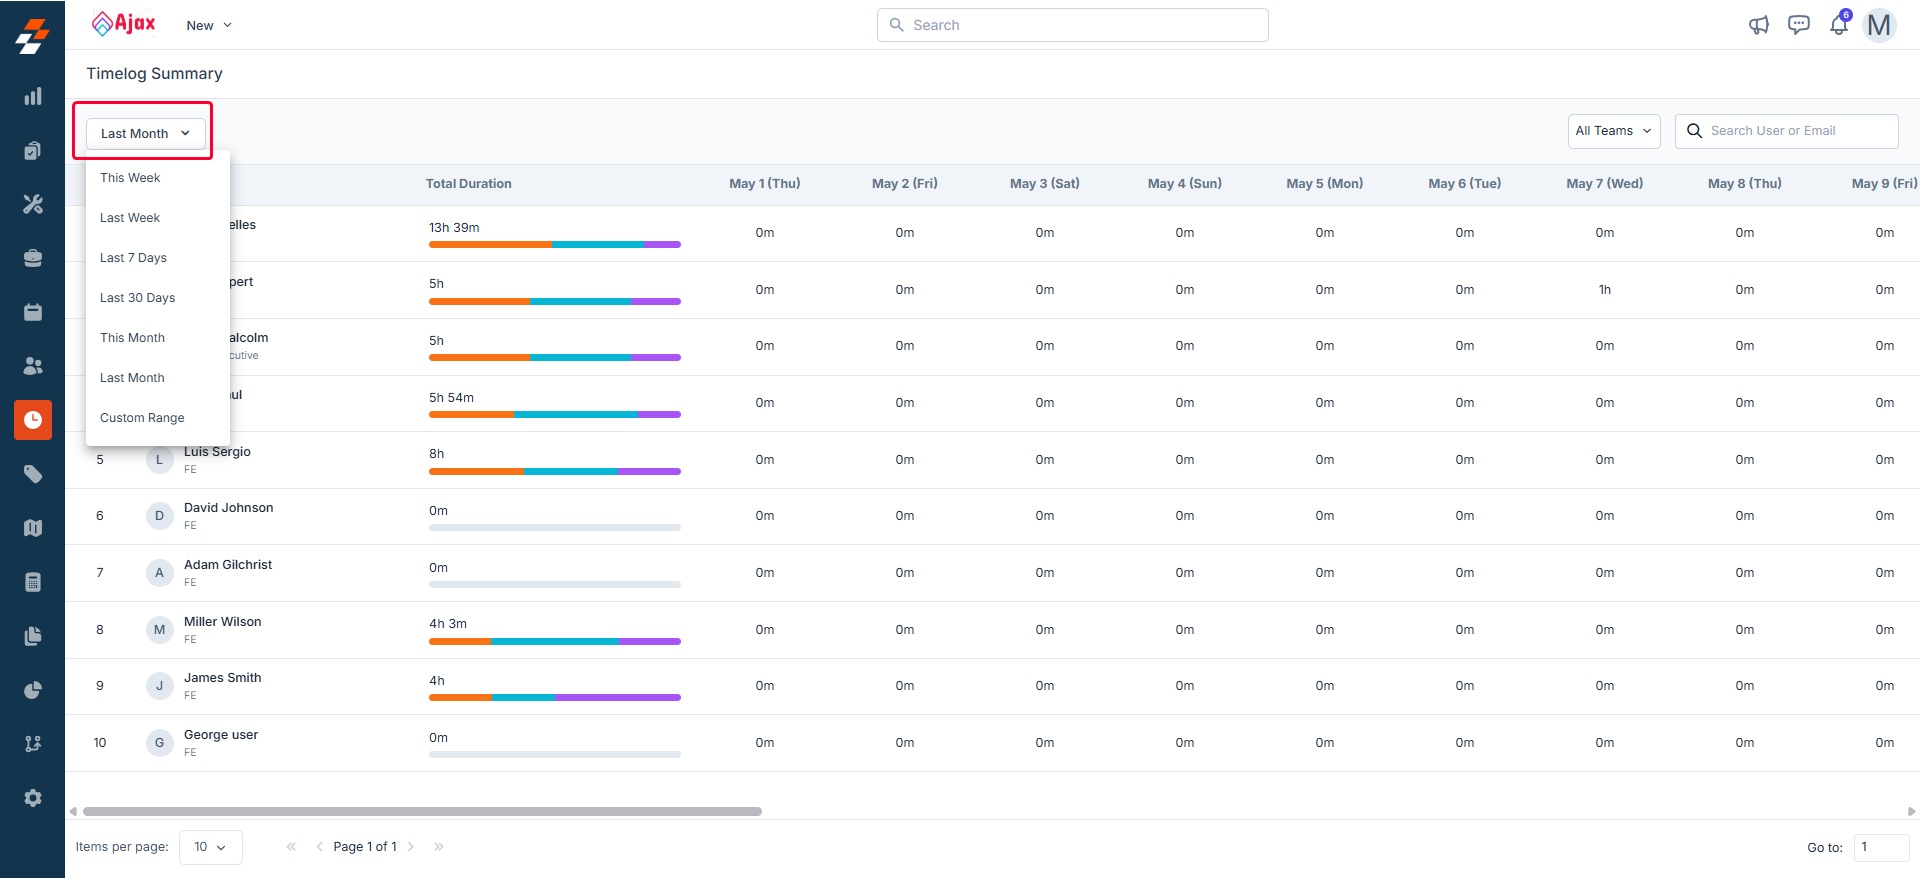
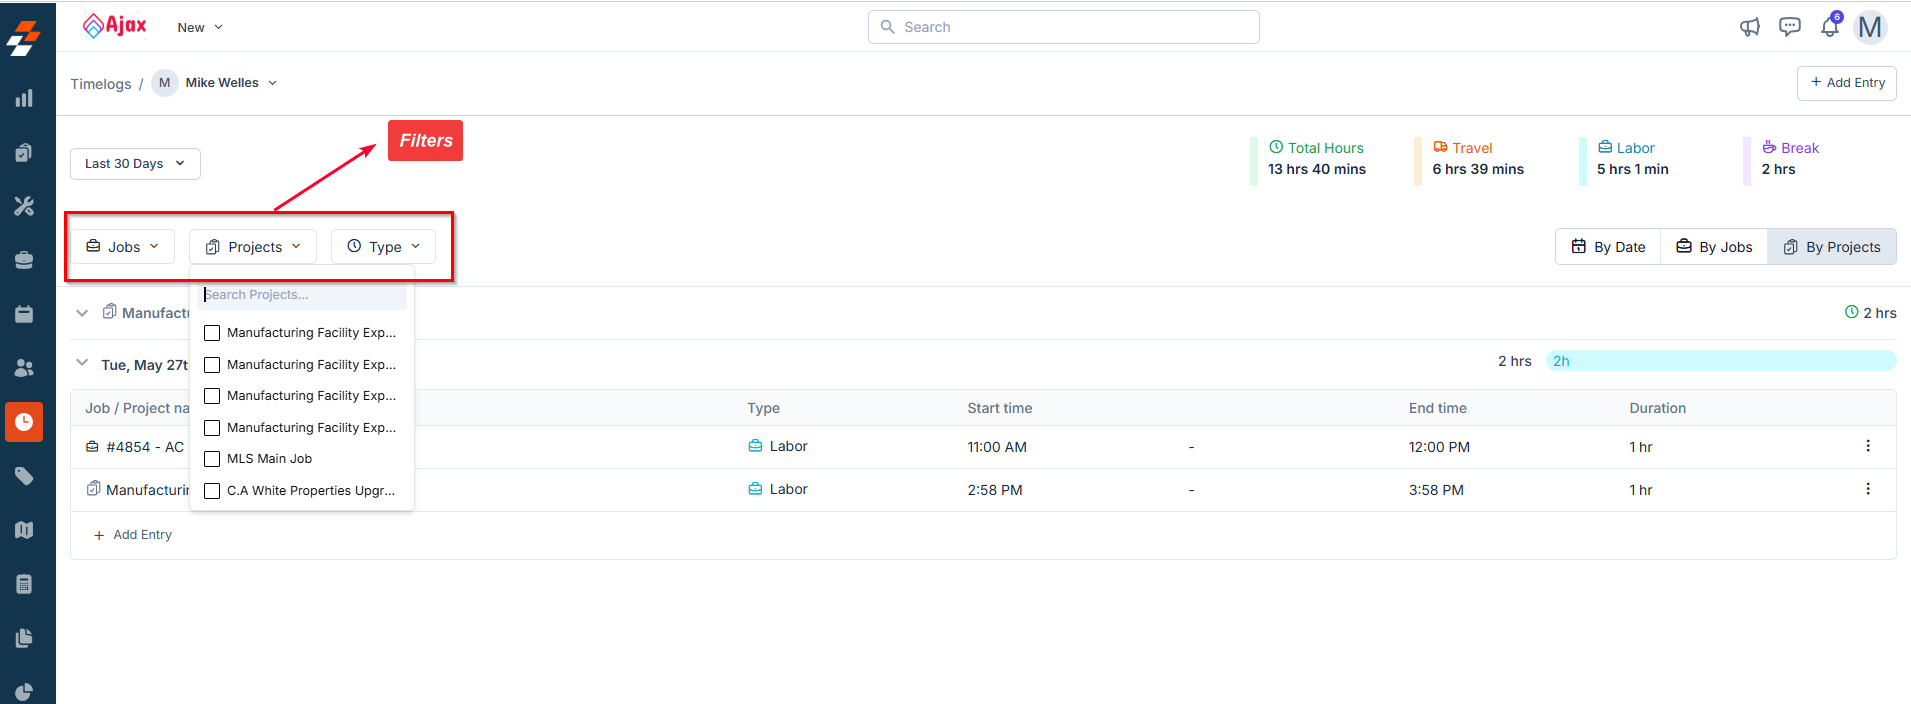
Filtering options
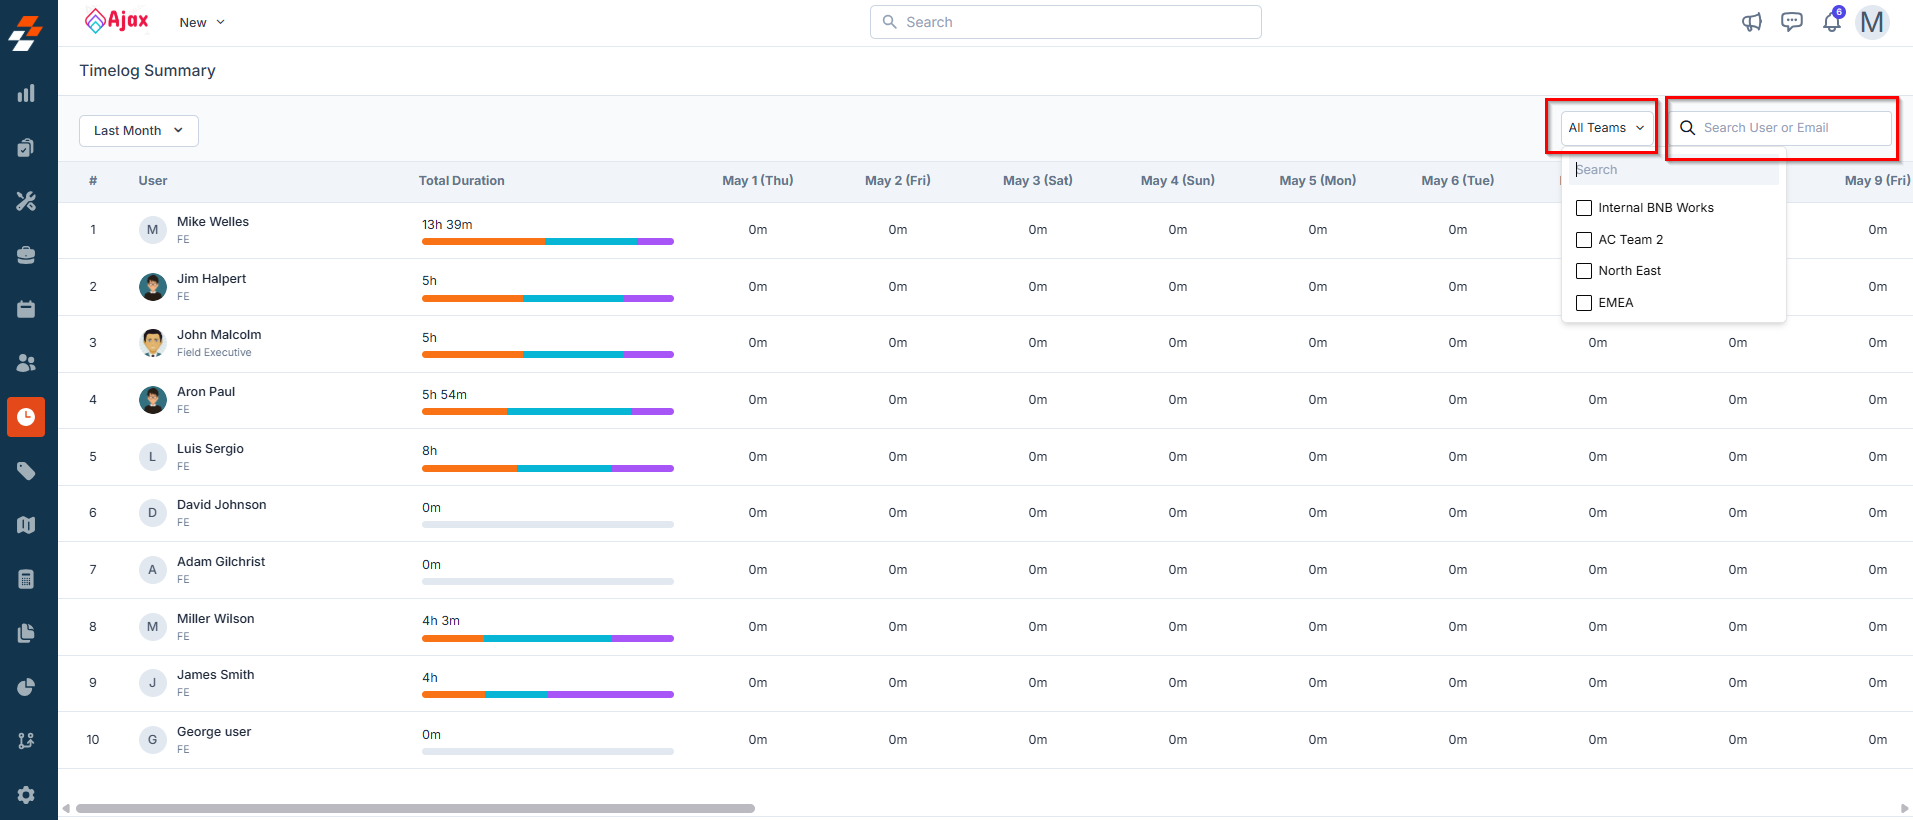
To narrow down the data displayed in the timelog summary table, you can use the available filter options:- Teams: Select a team from the drop-down menu to view timelog entries only for users who belong to that specific team. This is useful for team-based time tracking, performance analysis, and reporting.
- Search Bar: Use the search bar to quickly find a specific user by name or email. This is helpful when viewing entries for large teams or across multiple departments.
Manage user timelog entries
The timelog summary page gives you a high-level overview, but when you need a deeper look into how a user spends their time across specific jobs and projects on specific dates, the detailed timelog page is your go-to. This page helps admins and team leads review users’ day-to-day activities, track productivity, and ensure accurate records for payroll, reporting, or compliance. From here, you can explore each time entry, make edits, or add missed entries as needed. To view and manage an individual user’s timelog entries, follow these steps:- On the timelog summary page, click the username whose timelog details you want to view.
-
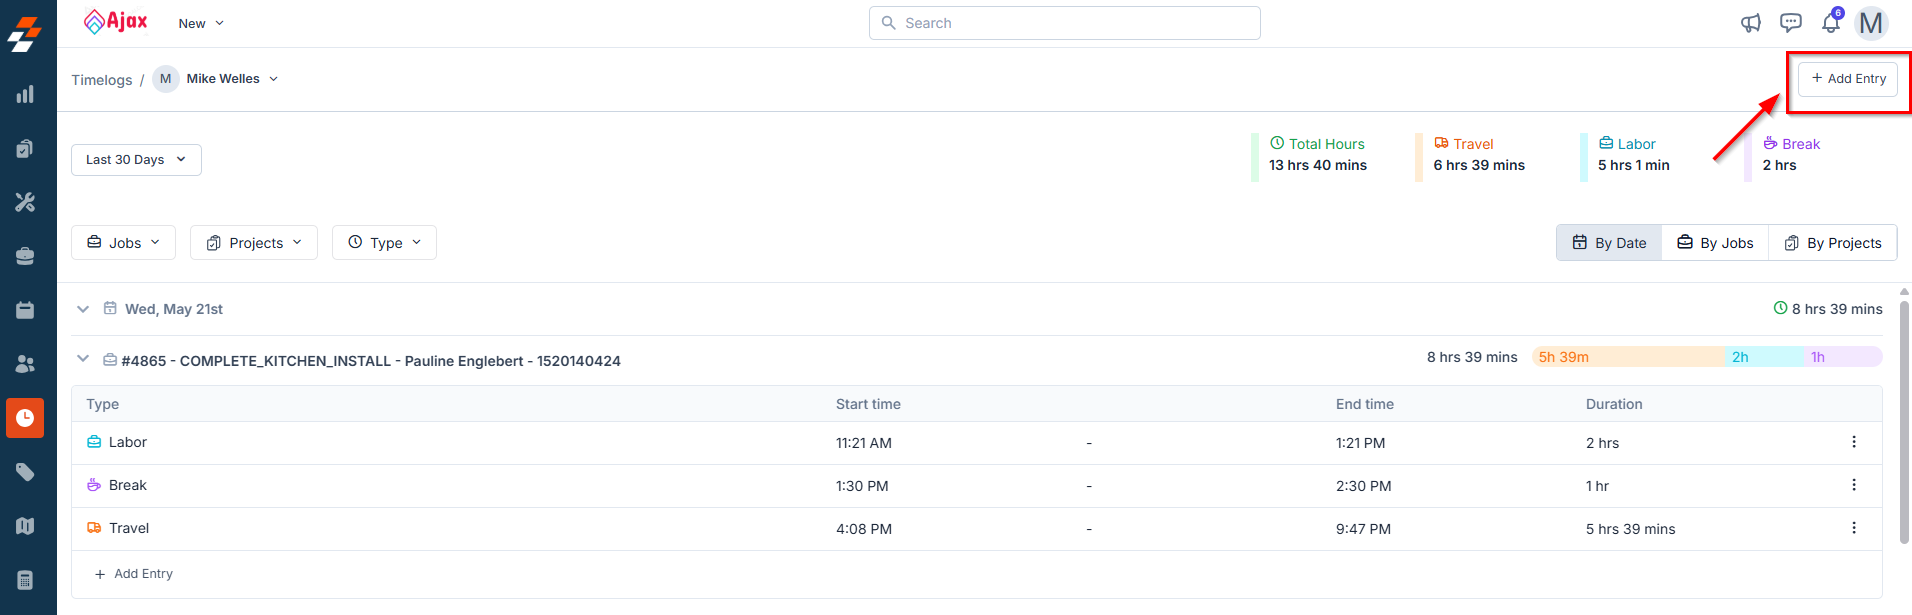
The user’s detailed timelog entry page will open, displaying the following information:
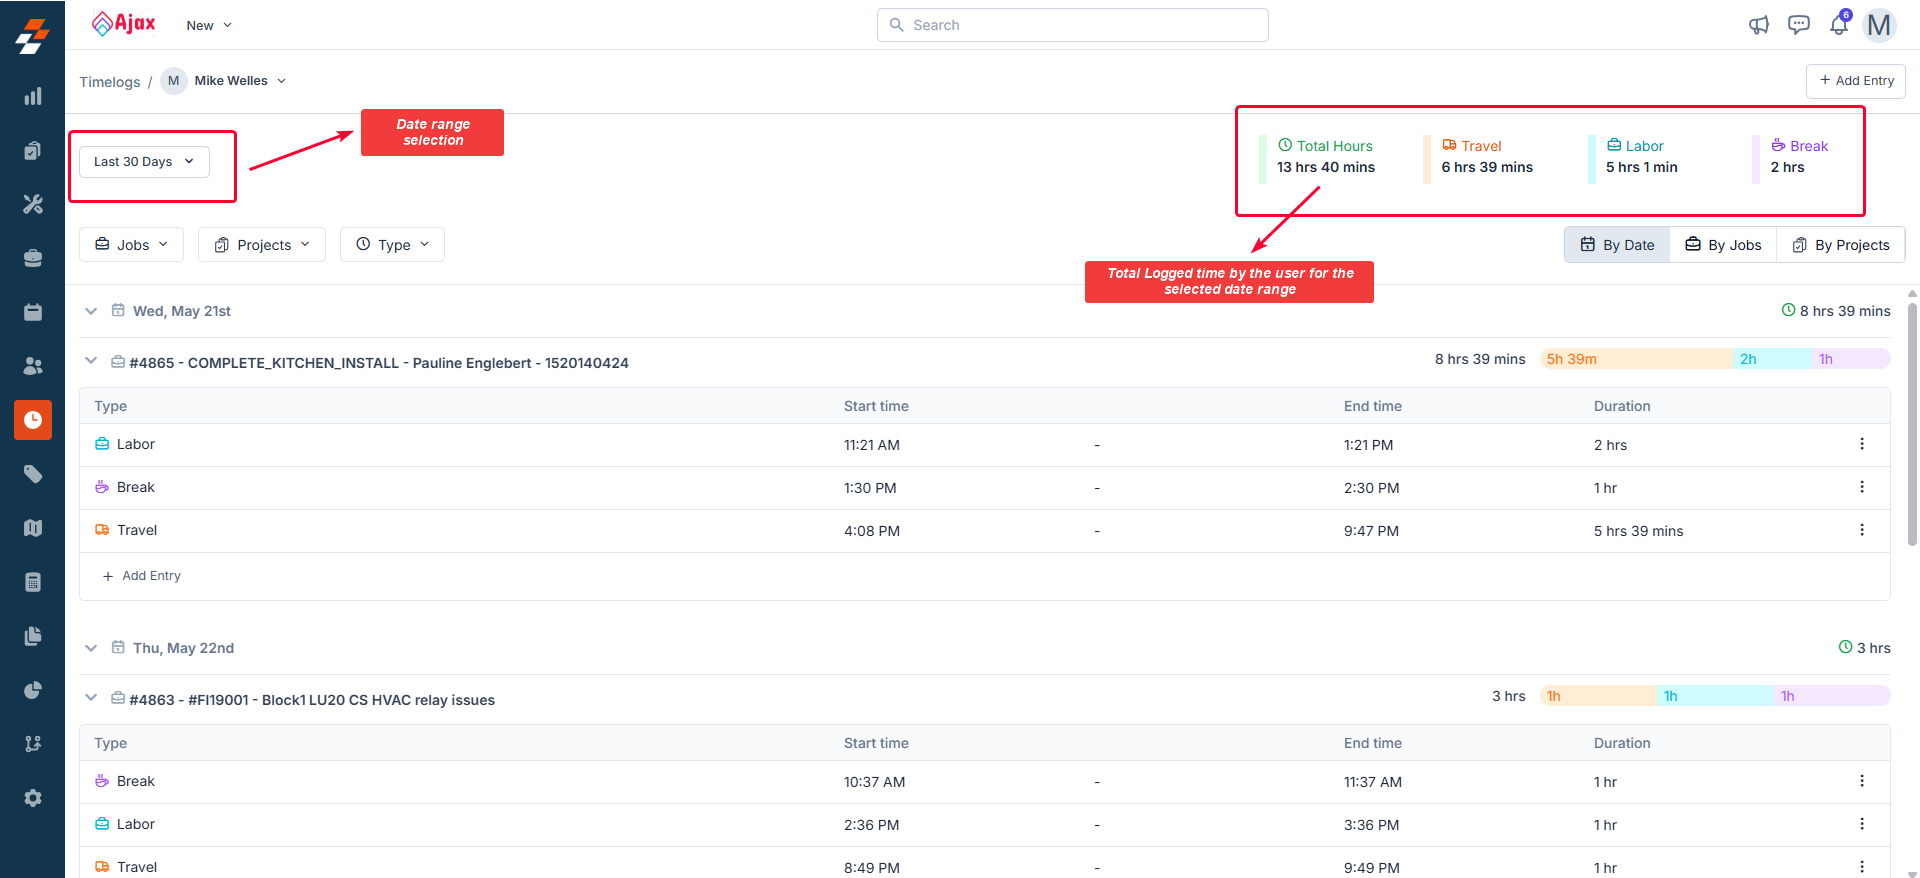
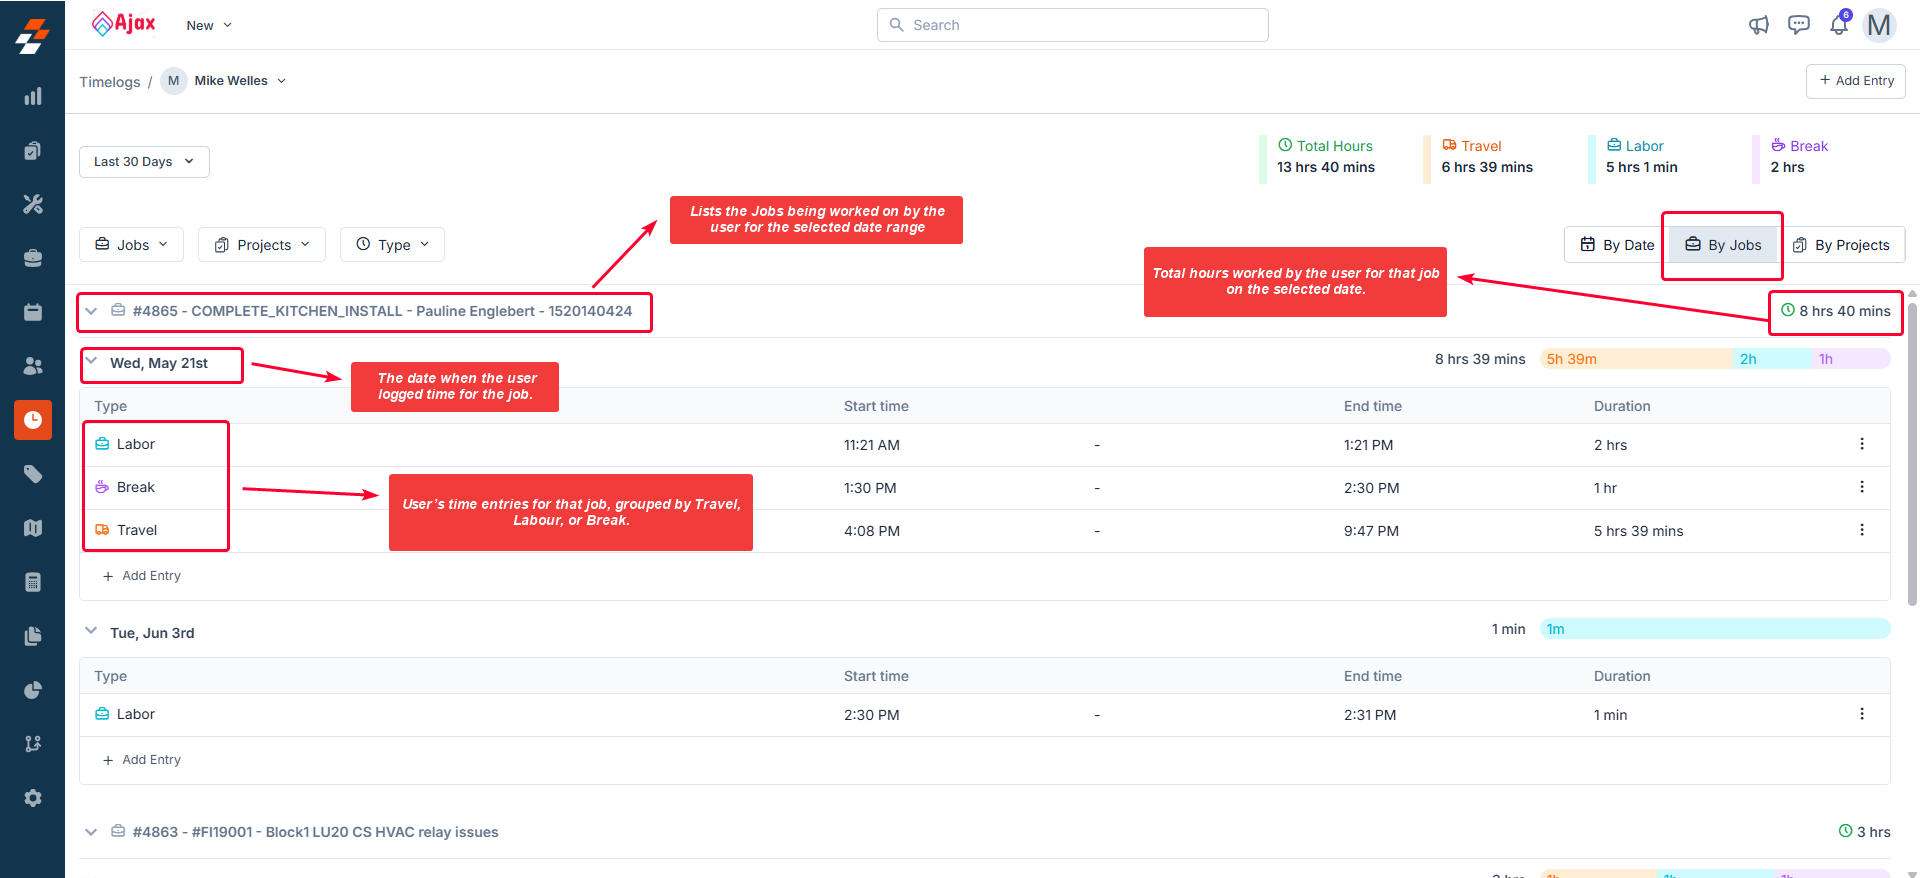
- Date range: The selected period for which timelog entries are shown (e.g., “2 March - 8 March 2025”). You can modify this range using the date picker as needed.
- Total Logged time: A consolidated overview of the total time logged by the user for the selected date range, categorized into travel, labour, and break hours (e.g., 60 hours 40 mins total, 6 hours 40 mins on Travel, 12 hours 40 mins on Labour, 12 hours 40 mins on Break).
- Detailed time log breakdown: This displays individual time entries grouped by Date, Job, or Project. Each entry includes essential details such as the activity type (Travel, Labour, or Break), associated job/project, start time, end time, and total duration.
Note: You can use the drop-down menu at the top left of the page to switch between users and view their detailed timelog entries. 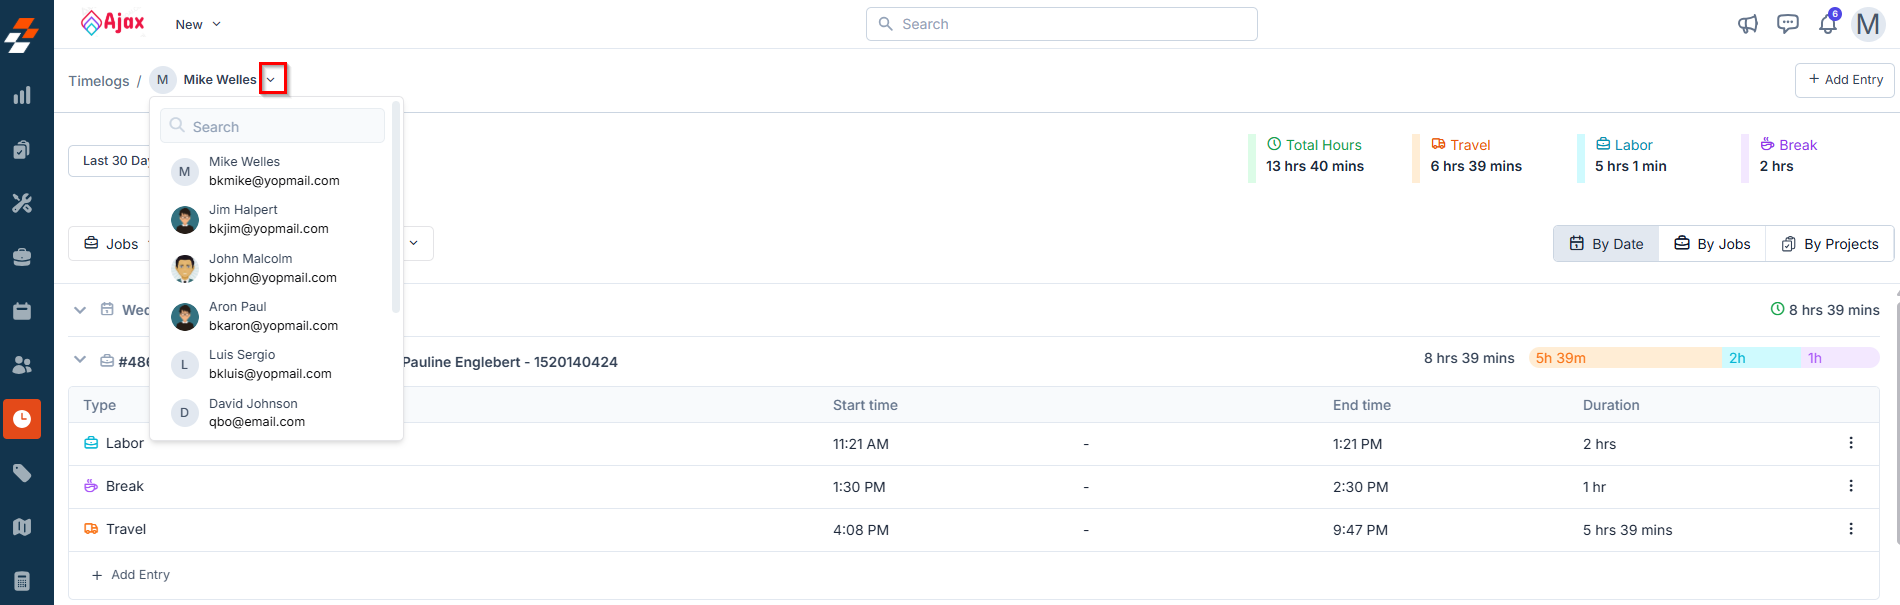
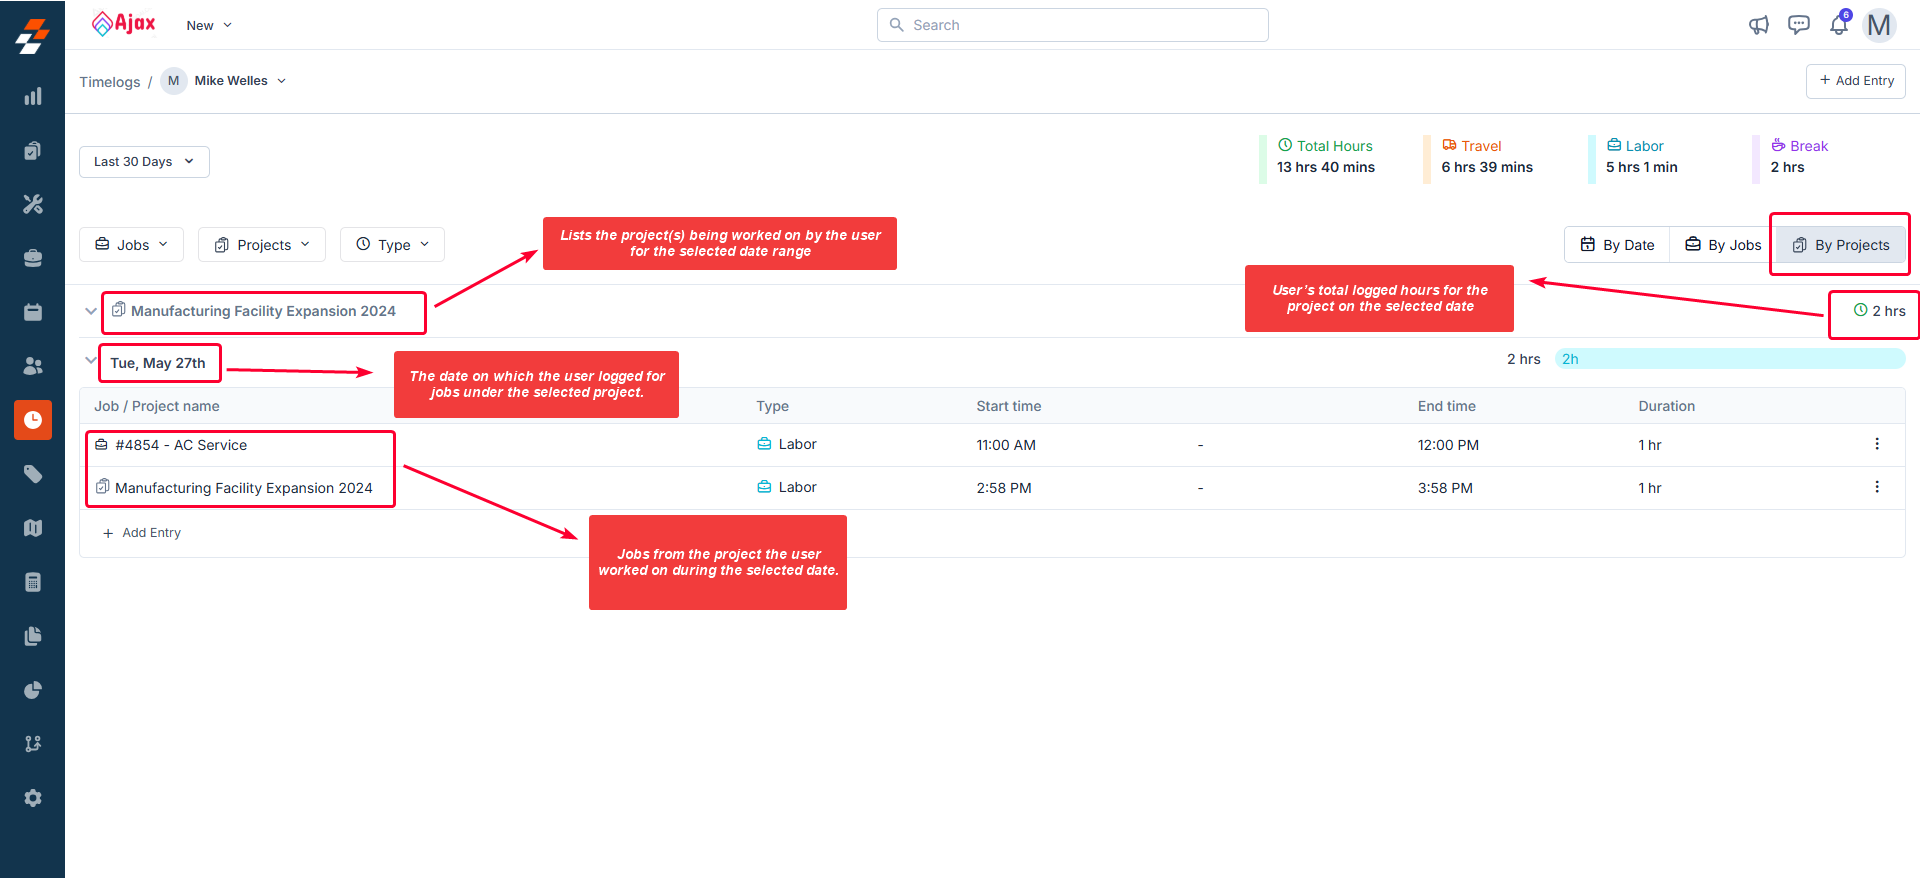
Understanding the detailed time log breakdown
The detailed time log entries are displayed in a clear, tabular format to help you easily review and analyze the technician’s work hours. Depending on your business needs, you can choose to group and view the entries by Date, Job, or Project.- By Date
- By Jobs
- By Projects
When you group using the “By Date” view, the table is structured to provide a day-wise breakdown of the user’s logged hours for each job, including the type of entry. The layout includes the following details: 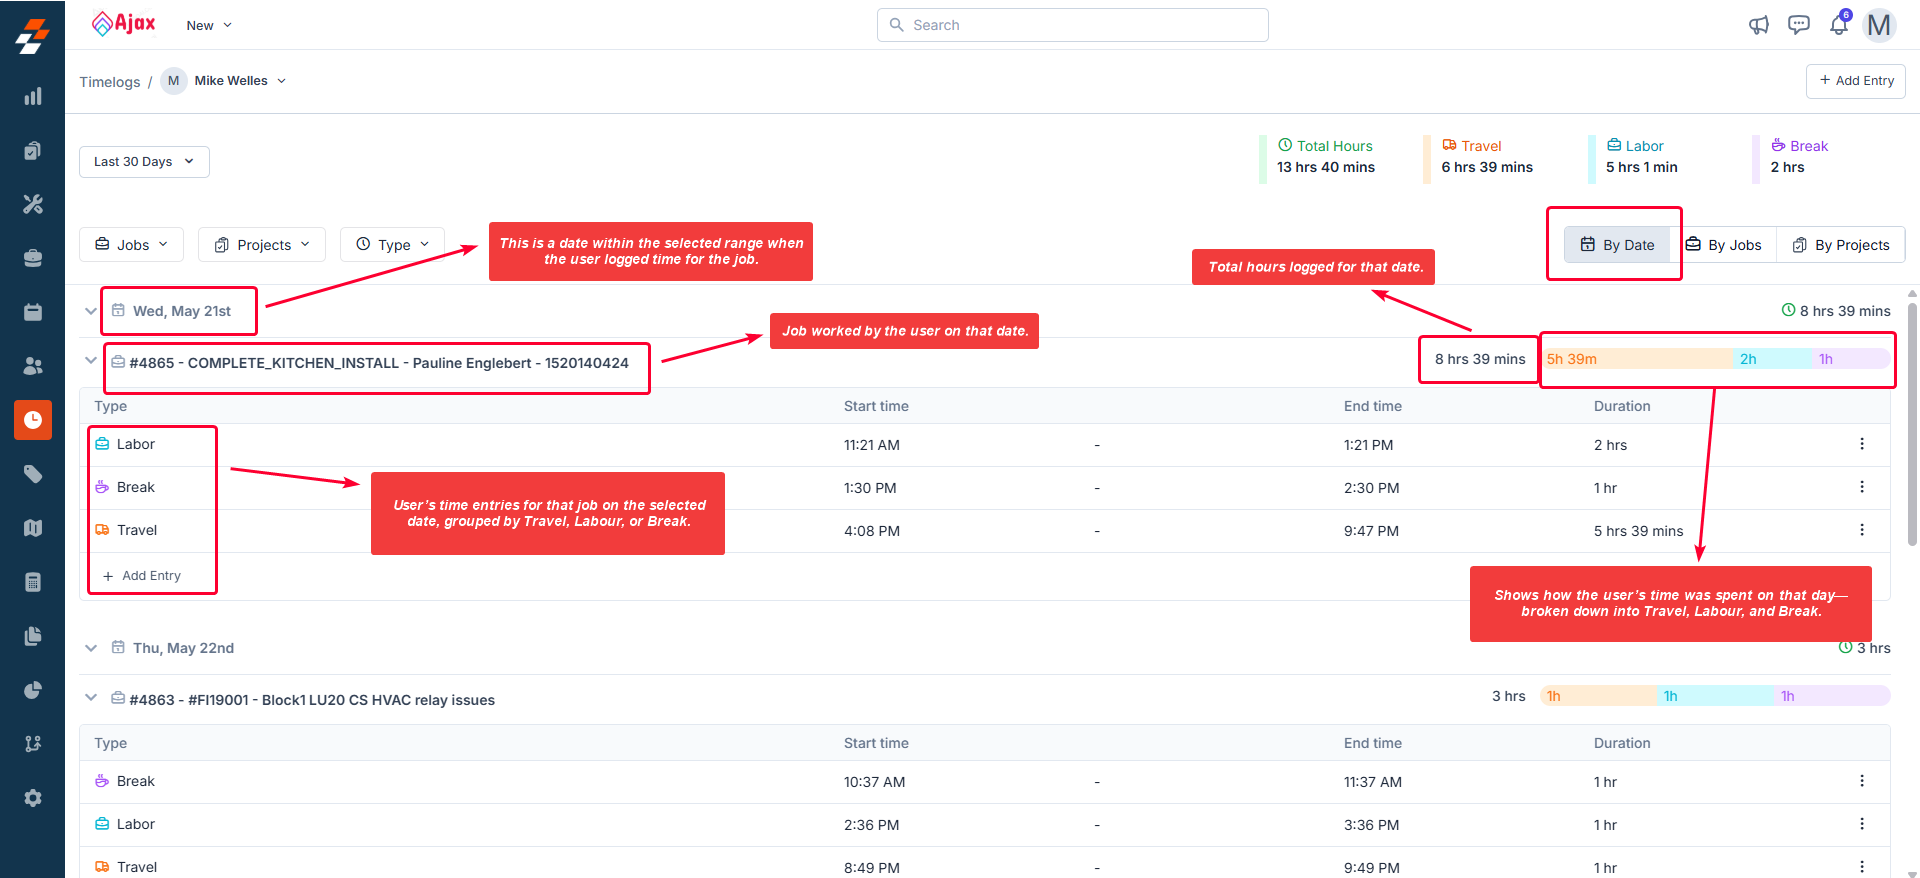
- Date – Displays the specific day for which the timelog entries are recorded.
- Job and Project Name – Shows the job worked on that day, along with the associated project (if applicable).
- Timelog Type and Duration – Lists each entry under the job, categorized as Travel, Labour, or Break, along with:
- Start Time
- End Time
- Duration
Note: On the right-hand side, you can also view the total hours logged for that date.
More actions on the detailed timelog page
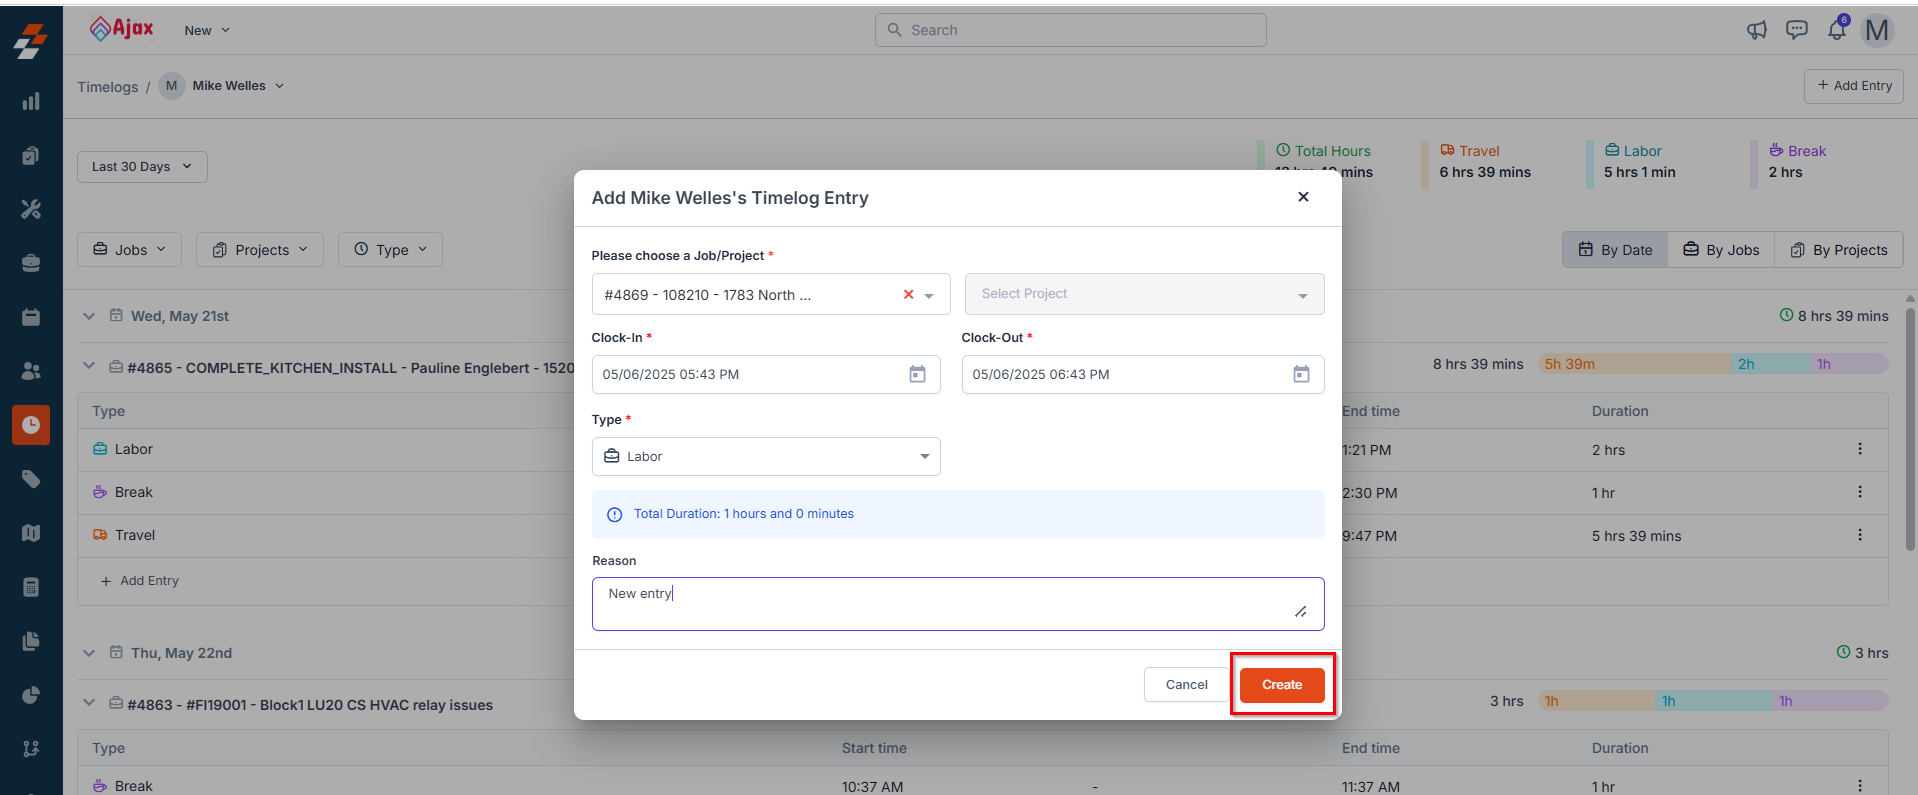
The detailed timelog page is not just for viewing time entries, it also allows you to perform key actions to ensure accurate time tracking for the user. From this page, you can add new entries, insert missed entries, edit, and delete entries directly, helping you maintain complete and precise records. Add new entry: To add a new time entry manually:- Click the ”+ Add Entry” button at the top-right corner of the page.
- In the dialog box that appears:
- Choose the relevant job or project with which to associate the entry.
- Choose the appropriate clock-in and clock-out date and time.
- Select the timelog type: Travel, Labour, or Break.
- Click “Create” to save the entry.
- Click the ”+ Add Entry” link found below the relevant timelog entry (e.g., under the job “#1025 - Cleaning” for the date 22/05/2025).
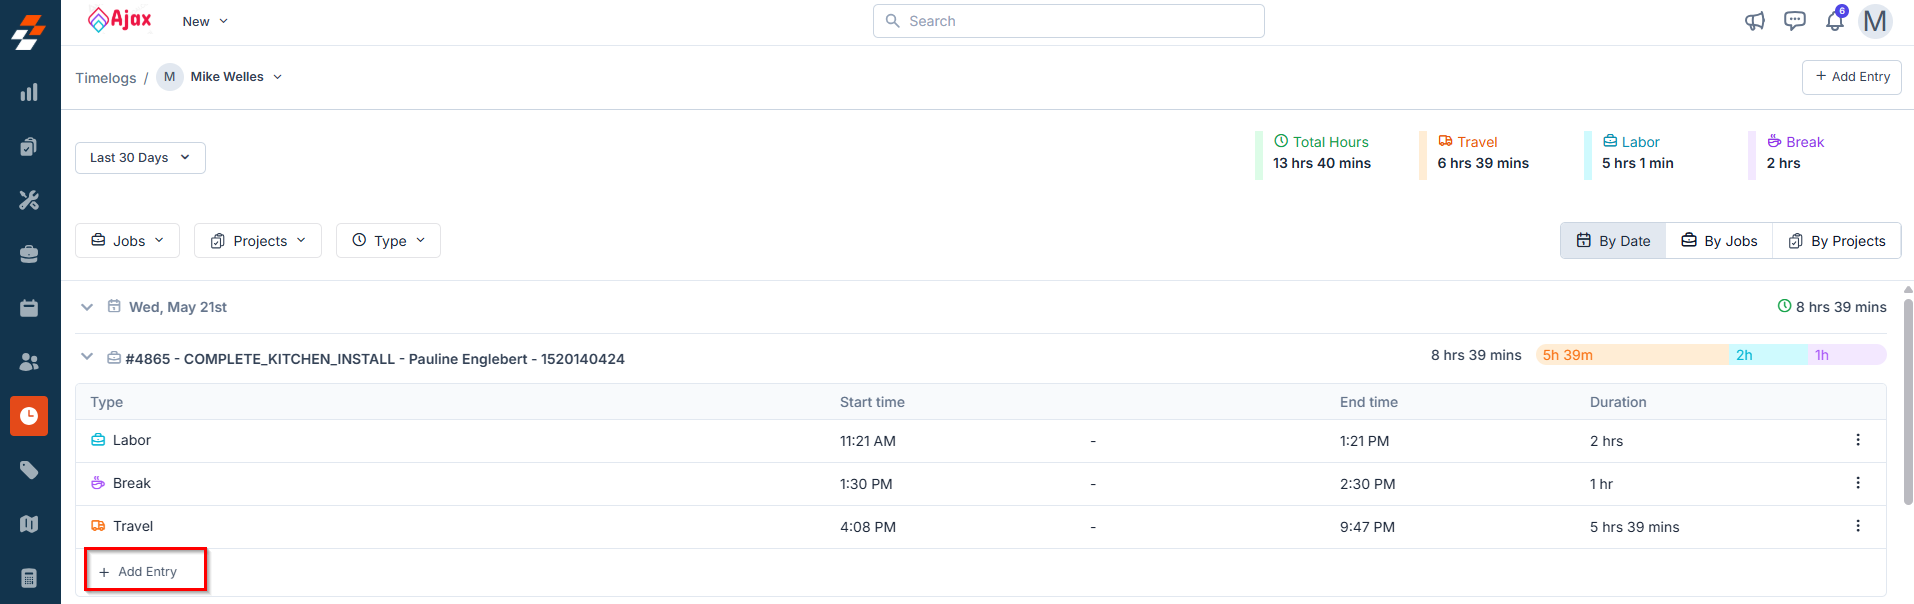
- An Add Entry dialog box will appear with some pre-filled data:
- Date: Auto-filled with the date of the selected entry (e.g., Tuesday, May 22).
- Associated Job/Project: Pre-filled with the job or project associated with the original entry (e.g., #1025 - Cleaning under ISP Installation for Polaris Co.).
- Select the Timelog Type (Travel, Labour, or Break).
- Enter the clock-in and clock-out time for the new entry (e.g., 4:00 PM to 5:00 PM).
- Click “Create” to add the new entry below the existing one.
- On the detailed timelog page, click the kebab icon () next to the entry you want to modify.
- Select “Edit Entries” from the dropdown menu.
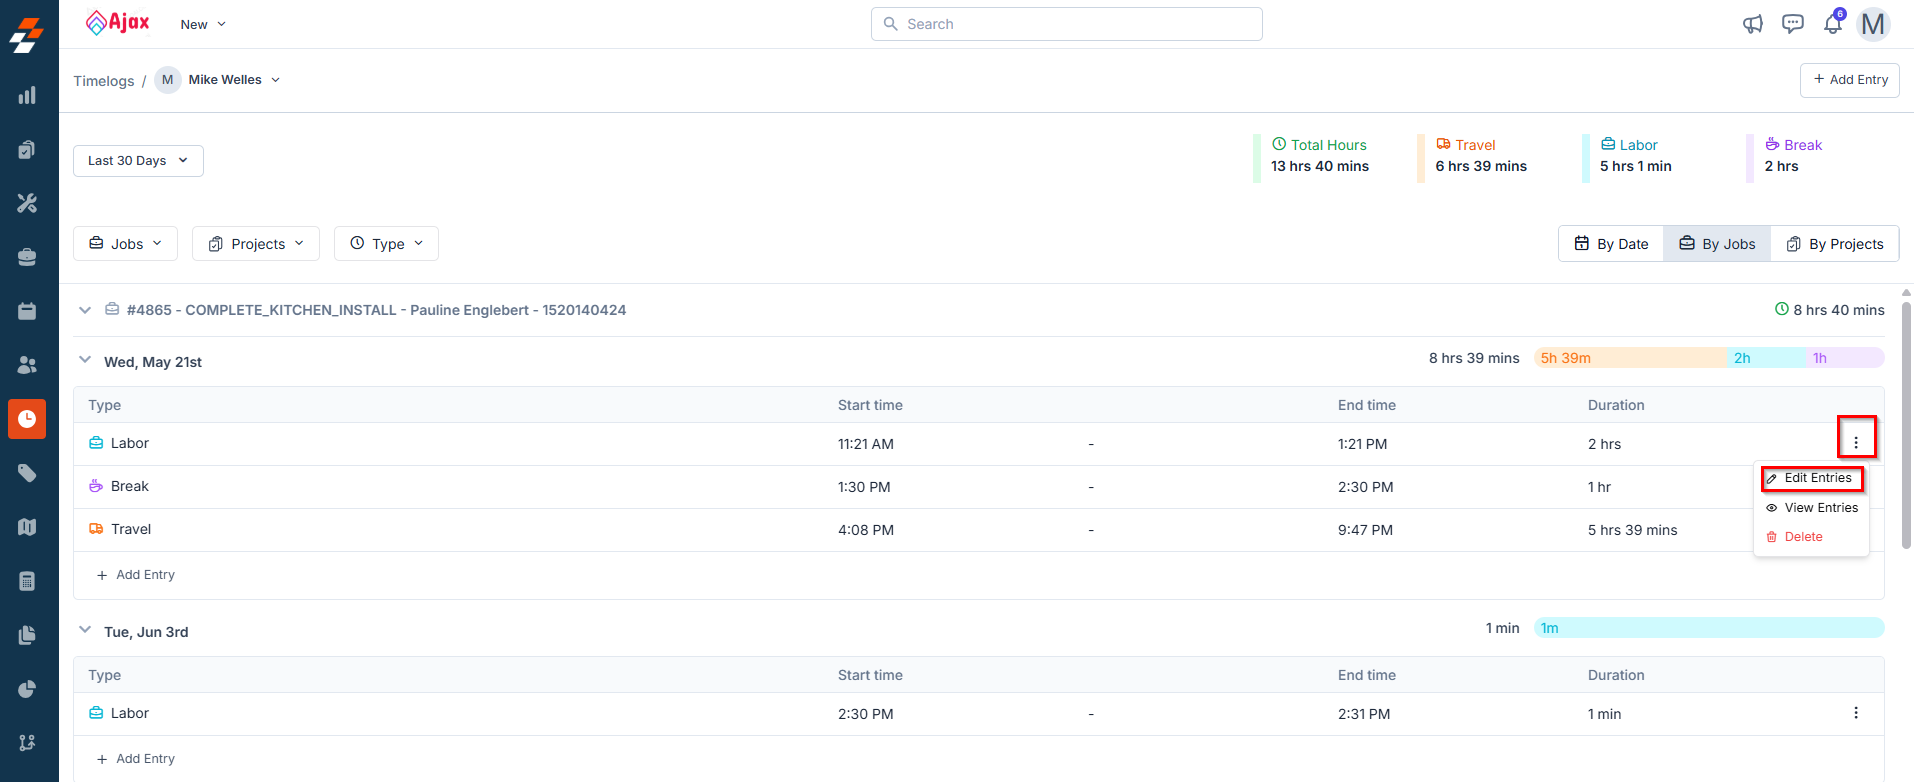
- In the Edit Entry dialog box, you can change the clock-in and clock-out date and time, but the timelog type cannot be modified.
- Click “Update” to apply the changes.
Note: The ability to edit, delete, or add entries depends on the permissions assigned to your user role.
- On the detailed timelog page, click the kebab icon () next to the entry you want to delete.
- Select “Delete” from the dropdown options. A confirmation pop-up will appear.
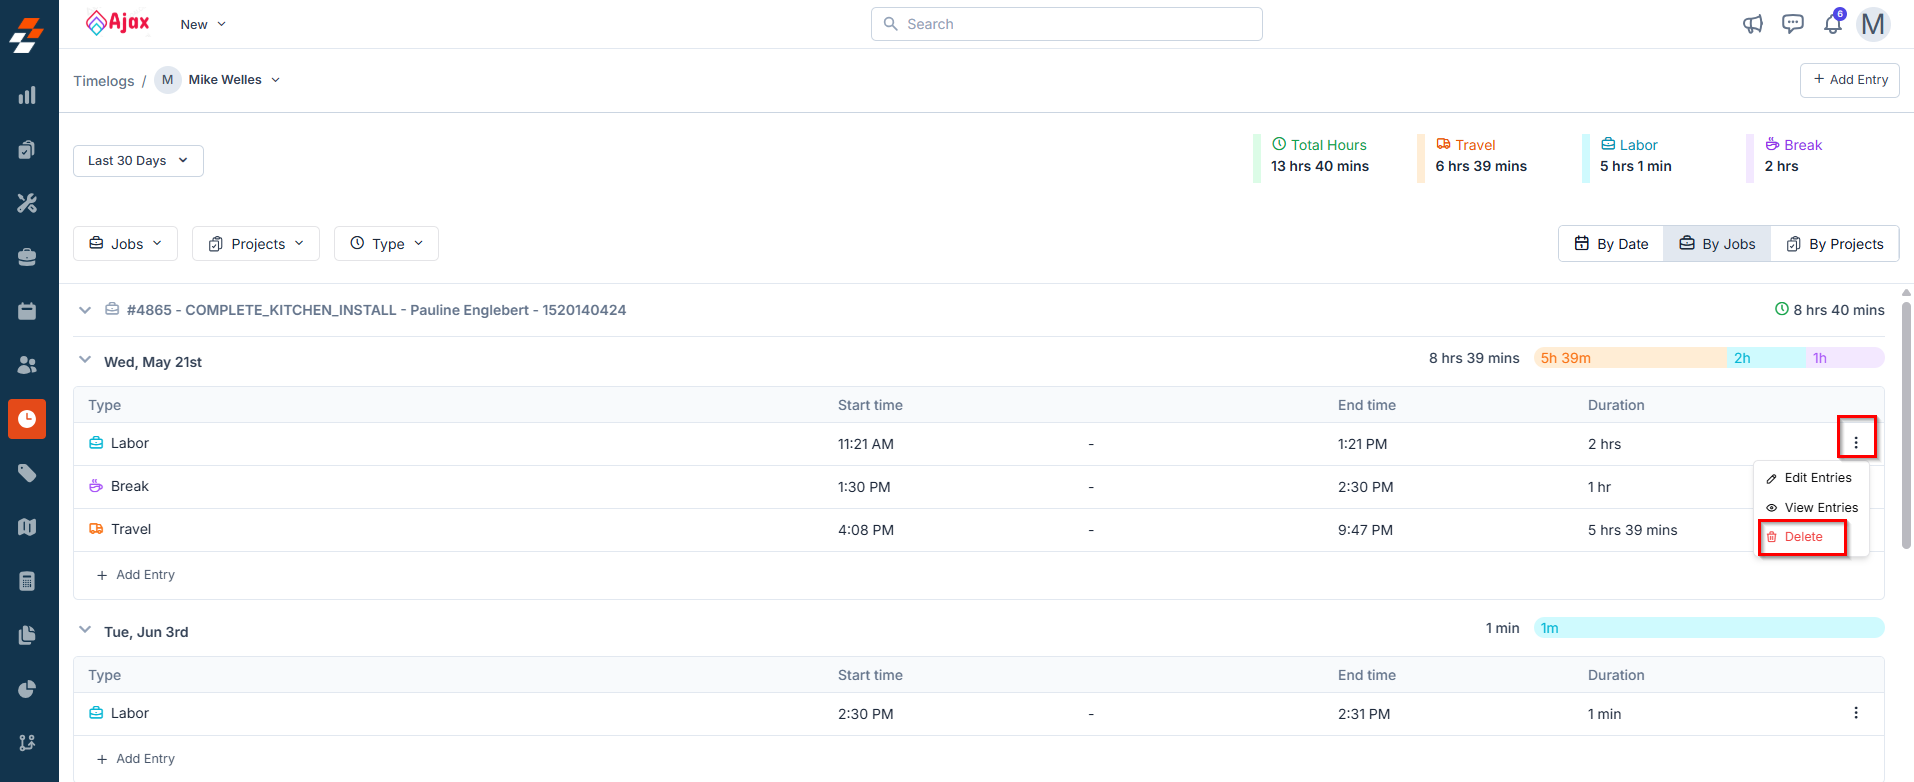
- Click “Delete”. The entry will be permanently removed from the record.
- Want to learn how technicians create these time entries using the mobile app? Check out our guide: [Log Work and Travel Time on a Job].
- Looking to view time logs for all users or technicians who worked on a job? Refer to our guide: [Managing Job Timelogs].
FAQs
- What is the Timelog Summary feature in Zuper?
- Is the Timelog Summary feature priced separately?
- Where can I access the Timelog Summary in the Zuper web app?
- What if the same technician works on two different jobs—how will their time be recorded in the Timelog Summary?
- Click the technician’s name from the Timelog Summary to open their detailed timelog page.
- Use the “Group by Jobs” view to see how their hours are distributed across each job, with full details for start time, end time, duration, and activity type.
- Can I add timelog entries for technicians?
- A technician forgets to log time using the mobile app.
- You need to record work done outside of standard logging hours.
- You’re correcting or updating previously missed entries.
- Navigate to the time module and select Timelog Summary.
- Click on the technician’s name to open their Detailed Timelog page.
- Click the “+ Add Entry” button at the top right of the detailed view page.
- Choose the appropriate job or project to link the entry with.
- Select the clock-in and clock-out date & time.
- Select the Timelog Type (Travel, Labour, or Break).
- Click “Create” to save the entry.
- How do I add missed timelog entries?
- The technician forgot to clock in/out.
- An entry wasn’t captured due to connectivity or device issues.
- You need to maintain accurate records for reporting or payroll.
- Navigate to the time module > Timelog Summary.
- Click the technician’s name to open their Detailed Timelog page.
- Under the relevant job/date, click “+ Add Entry” below the existing entry.
- The date and job/project will be auto-filled.
- Select the Timelog Type (Travel, Labour, or Break), and enter the clock-in and clock-out time.
- Click “Create” to save the missed entry.
- Can I edit or delete existing entries?
- Edit Entries to update the date and time.
- Delete to remove the entry permanently.
- What are the different timelog types, and what do they mean?
- Travel (Orange) – Time spent commuting between locations.
- Labour (Blue) – Time actively working on jobs/projects.
- Break (Purple) – Non-working time, like lunch or rest.