

- Open Assisted Scheduling while creating a job.
- Read the Slot View and Resource View.
- Understand how business hours, work hours, and shifts determine the slots you see.
- Apply filters to narrow down the best available slots.
Pre-requisites
Before you begin, make sure the following are set up:- Business hours and work hours are configured correctly for your organization and your users.
- For teams that work across multiple time zones, set “Enable Switching Timezones” to “Yes” under Organization settings > General settings, and assign each team to the appropriate time zone.
Navigation: Jobs -> New Job -> Assisted Scheduling
Access assisted scheduling
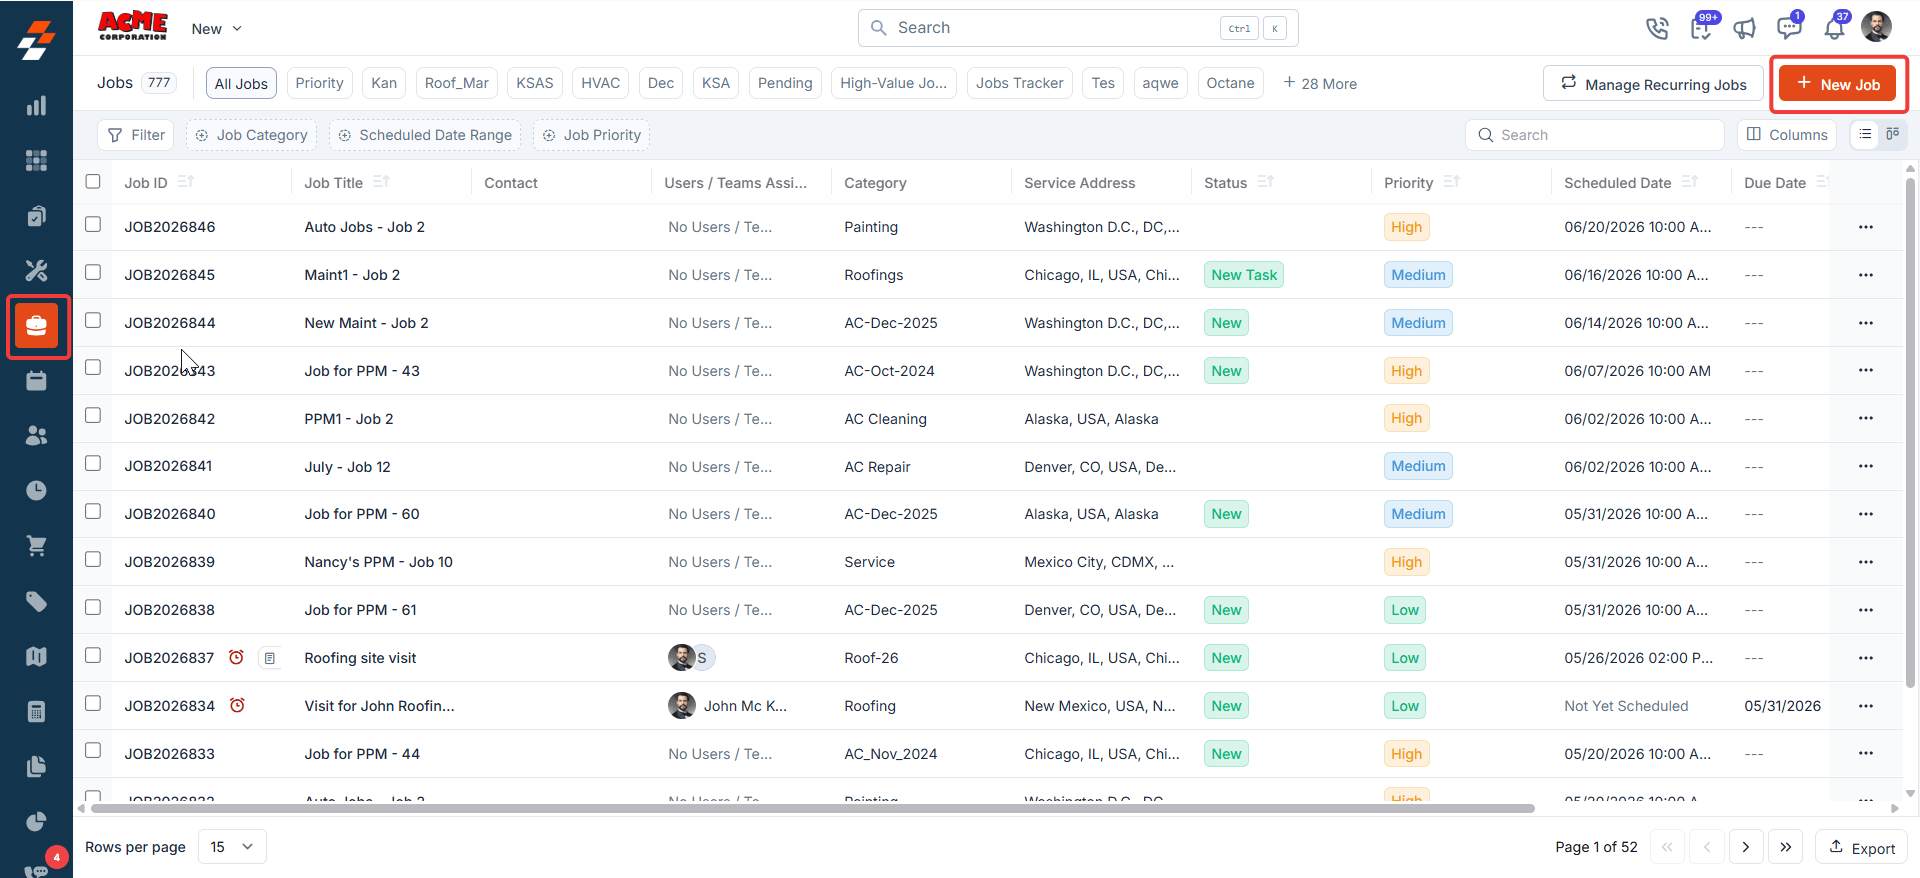
- Click the “+ New Job” button at the top right corner of the page to create a new job.
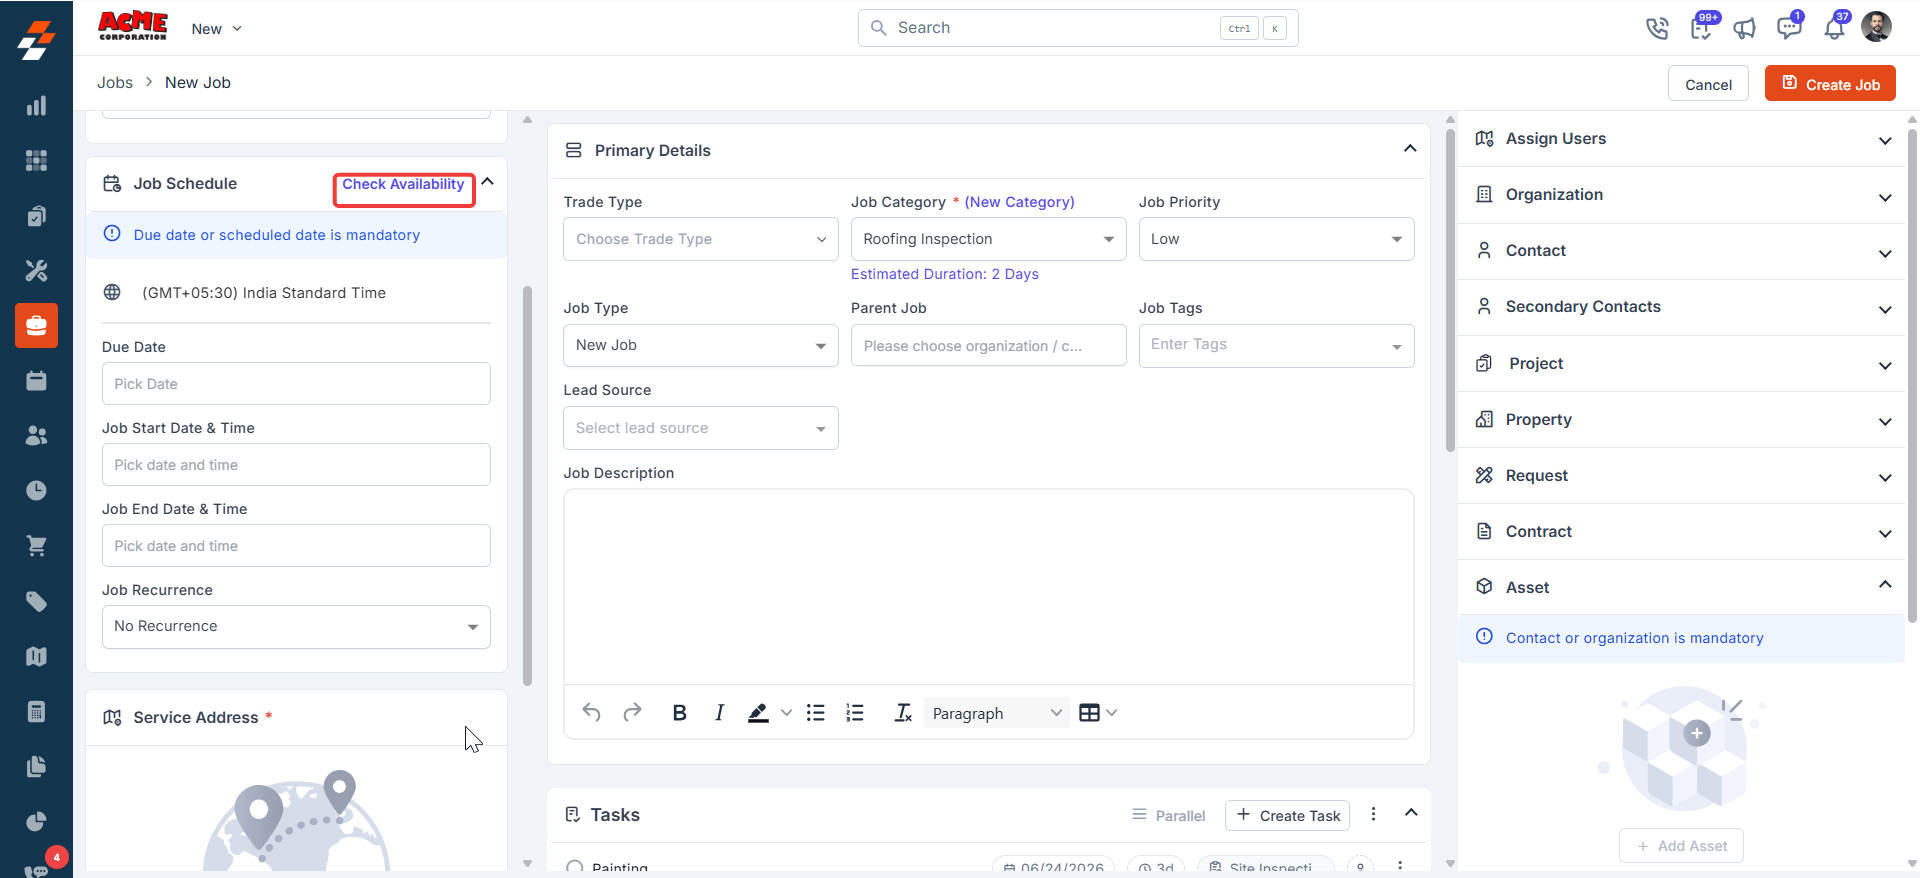
- Click the “Check Availability” button to open the dialog box.
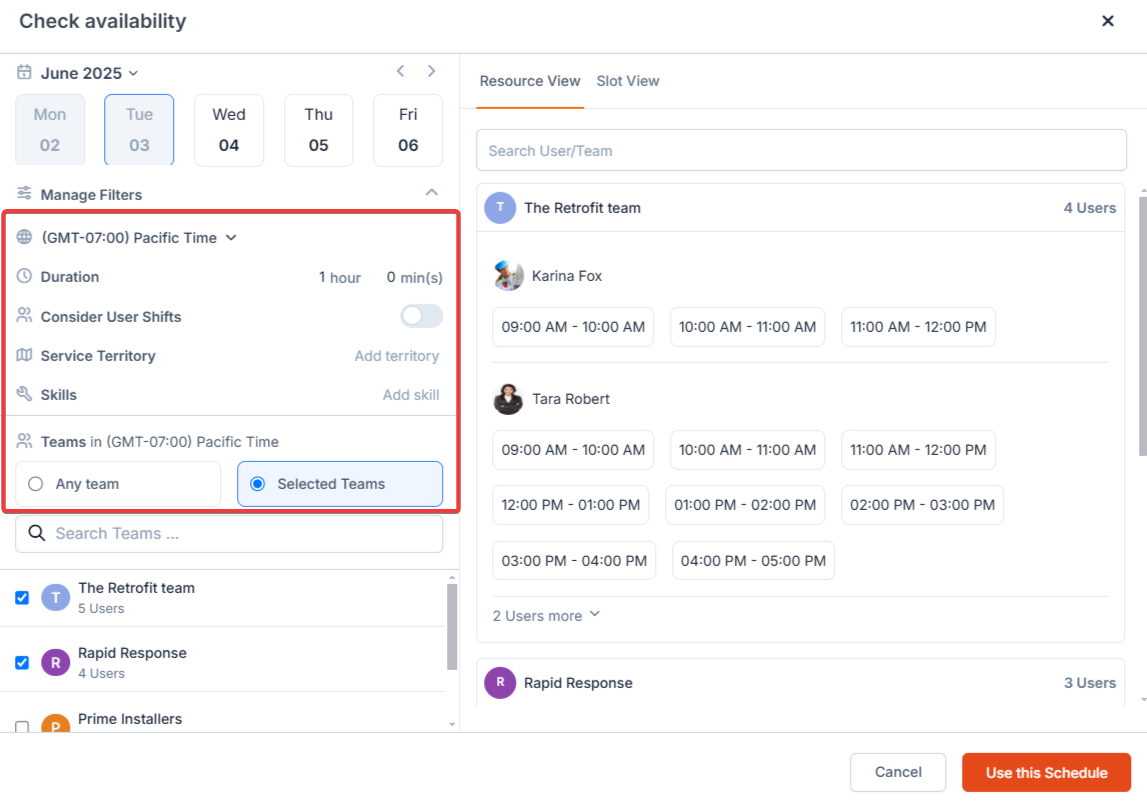
- Select a preferred date from the calendar on the left-hand side of the interface, then choose how you want to view availability — “Resource View” or “Slot View.”
Slot Availability
When Assisted Scheduling decides which slots to display, it takes several factors into account:- Business hours
- Work hours
- Shift hours
- Whether a user is already assigned to another job or a non-job event
- User time off
- Holidays
How business hours, work hours, and shifts work together
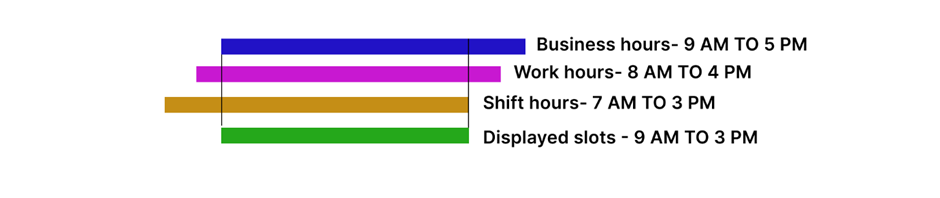
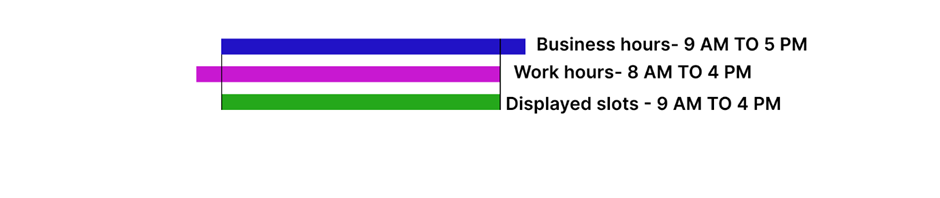
This is the part most people ask about, so let’s break it down. Three kinds of hours can influence a technician’s availability:- Business hours — your company’s operating hours (for example, 9 AM–5 PM).
- Work hours — the standard hours an individual technician works (for example, 8 AM–4 PM).
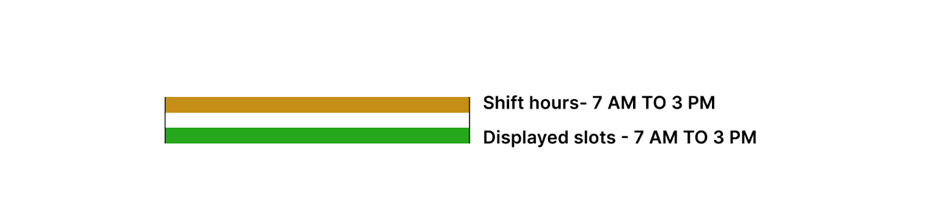
- Shift hours — a specific shift assigned to a technician on a particular date (for example, 7 AM–3 PM on November 20).
- When “Consider User Shifts” is off, Zuper starts with business hours and then narrows them by the technician’s shift for that date (if one exists) or by their work hours (if no shift exists).
- When “Consider User Shifts” is on, Zuper ignores business and work hours entirely and shows only the technician’s shift hours. If the technician has no shift on that date, no slots appear.
Tip: If a technician’s slots aren’t appearing as you expect, check the “Consider User Shifts” setting first. When it’s on, a technician with no shift for the selected date will have no available slots.
User assignment to jobs and non-job events
- When a user is assigned to a job or a non-job event (with availability set to ‘Busy’ for the non-job event), the corresponding time slot is blocked in the Resource View.
- If all users are occupied at a specific time, that slot is also blocked in the Slot View.
- A slot becomes available again if the assigned job is ‘Completed,’ ‘Closed,’ or ‘Cancelled.’
User time off
- When a user is on time off, their slots are hidden in the Resource View.
- If all users are on time off during a specific slot, that slot is hidden in the Slot View.
Holidays
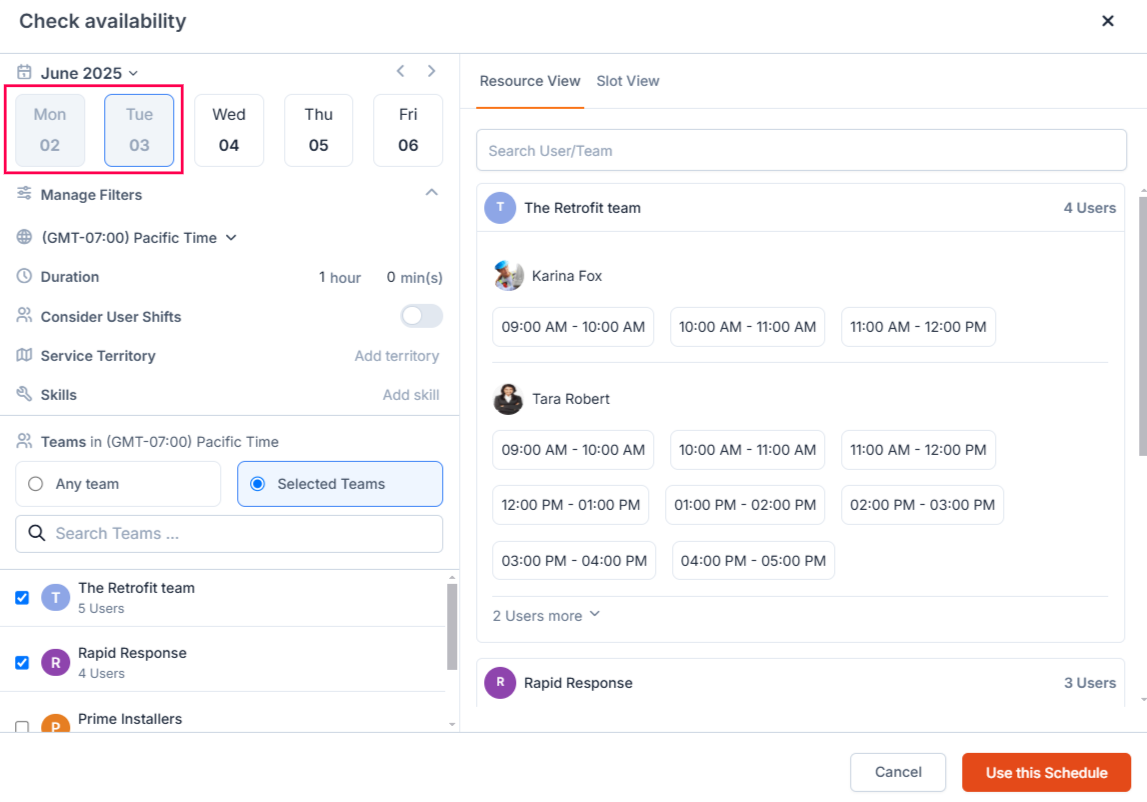
In Zuper, holidays can apply to all users or to specific teams, and each holiday can either allow or restrict job scheduling. Here is how the different holiday types appear in Assisted Scheduling:
Example: If April 2 (Wednesday) is a holiday with jobs allowed, you can still select it for scheduling. If April 1 (Tuesday) is a holiday with jobs restricted, you cannot select it.
Applying Filters
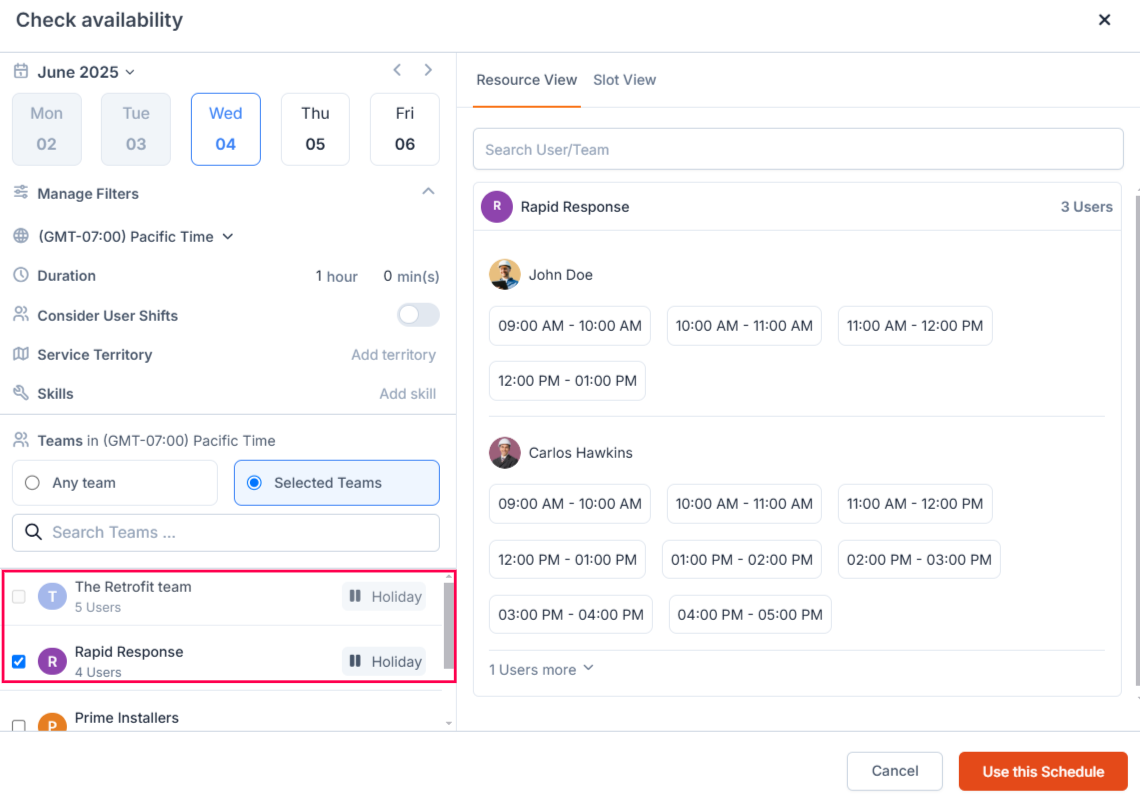
To refine the list of available slots, you can apply these filters:- Time Zone: Available slots are listed only for teams in the selected time zone. As mentioned, business and work hours are considered in the selected time zone.
- Duration: Slots are displayed in the selected duration; the maximum duration allowed is 8 hours. If a category is selected, the category duration is pre-filled (if the category duration exceeds 8 hours, 8 hours is pre-filled). If no category is selected, the duration is pre-filled to 1 hour.
- Consider User Shifts: Adjust based on shift settings (as detailed above).
- Service Territory: Limit slots to users in a specific geographic area.
- Skills: Show slots for users with the required skills.
- Team: Selecting “Any Team” lists slots for every team that satisfies the Time Zone, Service Territory, and Skill filters. Selecting “Selected Teams” lets you pick specific teams that satisfy those same filters.
Best Practices
- Use filters to narrow down options when scheduling for specific teams, skills, or territories.
- Double-check the “Consider User Shifts” setting to ensure it aligns with your scheduling preferences.
- Adjust time zones carefully to match customer or operational needs.